DIY Oyster Crackers Recipe: Who doesn’t love those tiny, crunchy, slightly salty crackers floating on a warm bowl of soup? Yep, we’re talking about oyster crackers! These bite-sized delights have earned their spot in the hearts of soup lovers everywhere. But here’s the kicker: store-bought versions can’t hold a candle to the fresh, flavorful magic of homemade oyster crackers.
If you’re someone who enjoys a good DIY kitchen challenge or just wants a fun weekend baking project, you’re in the right place. Making oyster crackers from scratch is easier than you think—and way more rewarding than you can imagine. Whether you’re topping chili, adding crunch to a salad, or just snacking straight from the jar, this guide will walk you through each step of the process, no guesswork involved.
Let’s roll up those sleeves and start baking!
What Are Oyster Crackers?
Oyster crackers are small, round, salted crackers traditionally served as a topping for soups, stews, and chowders—especially clam chowder. Despite the name, they contain no oysters. The name comes from their historical pairing with oyster stew. Their light, crisp texture and mild flavor make them the perfect addition to anything savory.
Think of them as the humble sidekick to your soup’s superhero moment. They’re crunchy, bite-sized, and incredibly addictive. And when they’re homemade? The flavor is unbeatable. Most people are surprised to learn how easy it is to whip them up with just a few kitchen staples.
Why Make Oyster Crackers at Home?
Sure, you could buy a bag of oyster crackers at the store—but where’s the fun in that? Homemade versions offer so much more than convenience-store packets. Here’s why you should consider making your own:
- Better flavor: Fresh-baked crackers have a warm, buttery flavor that prepackaged ones simply can’t match.
- Control over ingredients: No preservatives, additives, or mystery chemicals—just pure, simple goodness.
- Customizable: Add herbs, spices, or even cheese to make them your own.
- Fun to make: It’s a simple and satisfying project that’s perfect for beginners and baking pros alike.
- Budget-friendly: You probably already have most of the ingredients at home.
You’re not just baking a snack—you’re elevating your kitchen game!
Perfect Occasions to Serve Oyster Crackers
These crackers may be small, but they’re mighty when it comes to versatility. Here’s where they shine best:
- Topping for soups and stews: Clam chowder, tomato soup, chili—you name it.
- Crouton substitute for salads: Adds a delicious crunch without the bulk.
- Party snacks: Toss with seasoning and serve in bowls as a crowd-pleaser.
- Lunchbox filler: Kids love them, and they’re healthier than chips.
- Snack-time hero: Munch them solo or with dips like hummus or cheese spread.
Basically, anytime is a good time for oyster crackers!
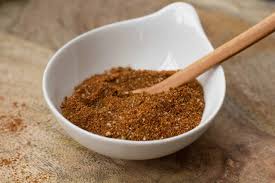
List of Ingredients You’ll Need
Basic Pantry Staples
Here’s everything you’ll need to make a classic batch of oyster crackers:
- 1 ½ cups all-purpose flour
- ¾ teaspoon baking powder
- ½ teaspoon salt
- 1 teaspoon sugar
- 2 tablespoons unsalted butter (cold, cut into small pieces)
- ½ cup water (cold)
These ingredients form the base of your dough—simple, affordable, and likely already in your pantry.
Optional Flavor Enhancers
If you want to spice things up, try adding any of these:
- ½ teaspoon garlic powder
- ½ teaspoon onion powder
- 1 teaspoon dried herbs (rosemary, thyme, oregano)
- Fresh cracked pepper
- Grated Parmesan cheese (for cheesy crackers)
Start with the basic recipe and then tweak to match your taste buds!
Essential Tools You’ll Need
Good tools make any job easier—and baking oyster crackers is no different. Here’s what you’ll need:
- Mixing bowl
- Pastry cutter or fork
- Rolling pin
- Sharp knife or pizza cutter
- Baking sheet
- Parchment paper or silicone baking mat
- Cooling rack
No fancy gadgets necessary—just basic kitchen essentials.
Preparation Tips Before You Start
Before you dive in, take a moment to prep your space and ingredients. Trust us, it makes the process smoother.
- Measure all ingredients first so you’re not scrambling mid-recipe.
- Use cold butter and cold water—this helps create that flaky texture.
- Preheat your oven to 375°F (190°C) before rolling out the dough.
- Line your baking sheet with parchment to avoid sticking.
- Clear your counter space for rolling out the dough properly.
A little prep goes a long way in baking. Ready to start?
Step-by-Step Guide to Make DIY Oyster Crackers
Step 1: Prepare Your Dough
In a large mixing bowl, combine the flour, baking powder, salt, and sugar. Whisk them together to evenly distribute the dry ingredients. Next, cut in your cold butter using a pastry cutter or fork. You’re looking for a coarse, crumbly texture—like wet sand.
Gradually add the cold water, mixing gently until a dough forms. Don’t overmix—just bring everything together into a smooth ball. If it’s too dry, add a few more drops of water. Too sticky? A dusting of flour will fix it.
Wrap the dough in plastic wrap and let it rest in the refrigerator for about 15–20 minutes. This relaxes the gluten and makes rolling easier.
Step 2: Roll and Cut the Dough
Lightly flour your work surface and roll out the chilled dough to about ⅛ inch thickness. The thinner the dough, the crispier the cracker.
Now, cut the dough into small rounds (about the size of a dime) using a small cookie cutter, piping tip, or even the end of a spice bottle cap. Want traditional hexagon shapes? A pizza cutter works great for cutting small squares or diamonds.
Transfer the cut dough to your prepared baking sheet, spacing them slightly apart.
Step 3: Preheat Your Oven
This step is simple but crucial. Preheat your oven to 375°F (190°C). Make sure it’s fully up to temp before baking—crackers need consistent heat to puff and brown properly.
Want an extra crunch? Right before baking, mist the tops lightly with water or brush with a tiny bit of oil.
Step 4: Bake to Golden Perfection
Place the tray in the oven and bake for 12 to 15 minutes. Keep an eye on them after the 10-minute mark—every oven is different. You’re looking for a lightly golden color with slightly puffed tops.
Rotate the pan halfway through for even browning.
Once done, remove from the oven and let them cool on the tray for a few minutes, then transfer to a wire rack.
Step 5: Cool and Store
Allow your oyster crackers to cool completely before storing—this keeps them crisp. Once cooled, transfer to an airtight jar or container.
They’ll stay fresh for up to 1 week at room temperature, or longer if sealed well. For even longer storage, you can freeze them and re-crisp in the oven for a few minutes when ready to eat.
Flavor Variations to Try
Here’s where things get fun. Once you’ve mastered the basic oyster cracker, you can play around with flavors to suit your cravings. These variations can be added directly into the dough or tossed with the crackers after baking.
Savory Garlic & Herb
Mix garlic powder, onion powder, and a pinch of dried rosemary or thyme into the dough for a robust, herby flavor. After baking, sprinkle a little more herb blend while warm.
Spicy Chili-Lime
Add a dash of chili powder or cayenne pepper into your dough. Once baked, toss the crackers with lime zest and a pinch of sea salt for a zesty, spicy snack that’s perfect for munching.
Cheddar Bliss
Grate some sharp cheddar into the dough before rolling. The cheese melts into the crackers as they bake, creating little pockets of flavor. Pro tip: Sprinkle extra cheese on top before baking for that crispy-cheddar edge.
Everything Bagel Crackers
Add a tablespoon of everything bagel seasoning to the dough and another light sprinkle on top before baking. These pair perfectly with cream cheese dips or hummus.
Don’t be afraid to get creative—your taste buds will thank you.
How to Store Oyster Crackers for Freshness
You’ve put in the work—now protect those golden nuggets of flavor! Proper storage keeps them crisp, flavorful, and snack-ready.
Short-Term Storage
- Let crackers cool completely to avoid trapping moisture.
- Store in an airtight container or mason jar.
- Keep in a cool, dry place away from sunlight.
Your crackers should stay crispy for up to 7–10 days this way.
Freezing for Longer Life
- Place cooled crackers in a freezer-safe bag or container.
- Label with the date and freeze for up to 3 months.
- To use, reheat in a 300°F (150°C) oven for 5–7 minutes to restore crunch.
No soggy crackers here—just pure, homemade crispness whenever you want.
Serving Suggestions
Oyster crackers might be small, but they’re mighty when it comes to versatility. Here are some tasty ways to enjoy them:
Classic Soup Topper
There’s no wrong way to add them to soup—drop a handful into chowder, chicken noodle, or minestrone for texture and extra bite.
Tossed in Seasonings
Once cooled, toss your crackers in olive oil and seasoning blends (like ranch or Cajun) for a bold snack mix.
Salad Crunch
Skip the croutons! Toss a few oyster crackers on your next Caesar or garden salad for a unique crunch.
Party Mix Ingredient
Add to a snack mix with pretzels, nuts, and cereal. Bake with butter and seasoning for a savory trail mix-style treat.
With Cheese or Spreads
Use them as a mini base for soft cheese, pimento spread, or hummus. Think of them like tiny edible spoons.
Small in size, big in impact.
Common Mistakes to Avoid
Even simple recipes have their pitfalls. Here’s what to steer clear of:
1. Overworking the Dough
Kneading too much develops the gluten, making the crackers tough instead of flaky. Mix just until it comes together.
2. Cutting Too Thick or Thin
Too thick? They’ll be chewy, not crunchy. Too thin? They’ll burn. Stick to about ⅛ inch thickness for best results.
3. Forgetting to Chill
Cold dough = puffier crackers. Warm dough = flat and greasy. Chill the dough before rolling out.
4. Not Watching the Oven
They bake fast! Check at 10 minutes and keep your eyes on them. Every oven is slightly different.
5. Storing While Warm
Warm crackers in a sealed container = soggy mess. Cool completely first.
Learning these small tricks makes all the difference between “meh” and “wow.”
Nutritional Value of Homemade Oyster Crackers
Homemade oyster crackers are lighter and healthier than most store-bought versions, especially when you control the ingredients. Here’s a rough idea based on a serving of 20 crackers:
| Nutrient | Amount (Approx.) |
|---|---|
| Calories | 100–120 kcal |
| Carbs | 15–18g |
| Protein | 2–3g |
| Fat | 3–4g |
| Sodium | 100–150mg |
| Sugar | <1g |
Want to make them even healthier? Try whole wheat flour, olive oil instead of butter, or reduce the salt.
Gluten-Free and Vegan Alternatives
Good news—this recipe is easy to adapt for special diets!
Gluten-Free Version
Swap all-purpose flour with a 1:1 gluten-free flour blend. Add ¼ teaspoon xanthan gum if your mix doesn’t include it to help with texture and binding.
Vegan-Friendly Version
Replace butter with cold coconut oil, vegan butter, or even chilled olive oil. Stick to unsweetened options to keep the savory profile intact.
Low-Sodium Option
Use unsalted butter and reduce added salt by half. You’ll still get a tasty cracker, especially with herbs or spices for flavor.
Now everyone can enjoy this crunchy classic—no matter their dietary needs.
FAQs about DIY Oyster Crackers Recipe
1. Can I use whole wheat flour instead of all-purpose?
Yes! Whole wheat flour gives the crackers a nutty flavor and a bit more fiber. Just be aware they might be slightly denser.
2. How do I make the crackers puffier?
Use cold butter and chill your dough before baking. Also, don’t skip the baking powder—it’s key for a nice rise.
3. Can I make these in an air fryer?
Absolutely. Air fry at 350°F (175°C) for 6–8 minutes, shaking the basket halfway through. Watch closely to prevent burning.
4. Are oyster crackers the same as saltines?
Not quite. While they share ingredients, oyster crackers are smaller, puffier, and less salty than saltines.
5. Can I add sweet flavors like cinnamon sugar?
You bet! Add a tablespoon of sugar to the dough and sprinkle cinnamon sugar on top before baking for a fun sweet twist.
Conclusion
So there you have it—a complete, step-by-step guide to making delicious, crisp, homemade oyster crackers that are a thousand times better than anything you’ll find on a grocery shelf.
From pantry staples to personal flavor twists, these tiny crackers pack a punch and show off your baking skills in the simplest way. Whether you’re dressing up your favorite chowder, making an impressive snack mix, or just nibbling between meals, these DIY oyster crackers are sure to become a go-to favorite.
Once you try them homemade, there’s no going back.