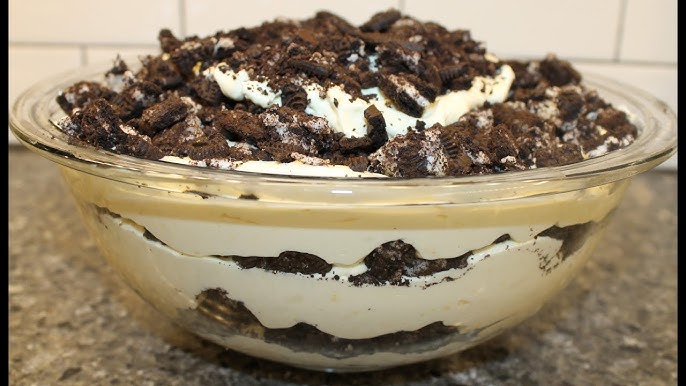
Dirt Cake Recipe: Dirt Cake is a delightful, no-bake dessert that combines creamy layers of pudding and whipped topping with a crunchy cookie base to create a treat that resembles, well, dirt! It’s a fun and whimsical dish, often adorned with gummy worms or candy rocks, making it a hit at parties, family gatherings, and especially with kids.
But why is Dirt Cake such a crowd-pleaser? The combination of textures—crunchy, creamy, and chewy—makes every bite exciting. Plus, it’s super customizable, so you can make it your own by adding flavors or decorations.
Let’s dig into this simple yet rewarding recipe!
Ingredients and Tools
Essential Ingredients for Dirt Cake:
- Crushed Cookies: Classic Oreos work best, but you can use any chocolate sandwich cookies.
- Cream Cheese: Softened to room temperature for smooth mixing.
- Instant Pudding Mix: Vanilla or chocolate, depending on your preference.
- Milk: To prepare the pudding mix.
- Powdered Sugar: For sweetness.
- Whipped Topping (e.g., Cool Whip): To make the filling light and fluffy.
- Gummy Worms or Candy Decorations: For that iconic dirt effect.
Kitchen Tools You’ll Need:
- A large mixing bowl
- Hand or stand mixer
- Food processor or a resealable bag with a rolling pin (for crushing cookies)
- Spatula
- Serving dish or individual cups
Pro Tip: Choose high-quality ingredients, especially for the cookies and pudding, to get the best flavor.
How to Make Dirt Cake
Step 1: Preparing the Cookie Base
The cookie base forms the “dirt” of your Dirt Cake, so you’ll want to get the texture just right.
- Choose Your Cookies: Oreos are the go-to choice, but feel free to experiment with other chocolate cookies.
- Crush the Cookies: Use a food processor for fine crumbs, or place them in a resealable bag and crush with a rolling pin. The goal is a dirt-like consistency—fine, but with some small chunks.
- Set Aside for Layering: Reserve a portion of the crushed cookies for the top layer.
Pro Tip: Don’t remove the cream filling from the cookies—it adds extra flavor to your Dirt Cake!
Step 2: Making the Creamy Filling
The creamy filling is what makes Dirt Cake so indulgent.
- Prepare the Pudding: In a large bowl, whisk together the instant pudding mix and milk. Let it set for 5 minutes until thickened.
- Cream the Cheese: Beat the softened cream cheese and powdered sugar until smooth.
- Combine Everything: Fold the pudding mixture into the cream cheese, then gently fold in the whipped topping. This creates a light and fluffy filling.
Pro Tip: Ensure all ingredients are at room temperature for easier mixing and a lump-free filling.
Step 3: Layering the Dirt Cake
Now comes the fun part—assembling your Dirt Cake!
- Start with the Cookie Base: Spread a layer of crushed cookies evenly at the bottom of your serving dish.
- Add Creamy Filling: Gently spoon and spread a layer of the pudding mixture over the cookies.
- Repeat the Layers: Continue alternating layers of cookies and cream, finishing with a cookie layer on top.
- Add Decorations: Press gummy worms into the top layer for a playful touch.
Pro Tip: Use clear glasses or a trifle bowl for a stunning presentation.
Step 4: Final Touches and Decoration
Here’s where you can get creative!
- Realistic Toppings: Add shredded coconut dyed with food coloring or chocolate shavings to mimic grass and dirt.
- Personalized Decorations: Add candy flowers or edible rocks for a garden effect.
- Chilling: Refrigerate your Dirt Cake for at least 3 hours (or overnight) to set the layers and enhance the flavors.
Variations of Dirt Cake
- Chocolate Peanut Butter Dirt Cake: Add peanut butter to the cream cheese mixture and use Reese’s Pieces as decorations.
- Oreo Mint Dirt Cake: Use mint Oreos and add a few drops of peppermint extract to the filling.
- Vegan and Gluten-Free Options: Substitute plant-based cream cheese, non-dairy milk, and gluten-free cookies.
Serving Suggestions
- Perfect Occasions: Serve Dirt Cake at birthday parties, BBQs, or Halloween gatherings.
- Fun Serving Ideas: Use mini flowerpots or mason jars for individual servings.
- Pairings: Serve with vanilla ice cream or coffee for a delightful combo.
Common Mistakes to Avoid
- Over-Mixing: Overworking the filling can make it too runny.
- Skipping the Chill Time: Chilling is essential for firm layers.
- Wrong Cookie Texture: Soft cookies won’t give you that satisfying crunch.
Nutritional Information
- Approximate calories per serving: 300-400 (depends on ingredients and portion size).
- Healthier Tips: Swap regular cookies for sugar-free versions, use light cream cheese, and opt for homemade whipped cream.
FAQs About Dirt Cake Recipe
Q: What is a dirt cake?
A: Dirt cake is a fun, no-bake dessert typically made with crushed cookies (resembling dirt), creamy pudding, and whipped topping. It’s often garnished with gummy worms for a playful touch.
Q: Can I make dirt cake ahead of time?
A: Yes! Dirt cake is perfect for preparing in advance. Refrigerate it for at least 4 hours to let the flavors meld, but it can be made up to a day before serving.
Q: What type of cookies should I use?
A: Classic chocolate sandwich cookies, like Oreos, work best. Crush them finely to create the “dirt” texture.
Q: Can I customize the recipe?
A: Absolutely! You can add layers of cream cheese, peanut butter, or even fruit like bananas or strawberries to make it unique.
Q: How do I store dirt cake?
A: Store dirt cake in an airtight container in the refrigerator for up to 3-4 days. Avoid leaving it at room temperature for long periods to maintain freshness.
Q: Is dirt cake suitable for kids?
A: Definitely! Its whimsical presentation and gummy worm toppings make it a hit at kids’ parties and gatherings.
Conclusion
Dirt Cake is a nostalgic, versatile, and utterly delicious dessert that’s as fun to make as it is to eat. With its layers of creamy filling and crunchy cookies, it’s sure to be a hit at any gathering. Don’t be afraid to customize it and let your imagination run wild with decorations. So grab your ingredients and get ready to dig in!


