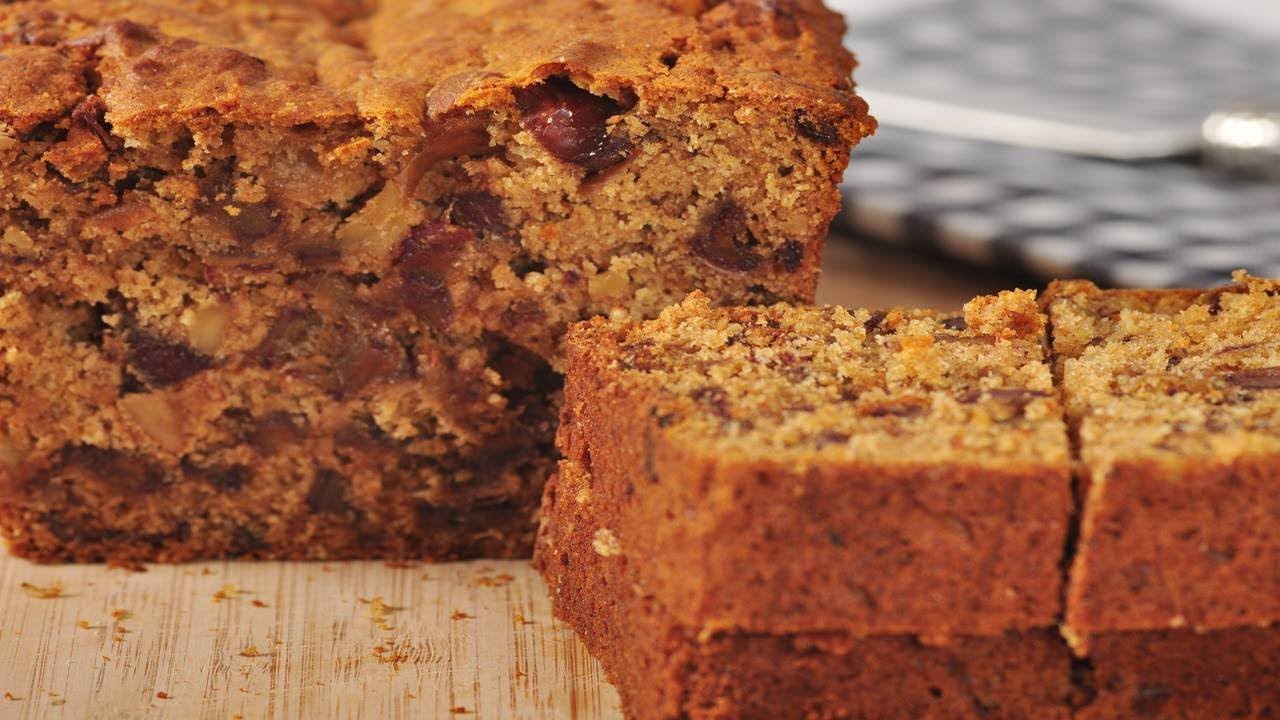
Date Nut Bread Recipe: Date nut bread is one of those recipes that never goes out of style. It’s moist, dense, slightly sweet, and packed with wholesome goodness that comes from nature’s candy—dates—and crunchy, nutritious nuts. This bread is a delightful cross between a dessert and a breakfast loaf, making it versatile for any occasion. Whether you serve it warm with a pat of butter, pair it with cream cheese, or simply enjoy it with your morning coffee, date nut bread has an irresistible charm that brings comfort with every slice.
What makes this bread so special is its history. Recipes for date nut bread have been around for generations, often passed down from grandmothers to mothers and now enjoyed by home bakers worldwide. It’s the kind of baked good that feels nostalgic, reminding us of cozy kitchens, family gatherings, and the joy of simple, homemade treats. Unlike overly sweet cakes or sugary pastries, this bread strikes a perfect balance—it’s sweet but not cloying, hearty but still tender.
If you’re someone who loves baking, date nut bread is an excellent recipe to master. It requires simple ingredients, minimal preparation, and delivers big flavor without the fuss. Plus, it’s one of those breads that actually tastes better the next day because the flavors have more time to blend together. No wonder it’s a beloved recipe in so many households!
Why Date Nut Bread is Loved Worldwide
The love for date nut bread isn’t limited to one culture or country—it’s truly a global favorite. In the Middle East, where dates are a staple fruit, breads and cakes featuring dates are part of traditional cuisine. In Western countries, date nut bread became popular in the 1920s and 1930s when dates were imported in larger quantities and home baking was an everyday activity. Over the years, it became a holiday classic, often baked during Christmas and Thanksgiving for its rich, festive flavor.
The worldwide appeal comes from the universal qualities of the bread itself. It’s naturally sweet without needing refined sugar in large amounts. It’s filling and nutritious thanks to the combination of fiber-rich dates and protein-packed nuts. And most importantly, it feels homemade—something baked with love that you can share with family and friends.
Today, you’ll find variations of date nut bread across different cultures. Some add spices like cinnamon and nutmeg for a warm flavor, others drizzle it with honey or glaze for a sweeter touch, and some even turn it into muffins or mini loaves for easy serving. No matter the variation, the heart of the recipe remains the same: a wholesome loaf that celebrates the natural goodness of dates and nuts.
Health Benefits of Date Nut Bread
Nutritional Value of Dates
Dates are often called “nature’s candy” because of their natural sweetness, but they’re much more than just a sweet treat. These little fruits are packed with essential nutrients that make them a healthy addition to baked goods. Dates are rich in dietary fiber, which supports healthy digestion and keeps you full longer. They’re also a good source of natural sugars like glucose, fructose, and sucrose—perfect for providing quick energy without the crash that comes from refined sugar.
But the benefits don’t stop there. Dates are loaded with vitamins and minerals, including potassium, magnesium, vitamin B6, and iron. These nutrients support everything from heart health to bone strength. They also contain antioxidants, which protect the body from harmful free radicals and support overall wellness. When you bake with dates, you’re not just adding sweetness—you’re boosting the nutritional value of your bread.
Unlike processed sugars, dates bring along fiber and nutrients, making them a healthier sweetener. That’s why many health-conscious bakers love incorporating dates into their recipes. In date nut bread, they also add moisture, giving the loaf its signature tender texture.
The Goodness of Nuts
Nuts are another star ingredient in this recipe, and they bring both flavor and nutrition to the table. Whether you choose walnuts, pecans, or almonds, nuts add a satisfying crunch and a rich, earthy taste that balances the sweetness of the dates.
From a health perspective, nuts are powerhouse foods. They’re packed with healthy fats, especially omega-3 fatty acids, which are great for heart health. They also provide protein, making the bread more filling and sustaining. Nuts contain a variety of vitamins and minerals, including vitamin E, magnesium, and selenium, all of which play important roles in maintaining overall health.
The beauty of date nut bread is that you can customize the nut component to your liking. Walnuts are the most traditional choice, but pecans bring a buttery flavor, while almonds add a mild sweetness. No matter which nut you pick, you’re adding a nutritious crunch that makes each slice more enjoyable.
Why Homemade Bread is Healthier
In a world where packaged snacks and baked goods are everywhere, homemade bread stands out as a healthier option. Store-bought breads and cakes often contain preservatives, artificial flavors, and excessive amounts of refined sugar and unhealthy fats. When you make date nut bread at home, you control every ingredient.
Want to cut back on sugar? You can use fewer sweeteners since dates already bring plenty of natural sweetness. Prefer whole grains? You can swap out all-purpose flour for whole wheat flour. Need a dairy-free version? Use almond milk instead of regular milk. Baking at home allows you to create a bread that fits your dietary preferences and health goals without sacrificing flavor.
Another advantage of homemade date nut bread is freshness. There’s nothing quite like a warm loaf straight from the oven, with its aroma filling the kitchen. Unlike packaged versions that may sit on shelves for weeks, your homemade bread is wholesome, fresh, and free from unnecessary additives. Plus, the act of baking itself is rewarding—it’s a form of self-care and a way to share love with those around you.
Ingredients You’ll Need
Essential Ingredients for Date Nut Bread
To make a classic date nut bread, you’ll need the following ingredients:
- Dates – Chopped, pitted dates are the star of this bread.
- Nuts – Traditionally walnuts, but pecans or almonds work too.
- Flour – All-purpose flour is commonly used, though whole wheat flour can be substituted.
- Baking soda – Helps the bread rise and creates a light texture.
- Eggs – Bind the ingredients together and add structure.
- Sugar – Brown sugar is often used for its rich, caramel flavor.
- Butter or oil – Adds moisture and richness to the bread.
- Milk or water – Hydrates the batter and softens the dates.
- Vanilla extract – Adds depth of flavor.
- Salt – Balances the sweetness and enhances the overall flavor.
These ingredients are simple and likely already in your pantry, making date nut bread a convenient recipe to prepare.
Optional Ingredients for Flavor Variations
One of the best things about baking date nut bread is how easily you can customize it. Here are some optional add-ins to consider:
- Spices – Cinnamon, nutmeg, or allspice for warmth.
- Dried fruits – Raisins, cranberries, or chopped apricots.
- Chocolate chips – For a sweeter, dessert-style loaf.
- Citrus zest – Lemon or orange zest for a refreshing twist.
- Coconut flakes – Adds tropical flair.
Experimenting with flavors is part of the fun. You can stick with the traditional recipe or make it your own by adding a personal touch.
Substitutions for Dietary Needs
If you’re catering to specific diets, don’t worry—date nut bread is flexible.
- For gluten-free – Use a gluten-free flour blend instead of all-purpose flour.
- For vegan – Replace eggs with flax eggs (1 tablespoon ground flaxseed + 3 tablespoons water = 1 egg). Use plant-based milk and vegan butter or coconut oil.
- For low-sugar – Skip the added sugar and rely on the natural sweetness of dates. You can also use a sugar substitute like stevia or monk fruit.
- For nut allergies – Omit the nuts or replace them with seeds like pumpkin or sunflower seeds.
With these substitutions, everyone can enjoy a slice of date nut bread, no matter their dietary restrictions.
Equipment You’ll Need
Basic Kitchen Tools
To bake date nut bread, you won’t need anything fancy. Here are the essentials:
- Mixing bowls (one large, one medium)
- Measuring cups and spoons
- Wooden spoon or spatula
- Whisk
- Sharp knife (for chopping dates and nuts)
- Cutting board
- Loaf pan (standard 9×5 inch)
These basics are all you need to bring your bread to life.
Helpful Baking Accessories
While the basics are enough, a few extra tools can make the process smoother:
- Electric mixer – Speeds up mixing, though it’s not necessary.
- Parchment paper – Makes removing the loaf easier and prevents sticking.
- Cooling rack – Ensures even cooling and prevents sogginess.
- Digital scale – For precise measurements, especially helpful in baking.
Investing in a few of these items can elevate your baking experience and guarantee perfect results every time.
Step-by-Step Guide to Making Date Nut Bread
Step 1 – Preparing the Dates
The first step in making date nut bread is preparing the dates, and this part is crucial because it determines the flavor and texture of the loaf. Start by chopping your pitted dates into small pieces. If your dates are dry, you’ll need to soften them before using. Place them in a bowl, sprinkle with a teaspoon of baking soda, and pour boiling water or hot milk over them. Let them sit for about 10–15 minutes.
This process not only softens the dates but also enhances their natural sweetness and helps them blend better into the batter. The mixture will become thick, almost like a paste, and this is what gives the bread its signature moist texture. Some bakers even like to mash the softened dates slightly with a fork to ensure an even distribution throughout the loaf.
Don’t skip this step—it’s what makes the difference between a dry loaf and a beautifully moist one. At this point, your kitchen will already start smelling delicious, hinting at the goodness to come.
Step 2 – Mixing the Wet Ingredients
Once your dates are softened and ready, it’s time to move on to the wet ingredients. In a large mixing bowl, you’ll combine ingredients like eggs, sugar, melted butter (or oil), and vanilla extract. These form the foundation of the batter, adding richness, sweetness, and structure.
Start by whisking the eggs until they’re slightly frothy—this helps incorporate air, giving your bread a lighter texture. Then, gradually mix in the sugar until it dissolves into the eggs. Brown sugar is a popular choice here because it adds a warm, caramel-like flavor that pairs beautifully with the earthy sweetness of dates. However, if you prefer a lighter flavor, white sugar or even honey can be used as alternatives.
Next, stir in the melted butter or oil. Butter gives the bread a rich, indulgent taste, while oil (like vegetable or coconut oil) makes the loaf extra moist and soft. If you’re making a dairy-free or vegan version, coconut oil or vegan butter works perfectly. Finally, add a splash of vanilla extract. While it may seem like a small ingredient, vanilla deepens the flavor profile and ties everything together.
By the end of this step, your wet mixture should look smooth, glossy, and slightly thick. Don’t worry if it looks a little lumpy from the butter—it will all come together once you add the dates and dry ingredients. Think of this step as building the backbone of your bread, ensuring it has both structure and flavor before moving on.
Step 3 – Combining Dry Ingredients
Now it’s time to prepare the dry mix, which gives your bread its body and texture. In a separate bowl, whisk together your flour, baking powder, salt, and any spices you want to include. This may seem like a simple step, but it’s essential for evenly distributing the leavening agents and preventing clumps of salt or flour in your loaf.
All-purpose flour is the traditional choice, but you can also use whole wheat flour for a heartier, nutty flavor and extra fiber. If you want a gluten-free option, a 1:1 gluten-free flour blend works well. The key is to measure your flour correctly—spoon it into your measuring cup and level it off with a knife instead of scooping, which can pack in too much flour and make the bread dense.
Adding baking powder (or a combination of baking soda and baking powder) is what helps the bread rise. Without it, your loaf would be heavy and flat. A pinch of salt enhances all the flavors, balancing the sweetness of the dates and sugar. This is also the stage where you can add warm spices like cinnamon, nutmeg, or even cardamom to elevate the flavor. These spices transform the bread into a cozy, aromatic treat—perfect for the colder months or holiday baking.
Once everything is whisked together, your dry mix should look light and uniform. This step might not seem as exciting as mixing the wet ingredients or chopping dates, but it’s one of the secrets to achieving that perfectly soft crumb in your date nut bread.
Step 4 – Folding Everything Together
Here comes the magic—combining the wet and dry ingredients with the date mixture. Pour your softened dates (along with the liquid they were soaked in) into the bowl of wet ingredients and stir gently until fully incorporated. You’ll notice the mixture becoming thicker and darker, with flecks of sweet dates running throughout.
Next, add the dry mix gradually, folding it in gently with a spatula. The key here is not to overmix. Overmixing activates too much gluten in the flour, which can make the bread tough instead of soft and tender. Instead, fold the batter just until you no longer see streaks of flour. It’s okay if the mixture looks a little uneven—that’s what gives homemade bread its rustic charm.
Finally, stir in your chopped nuts. Walnuts are the classic choice, bringing a rich, slightly bitter crunch that balances the sweetness. Pecans add a buttery note, while almonds contribute a mild nuttiness. If you like variety, mix two types of nuts for extra texture. Be sure to save a few to sprinkle on top of the batter before baking—this gives your loaf a beautiful, bakery-style finish.
At this point, your batter should be thick but pourable, studded with dates and nuts in every spoonful. It’s almost impossible not to sneak a taste, and trust me—it’s just as delicious raw as it will be baked!
Step 5 – Baking to Perfection
Now for the most rewarding part: baking your bread. Preheat your oven to 350°F (175°C) and grease a standard loaf pan with butter or oil. For easier removal, you can also line it with parchment paper, leaving a little overhang on the sides so you can lift the loaf out once it’s done.
Pour your batter into the prepared pan, smoothing out the top with a spatula. If you saved some nuts earlier, sprinkle them over the top for a beautiful, crunchy finish. You could also dust the surface lightly with cinnamon sugar for extra sweetness and aroma.
Place the pan in the oven and bake for about 50–60 minutes, or until a toothpick inserted in the center comes out clean. Keep an eye on it around the 45-minute mark; if the top is browning too quickly, you can cover it loosely with aluminum foil to prevent burning while the inside finishes baking.
As the bread bakes, your kitchen will fill with the warm, nutty, caramel-like aroma of dates and spices—it’s the kind of smell that makes you instantly feel at home. Once baked, remove the loaf from the oven and let it cool in the pan for about 10–15 minutes before transferring it to a cooling rack. This step is important, as cutting into hot bread can make it crumble. Allowing it to rest helps it firm up, making slicing easier.
The result? A beautifully golden loaf with a moist, tender crumb, flecked with chewy dates and crunchy nuts. Whether you serve it warm with butter, toasted with cream cheese, or simply on its own, every slice will taste like a little piece of comfort.
Tips for Perfect Date Nut Bread
Use Fresh, High-Quality Ingredients
The quality of your ingredients makes all the difference in baking. Since dates are the star of this bread, always choose fresh, plump dates rather than old, dry ones. Medjool dates are particularly popular because they’re naturally soft and sweet, but Deglet Noor dates also work well. If you only have dry dates, soaking them longer will restore their moisture. Similarly, opt for fresh nuts that haven’t been sitting in the pantry for months, as old nuts can turn bitter and ruin the flavor of your loaf.
When it comes to flour, a good-quality unbleached flour yields the best results. If you’re using whole wheat flour, sift it before adding to avoid clumps and to create a lighter texture. And don’t forget—always check that your baking powder and baking soda are still active. Expired leavening agents won’t give your bread the rise it needs.
Don’t Overmix the Batter
One of the most common mistakes people make with quick breads is overmixing. It might be tempting to stir until the batter looks perfectly smooth, but doing so overdevelops the gluten in the flour, which results in a tough, chewy loaf instead of a soft, tender one. The golden rule is to fold the ingredients together just until combined. A few streaks of flour are okay—they’ll bake out in the oven.
If you’re using a mixer, keep it on the lowest speed and stop as soon as the dry ingredients disappear. For most bakers, mixing by hand with a spatula or wooden spoon is the safest way to avoid overworking the batter. Remember: rustic lumps are a sign of a delicious homemade bread!
Test for Doneness the Right Way
Since ovens can vary in temperature, the baking time for your date nut bread may be slightly different from what’s written in the recipe. The best way to know if your bread is ready is the toothpick test. Insert a toothpick or thin knife into the center of the loaf. If it comes out clean or with just a few moist crumbs, your bread is done. If it comes out wet with batter, it needs more time.
Another trick is to gently press the top of the loaf—if it springs back instead of sinking, it’s ready. Keep in mind that quick breads continue to cook a little while after being removed from the oven, so it’s better to take it out slightly early than risk drying it out.
Store Properly for Freshness
Date nut bread tastes best fresh out of the oven, but it also stores beautifully. To keep it moist, wrap the cooled loaf tightly in plastic wrap or store it in an airtight container. At room temperature, it will stay fresh for about 3–4 days. If you want it to last longer, refrigerate it for up to a week.
For longer storage, you can freeze the loaf. Wrap it in plastic wrap, then in aluminum foil, and freeze for up to three months. To enjoy, thaw it overnight in the refrigerator or leave it at room temperature for a few hours. You can even slice the bread before freezing so you can pull out individual portions whenever you want a quick snack or breakfast.
Serving Suggestions for Date Nut Bread
Classic Ways to Enjoy It
One of the best things about date nut bread is how versatile it is. You can enjoy it in countless ways depending on your mood. A simple yet classic option is to serve it warm with a generous pat of butter. The butter melts into the soft, moist bread, enhancing its rich flavor. For a creamier twist, spread a layer of cream cheese or mascarpone on top—it pairs beautifully with the sweetness of the dates.
Another delicious option is to toast slices lightly and drizzle them with honey or maple syrup. This transforms your bread into a decadent breakfast or dessert that feels indulgent yet wholesome. Some people also like to pair it with a cup of strong coffee or black tea, which balances the sweetness and makes for a comforting treat.
Creative Pairings and Variations
If you want to get a little more creative, try turning your date nut bread into sandwiches. Thick slices make a wonderful base for cream cheese and fruit preserves. You can also layer it with peanut butter and banana slices for a satisfying, energy-packed snack.
During the holidays, serve date nut bread with spiced apple butter or cranberry jam for a festive touch. For an elegant dessert, top it with whipped cream and a sprinkle of cinnamon. You can even turn leftover slices into French toast—dip them in an egg and milk mixture, fry until golden, and serve with syrup. It’s a great way to repurpose your bread into something new and exciting.
Serving for Special Occasions
Date nut bread isn’t just for casual snacking—it can also shine at special gatherings. Bake it in mini loaf pans or muffin tins and wrap them in parchment and twine for beautiful homemade gifts. These make wonderful holiday presents, hostess gifts, or party favors.
At brunches, a sliced loaf of date nut bread looks lovely on a platter alongside fresh fruit, cheese, and coffee. For afternoon tea, serve thin slices with clotted cream or lemon curd for a sophisticated touch. No matter how you present it, this bread always adds a touch of homemade charm to any table.
Common Mistakes to Avoid
Using Old or Dry Dates
If your dates are too dry, your bread will lack the signature moistness it’s known for. Always check the freshness of your dates before baking. If they feel hard or leathery, soak them longer in hot water or milk to restore their softness.
Skipping the Soak Step
Soaking the dates with baking soda isn’t optional—it’s essential. This step softens the dates, brings out their natural sweetness, and ensures they blend seamlessly into the batter. Without it, you may end up with hard, chewy bits in your bread instead of soft, caramel-like bites.
Incorrect Oven Temperature
Baking at the wrong temperature is another common pitfall. Too high, and the bread will brown too quickly while staying raw in the middle. Too low, and it will cook unevenly. Always preheat your oven fully before baking, and use an oven thermometer if you’re unsure of your oven’s accuracy.
Cutting the Bread Too Soon
It’s tempting to slice into your bread the moment it comes out of the oven, but resist! Cutting too soon releases steam and moisture, leaving the loaf dry. Allow the bread to cool for at least 20–30 minutes on a rack before slicing. This patience pays off with perfect slices and a moist crumb.
Variations of Date Nut Bread
Spiced Date Nut Bread
If you’re a fan of warm, cozy flavors, spiced date nut bread is the way to go. Adding spices like cinnamon, nutmeg, ginger, and cloves transforms the loaf into a fragrant treat reminiscent of autumn and winter holidays. These spices pair beautifully with the natural sweetness of dates and the earthy crunch of nuts, creating a loaf that tastes almost like gingerbread with a fruity twist.
To make this variation, simply add 1–2 teaspoons of ground cinnamon and a pinch of nutmeg and ginger to your dry mix. For an extra punch, you can add allspice or cardamom. Not only will your bread taste incredible, but it will also fill your kitchen with a heavenly aroma as it bakes. This spiced version is perfect for Christmas morning, Thanksgiving brunch, or any time you crave something warming and comforting.
Chocolate Chip Date Nut Bread
For those with a sweet tooth, chocolate chip date nut bread is a delightful upgrade. The rich, melty chocolate chunks add decadence to the wholesome flavors of dates and nuts. Semi-sweet chocolate chips work best because they balance the sweetness, but you can also use dark chocolate for a richer flavor or white chocolate for a creamier twist.
When adding chocolate chips, fold them into the batter just before baking, being careful not to overmix. To make the loaf extra special, sprinkle a handful of chips on top before popping it in the oven. This version is especially loved by kids and makes a wonderful treat for dessert or a sweet afternoon snack.
Citrus Date Nut Bread
If you prefer a refreshing, slightly tangy twist, citrus date nut bread is a fantastic option. Adding orange or lemon zest to the batter brightens the flavors and cuts through the richness of the dates and nuts. Some bakers also replace part of the liquid with orange juice for an even bolder citrus flavor.
This variation works wonderfully for spring and summer gatherings, offering a lighter take on the classic recipe. It pairs beautifully with tea, especially Earl Grey or chamomile, and makes for a cheerful addition to any brunch table.
Vegan and Gluten-Free Versions
The beauty of date nut bread lies in its adaptability. If you’re vegan, you can replace the eggs with flax eggs (1 tablespoon ground flaxseed + 3 tablespoons water = 1 egg) and use plant-based milk along with coconut oil or vegan butter. The results are just as moist and flavorful.
For gluten-free eaters, a 1:1 gluten-free flour blend works well. Adding a little extra moisture—like a tablespoon of applesauce or yogurt—can help balance the texture. With these adjustments, everyone can enjoy a slice of this delicious loaf, no matter their dietary needs.
Nutritional Information of Date Nut Bread
Calories and Macros
While exact nutrition values depend on the recipe, an average slice of date nut bread (about 1-inch thick) contains roughly:
- Calories: 180–220
- Carbohydrates: 30–35 g
- Protein: 4–5 g
- Fat: 6–8 g
- Fiber: 2–3 g
Compared to many desserts, date nut bread is a healthier option since it uses fruit for natural sweetness and includes nutrient-dense nuts.
Key Nutrients
- Potassium: Thanks to the dates, each slice provides a good dose of potassium, which supports heart health and muscle function.
- Magnesium: Present in both dates and nuts, magnesium helps with energy production and bone health.
- Fiber: The combination of dates, flour, and nuts provides dietary fiber, aiding digestion and keeping you fuller longer.
- Healthy fats: Nuts supply omega-3 and omega-6 fatty acids, which are beneficial for heart and brain health.
Making It Healthier
If you want to lighten up the recipe, there are plenty of ways to do so without compromising taste:
- Replace some or all of the sugar with honey, maple syrup, or a sugar substitute.
- Use whole wheat flour for more fiber.
- Reduce the butter or oil slightly and replace it with applesauce or Greek yogurt.
- Add chia seeds or flaxseeds for extra nutrition.
With these tweaks, you can make your date nut bread a wholesome treat that supports your wellness goals.
History and Origins of Date Nut Bread
Early Uses of Dates in Baking
Dates have been a staple food in the Middle East for thousands of years. Known as the “fruit of paradise,” dates were valued for their long shelf life, natural sweetness, and energy-boosting qualities. Ancient civilizations used them in breads, cakes, and even fermented drinks.
As trade expanded, dates spread to Europe and eventually to the Americas, where they became a popular ingredient in baking during the late 19th and early 20th centuries.
Rise in Popularity in the 20th Century
Date nut bread, as we know it today, gained popularity in the United States in the 1920s and 1930s. With the increased availability of imported dates, home bakers started experimenting with incorporating them into quick breads. Recipe pamphlets and cookbooks of the time featured date nut bread as a wholesome, family-friendly treat.
It became especially popular during the holidays because of its rich, festive flavor and ability to be made ahead of time. Some families even considered it a Christmas tradition, serving it with cream cheese or using it as part of holiday gift baskets.
Modern-Day Popularity
Today, date nut bread remains a beloved recipe, celebrated for its nostalgic charm and timeless flavor. It’s often passed down through generations, with each family adding their own twist—be it spices, different nuts, or unique serving styles. In a world full of fast food and prepackaged snacks, homemade date nut bread feels like a comforting reminder of simpler times.
Its enduring popularity also comes from its versatility—you can make it healthier, fancier, or more indulgent depending on your preference. From Middle Eastern kitchens to Western holiday tables, this bread has truly earned its place as a global classic.
FAQs about Date Nut Bread Recipe
1. Can I make date nut bread without nuts?
Yes! You can simply omit the nuts or replace them with seeds like pumpkin or sunflower seeds for added crunch without allergens.
2. How do I keep date nut bread moist?
Soaking the dates properly is key. Also, avoid overbaking, and store the loaf wrapped tightly to lock in moisture.
3. Can I freeze date nut bread?
Absolutely. Wrap the cooled loaf in plastic wrap and foil, then freeze for up to 3 months. Thaw at room temperature before serving.
4. What nuts work best in date nut bread?
Walnuts are the classic choice, but pecans, almonds, or even hazelnuts all taste delicious.
5. Why does my date nut bread sink in the middle?
This usually happens if the batter was overmixed, the oven door was opened too early, or the bread wasn’t fully baked before cooling.
Conclusion
Date nut bread is more than just a recipe—it’s a tradition, a comfort food, and a versatile treat that can be enjoyed in countless ways. With its moist, tender crumb, natural sweetness from dates, and crunchy bite of nuts, it strikes a perfect balance between indulgence and nourishment.
Whether you enjoy it plain, toasted with butter, spiced for the holidays, or upgraded with chocolate chips, date nut bread always delivers warmth and satisfaction. The best part? It’s simple to make, adaptable to dietary needs, and tastes even better the next day.
So, gather your ingredients, preheat your oven, and treat yourself to a loaf of this timeless bread. Once you’ve tried it, you’ll see why it has stood the test of time and remains a favorite across the globe.