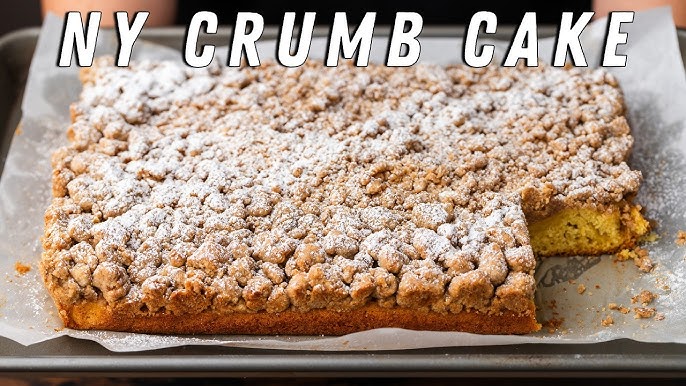
Crumb Cake Recipe: Crumb cake is a cozy, indulgent dessert that delivers a delightful balance between a soft, buttery cake base and a thick, crunchy, cinnamon-laced crumb topping. Think of it as the lovechild of a tender vanilla cake and a crumbly streusel topping, made for those who can’t decide between cake and cookies. Typically enjoyed with a warm beverage, crumb cake is perfect for breakfast, brunch, or dessert. It’s a staple at coffee shops and homemade brunch tables alike. But what makes it truly irresistible is that rich topping—crunchy, sugary, and satisfying.
What’s really magical about crumb cake is its versatility. It’s easy to dress up with fruit, nuts, or a drizzle of glaze. It can be served plain or with a scoop of ice cream. And despite its decadent flavor, it’s surprisingly simple to make with everyday pantry staples. Whether you’re a seasoned baker or just starting out, crumb cake is an approachable yet impressive treat you’ll want to make again and again.
History and Popularity of Crumb Cake
Crumb cake has deep roots in German baking traditions, originally known as “Streuselkuchen,” which translates to “streusel cake.” German immigrants brought this comforting recipe to the United States, where it found a permanent place in American kitchens, particularly in New York and New Jersey. Over time, the cake evolved from a thin, yeast-based version to the more modern butter cake base that we know and love today.
In its American incarnation, the crumb topping became thicker and more indulgent—sometimes rivaling or even surpassing the height of the cake itself! This version took hold particularly in New York City bakeries, where it became a breakfast favorite. Fast forward to today, and crumb cake is a beloved classic found in bakeries, homes, and brunch menus across the country. It’s celebrated for its homey charm, minimal fuss, and rich, nostalgic flavor.
Ingredients You’ll Need
For the Cake Base
The cake layer is light, moist, and subtly sweet. Here are the ingredients you’ll need:
- 1/2 cup unsalted butter (softened)
- 3/4 cup granulated sugar
- 2 large eggs
- 1 tsp vanilla extract
- 1/2 cup sour cream or Greek yogurt
- 1 1/4 cups all-purpose flour
- 1/4 tsp baking soda
- 1/4 tsp salt
- 1/2 tsp baking powder
Each of these ingredients plays a crucial role. Butter adds richness, while sugar sweetens and helps with structure. Eggs provide stability and moisture. Vanilla extract enhances flavor. Sour cream or yogurt adds a tangy richness and keeps the cake soft. The flour and leavening agents create the perfect rise and texture.
For the Crumb Topping
This is where the magic happens. The crumb topping is thick, buttery, and full of texture.
- 1 cup brown sugar (light or dark)
- 1 1/2 cups all-purpose flour
- 1 tbsp ground cinnamon
- 1/2 cup unsalted butter (melted)
- Pinch of salt (optional)
Mixing these ingredients results in a coarse, sandy dough that’s easy to sprinkle over the cake. Brown sugar adds a molasses depth, cinnamon brings warmth, and butter binds everything together into those chunky, crispy bits that define crumb cake.
Essential Tools for Baking
Kitchen Tools Checklist
You don’t need fancy equipment, but a few essential tools will make your baking smoother and more enjoyable:
- Mixing bowls (medium and large)
- Electric mixer or hand whisk
- Rubber spatula
- Measuring cups and spoons
- 8×8-inch square baking pan or round cake pan
- Parchment paper (optional, for easy removal)
- Wire cooling rack
Using the right tools ensures even mixing, accurate measurements, and the perfect bake. If you’re using a glass or ceramic pan, reduce your oven temperature slightly to avoid over-browning. For an easier cleanup, line your pan with parchment paper. Trust me—it makes lifting the cake out for slicing a breeze.
Step-by-Step Instructions
Step 1: Preparing Your Oven and Pan
Preheat your oven to 350°F (175°C). Grease your 8×8-inch pan with butter or non-stick spray, or line it with parchment paper for easier removal.
This step might seem basic, but it’s crucial. An unevenly heated oven can cause your cake to bake unevenly—crispy on the outside, raw in the middle. Always let your oven preheat fully before placing the cake inside. Position the rack in the center for the best heat distribution.
Once your pan is prepped, you’re ready to get mixing!
Step 2: Making the Crumb Topping
Start by mixing the brown sugar, flour, and cinnamon in a medium bowl. Once combined, pour in the melted butter and mix until the mixture forms clumps. You want a crumbly texture—not a dough. The mixture should resemble coarse sand or wet crumbs that stick together when pinched.
This step is important because the crumb topping is the star of the show. Make sure the butter is just melted—not hot—or it might cause the mixture to get too wet. Use a fork or your fingers to gently toss the ingredients together. Avoid over-mixing, which can result in a greasy or overly dense topping.
Once done, set the bowl aside. The topping will sit while you prepare the cake batter. Letting it rest for a few minutes helps it firm up, which leads to chunkier, more textured crumbs.
Step 3: Mixing the Cake Batter
In a large bowl, cream the softened butter and granulated sugar together until light and fluffy. This takes about 3–5 minutes with an electric mixer. Then, add the eggs one at a time, beating well after each addition. Stir in the vanilla extract.
Next, add the sour cream or yogurt and mix until smooth. In a separate bowl, whisk together the flour, baking soda, baking powder, and salt. Gradually add the dry ingredients to the wet ingredients, mixing just until combined. Be careful not to overmix—it can lead to a dense cake.
The batter should be thick and creamy. You’ll notice the sour cream gives it a slightly tangy smell and a velvety texture. This richness is what helps the cake stay moist for days.
Pour the batter into your prepared pan, spreading it evenly with a spatula. Make sure the surface is level—it ensures even baking and prevents the crumb topping from sinking.
Step 4: Layering and Baking
Now it’s time to add the crumb topping. Using your hands, sprinkle the mixture evenly over the batter. Don’t press it down—just let the crumbs fall naturally. The more variation in size, the better. Some big chunks, some little ones—that’s what gives it a rustic, bakery-style look.
Place the cake in the oven and bake for 35–40 minutes, or until a toothpick inserted into the center comes out clean. Keep an eye on it in the last 10 minutes to prevent over-baking. If the topping starts browning too quickly, loosely cover it with foil.
Once done, let the cake cool in the pan for about 15 minutes. Then transfer it to a wire rack to cool completely. This step is hard—we get it—but cooling helps the structure set, so the crumbs don’t fall off when slicing.
Pro Tips for the Perfect Crumb Cake
Avoiding a Dry Cake
A common crumb cake mistake? Overbaking. This cake isn’t meant to be dry or overly crumbly—ironic, we know! The key is checking the cake at the 30-minute mark. Gently press the center: it should spring back slightly but not feel firm.
Another secret weapon? Sour cream or full-fat Greek yogurt. These ingredients lock in moisture and give your cake that melt-in-your-mouth softness. Skipping them or using low-fat versions can drastically change the outcome.
Also, don’t skimp on the butter. Using margarine or oil may save a few calories, but you’ll miss that buttery depth that crumb cake is known for.
Getting the Perfect Crumb Texture
The topping needs to have that satisfying crunch while still clinging to the cake. Here’s how:
- Use melted—not softened—butter for the topping.
- Chill the topping briefly in the fridge before applying.
- Don’t pack it down on the batter—just sprinkle and let it settle naturally.
You can even use your fingers to shape some larger crumbs for more texture. When baked correctly, the topping will hold together without crumbling off at the first bite.
Variations and Add-Ins
Fruit-Filled Crumb Cake
Want to take your crumb cake to the next level? Add fruit! Fruit-filled crumb cakes are incredibly popular and add bursts of flavor, moisture, and natural sweetness.
Blueberries, raspberries, sliced peaches, or diced apples work beautifully in this recipe. To incorporate fruit, gently fold about 1 cup of your chosen fruit into the batter just before pouring it into the pan. If using frozen fruit, make sure it’s thawed and patted dry to avoid adding too much moisture.
Alternatively, you can layer fruit on top of the batter before adding the crumb topping. This way, the fruit bakes right below the topping, creating a jammy, juicy layer that perfectly contrasts the crunch.
Pro tip: Toss fruit in a tablespoon of flour before adding it to the batter. This helps prevent it from sinking to the bottom and ensures even distribution throughout the cake.
Chocolate Lover’s Crumb Cake
For the chocoholics out there, there’s an irresistible version of crumb cake just for you. Adding cocoa powder and chocolate chips transforms this classic treat into a rich, indulgent dessert.
Here’s how to do it:
- Add 1/4 cup unsweetened cocoa powder to the dry cake ingredients.
- Fold in 3/4 cup chocolate chips (semi-sweet or dark).
- Sprinkle additional chips over the batter before adding the crumb topping.
Want to go a step further? Add cocoa powder or mini chocolate chips to the crumb mixture for a double chocolate twist. The result is a brownie-meets-coffee-cake hybrid that no one can resist.
You can also drizzle melted chocolate or ganache over the cooled cake for a bakery-worthy finish. Serve with a dollop of whipped cream or a scoop of vanilla ice cream, and you’ve got yourself a showstopper dessert.
Storing and Serving Suggestions
How to Store Crumb Cake
Crumb cake stores incredibly well, which makes it perfect for meal prep or gifting. After it’s completely cooled, wrap it tightly in plastic wrap or aluminum foil and store it at room temperature for up to 3 days. It retains its moisture and the topping stays crisp, especially if stored in a cool, dry place.
For longer storage, refrigerate it for up to a week. Just know the fridge can make the crumb topping a bit less crunchy. To revive it, pop a slice in the microwave for about 10–15 seconds or warm it in a 300°F oven for 5–7 minutes.
You can also freeze crumb cake. Slice it into portions, wrap each slice in plastic wrap, and then place them in a freezer-safe bag or container. It stays fresh in the freezer for up to 2 months. Thaw at room temperature or warm before serving.
Serving Ideas
Crumb cake is wonderfully versatile when it comes to serving. Here are some of the best ways to enjoy it:
- With coffee or tea: A classic pairing that highlights the cake’s rich, comforting flavors.
- With whipped cream or yogurt: Adds creaminess and makes it feel like a full dessert.
- Topped with fruit: Fresh berries or caramelized bananas complement the cinnamon crumb topping beautifully.
- As a brunch centerpiece: Serve alongside scrambled eggs, bacon, and fruit salad for a balanced meal.
Crumb cake also works well for potlucks, bake sales, or holiday breakfasts. Its rustic charm and indulgent flavor make it a crowd-pleaser, no matter the occasion.
FAQs about Crumb Cake Recipe
1. What is the difference between crumb cake and coffee cake?
While both are topped with a sweet crumb layer, crumb cake has a much thicker crumb topping compared to coffee cake. Coffee cake may have a glaze or light streusel, while crumb cake focuses heavily on the buttery, cinnamon-sugar crumbs.
2. Can I make crumb cake ahead of time?
Yes! Crumb cake can be baked a day in advance and stored at room temperature in an airtight container. It actually tastes better the next day as the flavors meld together.
3. How do I store leftover crumb cake?
Store leftover crumb cake in an airtight container at room temperature for up to 3 days. For longer storage, refrigerate it for up to a week or freeze it for up to 3 months.
4. Why did my crumb topping sink into the cake?
If your crumb topping sinks, it’s likely because the batter was too thin or the crumb layer was pressed in too hard. Make sure to gently sprinkle the crumbs over a thick batter without pressing down.
5. Can I add fruit to my crumb cake?
Absolutely! Blueberries, apples, or raspberries make great additions. Just make sure the fruit is not too watery, as excess moisture can affect the texture of the cake.
6. How do I keep the crumb topping crunchy?
Use cold butter when making the crumb topping and don’t overmix. Baking the cake in the middle rack of the oven also helps keep the top crisp.
7. Can I make crumb cake without eggs?
Yes, you can substitute eggs with ingredients like yogurt, mashed banana, or a commercial egg replacer to make an eggless version of crumb cake.
8. Is crumb cake freezer-friendly?
Yes, crumb cake freezes well. Wrap individual slices tightly in plastic wrap and store them in a freezer-safe bag or container for up to 3 months.
9. What kind of pan should I use?
A square 8×8 or 9×9-inch baking pan is ideal. For thicker cakes, an 8-inch pan works best. Line it with parchment paper for easy removal.
10. Can I double the recipe for a larger crowd?
Certainly! Simply double the ingredients and bake in a 9×13-inch pan. Be sure to adjust the baking time and check for doneness with a toothpick.
Conclusion
Crumb cake is more than just a simple treat—it’s comfort food at its finest. With its tender, buttery base and thick, cinnamon-sugar topping, it’s no wonder this old-fashioned favorite continues to win hearts around the world. It’s easy enough for beginner bakers, yet flexible and impressive enough to wow any guest.
From classic versions to creative add-ins like fruit or chocolate, there’s a crumb cake out there for everyone. With the step-by-step guide above, you can whip up a bakery-worthy cake right in your own kitchen. Trust me—once you try homemade crumb cake, store-bought will never taste the same again.
So go ahead, gather your ingredients, preheat your oven, and treat yourself to a slice (or two) of homemade bliss.