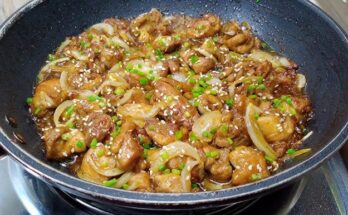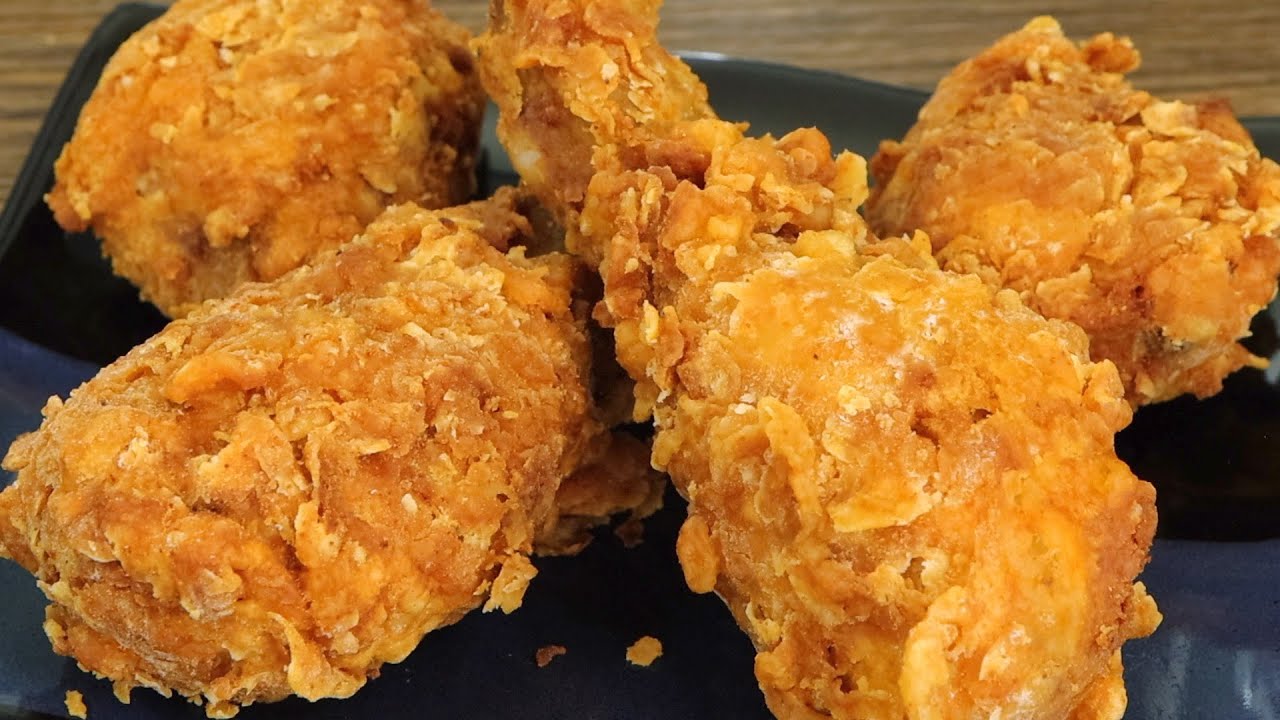
Crispy Fried Chicken Recipe: There is something timeless about crispy fried chicken. It is one of those comfort foods that feels familiar no matter where you are or who is serving it.
One bite into a properly fried piece of chicken gives you that golden crackle on the outside and juicy tenderness on the inside, and suddenly every other meal seems a little less exciting. That contrast is the magic.
The crisp coating grabs your attention first, but the flavor-packed chicken underneath is what keeps you coming back for more. It is food that speaks the universal language of satisfaction.
What Makes Fried Chicken Truly Crispy
A lot of people think crispiness comes down to luck, but it really comes down to technique. Crispy fried chicken is the result of controlling texture at every stage of the process. The marinade helps tenderize the meat, the coating creates layers, and the hot oil locks everything into place. If even one part of that chain is weak, the final result can suffer. It is like trying to paint on a wet wall—no matter how good the paint is, the surface underneath determines the outcome. Fried chicken works the same way.
The outer crust needs enough structure to cling to the chicken and enough texture to fry into little ridges and crags. That is why seasoned flour, cornstarch, and proper dredging matter so much. A smooth, thin layer will cook, but it will not give you the kind of dramatic crunch that people expect from restaurant-quality fried chicken. The best pieces have irregular surfaces where the coating puffs, crisps, and turns deeply golden. Those craggy bits are not accidents. They are built through process and patience.
Oil temperature also plays a major role. If the oil is too cool, the coating absorbs excess oil and becomes greasy instead of crisp. If it is too hot, the outside can brown too quickly while the inside remains undercooked. The sweet spot is what turns a flour-coated piece of chicken into a crunchy masterpiece. When all the moving parts work together, the result is exactly what you want: a crisp shell that shatters lightly with every bite and juicy, seasoned meat that stays tender inside.
The Science Behind Crunchy Coating
A crunchy coating forms when moisture from the chicken meets the dry flour mixture and then hits hot oil. That contact causes rapid evaporation, and the starches in the coating harden into a crisp crust. This is why ingredients like flour and cornstarch work so well together. Flour provides body and adhesion, while cornstarch helps create a lighter, more brittle crunch. The combination makes the crust feel less heavy and more crackly, which is exactly what most people want from homemade fried chicken.
Seasoning the coating is just as important as seasoning the chicken itself. A bland crust is a missed opportunity because the coating is the first thing your tongue notices. Salt, black pepper, paprika, garlic powder, onion powder, and a little cayenne help layer flavor into every crisp bite. These ingredients do not just sit on the surface. They fry into the crust, giving it depth and color. Paprika especially helps produce that warm golden tone that makes fried chicken look so tempting on the plate.
One smart trick is creating little clumps in the flour mixture by adding a spoonful or two of marinade into the dry coating before dredging. This creates tiny nuggets and textured bits that cling to the chicken and fry into extra crunchy patches. It is a small move, but it changes the final look and feel of the crust in a big way. That is the kind of detail that separates ordinary home cooking from truly professional fried chicken results.
Why Moisture Control Matters
Moisture is both a friend and an enemy when it comes to fried chicken. Inside the meat, moisture is what keeps the chicken juicy and tender. On the outside, too much moisture can ruin your crust. That is why controlling the surface of the chicken is essential. After marinating, the chicken should be allowed to drip off slightly before it goes into the flour. Too much wet marinade can cause the coating to slide away or form gummy patches rather than crisp layers.
Moisture control also matters after frying. The moment chicken comes out of the oil, steam begins escaping from the crust. If you place the hot chicken directly onto a flat plate lined heavily with paper towels, the bottom may trap steam and soften. A wire rack is a better resting place because it allows air to circulate and keeps the coating crisp on all sides. This may sound like a small detail, but it can make the difference between chicken that stays crunchy and chicken that turns limp after five minutes.
Even overcrowding the pan affects moisture. When too many pieces fry at once, the oil temperature drops and more steam builds up in the pan. Instead of crisping, the coating starts to stew in lukewarm oil. The result is a pale, oily crust rather than a crisp golden one. That is why frying in batches is not a suggestion—it is part of the formula. Great fried chicken is really a balancing act, and moisture is one of the most important elements to manage well.
Ingredients You’ll Need
Below is a complete ingredient list you can use for a classic batch of crispy fried chicken that serves about 4 to 6 people. The quantities are balanced for home cooking and designed to produce a flavorful, crunchy result without unnecessary complication. These ingredients are widely available and easy to work with, which makes this recipe perfect for beginners and experienced cooks alike.
Here is the full list of ingredients you’ll need:
| Ingredient | Amount | Purpose |
|---|---|---|
| Chicken pieces (drumsticks, thighs, wings, or breasts) | 2 kg / 4 to 4.5 lbs | Main protein |
| Buttermilk | 2 cups | Tenderizes and adds flavor |
| Eggs | 2 | Helps marinade cling |
| Salt | 2 tsp | Seasons chicken and coating |
| Black pepper | 2 tsp | Adds sharp flavor |
| Garlic powder | 2 tsp | Deep savory flavor |
| Onion powder | 2 tsp | Balanced aroma and taste |
| Paprika | 2 tbsp | Color and mild smoky flavor |
| Cayenne pepper | 1 tsp | Optional heat |
| All-purpose flour | 3 cups | Main coating base |
| Cornstarch | 1 cup | Extra crisp texture |
| Baking powder | 1 tsp | Helps lighten coating |
| Dried oregano or thyme | 1 tsp | Optional herbal note |
| Hot sauce | 1 tbsp | Optional marinade flavor |
| Vegetable oil, canola oil, or peanut oil | For frying | High-heat frying |
These ingredients work together like members of a band. None of them needs to dominate, but each one contributes something important. The flour builds the crust, the cornstarch sharpens the crunch, and the buttermilk softens the meat while helping the coating stick. Once you understand the role of each ingredient, the recipe becomes easier to master and easier to adapt to your own taste.
Chicken
The star of the dish is, of course, the chicken. Bone-in, skin-on pieces usually produce the best results because they stay juicy and flavorful while frying. Thighs and drumsticks are especially forgiving, making them excellent choices for anyone preparing fried chicken at home. Wings are great for parties, while breasts can work well if they are cut into smaller portions so they cook evenly. Using a mix of cuts gives variety, but cooking times may differ slightly depending on size.
Fresh chicken is ideal, but properly thawed frozen chicken also works well. The most important thing is to pat it dry before marinating and inspect it for uniform size. Pieces that are too different in thickness may cook unevenly, which can leave one batch overdone and another undercooked. Consistency helps you fry with confidence. Think of it like baking cookies—when the sizes match, everything cooks more predictably.
Skin-on chicken deserves special mention because the skin adds both flavor and texture beneath the crust. As it fries, the fat under the skin renders and helps keep the meat succulent. That extra richness is one of the reasons traditional fried chicken tastes so satisfying. You can use skinless pieces, but if your goal is the most classic, flavorful version of crispy fried chicken, skin-on cuts are hard to beat.
Buttermilk Marinade
Buttermilk is one of the most effective ingredients in any classic fried chicken marinade. It brings tangy flavor, but more importantly, it helps tenderize the meat gently without turning it mushy. The mild acidity loosens proteins just enough to make the chicken softer and juicier after frying. That is why buttermilk has remained a staple in Southern-style fried chicken for generations. It works quietly in the background, but the final bite tells the whole story.
Adding eggs to the buttermilk marinade gives the coating more grip later on. The egg proteins help create a sticky surface that holds onto the flour mixture more effectively. This is especially helpful if you want a thicker, craggy crust instead of a thin, smooth shell. A little hot sauce can also be added for depth. It will not make the chicken overly spicy unless you use a lot, but it does give the marinade a richer flavor profile.
Salt and spices in the marinade are not optional extras—they are the first stage of seasoning. Since the coating can only do so much, the meat itself also needs flavor. Letting the chicken soak in this seasoned buttermilk mixture means every bite tastes better from the inside out. It is one of those steps that pays off in a major way, and skipping it usually leads to less memorable fried chicken.
Seasoned Flour Coating
The coating is where the crunch is born. A combination of all-purpose flour and cornstarch creates a crust that is sturdy enough to cling to the chicken but light enough to stay crisp rather than dense. Flour alone works, but the addition of cornstarch improves texture noticeably. It makes the crust feel more delicate and crisp, almost like the difference between a heavy winter coat and a tailored jacket—both cover you, but one has a lot more style.
The seasoning in the flour should be generous and balanced. Paprika adds warmth and color, garlic powder and onion powder deepen the savory notes, black pepper adds edge, and cayenne contributes optional heat. A little baking powder can make the coating puff slightly during frying, creating more texture. This is especially helpful if you are chasing that rough, ridged exterior you see in top-tier fried chicken shops.
For even more crunch, some cooks like to drizzle a bit of marinade into the dry flour and mix lightly with their fingertips. This forms little lumps in the coating, and those lumps cling to the chicken and fry into crunchy peaks. It is a smart trick because it builds character into the crust. Fried chicken should not look too neat. The best pieces usually have a rugged, irregular texture that signals crispness before you even take the first bite.
Oil for Frying
The best oils for deep frying chicken are neutral oils with high smoke points, such as vegetable oil, canola oil, or peanut oil. These oils can handle the heat needed for frying without burning too quickly or introducing strange flavors. Olive oil is not ideal here because its flavor profile is stronger and its smoke point is generally lower than what you want for repeated high-heat frying. The oil should support the food, not compete with it.
You do not need an industrial deep fryer to make excellent fried chicken, but you do need enough oil to submerge at least half the chicken pieces in a sturdy pot or deep skillet. The chicken can be turned during frying if needed, but consistent heat is important. A heavy-bottomed pan helps retain temperature more effectively, which gives you better control. That steady heat is one of the hidden keys to a crisp, evenly browned crust.
Always make sure the oil is heated to about 175°C / 350°F before the chicken goes in. During frying, it may dip slightly, which is normal, but you want to keep it in the range of 160°C to 175°C / 325°F to 350°F. This temperature window helps the crust brown gradually while the inside cooks through. Too hot and the coating darkens before the meat is ready. Too cool and the crust turns greasy. Good oil management is what keeps the whole operation running smoothly.
Kitchen Tools That Make the Job Easier
You can make excellent fried chicken with basic equipment, but a few tools make the process far more manageable. A deep heavy-bottomed skillet, Dutch oven, or sturdy pot is one of the most helpful pieces of equipment because it holds heat well and makes temperature changes easier to control. That stability is important because frying is less forgiving than baking. Small heat swings can affect texture, color, and even cooking safety. When your pan works with you instead of against you, the whole recipe feels easier.
A kitchen thermometer is another major advantage. Guessing the oil temperature is possible, but it is not reliable, especially for beginners. A thermometer takes the mystery out of frying and gives you a clear target. The same goes for checking the internal temperature of the chicken. Fried chicken should reach 74°C / 165°F in the thickest part to be safely cooked. Without a thermometer, it is easy to end up cutting pieces open or relying on color alone, and that can lead to uneven results.
You will also want large mixing bowls, tongs, a wire rack, and a baking sheet or tray for resting the fried chicken. Tongs help keep your hands cleaner and safer when moving coated pieces. The wire rack helps preserve crispness after frying. Even something as simple as organizing a wet station and a dry station on your countertop can reduce mess and improve the flow of the recipe. Fried chicken does not have to feel chaotic. With the right tools in place, it becomes a smooth, satisfying cooking process rather than a juggling act.
How to Choose the Best Chicken Cuts
Choosing the right chicken cut can shape the entire outcome of your recipe. While almost any cut can be fried, some perform better than others depending on your goals. Chicken thighs and drumsticks are often the top choices because they are naturally juicy, flavorful, and more forgiving during frying. Even if you leave them in the oil a little longer than needed, they are less likely to dry out than breast meat. For home cooks, that makes them a dependable option.
Chicken breasts can absolutely be used, but they require more attention. Because white meat is leaner, it can dry out faster if overcooked. Cutting large breasts into smaller pieces helps them cook more evenly and match the timing of other cuts. Wings are another fantastic option if you want snack-style fried chicken with maximum crust-to-meat ratio. They cook relatively quickly and are perfect for gatherings, but they can be a little more tedious if you are aiming for a hearty main course.
Using bone-in pieces is generally best because the bones help the meat retain moisture and flavor. Skin-on cuts add another layer of richness and texture under the crust. Uniformity matters too. Try to keep pieces similar in size within each batch so they cook at the same pace. Fried chicken is already a recipe where timing matters, so setting yourself up with evenly sized cuts makes the whole process easier and more professional from the start.
Why Marinating Changes Everything
Marinating is one of those steps that some people treat like a bonus, but in truth it is one of the foundations of great crispy fried chicken. A proper marinade does more than add flavor to the surface. It works its way into the meat, helping create that juicy, seasoned interior that makes the final result taste complete rather than one-dimensional. Without marinating, even a beautiful crust can only do so much. The chicken itself may still feel flat or dry.
Buttermilk is especially effective because it tenderizes gently. Unlike stronger acidic marinades that can make chicken mushy if left too long, buttermilk softens the meat in a more controlled and forgiving way. It also creates a slightly tacky surface, which is ideal for grabbing onto the flour coating later. That means marinating does double duty: it improves both the tenderness of the meat and the performance of the crust. Few steps in this recipe work harder for the final result.
Marinating also gives the seasoning time to settle in. Salt, pepper, paprika, garlic powder, and hot sauce all become more integrated after several hours. The chicken does not just taste seasoned on the outside—it tastes seasoned throughout. That is what gives fried chicken its depth. A well-marinated piece feels balanced from the first bite to the last, with flavor in the crust and flavor in the meat working together rather than fighting for attention.
Best Marinating Time
The ideal marinating time for fried chicken is usually at least 4 hours, with overnight being even better. This gives the buttermilk and seasonings enough time to do meaningful work without affecting the texture negatively. A quick 20-minute soak may add a little flavor to the surface, but it will not give you the full tenderness and depth that make this method so reliable. Time is one of the most valuable ingredients in this recipe, even though you cannot see it on the counter.
An overnight marinade is especially useful when preparing for guests or a busy dinner schedule because it lets you do part of the work ahead of time. The next day, all you need to do is coat and fry. That makes the final cooking session feel far less rushed. It also gives the flavors more time to round out and settle together. The result is a chicken that tastes more developed, as though each bite had a chance to mature before reaching the hot oil.
Try not to marinate for too long beyond 24 hours, especially if your chicken pieces are small. While buttermilk is gentle, extended marinating can still alter the texture more than needed. You want tender chicken, not overly soft chicken. The sweet spot is long enough to create juicy flavor-packed meat but not so long that the texture starts to lose structure. Hitting that balance is what gives you consistently great results.
Flavor Benefits of Buttermilk
Buttermilk brings a subtle tang that brightens the richness of fried chicken beautifully. Since fried foods can sometimes feel heavy, that slight acidity helps keep the flavor lively and balanced. It is not loud or sour in the finished dish. Instead, it acts like a quiet background note that makes everything else taste a little more vivid. That is one reason buttermilk fried chicken has such a lasting reputation—it feels rich without becoming dull.
The texture benefits are just as important as the flavor. Buttermilk helps break down proteins gently, which means the chicken remains moist and tender even after frying. This is especially useful for thicker or bone-in cuts that spend more time in the oil. Instead of turning tough, the meat stays soft and succulent. That tenderness paired with a crisp exterior is what makes each bite so satisfying. It is the culinary version of contrast done right.
Another often overlooked advantage is adhesion. The buttermilk marinade leaves a clingy coating on the surface of the chicken, which helps the seasoned flour stick more effectively. That means fewer bare spots and a more even crust. Good fried chicken is all about structure, and buttermilk helps hold that structure together from the first step to the last. It is not just tradition—it is practical, powerful, and delicious.
Step-by-Step Guide for Crispy Fried Chicken
Follow these steps carefully, and you will create crispy, juicy chicken with a beautifully seasoned crust. Each step has a purpose, and none of them should be skipped if you want the best possible result.
Step 1: Prepare and Season the Chicken
Wash and pat the chicken pieces dry with paper towels. Season them well with salt, black pepper, paprika, garlic powder, onion powder, and a little cayenne if you like heat. Make sure each piece is evenly coated for the best flavor.
Step 2: Marinate for Tenderness
Place the seasoned chicken in a bowl and pour in buttermilk or milk mixed with a little lemon juice. Let it marinate for at least 30 minutes, or a few hours for deeper flavor and more tender meat. This step helps keep the chicken juicy inside.
Step 3: Make the Crispy Coating
In a separate bowl, combine flour with cornstarch, salt, black pepper, paprika, garlic powder, and onion powder. The cornstarch helps create a lighter, crispier crust. Mix everything well so the seasoning is evenly distributed.
Step 4: Dredge the Chicken Properly
Remove the chicken from the marinade and coat each piece thoroughly in the flour mixture. Press the coating onto the chicken to help it stick well. For extra crunch, dip it back into the marinade and dredge again.
Step 5: Heat the Oil Correctly
Pour enough oil into a deep skillet or pot and heat it over medium heat. The oil should be hot but not smoking, around 175°C (350°F). Proper oil temperature is important for crispy, evenly cooked chicken.
Step 6: Fry Until Golden and Crisp
Carefully place the chicken into the hot oil without overcrowding the pan. Fry each piece until golden brown, crispy, and fully cooked inside. Turn occasionally for even cooking, then remove and drain on a wire rack or paper towels.
Step 7: Rest Before Serving
Let the fried chicken rest for a few minutes before serving. This helps the juices settle and keeps the coating crisp. Serve hot with your favorite sides.
Common Mistakes to Avoid
Even the best recipe can go sideways when a few common mistakes creep in. One of the biggest is skipping the marinade or not giving it enough time. Without proper marination, the chicken may still fry up nicely on the outside, but the inside can taste under-seasoned and feel less juicy. Another frequent problem is under-seasoning the flour. Since the crust carries so much of the overall flavor, bland coating can make the whole dish fall flat even when the texture looks perfect.
Temperature mistakes are another major issue. Oil that is too hot burns the outside before the inside cooks through. Oil that is too cool leads to greasy, soggy chicken. That is why using a thermometer makes such a difference. Overcrowding the pan also causes trouble because it lowers the oil temperature and traps steam. Instead of crisping, the chicken starts to soften in the oil, and that is the opposite of what you want.
Another common error is resting the chicken on a flat surface instead of a wire rack. It seems harmless, but trapped steam can soften the bottom crust quickly. Not letting the dredged chicken rest before frying can also make the coating fall away more easily. Fried chicken rewards patience at every stage. When you slow down just enough to respect the process, the results improve dramatically.
Best Side Dishes to Serve with Crispy Fried Chicken
A plate of crispy fried chicken becomes even better when paired with the right side dishes. Since fried chicken is rich, salty, and crunchy, it works beautifully with sides that offer contrast. Creamy mashed potatoes, tangy coleslaw, buttery biscuits, mac and cheese, corn on the cob, and seasoned fries are all classic choices. Each one brings something different to the table, whether it is softness, freshness, or extra comfort. It is all about building a meal that feels complete rather than one-note.
Coleslaw is especially effective because its cool crunch and slight acidity balance the warmth and richness of the chicken. Mashed potatoes provide a smooth, creamy contrast that makes the crispy coating stand out even more. Biscuits add a soft, flaky element that feels right at home next to fried chicken. If you want something lighter, a simple green salad with a sharp vinaigrette can cut through the richness surprisingly well. It all depends on the kind of meal you want to create.
For drinks, iced tea, lemonade, or sparkling water with lemon all pair nicely. The goal is to balance richness with freshness so the meal stays enjoyable from start to finish. Fried chicken is bold and comforting, so it deserves side dishes that support it rather than compete with it. When the pairing is right, the whole plate feels thoughtful, generous, and deeply satisfying.
FAQs about Crispy Fried Chicken Recipe
1. What makes fried chicken crispy?
A crispy coating usually comes from a well-seasoned flour mixture, proper dredging, and frying at the right oil temperature. Cornstarch or double coating can also help create extra crunch.
2. Why should I marinate the chicken first?
Marinating helps tenderize the chicken and adds more flavor. Buttermilk is especially popular because it keeps the meat juicy and helps the coating stick better.
3. What oil is best for frying chicken?
Vegetable oil, canola oil, or peanut oil are great choices because they have high smoke points and fry the chicken evenly.
4. How do I know when the chicken is fully cooked?
The chicken is done when the inside is no longer pink and the internal temperature reaches 75°C (165°F).
5. Can I use boneless chicken?
Yes, boneless chicken works well and usually cooks faster than bone-in pieces. Just be careful not to overcook it.
6. Why is my fried chicken not crispy?
This can happen if the oil is too cool, the pan is overcrowded, or the chicken is covered immediately after frying. Letting it drain on a wire rack helps keep it crisp.
7. Can I make fried chicken without buttermilk?
Yes, you can use regular milk mixed with a little lemon juice or vinegar as a simple substitute.
8. How do I store leftovers?
Store leftover fried chicken in an airtight container in the refrigerator for up to 3 days. Reheat in an oven or air fryer for the best texture.
Conclusion
This step-by-step guide turns the process into something practical and repeatable. Instead of guessing, you know why each step matters and how each choice affects the final texture and flavor. That is what makes a recipe dependable. It is not just about getting dinner on the table once. It is about being able to make it again with confidence and get the same delicious result.
Whether you serve it at a family gathering, a casual weekend meal, or a special comfort-food dinner, this recipe delivers the classic fried chicken experience people crave. The crust is crisp, the seasoning is balanced, and the chicken stays juicy where it counts. When done right, fried chicken is not just food—it is a full sensory event, from the sound of the crunch to the warmth of the first bite.