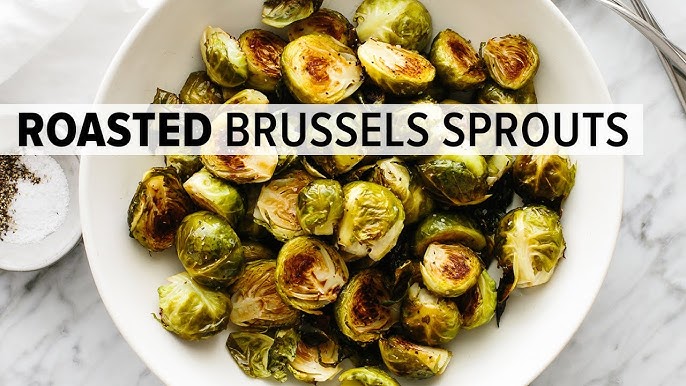
Crispy Brussel Sprouts Recipe: Let’s be honest—Brussel sprouts don’t always have the best reputation. But when done right, they transform from bitter, mushy veggies to irresistibly crispy, golden bites of joy.
We’re talking about that perfect balance of caramelized outer leaves with a tender center that almost melts in your mouth. Whether you’re a die-hard veggie lover or someone who usually avoids greens, this recipe will convert you.
Ready to fall in love with Brussel sprouts? Let’s get started!
Why You’ll Love This Recipe
This recipe isn’t just about getting your greens in—it’s about craving them. These crispy Brussel sprouts are easy to make, require minimal ingredients, and deliver maximum flavor. Plus, they’re super versatile. Serve them as a side dish, a snack, or even the star of your meal. They’re naturally gluten-free, low in carbs, and can be made vegan with a simple tweak or two.
Here’s why you’ll be obsessed:
- Texture heaven: Crunchy outside, soft inside.
- Flavor-packed: Customizable with herbs, spices, and sauces.
- Healthy: High in fiber, antioxidants, and vitamins.
- Quick & easy: Ready in 30 minutes or less.
These aren’t your grandma’s Brussel sprouts—they’re crispy, golden nuggets of flavor perfection.
Ingredients You’ll Need
To make the best crispy Brussel sprouts, start with simple, high-quality ingredients. You probably already have most of them in your kitchen.
- 1 lb of fresh Brussel sprouts
- 2–3 tbsp olive oil or avocado oil
- 1 tsp garlic powder
- Salt and pepper to taste
- Optional: balsamic glaze, parmesan, chili flakes
Let’s break it down a bit more…
Fresh vs Frozen Brussel Sprouts
Fresh Brussel sprouts are always the best choice if you’re aiming for that extra crispy texture. They roast beautifully and maintain their structure. Frozen sprouts can work in a pinch, but you’ll need to thaw and dry them thoroughly before cooking. Otherwise, they’ll steam instead of crisp.
Best Oils and Seasonings for Crispiness
High smoke point oils like avocado oil, grape seed oil, or even ghee are ideal for roasting. Olive oil works fine too if you’re keeping it at moderate temps. As for seasoning, garlic powder, onion powder, smoked paprika, and a hint of cayenne can take things to the next level. Want umami? Add a sprinkle of nutritional yeast or a dash of soy sauce.
Prepping Brussel Sprouts Like a Pro
Your prep game can make or break your sprouts. Here’s how to get them ready for greatness.
Washing and Trimming Tips
First, rinse them thoroughly to get rid of dirt or pesticides. Then trim off the woody stem end and remove any yellow or damaged outer leaves. This not only improves the texture but ensures even cooking.
Cutting for Maximum Crisp
The way you cut Brussel sprouts can seriously change the game. Halve them if they’re medium to large—this gives you more surface area to crisp up. For tiny ones, leave them whole. Want them extra crispy? Try quartering larger sprouts.
Oven-Baked Crispy Brussel Sprouts
Oven-roasting is the classic method and arguably the easiest for beginners.
Temperature and Time
Preheat your oven to 425°F (220°C). This high temperature is crucial—it allows the outer leaves to caramelize without overcooking the insides. Roast for about 25–30 minutes, flipping halfway through. Keep an eye on them towards the end so they don’t burn.
Spreading for Even Cooking
Don’t overcrowd the pan. If Brussel sprouts are too close together, they’ll steam instead of roast. Give each piece a little breathing room. Use a large baking sheet and line it with parchment paper for easy cleanup.
Pan-Fried Brussel Sprouts for Extra Crunch
If you’re after that restaurant-style sear, pan-frying is the way to go. This method delivers a deeper caramelization and unbeatable crunch, especially around the edges. It’s also a faster technique when you’re short on time but still want big flavor.
Best Skillets to Use
A heavy-bottomed skillet is your best friend here. Cast iron is the gold standard—it holds heat well and gives you that beautiful char. Stainless steel is a solid runner-up, but non-stick pans should be your last resort since they don’t get as hot and can prevent browning.
Heat the skillet over medium-high, then add enough oil to coat the bottom. Let it shimmer before tossing in your sprouts—crowding the pan will steam them instead of crisping, so work in batches if needed.
Cooking Techniques for Even Crispiness
After adding the sprouts (cut side down), don’t stir right away. Let them sit untouched for 5–7 minutes to form that golden crust. Then stir occasionally for even browning. Finish with a sprinkle of salt, and if you want extra zing, a splash of lemon juice or balsamic vinegar in the final minute adds flavor depth and deglazes the pan.
Bonus tip: adding a lid for the first few minutes can help soften the insides while keeping the outside crisp.
Air Fryer Brussel Sprouts Method
Air fryers have revolutionized healthy cooking, and Brussel sprouts are no exception. This method is perfect for achieving that irresistible crisp without tons of oil.
Toss your trimmed and halved sprouts with oil and seasoning, then air fry at 375°F (190°C) for 15–20 minutes. Shake the basket halfway through for even crisping. They come out hot, crispy, and ready for dipping. Plus, it’s hands-off and foolproof—no flipping or babysitting the oven.
Want them extra indulgent? Add a little grated parmesan cheese in the last five minutes. Or drizzle with a hot honey glaze for a sweet and spicy twist.
Flavor Variations to Try
Let’s spice things up. These flavor variations can take your crispy Brussel sprouts from basic to bold. Try one—or all—depending on your mood.
Balsamic Glazed
After roasting or frying, drizzle with balsamic glaze and a touch of maple syrup. Toss well and serve immediately. The glaze adds a tangy-sweet finish that complements the roasted flavor beautifully.
Garlic Parmesan
Add minced garlic during the last 5 minutes of roasting or pan-frying. Then, toss with fresh grated parmesan and a dash of black pepper. The result? Nutty, garlicky, cheesy goodness.
Spicy Sriracha
Mix 1 tbsp olive oil with 1 tsp sriracha and a pinch of honey. Toss the sprouts in this sauce after cooking. This variation hits that perfect sweet-heat combo that keeps you coming back for more.
Tips to Avoid Soggy Brussel Sprouts
Nothing kills the vibe faster than soggy sprouts. Here’s how to avoid that kitchen tragedy:
- Dry them thoroughly: Moisture = steam = soggy sprouts.
- High heat only: Stick to 400°F or higher when baking.
- Don’t overcrowd: Give them space on the pan.
- Use enough oil: But don’t drench them.
- Flip or shake halfway through: This ensures even browning.
Pro tip: if your sprouts still aren’t crisping, pop them under the broiler for a minute or two at the end.
Serving Suggestions
Now that you’ve mastered crispy Brussel sprouts, let’s talk about how to serve them. These little green gems are wildly versatile and can complement a wide range of dishes or stand tall as the star of the show.
Side Dish Favorites:
- Pair them with roasted chicken, grilled steak, or baked salmon.
- Add them alongside mashed potatoes or risotto for a gourmet touch.
- Serve them as part of a Thanksgiving or holiday spread—they’re always a hit.
Main Course Add-ons:
- Toss into grain bowls with quinoa, brown rice, or farro.
- Top your pizza with crispy sprouts, prosciutto, and a drizzle of honey.
- Mix into pasta dishes with garlic butter and shaved parmesan.
Snack Attack:
- Serve with a dipping sauce like aioli, spicy mustard, or ranch.
- Eat them straight from the pan with a squeeze of lemon for a quick, guilt-free snack.
Brussel sprouts also pair beautifully with flavors like lemon, mustard, maple syrup, and herbs such as thyme, rosemary, and tarragon. Don’t be afraid to experiment!
Storing and Reheating Leftovers
Let’s face it—crispy Brussel sprouts are so good they rarely make it to the leftovers stage. But if you do have some remaining, here’s how to store and revive them without losing that crunch.
Storing Tips:
- Let the sprouts cool completely before storing.
- Place in an airtight container and refrigerate for up to 4 days.
- Avoid sealing them while still warm—they’ll get soggy from trapped steam.
Reheating Tips:
- Skip the microwave. It’ll steam them into mush.
- Instead, pop them in a 400°F oven or toaster oven for 5–10 minutes.
- Alternatively, toss them back into a hot skillet with a touch of oil to re-crisp.
Want to give them a second life? Chop them and add to salads, omelets, or even grilled cheese sandwiches.
Common Mistakes to Avoid
Even seasoned home cooks can fall into a few traps when cooking Brussel sprouts. Let’s highlight the usual suspects and how to steer clear:
- Overcrowding the pan: The #1 mistake! If they’re too close, they steam instead of roast. Use a large baking sheet or cook in batches.
- Skipping the preheat: A cold oven means limp sprouts. Always preheat!
- Too much oil: A little goes a long way. Over-oiling leads to sogginess.
- Cutting unevenly: Uniform sizes = even cooking. Halve or quarter consistently.
- Not drying them: Wet sprouts steam. Always pat them dry after washing.
- Neglecting seasoning: Sprouts need flavor. Don’t be shy with herbs and spices.
- Overcooking: Burnt Brussels are bitter Brussels. Watch the clock and your oven!
Avoiding these pitfalls will guarantee crispy, golden perfection every time.
Health Benefits of Brussel Sprouts
Yes, they’re delicious—but did you know Brussel sprouts are also a nutritional powerhouse? These mini cabbages pack serious health perks:
- High in fiber: Great for digestion and gut health.
- Rich in antioxidants: Particularly kaempferol, which helps fight inflammation.
- Loaded with vitamins: Especially Vitamin C (boosts immunity) and Vitamin K (great for bones).
- Low in calories: Only about 40 calories per cup, so snack away guilt-free!
- Cancer-fighting compounds: Sulforaphane, found in cruciferous veggies, may reduce cancer risk.
So, next time you eat these crispy delights, you’re not just indulging—you’re nourishing your body, too.
FAQs about Crispy Brussels Sprouts Recipe
1. Why won’t my Brussels sprouts get crispy?
Brussels sprouts may not crisp up if they’re overcrowded on the baking tray or if there’s too much moisture. To ensure crispiness, dry them thoroughly after washing, cut them in half, and spread them out in a single layer with space between each piece. Use high heat (400°F–425°F) and avoid using too much oil.
2. Should I boil Brussels sprouts before roasting them?
No, boiling is not necessary. In fact, skipping the boil helps achieve a crispier texture. Roasting raw Brussels sprouts brings out their natural sweetness and helps them caramelize beautifully.
3. What’s the best oil to use for crispy Brussels sprouts?
Olive oil is a popular choice, but avocado oil or grapeseed oil are also great for high-heat roasting. They help the sprouts roast evenly and develop a golden, crispy exterior.
4. Can I make crispy Brussels sprouts in the air fryer?
Absolutely! The air fryer is an excellent tool for making Brussels sprouts ultra-crispy. Toss them with oil and seasonings, then air fry at 375°F–400°F for 12–15 minutes, shaking halfway through.
5. How do I store and reheat leftovers?
Store leftover Brussels sprouts in an airtight container in the refrigerator for up to 3 days. Reheat them in a hot oven or air fryer to restore their crispiness. Avoid microwaving, as it makes them soggy.
6. What seasonings go well with crispy Brussels sprouts?
Classic combinations include garlic powder, smoked paprika, balsamic glaze, or Parmesan cheese. You can also try a sweet-spicy mix with honey and chili flakes or a savory umami boost with soy sauce and sesame oil.
7. Are crispy Brussels sprouts healthy?
Yes, Brussels sprouts are packed with fiber, vitamin C, and antioxidants. Roasting them with a small amount of healthy oil keeps the dish nutritious while enhancing flavor.
Conclusion
There you have it—a foolproof guide to making the crispiest, most crave-worthy Brussel sprouts you’ve ever tasted. Whether you’re roasting, frying, or air frying, the key lies in simple ingredients, high heat, and a little TLC in the kitchen. These sprouts are no longer the dreaded vegetable of your childhood—they’re crispy, flavorful, and totally addictive.
Serve them as a side, snack on them straight from the pan, or jazz them up with your favorite toppings. The possibilities are endless. Once you try them, you’ll find yourself making them again and again—don’t say we didn’t warn you!

