Cream Cheese Recipe: There’s something incredibly satisfying about making your own cream cheese from scratch. It’s not only easy but also allows you to control what goes into it—no preservatives, additives, or mystery ingredients.
Whether you’re using it for bagels, cheesecakes, dips, or just as a spread, this guide will show you how to create smooth, rich, and tangy cream cheese at home using just a few ingredients and tools.
Why Make Cream Cheese at Home?
Most of us are used to picking up a tub of cream cheese from the dairy aisle without giving it much thought. But once you experience the flavor and texture of homemade cream cheese, it’s hard to go back. The homemade version is creamier, richer, and far more flavorful than anything you’ll find in stores.
Making cream cheese at home also allows you to customize the taste and consistency to suit your preferences. Want it thicker? Strain it a little longer. Prefer a touch more tang? Add a bit more acid. It’s like customizing your coffee order—only much creamier.
Plus, the cost-saving benefit is undeniable. With just milk, cream, lemon juice (or vinegar), and a bit of salt, you can whip up a batch for a fraction of the price of branded cream cheese.
Benefits Over Store-Bought Options
Aside from flavor and cost, homemade cream cheese has a few other standout benefits. You know exactly what’s going into it—no gums, stabilizers, or strange additives. It’s fresher, and you can make it organic or lactose-free if needed.
Health-wise, it’s also cleaner. By using fresh dairy and natural acids, you avoid the chemical preservatives often found in store-bought versions. And if you’re into sustainability, making your own helps reduce plastic waste from packaging.
Ingredients Needed for Homemade Cream Cheese
Simple Ingredients List
Here’s what you’ll need to make your own batch of luscious cream cheese:
- 4 cups of whole milk (not ultra-pasteurized)
- 2 cups of heavy cream
- 3 tablespoons of lemon juice (or white vinegar)
- ½ teaspoon of salt (adjust to taste)
- Cheesecloth or a clean kitchen towel
- A fine mesh strainer
- Blender or food processor (optional, for smoother texture)
That’s it! No exotic ingredients or equipment. If you’ve got a kitchen and a little patience, you’re all set.
Choosing the Right Milk and Cream
Choosing quality ingredients is the key to making cream cheese that rivals gourmet versions. Whole milk is essential because it has the fat content needed for a creamy result. Avoid ultra-pasteurized milk if possible; it doesn’t curdle as effectively.
For the cream, go with heavy or whipping cream—again, not ultra-pasteurized. Organic is even better if you want the cleanest flavor. The higher the quality of your dairy, the better your end product will taste.
The acid you use also plays a crucial role. Lemon juice gives a fresh, zesty taste, while white vinegar results in a more neutral flavor. You can even experiment with apple cider vinegar for a subtle twist.
Step-by-Step Guide to Making Cream Cheese
Step 1 – Heating the Milk and Cream
Start by combining the milk and cream in a heavy-bottomed pot over medium heat. Stir gently to prevent the dairy from scorching. You want to heat it to around 185°F (85°C), just before it begins to boil. You’ll see steam rising and small bubbles forming around the edges.
This is an important step because heating the dairy properly allows the curds to separate cleanly once the acid is added. Don’t rush this part—slow and steady heating helps maintain the texture and flavor.
Once the milk is hot enough, remove it from the heat. Now comes the magic.
Step 2 – Adding the Acid
Slowly stir in the lemon juice (or vinegar) one tablespoon at a time. Stir gently after each addition. You’ll start to see the milk curdle and form soft lumps—this is the curds separating from the whey.
Let the mixture sit undisturbed for about 10–15 minutes. During this time, the curds will firm up a bit more, making them easier to strain.
If you don’t see curds forming, gently reheat the mixture and add a touch more acid. Sometimes milk behaves differently depending on its fat content or pasteurization level.
Step 3 – Curdling and Separating
Once curds have fully formed and you see a yellowish liquid (whey) surrounding them, it’s time to separate them. This is the moment where your cream cheese really starts taking shape.
Place a fine mesh strainer over a bowl and line it with a cheesecloth or clean kitchen towel. Slowly pour the curdled mixture into the strainer. Let gravity do its thing—don’t squeeze or press yet.Let it drain for at least an hour for a soft texture, or longer if you want a firmer cheese. For thick cream cheese, some people even let it drain overnight in the fridge.
Step 4 – Straining the Curds
Now that your curds are comfortably nestled in the cheesecloth, it’s time to let them shed their excess whey. This is where the magic of texture happens. If you prefer a softer, spreadable cream cheese, let it drain for about 1 to 2 hours. For a firmer, denser consistency—more suitable for baking or slicing—extend the draining time up to 6 hours or even overnight in the refrigerator.
To ensure an even texture, gather the corners of the cloth and tie them together. You can hang the bundle over your sink or a bowl using a wooden spoon or clip. This allows gravity to naturally extract the whey without pressing, which can make the cheese too dense or grainy.
After the desired draining time, open the cloth and give the curds a gentle stir. You’ll notice they’ve taken on a creamy, somewhat crumbly texture. At this point, the cream cheese is still a bit rustic—but we’re not done yet!
Step 5 – Blending to Creamy Perfection
Here comes the final step: transforming those curds into that luscious, velvety cream cheese we all crave. Transfer the curds into a food processor or blender. Add your salt, and blend until smooth and creamy. Depending on your desired texture, you can blend for 30 seconds to 2 minutes.
If it seems too thick, add a teaspoon or two of the reserved whey to help it along. Taste and adjust salt as needed. You can even toss in fresh herbs, roasted garlic, or a touch of honey for a flavored version.
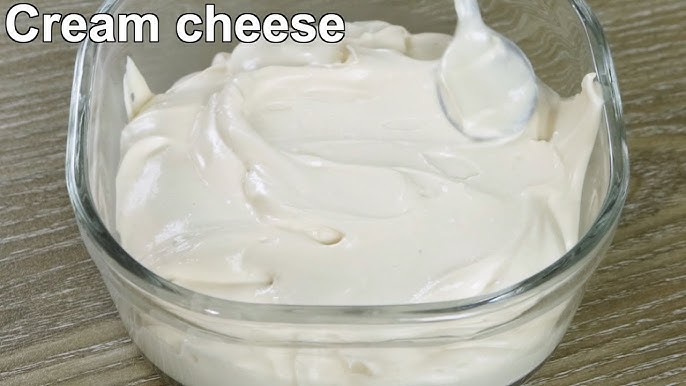
Once smooth, your cream cheese is ready! Transfer it to an airtight container and refrigerate. It’ll firm up slightly as it chills, making it perfect for spreading, mixing, or baking.
Tips for Perfect Cream Cheese Every Time
Common Mistakes to Avoid
- Using ultra-pasteurized milk – This kind of milk has been heated to the point where it won’t curdle properly. Stick to regular pasteurized or raw milk.
- Boiling the milk – You want it hot, not boiling. Overheating can cause the milk to separate unevenly.
- Adding acid too quickly – Pouring it all in at once can shock the milk. Add slowly and stir gently.
- Squeezing the curds too soon – Let gravity do the draining. Pressing can lead to a rubbery texture.
- Skipping the blending step – Don’t settle for lumpy cheese unless that’s your goal. Blending is where creaminess happens.
Learning from these common pitfalls ensures every batch you make turns out just as dreamy as the last.
Enhancing Flavor Naturally
One of the biggest perks of making your own cream cheese is the flavor customizability. Want something savory? Add minced chives, cracked black pepper, or caramelized onions. Craving a sweet treat? Try blending in honey, cinnamon, or even crushed berries.
Here are a few flavor combo ideas:
- Herb & Garlic – Blend with minced garlic, parsley, and chives.
- Spicy Jalapeño – Add chopped pickled jalapeños and smoked paprika.
- Sweet Cinnamon – Mix in brown sugar, vanilla extract, and a dash of cinnamon.
Experimentation is encouraged. The neutral base of cream cheese makes it a blank canvas for whatever your taste buds are dreaming up.
Storage, Shelf Life, and Usage Ideas
Proper Storage Techniques
Store your fresh cream cheese in an airtight container in the refrigerator. It’ll stay fresh for about 7–10 days. Always use a clean spoon or knife to scoop it out to prevent contamination.
If you made a large batch, you can freeze a portion, though it may slightly alter the texture. For best results, use frozen cream cheese in cooked dishes like cheesecakes or sauces rather than as a spread.
Label your container with the date so you can keep track of freshness—homemade foods don’t have preservatives, so don’t stretch the limits too far.
Delicious Ways to Use Homemade Cream Cheese
Here’s where your new culinary creation really shines. Homemade cream cheese is incredibly versatile. Here are some tasty ideas:
- Spread on bagels or toast – Classic and unbeatable.
- Cheesecakes and frostings – Bake a creamy New York-style cheesecake or whip up a decadent cream cheese frosting.
- Stuffed vegetables – Fill celery sticks, mini bell peppers, or jalapeños.
- Creamy pasta sauces – Melt into hot pasta for a tangy, rich sauce.
- Dips and spreads – Mix with herbs or smoked salmon for a gourmet dip.
Once you start using homemade cream cheese, you’ll never want to go back to store-bought. The taste, texture, and versatility make it a staple in any kitchen.
FAQs about Cream Cheese Recipe
1. Can I make cream cheese without a blender or food processor?
Absolutely! If you don’t have a blender, you can mix the curds by hand using a fork or a whisk. It may take more time and effort, but you’ll still end up with a delicious spread, albeit with a slightly more rustic texture.
2. What can I do with the leftover whey?
Don’t throw it out! Whey is packed with nutrients. You can use it in smoothies, soups, or even as a substitute for water when baking bread. It also makes an excellent addition to your compost pile if you don’t want to consume it.
3. How can I make lactose-free cream cheese?
Use lactose-free milk and cream. Just make sure they’re not ultra-pasteurized. The process stays the same, and you’ll get a delicious lactose-free version of your favorite spread.
4. Is homemade cream cheese safe to eat?
Yes! As long as you follow basic hygiene and food safety guidelines—like using clean utensils and storing the cheese properly in the fridge—it’s perfectly safe and healthy to enjoy.
5. Can I add flavors before or after blending?
You can do either. If you want a smooth and consistent flavor, blend your ingredients in with the curds. For chunkier add-ins like herbs, nuts, or fruit bits, stir them in after blending to keep the texture interesting.
Conclusion
Homemade cream cheese isn’t just a fun weekend project—it’s a game-changer for your kitchen. The taste? Unbeatable. The texture? Dreamy. The satisfaction of creating something so creamy and flavorful from scratch? Priceless.
What’s truly amazing is how simple the process is. Just a handful of basic ingredients, a little bit of patience, and a good blender are all you need to whip up a batch of rich, velvety cream cheese. And once you’ve tried it, you’ll see just how much more flavorful and wholesome it is compared to store-bought versions.
Whether you’re slathering it on a fresh bagel, mixing it into pasta, or crafting the perfect cheesecake, your homemade cream cheese will bring a freshness and depth of flavor that elevates any dish. Plus, it’s customizable, free from preservatives, and surprisingly cost-effective.
So the next time you think about grabbing that plastic tub at the store, pause. Grab your pot, some milk and cream, and make your own magic instead. Your taste buds—and your wallet—will thank you.