Cream Cheese Pound Cake Recipe: If you’re craving something rich, buttery, and absolutely irresistible, then you’re in for a treat! The cream cheese pound cake is not just your ordinary cake—it’s a velvety, dense, and moist dessert that leaves a lasting impression with every bite. This classic Southern favorite has stood the test of time because of its luxurious texture and subtle tanginess, thanks to one secret ingredient: cream cheese.
What makes this cake even more delightful is its versatility. You can enjoy it plain, topped with fresh berries, or served with a drizzle of chocolate or fruit sauce. It’s the kind of dessert that feels indulgent without being overly complicated, which is perfect for bakers of all levels.
So, whether you’re baking for a family gathering, holiday celebration, or just satisfying a sweet tooth, this step-by-step guide will help you master the ultimate cream cheese pound cake.
Why This Cake is a Crowd Favorite
Ever wonder why everyone seems to rave about cream cheese pound cake? It’s simple—the combination of butter and cream cheese creates an ultra-rich and creamy base that’s hard to beat. Unlike traditional pound cakes that can sometimes lean toward being dry or crumbly, this version has an incredibly moist crumb that stays tender for days.
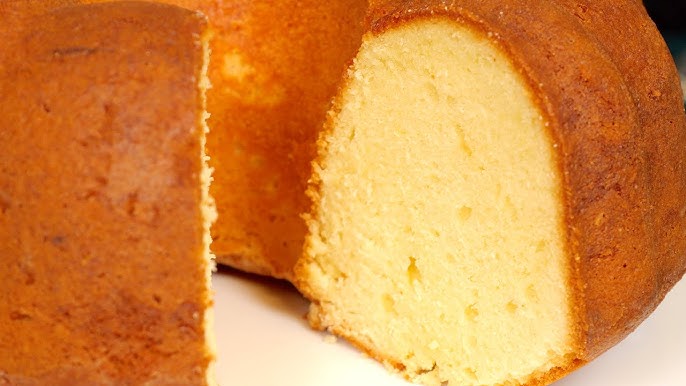
Another reason for its popularity? The flavor is perfectly balanced. It’s not too sweet, allowing the natural richness of cream cheese to shine through. And let’s not forget the golden-brown crust that forms while baking—slightly crisp on the outside, buttery soft on the inside. That contrast in texture is what makes each bite a little piece of heaven.
Lastly, it’s a cake that’s beautiful in its simplicity. You don’t need elaborate decorations or fancy layers—just a dusting of powdered sugar or a dollop of whipped cream, and you’ve got a showstopper.
Perfect Occasions for This Dessert
Cream cheese pound cake is the go-to dessert for nearly any occasion. Need a crowd-pleaser for a potluck? This cake holds up beautifully during transport and serves easily. Looking for a make-ahead dessert for the holidays? It actually tastes better the next day as the flavors have time to deepen.
It’s perfect for:
- Family dinners – Serve with vanilla ice cream and a warm berry compote.
- Tea time – Slice it thin and enjoy with a hot cup of Earl Grey.
- Birthday parties – Glaze it with lemon icing for a zingy twist.
- Picnics – It travels well and doesn’t need refrigeration right away.
There’s really no bad time for this cake—only regret if you don’t try it!
Ingredients You’ll Need
Creating the perfect cream cheese pound cake starts with the right ingredients. Here’s what you’ll need for a classic, no-fail version.
Essential Ingredients List
- 1 ½ cups (340g) unsalted butter, softened – For richness and structure.
- 1 (8 oz) block cream cheese, softened – Adds moisture and tang.
- 3 cups (600g) granulated sugar – For sweetness and that perfect golden crust.
- 6 large eggs – Adds structure and richness.
- 3 cups (375g) all-purpose flour – Gives the cake its body.
- 1 tsp vanilla extract – Enhances flavor.
- ½ tsp salt – Balances the sweetness.
Tips for Choosing Quality Ingredients
When it comes to baking, the better your ingredients, the better your cake. Opt for full-fat cream cheese (avoid the low-fat versions—they can make the texture gummy). Use unsalted butter to control the salt levels and choose high-quality vanilla extract for a deeper flavor profile.
And don’t forget the eggs! Room temperature eggs blend better into the batter, ensuring a smoother texture. If you forgot to take them out ahead of time, just place them in warm water for a few minutes.
Tools and Equipment Required
Before you dive into mixing and baking, having the right tools on hand can make the process smooth and stress-free.
Baking Tools Checklist
- Stand mixer or hand mixer – For creaming the butter and cream cheese.
- Mixing bowls – Preferably one large and one medium.
- Measuring cups and spoons – For accurate proportions.
- Rubber spatula – Helps scrape every bit of batter.
- Sifter – To ensure a light, lump-free flour mixture.
Must-Have Equipment for Best Results
- Tube pan or bundt pan (10-inch) – Traditional for pound cakes.
- Oven thermometer – To verify accurate baking temperature.
- Cooling rack – Prevents the cake from becoming soggy on the bottom.
Using the right pan is crucial. A bundt pan not only gives your cake a beautiful shape but also allows even heat distribution for a perfectly baked center. Just be sure to grease and flour it thoroughly to avoid sticking.
Preparing for Baking
Baking is more fun (and less messy) when you’re prepared ahead of time. Here’s how to get your kitchen ready for cream cheese pound cake success.
Setting Up Your Kitchen
Start by clearing your workspace. Make sure your mixer is clean and the ingredients are measured out and placed within arm’s reach. Having a “mise en place” setup (that’s French for “everything in its place”) makes the process smooth and enjoyable.
Also, take your butter, cream cheese, and eggs out of the fridge about an hour before baking. Working with room temperature ingredients helps them blend better, creating a smoother and more cohesive batter.
Preheating and Preparation Tips
Preheat your oven to 325°F (163°C) at least 20 minutes before baking. This ensures your cake bakes evenly from start to finish. While the oven heats, grease your bundt or tube pan generously with butter, then dust with flour or use baking spray with flour included.
Pro tip: After greasing, turn the pan upside down and tap gently to remove excess flour. This prevents clumps from forming on the outer crust of your cake.
Step-by-Step Instructions to Make Cream Cheese Pound Cake
Time to roll up your sleeves and dive into the fun part—baking! This recipe is straightforward, but attention to detail is key for getting that perfect texture. Follow each step closely, and you’ll have a stunning, moist pound cake that tastes like it came straight from a bakery.
Step 1: Creaming Butter and Cream Cheese
Start by placing the softened butter and cream cheese into the bowl of your stand mixer (or a large mixing bowl if using a hand mixer). Using the paddle attachment, beat them together on medium speed for about 2 to 3 minutes, or until the mixture looks fluffy and well-blended.
This step is crucial. Creaming creates tiny air pockets that help the cake rise while baking. Don’t rush it. Make sure the cream cheese is completely incorporated—no lumps!
Once creamy, scrape down the sides of the bowl with a rubber spatula to ensure everything mixes evenly. This forms the rich, smooth base that sets the tone for the rest of the batter.
Step 2: Adding Sugar and Eggs
With the mixer running on medium speed, gradually add in the granulated sugar—one cup at a time. This slow addition helps maintain the creamy texture and ensures the sugar dissolves properly into the fat. After all the sugar is added, beat the mixture for another 3–4 minutes until it’s very light and airy.
Now for the eggs. Add them one at a time, beating well after each addition. This helps emulsify the batter, making it smoother and more stable. If you add them too quickly, the mixture can curdle—which affects the final texture.
By this point, your batter should look creamy, pale yellow, and incredibly luscious. Don’t forget to scrape the bowl a couple of times throughout this process to keep everything evenly mixed.
Step 3: Sifting and Mixing Dry Ingredients
While your mixer does the heavy lifting, it’s time to prepare the dry ingredients. In a medium bowl, sift together the all-purpose flour and salt. Sifting may seem like a small step, but it really makes a difference—it removes clumps and aerates the flour, which helps the cake turn out tender and light.
Once sifted, you can optionally whisk the mixture gently to ensure the salt is evenly distributed. This is your dry base, and it’s about to meet the creamy goodness you just whipped up.
When ready, reduce the mixer speed to low. Add the dry ingredients in three batches, mixing gently after each addition just until combined. Avoid overmixing at this stage—doing so can lead to a dense or tough cake.
Step 4: Combining Wet and Dry Mixtures
By now, everything is coming together. Gently fold in the final batch of flour using a spatula to avoid overworking the batter. You want it thick, smooth, and streak-free. Finally, add the vanilla extract, giving the batter its signature warmth and depth.
Pour the finished batter into your prepared bundt or tube pan. Use a spatula to spread it evenly and smooth the top. Give the pan a gentle tap on the counter to release any air bubbles trapped in the batter.
This batter is dense, so don’t expect it to pour like a box mix—it’s more like a thick ribbon. But that’s exactly what you want for a pound cake that’s rich and satisfying.
Step 5: Baking the Cake Perfectly
Slide the pan into your preheated 325°F oven and bake for 75 to 90 minutes. Yes, it’s a long time, but good things take time! You’ll know it’s done when a wooden skewer inserted into the center comes out clean, and the top is a beautiful golden brown.
Resist the urge to open the oven door too often—this can cause the cake to fall. Instead, check only after about 70 minutes have passed.
Once baked, remove the cake from the oven and let it cool in the pan for at least 10–15 minutes. This allows it to firm up slightly so it doesn’t break when you turn it out.
To release, gently run a knife around the edges and center tube of the pan, then invert the cake onto a wire rack. Let it cool completely before slicing or glazing. Trust me, this wait is worth it!
Serving Suggestions for Cream Cheese Pound Cake
One of the best things about cream cheese pound cake is its flexibility when it comes to serving. Whether you’re aiming for elegance or something more casual, this cake can adapt to any style or event.
Serve It Simply
- Plain and Proud: A thick slice of this pound cake with a cup of coffee or tea is pure bliss. No need for extras!
- With Powdered Sugar: Lightly dusting the top with powdered sugar adds a classy touch and a hint of sweetness.
- Toasted with Butter: Feeling indulgent? Toast a slice and add a pat of butter on top. The crisp edges and melty center are next-level delicious.
Elevate with Toppings
- Fresh Berries & Whipped Cream: Strawberries, blueberries, raspberries—they all pair beautifully with this cake. Add a dollop of whipped cream and a sprig of mint for a fresh and colorful presentation.
- Fruit Compote or Jam: Warm up some peach, cherry, or blueberry preserves and drizzle over the top for a sweet, tangy finish.
- Glazes and Sauces: Lemon glaze, chocolate ganache, or caramel sauce—any of these can elevate your pound cake from homey to haute.
Pairing with Drinks
This cake also pairs wonderfully with beverages:
- Coffee: A natural companion thanks to the cake’s richness.
- Hot tea: Try black tea, chai, or green tea depending on the flavor additions.
- Sweet dessert wines or liqueurs: For fancy dinner parties, a splash of something sweet can complement the dense texture.
Storage Tips to Keep It Fresh
Pound cake has great staying power, which makes it ideal for making ahead of time. Here’s how to store it so it stays fresh and delicious for as long as possible.
Room Temperature
If you plan to eat it within a few days:
- Wrap the cake tightly in plastic wrap or aluminum foil.
- Store it in an airtight container at room temperature.
- It will stay fresh for up to 4 days this way.
Refrigeration
Want it to last a bit longer?
- Store in the fridge, wrapped and airtight.
- The cake can last for up to 7 days in the fridge.
- Just let it come to room temp or warm it slightly before serving to bring back its full flavor and softness.
Freezing for Later
Yes, cream cheese pound cake freezes beautifully!
- Wrap the cake (whole or sliced) in plastic wrap, then in foil.
- Place it in a freezer-safe zip bag or container.
- It will last up to 3 months.
- Thaw overnight in the fridge or at room temperature for a few hours before serving.
Freezing tip: Slice it before freezing so you can grab one piece at a time whenever that sweet craving hits.
Common Mistakes to Avoid
Even though this recipe is simple, a few missteps can throw off your perfect cake. Here are the most common pitfalls—and how to dodge them.
Using Cold Ingredients
Cold butter, cream cheese, or eggs can cause your batter to curdle and not mix properly. Always use room temperature ingredients for a smooth batter and even baking.
Overmixing the Batter
Once you add the flour, mix just until combined. Overmixing can activate the gluten and make the cake dense and rubbery rather than soft and tender.
Incorrect Pan Preparation
Pound cake loves to stick. Always grease your bundt pan thoroughly and dust it with flour (or use baking spray with flour included). Skipping this step can lead to heartbreak when your cake won’t release cleanly.
Baking at the Wrong Temperature
This cake needs a low and slow bake. Don’t rush it. Baking at a higher temperature will brown the outside too quickly while leaving the center undercooked.
Variations to Try
Once you’ve mastered the classic version, you can mix things up with fun flavor additions. Here are a few tasty ideas to try:
Citrus Cream Cheese Pound Cake
Add zest from a lemon, lime, or orange to your batter and swap out the vanilla for a citrus extract. Top with a citrus glaze for a fresh twist.
Chocolate Marble Pound Cake
Melt a bit of dark chocolate and swirl it into half of the batter before baking. You’ll get beautiful marbled patterns and deep cocoa flavor.
Spiced Cream Cheese Pound Cake
Add a teaspoon of cinnamon or nutmeg, or even a pinch of clove for a cozy, warming twist—perfect for fall baking.
Almond or Coconut Flavored
Replace half the vanilla extract with almond or coconut extract. Fold in shredded coconut or slivered almonds for a nutty texture boost.
FAQs about Cream Cheese Pound Cake Recipe
Q1: Can I use low-fat cream cheese for this recipe?
It’s best to use full-fat cream cheese for a rich and moist pound cake. Low-fat versions may alter the texture and flavor.
Q2: Why is my pound cake dense or dry?
Overmixing the batter or baking it too long can cause a dense or dry cake. Stick to the suggested mixing time and check for doneness with a toothpick.
Q3: Can I freeze cream cheese pound cake?
Yes! Wrap the cake tightly in plastic wrap and foil, then freeze for up to 3 months. Thaw at room temperature before serving.
Q4: Should the ingredients be at room temperature?
Absolutely. Room temperature butter, eggs, and cream cheese blend better, resulting in a smoother batter and lighter crumb.
Q5: Can I add flavors like lemon or almond extract?
Definitely! A teaspoon of lemon or almond extract can elevate the flavor—just don’t go overboard.
Q6: What kind of pan should I use?
A bundt pan or loaf pan works great. Just grease it well to prevent sticking.
Q7: How do I store leftover pound cake?
Keep it in an airtight container at room temperature for up to 3 days or refrigerate for longer freshness.
Final Thoughts
There’s something timeless and comforting about a cream cheese pound cake. It’s the kind of recipe you’ll want to make again and again, not just because of how easy it is, but because of how loved it becomes by everyone who tastes it. From weekday treats to weekend indulgences, this cake delivers every time.
So next time you’re looking for that perfect dessert that never fails to impress—whether it’s served with berries, dressed up with glaze, or eaten straight from the fridge at midnight—this cream cheese pound cake is it. Happy baking!