Country Style Pork Ribs Recipe: There’s something undeniably mouthwatering about the tender, juicy flavor of country-style pork ribs. Whether you’re hosting a weekend barbecue or just craving a hearty dinner, these ribs bring that rich, smoky, savory taste straight to your plate without all the fuss of traditional rib cuts. Ready to learn how to make them at home, step by step? Let’s dive in and turn you into a backyard rib master.
What Makes Them Unique?
Country-style pork ribs aren’t actually ribs in the traditional sense. They’re cut from the blade end of the loin near the shoulder, making them meatier than traditional ribs and full of flavorful marbling. This means you get more bite, more taste, and a more satisfying experience with every forkful. Because of their richness, they hold up beautifully to slow cooking methods and bold seasonings.
Unlike baby back or spare ribs, country-style ribs are easier to prepare and more forgiving when it comes to cooking time. They’re ideal for busy home cooks who want impressive flavor without needing restaurant-level skills. Plus, they’re often more budget-friendly.
Ideal for Family Dinners
One of the best things about this cut is its versatility. You can make it saucy and sweet for kids, spicy and smoky for adults, or simply seasoned with salt and pepper for a classic comfort meal. Country-style pork ribs can be roasted, grilled, or even tossed in a slow cooker in the morning for a “set-it-and-forget-it” dinner that’s waiting for you when you get home.
Ingredients You’ll Need
Basic Ingredients
Here’s what you’ll need to whip up a batch of mouthwatering country-style pork ribs:
- 2 to 3 lbs of country-style pork ribs (bone-in or boneless)
- Salt and freshly ground black pepper
- Garlic powder
- Onion powder
- Smoked paprika (for that rich BBQ flavor)
- Olive oil or vegetable oil
- Your favorite BBQ sauce
These staples form the base of your flavor profile. If you prefer, you can keep it ultra-simple with just salt, pepper, and BBQ sauce — and they’ll still taste amazing.
Optional Add-ons for Extra Flavor
Want to take your ribs to the next level? Add these optional ingredients:
- Brown sugar (adds sweetness and caramelization)
- Apple cider vinegar (for a tangy punch)
- Worcestershire sauce (deep umami flavor)
- Crushed red pepper flakes (a kick of heat)
- Mustard or Dijon mustard (sharp, tangy contrast)
- Liquid smoke (to simulate that grill-smoked taste indoors)
These ingredients can be adjusted to your personal taste or dietary needs, and they give you full creative control over the final flavor.
Choosing the Right Ribs
Bone-In vs Boneless
When selecting country-style ribs, you’ll likely encounter both bone-in and boneless options. Bone-in ribs tend to be more flavorful due to the marrow and connective tissue that breaks down during cooking. However, boneless ribs are easier to handle, especially for kids or quick weeknight dinners.
Both types cook similarly, but you may need to adjust the timing slightly — boneless usually cooks a little faster since there’s less mass.
Where to Buy Quality Pork Ribs
Look for fresh, well-marbled cuts with a nice pink hue. Local butcher shops are ideal since you can often request a specific cut or ask for cooking tips. If shopping at a supermarket, aim for ribs with minimal liquid in the package (too much could mean the meat has been frozen and thawed) and no unpleasant odor.
For larger gatherings or meal prep, consider buying in bulk at warehouse stores — just be sure to freeze what you won’t use within a couple of days.
Prepping the Ribs
Cleaning and Trimming
Before cooking, rinse the ribs under cold water and pat them dry with paper towels. This helps the seasoning stick better and promotes a better sear if you’re grilling or pan-searing them first. Trim any excess fat or silver skin — this connective tissue won’t break down during cooking and can be tough to chew.
Take a minute to inspect the ribs for bone fragments or uneven pieces. This ensures even cooking and prevents surprise crunches in your finished dish.
Marinating for Deeper Flavor
Marinating your ribs isn’t required, but it’s an easy way to infuse deep flavor. A simple marinade can include:
- 1/4 cup olive oil
- 2 tablespoons apple cider vinegar
- 1 tablespoon Worcestershire sauce
- 1 tablespoon brown sugar
- 2 cloves minced garlic
- Salt and pepper
Let the ribs sit in the marinade for at least 2 hours, but preferably overnight. This not only boosts flavor but helps tenderize the meat, making every bite melt-in-your-mouth good.
Seasoning Options
Classic Dry Rub
When it comes to country-style pork ribs, a dry rub is the holy grail of flavor. A good dry rub creates a bold, caramelized crust on the outside of the ribs, locking in juices and enhancing the natural flavors of the pork. Here’s a classic rub to get you started:
Dry Rub Ingredients:
- 2 tbsp brown sugar
- 1 tbsp smoked paprika
- 1 tsp garlic powder
- 1 tsp onion powder
- 1/2 tsp cayenne pepper (optional for heat)
- 1 tsp black pepper
- 1 tsp salt
Mix everything together and generously coat the ribs on all sides. For best results, apply the rub at least an hour before cooking—or even better, refrigerate overnight. This lets the spices penetrate the meat and builds layers of flavor that’ll wow your taste buds.
Wet Marinade Ideas
If you prefer ribs that are tender, juicy, and a bit sticky, try a wet marinade. Wet marinades work especially well if you’re going the slow cooker or oven route. Here’s a tangy-spicy marinade you’ll love:
Wet Marinade Ingredients:
- 1/4 cup soy sauce
- 2 tbsp honey or maple syrup
- 2 tbsp Dijon mustard
- 1 tbsp apple cider vinegar
- 1 tsp chili flakes
- 1 tsp garlic paste
Combine all ingredients and pour over the ribs. Seal in a zip-lock bag or covered bowl, and let them marinate in the fridge for 4 to 8 hours. This ensures the flavor seeps deep into the meat, giving you a deliciously tender result.
Cooking Methods Explained
Oven-Baked Ribs
Oven-baking is the go-to method for consistent, juicy country-style ribs. It’s hands-off, easy to control, and great for year-round cooking. By using foil and low heat, you create a mini oven environment that locks in moisture.
Key Advantages:
- Even cooking
- Minimal babysitting
- Works in any season
Grilled to Perfection
If you’re all about that smoky, charred flavor, the grill is your best friend. Grilling gives you that beautiful bark (the crusty, flavorful exterior) while allowing you to baste and caramelize the ribs with BBQ sauce.
Why Grill?
- Smoky flavor
- Caramelized exterior
- Great for entertaining outdoors
Slow Cooker for Ease
The slow cooker is perfect for busy weekdays. Just set it and forget it. The long, slow cooking process turns even the toughest cuts into fall-apart-tender deliciousness. Plus, cleanup is a breeze.
Why You’ll Love It:
- Effortless
- Juicy and tender meat
- Great for meal prepping
Step-by-Step Oven Recipe
Preheating and Initial Prep
First things first: preheat your oven to 300°F (150°C). Low and slow is the key to juicy, fall-off-the-bone ribs.
Steps:
- Line a large baking dish or sheet with aluminum foil.
- Lightly grease the foil with olive oil or cooking spray.
- Place your seasoned ribs in the dish in a single layer.
Cooking Process in Detail
- Cover the ribs with foil to lock in moisture.
- Bake for 2.5 to 3 hours, depending on thickness.
- Check for tenderness by inserting a fork—it should slide in easily.
- Optional: Add a splash of apple juice or water for extra steam.
After 2.5 hours, remove the foil and crank the heat to 400°F. Brush on your favorite BBQ sauce and bake uncovered for 10–15 minutes. This will caramelize the sauce and create a sticky, flavorful crust.
Broiling for a Crispy Finish
Want a crispy, charred top? After baking, turn your oven to broil. Keep a close eye, and broil the ribs for 3–5 minutes. This step adds that final, irresistible layer of texture that makes your ribs restaurant-worthy.
Grilling Instructions
How to Prepare the Grill
For grilling, set up a two-zone fire: one side for direct heat (hot side) and one for indirect heat (cool side).
Steps:
- Preheat grill to medium-high (around 350°F).
- Oil the grates to prevent sticking.
- Place ribs on indirect heat, close lid, and cook for 30 minutes.
Cooking Time and Temperatures
- After 30 minutes, move ribs to the direct heat side.
- Flip occasionally and baste with BBQ sauce.
- Cook for an additional 15–20 minutes or until internal temperature reaches 145°F.
Grilling gives you that perfect balance of juicy meat with crispy, smoky edges. Be sure to let the ribs rest for 5–10 minutes before serving to lock in juices.
Using a Slow Cooker
Low and Slow Magic
The slow cooker transforms country-style pork ribs into melt-in-your-mouth perfection with barely any effort. This method is ideal for those who want to prep in the morning and come home to a house filled with the rich aroma of seasoned, tender pork.
How to Use the Slow Cooker:
- Start by seasoning your ribs or placing them in a marinade overnight.
- Layer the bottom of your slow cooker with sliced onions, garlic, or even a splash of broth.
- Place the ribs on top and drizzle with BBQ sauce or additional marinade.
- Cover and cook on low for 6–8 hours or on high for 4–5 hours.
By the end, the meat will be so tender it practically falls apart when touched. This method also helps infuse every inch of the meat with deep, consistent flavor.
Best Settings and Times
- Low and Slow: 6–8 hours (best texture and flavor)
- Faster Cook: 4–5 hours on high (still great if you’re short on time)
Want to crisp up the outside? Transfer the ribs to a baking sheet, brush with BBQ sauce, and broil in the oven for 5 minutes before serving.
Homemade BBQ Sauce Recipes
Sweet and Smoky
Creating your own BBQ sauce lets you control sweetness, spice, and texture. Here’s a homemade sweet and smoky version that pairs beautifully with pork:
Ingredients:
- 1 cup ketchup
- 1/4 cup brown sugar
- 2 tbsp apple cider vinegar
- 1 tbsp Worcestershire sauce
- 1 tsp smoked paprika
- 1/2 tsp garlic powder
Instructions:
Combine all ingredients in a saucepan over medium heat. Simmer for 10–15 minutes until thickened. Store in the fridge for up to 2 weeks.
Spicy and Tangy
Prefer something with a kick? Try this spicy BBQ blend:
Ingredients:
- 1 cup tomato sauce
- 2 tbsp hot sauce
- 2 tbsp honey
- 1 tbsp mustard
- 1/2 tsp cayenne pepper
- 1 tsp garlic powder
This tangy, fiery blend adds boldness to your ribs without overpowering the pork’s natural flavor. Perfect for spice lovers!
Serving Suggestions
Best Side Dishes
Country-style ribs are hearty, so you’ll want sides that complement without overshadowing. Here are a few perfect pairings:
- Mashed potatoes – creamy and comforting
- Cornbread – slightly sweet, balances smoky ribs
- Coleslaw – crunchy, tangy, refreshing
- Grilled corn on the cob – smoky and buttery
- Baked beans – rich and flavorful
You can even go low-carb with sides like roasted Brussels sprouts or a cauliflower mash if that’s your jam.
Plating for Presentation
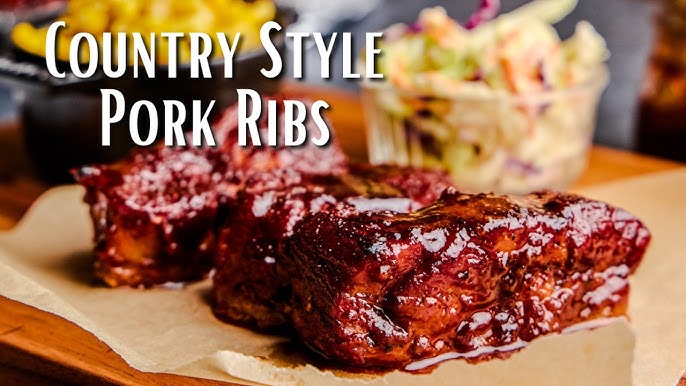
Presentation counts—especially when serving guests. Arrange your ribs neatly on a wooden board or platter. Drizzle with extra sauce and sprinkle with chopped parsley or green onions for a pop of color. Serve sides in separate bowls or ramekins for a polished look.
Storage and Leftovers
How to Store Properly
If you’ve made a big batch of ribs, don’t worry—leftovers are a blessing. Allow the ribs to cool completely before storing. Use airtight containers or wrap tightly in foil.
Fridge: Store for up to 4 days
Freezer: Wrap in foil and place in a freezer bag for up to 3 months
Label your containers with the date so you know when to use them.
Reheating Without Drying Out
The trick to reheating ribs is keeping them moist:
- Oven Method: Wrap in foil, splash with a little broth or water, and reheat at 300°F for 15–20 minutes.
- Microwave: Place ribs in a microwave-safe dish with a damp paper towel over them. Heat in 30-second bursts.
- Skillet: Heat on low with a lid on and a few drops of water to steam.
Avoid overheating, as it can dry out the meat. Aim for a warm-through result without losing juiciness.
Common Mistakes to Avoid
Overcooking and Dryness
One of the biggest pitfalls with pork ribs is overcooking, especially when grilling or baking. It’s easy to think longer cooking means more tenderness, but in reality, it can suck the juices right out.
Fix: Use a meat thermometer. Internal temp should hit around 145°F, then allow a 5–10 minute rest.
Not Letting the Meat Rest
Resting your ribs before cutting or serving allows the juices to redistribute. Skip this step, and you risk dry, uneven bites.
Fix: Always rest your ribs under foil for 5–10 minutes after cooking. Trust me, it makes all the difference.
Other mistakes?
- Not seasoning enough: Don’t be shy—ribs can handle bold flavors.
- Using too much sugar on the grill: It can burn easily.
- Crowding your pan or grill: Leave room for even heat distribution.
FAQs about Country Style Pork Ribs Recipe
1. Can I use boneless ribs for all cooking methods?
Yes! Boneless ribs work for oven, grill, and slow cooker methods—just adjust cooking time slightly since they cook faster.
2. What’s the best internal temperature for cooked pork ribs?
The USDA recommends 145°F for pork. For a more tender texture, many cooks aim for 190°F–200°F to break down connective tissues.
3. Can I make ribs ahead of time?
Absolutely! Cook a day ahead, refrigerate, then reheat in the oven with fresh sauce before serving.
4. What if I don’t have BBQ sauce?
No worries. Use ketchup, mustard, honey, and spices to whip up a homemade version. Or go dry rub all the way.
5. Do I need to boil ribs before cooking?
Nope! That’s an old myth. Boiling can actually strip flavor. Stick with slow roasting or grilling for the best results.
Final Thoughts
Country-style pork ribs are a flavorful, budget-friendly, and versatile option that turns an ordinary meal into something extraordinary. Whether you’re baking, grilling, or slow cooking, this cut of pork adapts beautifully to various seasonings and techniques. With just a few ingredients and the right method, you can create a dish that’s finger-licking good and worthy of any family dinner or weekend feast. So get your spices ready, fire up that oven or grill, and get cooking—your taste buds will thank you!