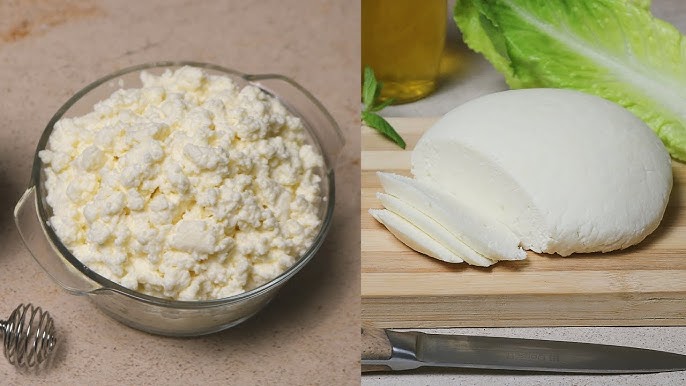
Cottage Cheese Recipe: Cottage cheese is a fresh, mild-flavored cheese made by curdling milk and separating the curds from the whey. It’s incredibly versatile, rich in protein, and often used in both savory and sweet dishes. Unlike aged cheeses, it’s consumed fresh, making it a healthier and lighter choice for many.
Cottage cheese has a slightly tangy taste and a creamy yet lumpy texture. It’s known for being a favorite among health-conscious eaters, bodybuilders, and those on low-carb or high-protein diets. It contains essential nutrients like calcium, vitamin B12, and phosphorus, making it a nourishing addition to your daily diet.
Benefits of Making It at Home
Why make cottage cheese at home when you can easily buy it at the store? Here’s why:
- No preservatives: Homemade versions are free from unnecessary additives or preservatives.
- Customizable: Adjust the fat content, texture, and salt level to your liking.
- Cost-effective: It’s significantly cheaper to make at home, especially if you consume it regularly.
- Freshness guaranteed: You control the freshness—no more guessing how long it’s been on the shelf.
Making your own cottage cheese might sound intimidating, but it’s surprisingly simple. Plus, the satisfaction of creating a kitchen staple from scratch is worth every effort.
Ingredients Needed
Simple, Readily Available Items
You don’t need a grocery list a mile long. Just a few basic ingredients, many of which you likely already have in your kitchen:
- 1 gallon of whole milk (you can use 2% or skim, but whole milk gives a creamier result)
- 1/2 cup white vinegar or lemon juice (acts as the acid to curdle the milk)
- 1 tsp salt (optional, to taste)
- 1/4 cup cream or milk (optional, for creamier texture after curdling)
That’s it! No rennet, special cultures, or fancy ingredients required.
Pro Tip: Always choose high-quality milk for the best results. Pasteurized is fine, but avoid ultra-pasteurized milk as it might not curdle well.
Tools and Equipment
Kitchen Tools You’ll Need
Before jumping into the process, gather the tools you’ll need. This makes the process smooth and stress-free.
- Large pot (preferably stainless steel)
- Wooden spoon or spatula
- Colander or sieve
- Cheesecloth or clean dish towel
- Thermometer (optional but helps with precision)
- Large bowl
- Measuring cups and spoons
Having everything on hand helps you move from one step to the next without scrambling for tools midway. And trust me, you’ll appreciate the organization once the milk starts curdling!
Step-by-Step Guide to Making Cottage Cheese
Step 1: Heating the Milk
Pour your milk into the pot and place it over medium heat. Stir occasionally to prevent scorching and heat until it reaches about 120°F (49°C). If you don’t have a thermometer, you can test with a clean finger—it should feel hot but not scalding.
Make sure not to boil the milk. Once it’s hot enough, remove it from the heat.
Step 2: Adding the Acid
Next, stir in the vinegar or lemon juice slowly while stirring the milk. As the acid reacts with the milk, you’ll see it begin to curdle—this is the magic moment! The curds (solid white clumps) will separate from the whey (a yellowish liquid).
Let the mixture sit undisturbed for about 5–10 minutes to allow full separation.
Step 3: Curdling and Separating
After resting, you should see a clear separation between the curds and whey. If the whey is still milky, add a little more acid and wait another 5 minutes.
Gently stir the curds to help them come together more uniformly.
Step 4: Draining the Curd
Line your colander with cheesecloth and place it over a bowl or sink. Carefully pour the curdled mixture into the colander, allowing the whey to drain out. Let it sit for 5–15 minutes depending on how dry or moist you prefer your cottage cheese.
For drier curds, leave it longer. For a moister, creamier result, drain for a shorter time.
Step 5: Rinsing and Storing
Rinse the curds under cold running water. This cools them down and removes excess acidity. Then gently squeeze out the water by wringing the cloth or pressing lightly.
Transfer the curds to a bowl. Add salt and cream (if using), then stir to your desired consistency. And there you go—fresh, homemade cottage cheese!
Tips for Perfect Homemade Cottage Cheese
Common Mistakes to Avoid
Making cottage cheese at home might be simple, but like any recipe, there are a few pitfalls to avoid if you want the best results:
- Using ultra-pasteurized milk: This type of milk has been heated at such high temperatures that it loses its ability to curdle effectively. Always go for regular pasteurized or raw milk if you can find it.
- Not heating the milk properly: If the milk isn’t hot enough before adding the acid, curds may not form well. If it’s too hot, you risk scalding or overcooking the curds. Stick to around 120°F (49°C).
- Overmixing: Once the curds form, avoid stirring too vigorously. This can break them up into overly small pieces and affect texture.
- Not draining long enough: If you want dry curds, you need to let them drain fully. If you prefer moist cottage cheese, reduce the draining time—but don’t skip rinsing.
- Skipping the rinse: Rinsing the curds with cold water removes excess whey and acidity, giving your cheese that clean, neutral taste.
- Over-salting: Start with a small amount of salt. You can always add more, but you can’t take it out once mixed in.
With practice, you’ll get a feel for your ideal texture, saltiness, and creaminess. That’s the beauty of homemade—you’re in charge!
How to Store and Use Cottage Cheese
Shelf Life and Storage Tips
Homemade cottage cheese doesn’t contain preservatives, so it has a shorter shelf life than store-bought versions. Store it in an airtight container in the fridge and aim to use it within 5 to 7 days.
If you added cream to the final mix, the fat can separate over time. Just give it a quick stir before serving. Also, label your container with the date you made it so there’s no guessing involved.
Avoid freezing homemade cottage cheese. It can become watery and grainy once thawed, ruining the texture. If you must store it longer, consider using it in cooked recipes like casseroles or pasta where texture won’t matter as much.
Creative Uses in Recipes
There’s so much more to cottage cheese than just eating it with fruit or sprinkling it on a salad. Here are a few ways to use your fresh batch:
- Smoothies: Add a scoop to your morning smoothie for an extra protein boost.
- Lasagna: Use it as a lighter, healthier alternative to ricotta.
- Pancakes and muffins: Mix into batter for a protein-rich, moist result.
- Stuffed pastas: Fill ravioli or cannelloni for a creamy, cheesy interior.
- Toast topping: Spread on whole-grain toast and top with tomatoes or avocado.
- Baking substitute: Use in place of sour cream or cream cheese in recipes.
It’s such a flexible ingredient that once you start using it regularly, you’ll find endless possibilities.
FAQs about Cottage Cheese Recipe
1. Can I make cottage cheese with plant-based milk?
Traditional cottage cheese requires dairy milk due to the curdling process. Most plant-based milks won’t curdle the same way, though some versions using almond or soy milk with added coagulants do exist.
2. How do I make my cottage cheese creamier?
To make it creamier, add a splash of milk or cream after draining and rinsing the curds. Stir in until you reach your desired consistency.
3. What if my curds didn’t separate properly?
This could be due to low milk temperature or not enough acid. Gently reheat the mixture and add a bit more vinegar or lemon juice, then let it sit again.
4. Can I flavor cottage cheese?
Absolutely! Try adding herbs, garlic, or even fruit puree. Just mix in after the curds are fully prepared and drained.
5. Is homemade cottage cheese safe to eat?
Yes, as long as you use clean equipment and fresh ingredients. It’s always best to refrigerate immediately and consume within a week.
Conclusion
Homemade cottage cheese is fresher, more customizable, and often more nutritious than store-bought options. With just a few basic ingredients and tools, you can create a protein-packed, creamy, and delicious cheese that fits into your meals in countless ways.
So whether you’re looking to add more protein to your diet, reduce processed foods, or simply enjoy the satisfaction of DIY kitchen skills, making cottage cheese is a perfect starting point. Give it a try—you’ll be amazed at how easy and rewarding it can be!