Collard Green Recipe: Looking for a foolproof, finger-licking collard green recipe that hits all the right notes? You’re in the right place! Whether you’re making a holiday feast or simply want to spice up your weekday meals, collard greens are a hearty, flavorful, and super-nutritious choice.
In this guide, we’ll walk you through everything you need—from ingredients to techniques—to cook up a delicious pot of collards like a true pro. So roll up your sleeves, sharpen your knives, and let’s get cooking!
Introduction to Collard Greens
Collard greens are a beloved leafy vegetable in the brassica family, related to kale, cabbage, and broccoli. Known for their slightly bitter taste and robust texture, they’ve carved out a permanent spot in Southern cooking, often slow-simmered with smoked meats and bold seasonings. But their use isn’t limited to the South—these greens are globally appreciated, appearing in Portuguese, Brazilian, and African cuisines too.
Historically, collard greens have deep roots in African-American culture, often served during Sunday dinners and family gatherings. During slavery, enslaved Africans turned humble ingredients like collards into something soulfully rich. Today, these greens remain a cherished staple in many households, both for their taste and tradition.
Health Benefits of Collard Greens
Let’s talk health for a minute—because collard greens are nothing short of a powerhouse. They’re loaded with essential vitamins and minerals, including Vitamin K, A, and C, as well as calcium, iron, and magnesium. One cup of cooked collards can meet your entire daily Vitamin K needs, which is vital for blood clotting and bone health.
What’s more? Collards are fiber-rich, making them fantastic for digestion. That same fiber helps regulate blood sugar levels and keep you feeling full longer. And thanks to their antioxidant content, they’re great for reducing inflammation and protecting your heart. Oh, and they’re low in calories—so you get all this goodness without the guilt.
Another bonus? Collards contain glucosinolates, compounds that help your body detox at a cellular level. Translation: they help flush out toxins and support liver function. If you’re looking for food that’s as healing as it is hearty, collards are your new best friend.
Ingredients Needed for Classic Collard Greens
Alright, before we get to cooking, let’s gather everything you’ll need. This list sticks to the classic Southern-style version, but we’ll throw in a few fun twists too.
Main Ingredients:
- 2 lbs fresh collard greens (about 2 large bunches)
- 1 smoked ham hock or turkey leg (for flavor)
- 1 large onion, chopped
- 3-4 garlic cloves, minced
- 4 cups chicken broth or water (or a mix)
- 2 tablespoons apple cider vinegar
- 1 tablespoon sugar (optional but recommended)
Seasonings:
- 1 teaspoon red pepper flakes
- Salt and black pepper to taste
- A pinch of smoked paprika (optional for depth)
Optional Add-ins:
- Chopped bacon or pancetta
- A dash of hot sauce
- A bit of olive oil or butter for richness
- Lemon juice for a tangy finish
Fresh ingredients are always best, especially the collard greens. Look for dark green, crisp leaves without yellow spots or wilting. And while smoked meats are traditional for that deep, soulful flavor, you can swap them for veggie alternatives like liquid smoke or smoked paprika for a meatless version.
Preparing Your Collard Greens
Good prep makes all the difference. Collard greens come with thick stems and can be sandy if not cleaned well. Here’s how to get them recipe-ready.
Step-by-step Prep Guide:
- Wash Thoroughly: Fill a large bowl or sink with cold water. Soak the collard greens, swishing them around to loosen dirt. Repeat until the water runs clear—usually 2-3 rounds.
- Remove Stems: Fold each leaf in half along the stem, then cut or tear the tough central stem away. While edible, stems are fibrous and take longer to cook.
- Chop: Stack the leaves, roll them up, and slice into ribbons (about 1-inch wide). This technique is called “chiffonade” and makes for even cooking.
- Optional Storage: If you’re prepping in advance, store the chopped leaves in a sealed container or zip-lock bag with a paper towel to absorb moisture. They’ll stay fresh for up to 5 days in the fridge.
And here’s a tip: if you’re short on time or just not in the mood for cleaning, many grocery stores now sell pre-washed, chopped collards. Just double-check the bag to make sure they’re clean and stem-free.
Cooking Methods for Collard Greens
Time to bring those greens to life! There are several ways to cook collards depending on your taste and schedule.
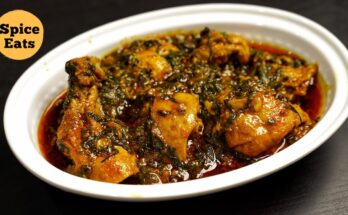
1. Traditional Southern-Style (Braised):
This is the go-to method for deep flavor and melt-in-your-mouth greens.
Steps:
- In a large pot, sauté onion and garlic until soft.
- Add the ham hock and pour in the broth.
- Let it simmer for 20 minutes to infuse the base.
- Toss in the collard greens, apple cider vinegar, sugar, and seasonings.
- Simmer uncovered for 45 minutes to 1 hour, until tender.
Flavor tip: The longer it cooks, the better it tastes. These greens get better the next day, so don’t hesitate to make them ahead.
2. Vegan or Vegetarian Style:
Skip the meat, but not the flavor.
Steps:
- Use olive oil instead of meat fat.
- Add smoked paprika, liquid smoke, or chipotle powder for that rich, smoky vibe.
- Sub veggie broth for chicken broth.
This version is lighter but still bold and delicious.
3. Quick Sauté Method:
Perfect for weeknights when time is short.
Steps:
- Heat oil in a skillet, sauté garlic and onion.
- Toss in chopped collards with a splash of broth or water.
- Cover and cook for 10-12 minutes until tender but still vibrant.
- Finish with lemon juice and red pepper flakes.
Think of this as the “weeknight warrior” version—quick, healthy, and flavorful.
Flavor Boosting Tips and Tricks
So, you’ve got the basics down—but want to take your collard greens from “good” to “mind-blowingly delicious”? You’re in luck! The flavor potential of collards is huge, and with a few easy tips, you’ll be getting rave reviews every time you serve them.
1. Let It Simmer Low and Slow
The longer you simmer your greens (especially with a smoked ham hock or turkey leg), the more flavor they soak up. That meaty, savory essence infuses every bite. Don’t rush it—let time do the work.
2. Season in Layers
Start with your aromatics (onion, garlic), then add seasoning as you build the pot. Taste as you go. Want a little kick? Add hot sauce near the end. Need a touch of sweetness? A bit of brown sugar balances the bitterness of the greens perfectly.
3. Acid Is Key
A splash of vinegar or lemon juice added at the end brightens the entire dish. It cuts through the richness and brings the flavors to life. Apple cider vinegar is a classic, but white vinegar or even balsamic works too.
4. Use the Pot Liquor (“Potlikker”)
Don’t toss the liquid at the bottom of the pot! Known as “potlikker,” this savory broth is packed with nutrients and flavor. Some folks even sip it on its own or pour it over cornbread.
Serving Suggestions for Collard Greens
Now that your greens are perfectly cooked, how should you serve them? Good news—they’re crazy versatile and go with almost anything.
Southern Classic Pairings:
- Cornbread: Nothing soaks up that potlikker like a crumbly, buttery slice of cornbread.
- Fried Chicken: The crispy-savory combo is unbeatable.
- Mac and Cheese: A creamy counterpoint to those tangy greens.
- Black-eyed Peas: Round out a true soul food plate.
For a Healthier Twist:
- Serve with grilled chicken or fish
- Add to grain bowls with quinoa or brown rice
- Toss into a wrap with roasted veggies and hummus
Creative Uses:
- Chop and stir into soups or stews
- Add to omelets or scrambled eggs
- Mix into pasta with garlic and olive oil
Don’t be afraid to get creative—collards can handle bold flavors, so experiment away.
Storing and Reheating Collard Greens
Leftovers? Lucky you. Collard greens are one of those dishes that actually taste better the next day. The flavors deepen, the texture softens, and it just gets yummier with time.
Storing Tips:
- Let the greens cool completely before storing.
- Place in an airtight container with the liquid to keep them moist.
- Store in the fridge for up to 5 days.
Reheating:
- Reheat on the stove over low heat, adding a splash of broth or water if needed.
- You can also microwave them, but stir midway through to heat evenly.
- Avoid reheating multiple times—take only what you need.
Want to freeze them? Totally doable. Collard greens freeze well for up to 3 months. Just be sure to cool them and store them in freezer-safe containers. When you’re ready to eat, thaw in the fridge overnight and reheat gently.
Common Mistakes to Avoid
Even a simple dish like collard greens can go sideways if you’re not careful. Avoid these common pitfalls to make sure your greens shine every time.
1. Not Cleaning Them Properly
This one’s huge. Gritty greens are the fastest way to ruin your dish. Wash thoroughly, rinse again, and double-check. Clean greens are happy greens.
2. Overcooking or Undercooking
Undercooked collards are tough and bitter, while overcooked ones can turn into mush. Aim for that perfect tenderness with a bit of bite. Check texture around the 45-minute mark when simmering.
3. Skimping on Seasoning
Collards need flavor help. Don’t be shy—layer your seasonings, use good broth, and don’t forget acid at the end. Taste often and adjust.
4. Not Using Enough Liquid
You need enough broth or water to fully submerge the greens, especially for the braised version. Not only does this help cook them evenly, but it also creates that golden “potlikker.”
Making Collard Greens for a Crowd
Hosting a big dinner or holiday feast? Collard greens are a hit with large groups and easy to scale up.
Planning and Portions:
- One bunch of collards serves about 2-3 people as a side.
- For a group of 10, you’ll need at least 4-5 bunches.
- Cook in batches if needed and combine later.
Cooking Tips for Crowds:
- Use a large stockpot or Dutch oven.
- Prep greens the day before and refrigerate until ready to cook.
- Double or triple the broth and seasoning amounts for big batches.
Collards are a holiday essential in many homes, especially on New Year’s Day when they’re served for prosperity and good luck—often with black-eyed peas and cornbread.
Collard Greens in World Cuisines
Though we mostly associate collard greens with the American South, they’ve got a rich, global reputation. These hearty greens pop up in dishes from all over the world—each with its own spin and flavor profile.
1. Brazil – Couve à Mineira
In Brazil, collard greens are thinly sliced and quickly sautéed with garlic and olive oil, typically served as a side to feijoada (a black bean and pork stew). This quick-cook method keeps the greens vibrant and slightly crisp.
2. Portugal – Caldo Verde
This classic Portuguese soup features collard greens simmered with potatoes, garlic, and chorizo. It’s simple, rustic, and deeply comforting—especially on a cold day.
3. East Africa – Sukuma Wiki
In countries like Kenya and Tanzania, collard greens are known as “sukuma wiki,” which means “stretch the week.” It’s a staple veggie sautéed with tomatoes, onions, and sometimes meat to make an affordable, flavorful side dish.
4. Caribbean Islands
Collards are often cooked down with coconut milk, garlic, and spicy peppers in Caribbean cuisines, making for a silky, rich dish that complements rice and plantains.
No matter where you go, these greens bring bold flavor and wholesome nutrition to the table.
Kid-Friendly Collard Greens Ideas
Getting kids to eat their greens can feel like a battle, right? Luckily, collard greens are surprisingly versatile and can be kid-approved with the right presentation and pairings.
1. Add Cheese
A little sprinkle of parmesan or cheddar can transform greens into a cheesy, creamy treat. Think “green mac and cheese” vibes.
2. Make a Wrap
Use large collard leaves as a tortilla alternative—fill them with chicken, rice, or veggies and a tasty sauce. It’s fun, colorful, and interactive.
3. Bake into Muffins or Fritters
Chop cooked collards finely and sneak them into savory muffins or fritters. Kids won’t even know they’re eating veggies.
4. Pair with Familiar Foods
Serve greens alongside favorites like mashed potatoes, crispy chicken tenders, or buttery rice. The contrast helps them ease into the taste.
The key? Start small, season well, and maybe let them help in the kitchen. Kids love food they’ve helped make.
Collard Greens vs Kale: What’s the Difference?
Both leafy greens. Both healthy. But what makes collard greens different from kale?
| Feature | Collard Greens | Kale |
|---|---|---|
| Texture | Thicker, more fibrous | Softer, more delicate |
| Taste | Earthy, slightly bitter | Mild, sometimes peppery |
| Cooking Style | Best slow-cooked or sautéed | Great raw or lightly cooked |
| Nutritional Edge | Higher in fiber and calcium | Higher in Vitamin C |
In short, collards are the sturdier cousin of kale. They hold up to long cooking and pair well with robust flavors. Kale shines in salads and smoothies but wilts quickly under heat.
Collard Greens for New Year’s Luck
Ever heard of eating collard greens on New Year’s Day for good fortune? It’s more than just tradition—it’s deeply rooted in Southern folklore.
Why Collards?
Their green color symbolizes money and financial prosperity. The idea is: the more greens you eat, the more wealth you’ll have in the new year.
The Classic Trio:
- Collard Greens = Money
- Black-eyed Peas = Coins
- Cornbread = Gold
Together, they make up a good-luck meal that’s as delicious as it is meaningful. Whether or not you believe in superstitions, starting the year with a nourishing plate never hurts!
Final Tips for Perfect Collard Greens Every Time
Let’s wrap things up with a few pro tips you’ll want to keep in your back pocket:
- Don’t rush the cook time. Good collards take patience. Let them simmer to absorb all that flavor.
- Use a lid for tenderness. It traps steam and helps break down the greens evenly.
- Taste often. The best cooks taste as they go—don’t be afraid to adjust the seasoning.
- Make extra. These greens taste even better the next day. Trust us.
- Experiment. Add a dash of honey, a pinch of mustard seeds, or even a swirl of cream. Make it yours.
FAQs about Collard Green Recipe
1. What are collard greens?
Collard greens are leafy vegetables from the cabbage family, known for their slightly bitter taste and hearty texture. They’re a soul food staple, rich in vitamins A, C, and K.
2. How do you get the bitterness out of collard greens?
The secret is in the simmer! Cook collard greens low and slow—usually with smoked meat, onions, and broth—to mellow out the bitterness and bring out deep, savory flavor.
3. Can I make collard greens without meat?
Absolutely! Use smoked paprika, garlic, and vegetable broth to get that smoky, comforting flavor in a vegan version.
4. How long should I cook collard greens?
Typically, collard greens simmer for 45 minutes to 1 hour until tender. Some prefer a quicker sauté for a firmer bite, but the Southern tradition leans slow and soft.
5. Can you freeze cooked collard greens?
Yes! Let them cool completely, then store in an airtight container in the freezer for up to 3 months. Reheat on the stove for best texture.
6. What can I serve with collard greens?
They pair perfectly with cornbread, fried chicken, mac and cheese, black-eyed peas, or rice. Basically, any comfort food knows collard greens are the ride-or-die sidekick.
7. Are collard greens healthy?
Very! They’re low in calories and packed with antioxidants, fiber, and nutrients. Just watch the sodium if you’re adding cured meats or broth.
Conclusion
There you have it—your ultimate step-by-step guide to cooking collard greens like a true kitchen boss. Whether you’re honoring Southern traditions or just exploring a new veggie, collards are the real deal. They’re healthy, hearty, and versatile enough to star on any plate. With the right prep and a little TLC, you’ll be dishing out bowls of green gold in no time. So grab a bunch, fire up that stove, and let the magic begin!