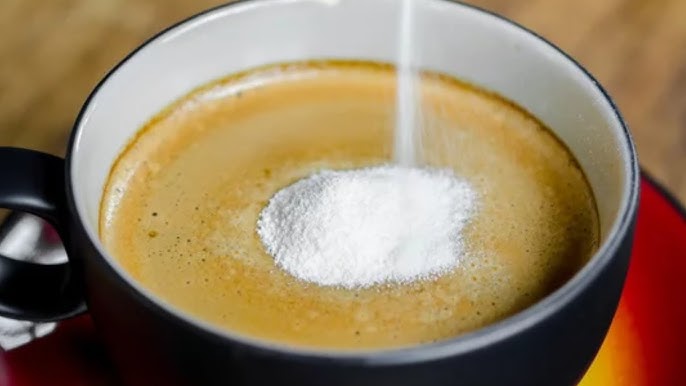
Coffee Creamer Recipe: If you’re one of those people who can’t start their day without a steaming cup of coffee, then chances are you’re also a fan of coffee creamer. It turns that bitter morning brew into a velvety, sweet indulgence. But let’s face it, store-bought creamers are often packed with artificial ingredients, sugars, and preservatives. So, why not take the healthier—and tastier—route of making your own?
Making homemade coffee creamer isn’t just easy, it’s also an enjoyable process. You control the ingredients, the flavor, and the sweetness. Whether you’re trying to cut down on sugar or want a dairy-free alternative, crafting your creamer at home allows full control. Plus, it’s kind of fun to play mad scientist in your own kitchen, tweaking recipes until they’re just right for your taste buds.
In this guide, I’ll walk you through everything you need to know about making your own coffee creamer—from the basic recipe to creative flavor variations that could rival anything you’d find at a café.
Benefits of Homemade Coffee Creamer
So, what’s the big deal about making your own coffee creamer? Is it really worth the time and effort? In short—absolutely. Here’s why.
1. Health Benefits
Store-bought creamers are convenient, but they often come with a long list of unpronounceable ingredients like mono- and diglycerides, sodium stearoyl lactylate, and carrageenan. If that sounds more like a science experiment than something you want in your morning cup, you’re not alone. By making your own, you can choose wholesome ingredients, reduce your sugar intake, and avoid artificial additives.
You can also cater to specific dietary needs—whether you’re vegan, lactose intolerant, or simply trying to live a cleaner lifestyle. You can use almond milk, oat milk, coconut milk, or other non-dairy options instead of traditional dairy.
2. Cost-Effectiveness
Let’s talk dollars and cents. A bottle of flavored creamer from the store might set you back $3 to $5, and it runs out fast—especially if you’re sharing it with a household of coffee lovers. Homemade creamer can be made in larger batches for a fraction of the price using pantry staples. The savings really add up over time.
3. Customizability
This is perhaps the most fun part. Want a hint of hazelnut with a splash of cinnamon? Or maybe a peppermint mocha creamer for the holidays? When you make your own, you can experiment with different flavors, sweeteners, and milk bases until you find the perfect match.
Whether you like your coffee light and sweet or rich and bold, there’s a creamer blend out there just for you—and you can make it exactly the way you like it.
Essential Ingredients for Homemade Coffee Creamer
Before you jump into the kitchen, let’s break down the basic ingredients you’ll need to whip up your own liquid gold. The beauty of homemade creamer is its simplicity. Most recipes start with just a few core components, and you can add from there depending on the flavor you want.
Base Ingredients
These ingredients form the creamy foundation of your recipe:
- Milk or milk alternatives: Whole milk, half-and-half, almond milk, oat milk, coconut milk, or soy milk.
- Sweetener: Sugar, maple syrup, honey, agave nectar, or artificial sweeteners like stevia or erythritol.
- Cream or heavy whipping cream: For a thicker consistency and richer flavor (optional but recommended for traditional creamers).
Flavor Add-ins
This is where you get to flex your creativity. Here are a few options:
- Vanilla extract: A staple for most basic creamers.
- Cocoa powder or chocolate syrup: For mocha flavors.
- Cinnamon or nutmeg: Perfect for a fall spice twist.
- Almond or hazelnut extract: To replicate store-bought flavors.
- Pumpkin puree and spice: Ideal for a seasonal pumpkin spice creamer.
- Peppermint extract: For a festive flair.
These ingredients can be mixed and matched to make endless combinations. And because you’re the boss of your kitchen, you can go wild or keep it classic.
Equipment You’ll Need
You don’t need a fully stocked professional kitchen to get started. Most of these tools are things you already have lying around:
- Medium-sized saucepan: For heating and combining ingredients.
- Whisk or spoon: To stir your mixture smoothly.
- Measuring cups and spoons: Accuracy matters, especially when it comes to sweeteners and extracts.
- Glass jars or bottles: For storing your creamer in the fridge.
- Strainer or cheesecloth (optional): If you’re using spices or ingredients that might leave residue.
- Funnel: Makes transferring your creamer to a bottle way easier and mess-free.
Once you’ve got these tools ready, making creamer becomes a breeze. You’ll be surprised how fast it comes together.
Basic Homemade Coffee Creamer Recipe
Let’s dive into the actual recipe. This basic vanilla coffee creamer is a great starting point. You can enjoy it as-is or use it as a base to build more complex flavors.
Ingredients:
- 1 cup whole milk (or non-dairy alternative)
- 1 cup heavy cream (or coconut cream for dairy-free)
- 3 tablespoons maple syrup (or preferred sweetener)
- 1 tablespoon pure vanilla extract
Instructions:
- Combine Ingredients: In a medium saucepan over medium heat, add the milk, cream, and sweetener.
- Heat Gently: Warm the mixture while stirring constantly, but don’t let it boil. Heating it helps dissolve the sweetener and meld the flavors.
- Add Flavor: Once warmed, remove from heat and stir in the vanilla extract.
- Cool and Store: Let the creamer cool to room temperature, then transfer to a clean bottle or jar using a funnel.
- Refrigerate: Store in the fridge for up to 7 days. Shake before each use, as natural separation is normal.
And just like that, you’ve got your own homemade coffee creamer. No mystery ingredients. No artificial junk. Just creamy, flavorful goodness made right in your kitchen.
Flavor Variations to Try
One of the best parts about making your own coffee creamer is getting to customize the flavors exactly how you like them. Below are some crowd-favorite variations that you can whip up easily with a few tweaks to the basic recipe. Feel free to get creative—half the fun is experimenting!
1. Mocha Coffee Creamer
Craving something chocolatey? This mocha version will make your coffee taste like a decadent treat.
- Add to base recipe:
- 2 tablespoons cocoa powder
- 1 teaspoon instant espresso powder (optional, for deeper flavor)
- Instructions:
Add the cocoa and espresso powders to the milk and cream mixture while it’s heating. Whisk well to dissolve completely before adding vanilla extract.
2. Pumpkin Spice Creamer
The fall favorite, all year round. Cozy and spiced, this version is perfect for chilly mornings.
- Add to base recipe:
- 3 tablespoons pumpkin puree
- 1 teaspoon pumpkin pie spice
- 1/2 teaspoon cinnamon
- Instructions:
Stir the pumpkin and spices into the warm milk mixture until well combined. For a smoother texture, strain the final mix through a fine sieve before storing.
3. Cinnamon Roll Creamer
Sweet and comforting, this one tastes just like a freshly baked cinnamon roll.
- Add to base recipe:
- 1 teaspoon ground cinnamon
- 1/4 teaspoon nutmeg
- 1/2 teaspoon butter extract (optional but gives that “baked goods” flavor)
- Instructions:
Whisk spices and extracts into the warm creamer base. Adjust cinnamon to your preference.
4. Hazelnut Creamer
Nutty and smooth, this is a great alternative to pricey store-bought hazelnut creamers.
- Add to base recipe:
- 1 teaspoon hazelnut extract
- Instructions:
Simply stir in the hazelnut extract after heating your base. You can also toast and blend real hazelnuts with your milk for an extra-natural approach, but make sure to strain well.
5. Peppermint Mocha Creamer
Perfect for the holidays, this one brings together chocolate and peppermint for a wintery indulgence.
- Add to base recipe:
- 2 tablespoons cocoa powder
- 1/2 teaspoon peppermint extract
- Instructions:
Whisk in cocoa powder while heating and add peppermint extract off heat. Too much peppermint can overpower, so start small and taste as you go.
With these variations, your coffee routine will never get boring. You can also mix and match—like adding cinnamon to the mocha base or tossing in almond extract with vanilla for a bakery-style vibe.
Dairy-Free and Vegan Coffee Creamer Options
Not everyone can—or wants to—consume dairy. Fortunately, there are a ton of plant-based options that work beautifully in homemade creamers.
Best Non-Dairy Bases
Here are some of the most popular and effective non-dairy milks for creamer:
- Almond milk: Light, nutty, and widely available.
- Oat milk: Naturally sweet and extra creamy.
- Coconut milk: Rich, tropical flavor (especially good in mocha or vanilla creamers).
- Cashew milk: Smooth and creamy with a mild flavor.
- Soy milk: Thicker consistency, great for traditional flavor profiles.
To replace the heavy cream in your base, you can use:
- Coconut cream: Ultra-rich and thick.
- Cashew cream: Blend soaked cashews with water until smooth.
Vegan Sweeteners and Flavors
To keep it vegan-friendly, opt for:
- Maple syrup or agave nectar instead of honey.
- Vegan-approved extracts and flavorings (check labels for hidden dairy).
You can follow the same steps as the original recipe—just sub in your favorite plant-based options. The result? A silky, flavorful creamer that suits your diet and tastes amazing.
How to Store Homemade Coffee Creamer
Proper storage is key to enjoying your creamer for as long as possible—and keeping it safe to consume.
Refrigeration Tips
- Always store your creamer in a clean, airtight container.
- Glass jars or bottles with screw tops work best.
- Label the jar with the date you made it to track freshness.
- Keep it refrigerated and don’t leave it out for long periods.
Shelf Life
Homemade creamers generally last up to 7–10 days in the fridge. If your creamer smells off, has curdled, or tastes weird—toss it. When in doubt, always err on the side of caution.
Separation Is Normal
Because homemade creamers don’t contain emulsifiers, separation is totally normal. Just give it a good shake before each use, and you’re good to go.
Tips for a Perfect Coffee Creamer Every Time
Let’s fine-tune your creamer game. Here are some bonus tips for achieving the best results, every single time.
1. Warm Before Mixing
Heating the milk and sweetener before adding flavors helps dissolve everything smoothly and blend the flavors better. Don’t skip this step.
2. Strain If Needed
If you use whole spices or chunky ingredients like pumpkin puree, consider straining your mixture before storing. It ensures a smooth pour every time.
3. Taste Test
Always taste your creamer before storing it. You can adjust sweetness or flavor strength on the fly. A little extra vanilla or a pinch more cinnamon can make all the difference.
4. Go Light on Extracts
Flavors like peppermint, almond, or hazelnut can be strong. Start small and increase to taste. You can always add more, but you can’t take it out.
5. Batch It
If you love a particular flavor, double or triple the recipe and store it in multiple jars. It saves time and ensures you always have some on hand.
Using Coffee Creamer Beyond Coffee
Sure, coffee creamer is made for coffee—but that doesn’t mean it has to stay there. Homemade coffee creamer is incredibly versatile, and once you realize the full potential, you’ll never look at that bottle the same way again.
1. Add to Tea or Chai
Certain creamers, especially those flavored with vanilla, cinnamon, or pumpkin spice, pair beautifully with black tea, chai, or rooibos. The added sweetness and creaminess elevate a simple tea to something far more indulgent.
2. Use in Smoothies
Add a splash of flavored creamer to your morning smoothie for extra richness and flavor. A tablespoon or two of vanilla or mocha creamer can turn your fruit smoothie into a dessert-worthy treat without extra effort.
3. Pour Over Oatmeal or Cereal
Try using your creamer as a sweetener for oatmeal, overnight oats, or even dry cereal. It replaces the need for sugar or syrup and adds a creamy texture that makes breakfast feel special.
4. Add to Pancake or Waffle Batter
Swap part of the milk in your pancake or waffle batter with your flavored creamer. The result? Fluffy, flavorful breakfast treats that taste like you added a secret ingredient.
5. Dessert Drizzle
You can even drizzle your creamer over brownies, cakes, or ice cream. Warm it up slightly for a quick, rich sauce with whatever flavor you’ve prepared—mocha, cinnamon roll, or pumpkin spice all work great.
Once you see how flexible your homemade creamer is, you’ll start finding uses for it in everything from French toast to fruit dips. It’s a fantastic way to add consistent flavor throughout your daily recipes.
Mistakes to Avoid When Making Coffee Creamer
Even though the process is pretty simple, a few common mistakes can mess with the flavor or texture of your homemade creamer. Let’s break down what to avoid:
1. Skipping the Heating Step
Some recipes may claim you can just mix everything cold, and while technically true, heating your base helps dissolve sugar or syrups fully and integrates flavors better. Without heating, the creamer might separate faster and have a gritty or uneven texture.
2. Using Too Much Extract
It’s tempting to pour in a generous splash of vanilla or hazelnut extract, but extracts are powerful. Overdoing it will make your creamer taste artificial or overwhelming. Always start with small amounts and add more if needed.
3. Not Straining After Mixing
If you’re using spices like cinnamon, pumpkin puree, or cocoa powder, your creamer might end up with little lumps or residue. A quick strain through cheesecloth or a fine mesh sieve makes a world of difference for texture.
4. Forgetting to Shake
Homemade creamers don’t have emulsifiers like store-bought ones. That means natural separation happens. Don’t mistake this for spoilage—just shake it well before each use to reblend.
5. Improper Storage
Always store your creamer in a clean, airtight container and keep it refrigerated. If it’s exposed to air or kept out too long, it can spoil quickly.
Avoiding these simple mistakes ensures your coffee creamer is consistently delicious, smooth, and safe to enjoy.
How to Adjust Sweetness and Thickness
One of the best things about making creamer at home is that you’re in full control of the flavor profile. Whether you like your coffee just barely sweet or rich and syrupy, it’s easy to tweak the recipe to suit your tastes.
To Adjust Sweetness:
- Use a lighter hand with sweeteners if you prefer your coffee on the bitter side.
- For a sweeter version, increase the sugar, maple syrup, or sweetener of choice a tablespoon at a time until it’s just right.
- Try different sweeteners: Brown sugar for a richer taste, honey for floral notes, or agave for a neutral sweetness.
To Adjust Thickness:
- Use more cream or coconut cream for a richer, thicker consistency.
- Add a spoonful of cornstarch or arrowroot powder, dissolved in cold water, to slightly thicken the mix during the heating step.
- Blend soaked cashews with water until creamy and use that as your base—perfect for plant-based lovers who want something extra rich.
Tuning your creamer to perfection may take a few tries, but once you hit that sweet spot, you’ll never want to go back to store-bought again.
Why Your Coffee Creamer Tastes Different at Home
Ever wonder why your homemade creamer tastes a bit different from what you buy at the store? That’s totally normal—and actually a good thing.
1. No Artificial Flavors
Commercial creamers often contain “natural and artificial flavors” designed to be extremely potent. Homemade versions rely on real ingredients, which results in a more authentic, subtle flavor.
2. No Emulsifiers or Thickeners
Store creamers are engineered to be ultra-smooth and uniform. At home, your mixture may separate or have more natural texture—don’t be alarmed.
3. You Control the Ingredients
Homemade creamer lets you decide how sweet, rich, or bold the flavors are. It may take a few batches to match your favorite brand’s taste, but you’ll end up with something healthier and more personal.
Remember, the difference in flavor is often a sign that your ingredients are fresher, cleaner, and better for you. That’s a trade-off worth making.
FAQs about Coffee Creamer Recipe
1. How long does homemade coffee creamer last?
Homemade coffee creamer lasts about 7–10 days in the fridge. Always store it in a clean, airtight container and give it a shake before using.
2. Can I freeze homemade coffee creamer?
Yes, you can freeze it, but the texture may change slightly when thawed. Shake or blend it well after defrosting to re-emulsify.
3. Is homemade coffee creamer healthier than store-bought?
Absolutely! You avoid preservatives, artificial sweeteners, and unnecessary additives. Plus, you control the sweetness and calorie count.
4. Can I use non-dairy milk for homemade creamer?
Yes, popular options include almond, oat, coconut, soy, and cashew milk. Pair them with coconut cream or cashew cream for extra richness.
5. Why does my creamer separate in the fridge?
That’s totally normal. Homemade creamers don’t have emulsifiers like commercial ones. Just shake it before each use.
Conclusion
Making your own coffee creamer might sound like a small thing, but it can dramatically improve your morning routine. It’s healthier, more cost-effective, and infinitely customizable. From classic vanilla to peppermint mocha and beyond, you can mix up flavors that rival any coffee shop offering. Plus, it only takes about 10 minutes from start to finish.
With just a few basic ingredients and simple tools, you can create a creamer that fits your diet, your taste buds, and your lifestyle. Say goodbye to store-bought mystery ingredients and hello to your new favorite kitchen ritual.