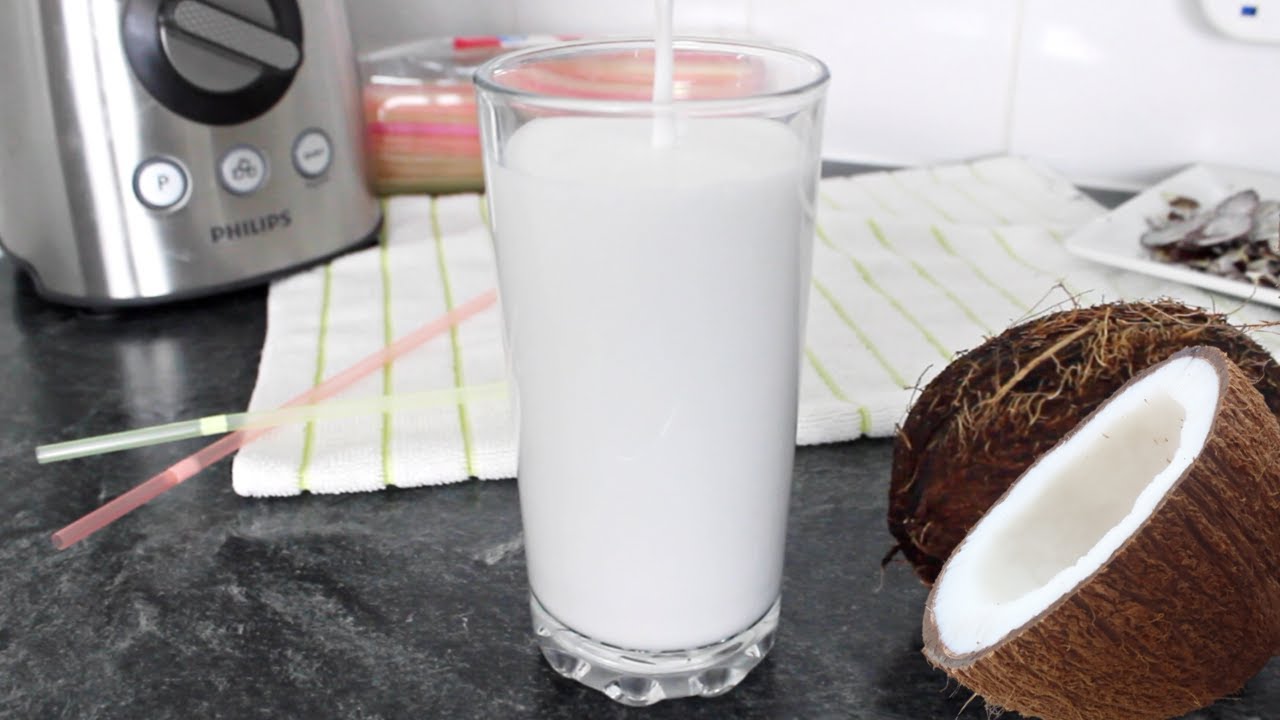
Coconut Milk Recipe: Have you ever grabbed a can of coconut milk from the store and thought, “What’s really in this?” You’re not alone. Store-bought coconut milk often comes packed with preservatives, thickeners, and additives. But here’s the good news—you can easily make your own fresh, creamy coconut milk at home using just two ingredients! Sounds too simple? It really is. Making your own coconut milk not only gives you full control over what goes in but also ensures a fresher, more flavorful result.
This guide walks you through everything from the ingredients to the storage and even how to reuse the pulp. Whether you want it for cooking, smoothies, or skincare, this recipe delivers fresh coconut goodness that’s 100% pure and natural. Let’s get started!
What is Coconut Milk?
Coconut milk is a rich, creamy liquid extracted from the grated meat of mature coconuts. It’s not to be confused with coconut water, which is the clear liquid found inside green coconuts. Coconut milk is used extensively in Asian, Caribbean, and African cuisines for its creamy texture and sweet, nutty flavor.
There are generally two types: thick coconut milk and thin coconut milk. The first extraction is thick, full-fat milk that’s perfect for desserts, sauces, and curries. The second extraction (from the same pulp with added water) results in a thinner milk, ideal for soups and smoothies.
Health Benefits of Coconut Milk
Homemade coconut milk isn’t just delicious—it’s incredibly nourishing. Here are a few reasons you might want to add it to your diet:
- Rich in healthy fats: Contains medium-chain triglycerides (MCTs), which may support weight loss and provide quick energy.
- Dairy-free alternative: Ideal for lactose-intolerant individuals or those following a vegan diet.
- Boosts immunity: Contains lauric acid, known for its antibacterial and antiviral properties.
- Supports heart health: Some studies suggest coconut milk can help maintain healthy cholesterol levels.
- Good for skin and hair: Packed with antioxidants and healthy oils.
Just remember, moderation is key—coconut milk is calorie-dense, so portion control matters.
Types of Coconut Milk
Knowing the type of coconut milk you need helps in using it more effectively. Here’s a breakdown:
- Thick Coconut Milk: Extracted from the first press of grated coconut with minimal water. Rich and creamy, it’s best for desserts, curries, and sauces.
- Thin Coconut Milk: Comes from a second press with added water. Perfect for soups, stews, or light smoothies.
- Canned Coconut Milk: Convenient but may contain stabilizers and preservatives.
- Homemade Coconut Milk: Fresh, customizable, and additive-free.
List of Ingredients You’ll Need
Making coconut milk at home only requires two main ingredients:
- 2 cups of fresh grated coconut (or desiccated coconut as an alternative)
- 4 cups of warm filtered water
Optional ingredients (for added flavor):
- A pinch of sea salt
- ½ teaspoon of vanilla extract
- 1–2 pitted dates (for natural sweetness)
Choosing fresh, organic coconut will yield the best flavor and nutritional value. Desiccated coconut works fine too, but make sure it’s unsweetened.
Essential Equipment
To make smooth, creamy coconut milk, gather the following tools:
- High-speed blender: A strong blender is essential to extract as much milk as possible.
- Cheesecloth or nut milk bag: Helps separate the milk from the pulp.
- Fine mesh strainer: Extra layer of straining for smoother milk.
- Large bowl: To catch the milk during straining.
- Glass jars or containers: For storing your coconut milk in the fridge.
These simple tools are all you need to start producing fresh coconut milk at home, even on your first try!
Step-by-Step Guide to Make Coconut Milk
Here comes the fun part! Follow these steps:
Step 1: Prepare the Coconut
If you’re using fresh coconut, crack it open, remove the meat, and grate it finely. If using desiccated coconut, measure about 2 cups.
Step 2: Blend with Warm Water
Add the coconut to your blender along with 4 cups of warm water. Warm water helps extract more fat and flavor. Blend for 2–3 minutes until you get a thick, creamy consistency.
Step 3: Strain the Mixture
Pour the blended mixture into a nut milk bag or cheesecloth over a bowl. Squeeze thoroughly to extract all the milk. You can strain a second time through a fine mesh strainer if needed.
Step 4: Store Your Coconut Milk
Transfer the milk into clean glass jars. Let it cool and store it in the fridge. It stays fresh for up to 4–5 days. Shake well before each use, as natural separation will occur.
Tips for Perfect Homemade Coconut Milk
Making coconut milk is easy, but a few smart tips can take your results from good to amazing. Here’s what you should keep in mind:
- Use warm water: Not boiling hot—just warm. This helps extract the natural oils and richness from the coconut more effectively.
- Don’t rush the blending: Let your blender run for 2 to 3 minutes for a smooth and creamy texture. The more thorough the blend, the better the yield and creaminess.
- Double strain for smoothness: Want ultra-silky milk? After squeezing the milk through a nut milk bag, run it again through a fine mesh sieve to catch any remaining solids.
- Adjust water for consistency: Want thicker milk? Use less water. Prefer it thinner? Add a little more. It’s that customizable.
- Optional add-ins: A tiny pinch of sea salt can bring out the natural flavor, while vanilla or dates can sweeten it up for drinking.
By following these easy tips, your homemade coconut milk will taste better than anything off the grocery shelf—plus, it’ll be healthier too.
Common Mistakes to Avoid
Even though this recipe is simple, small missteps can mess with the final result. Avoid these common mistakes:
- Using too much water: Over-diluting your blend will result in watery coconut milk that lacks richness and flavor.
- Over-blending: While blending is important, doing it for too long can heat up the mixture and negatively affect taste and texture.
- Skipping the strain: Don’t get lazy here. Proper straining is crucial for a smooth, creamy consistency. Leaving in bits of coconut pulp can make your milk gritty.
- Not storing properly: Homemade coconut milk is fresh and perishable. If you don’t refrigerate it in an airtight container, it will go bad fast.
- Throwing away the pulp: The leftover pulp is gold! You can bake with it, add it to oatmeal, or even dry it out for coconut flour.
Avoid these slip-ups, and your batch will be smooth, flavorful, and ready for anything.
How to Store Coconut Milk
Fresh coconut milk doesn’t contain preservatives, so it needs to be stored correctly. Here’s how:
- Refrigerate immediately: Store it in a sealed glass jar or bottle and refrigerate. It lasts about 4 to 5 days.
- Shake before use: Coconut milk naturally separates, so just give it a good shake before pouring.
- Freeze for longer storage: Pour into ice cube trays or silicone molds, freeze, and transfer cubes into freezer bags. It’ll keep for up to 3 months.
- Label it: Always date your containers so you know when it was made.
Freshly made coconut milk may form a layer of solid cream on top. That’s normal—just mix or scoop it depending on how you want to use it.
Ways to Use Coconut Milk
Homemade coconut milk is incredibly versatile! Here are some tasty and creative ways to use it:
In Cooking
- Stir into soups and curries for a creamy texture
- Add to mashed potatoes or creamy sauces
- Use in pancake or waffle batter as a dairy substitute
In Baking
- Replace dairy in cakes, muffins, and bread
- Use it in custards or puddings for extra richness
- Whip the thick part for vegan whipped cream
In Drinks
- Pour over granola or cereal
- Blend into smoothies or protein shakes
- Add to coffee or tea as a non-dairy creamer
In Beauty Routines
- Apply to hair as a deep conditioner
- Use as a moisturizing face mask
- Mix into DIY body scrubs or lotions
The best part? You’re skipping all the chemicals and preservatives found in store-bought versions.
How to Use Leftover Coconut Pulp
Don’t toss that pulp—repurpose it! The strained-out coconut pulp is full of fiber and flavor. Here’s how you can make the most of it:
Bake with it
- Add to muffins, breads, and cookies for texture
- Mix into granola or energy bars
Make Coconut Flour
- Spread the pulp on a baking tray and dry it in a low oven
- Blend into a fine flour and store in a dry jar
Add to Breakfast
- Stir into oatmeal, smoothies, or yogurt bowls
Beauty Uses
- Combine with honey for a gentle face scrub
- Mix with coconut oil for a DIY body scrub
This zero-waste approach means you’re getting the most out of every coconut!
Comparison: Homemade vs Store-Bought Coconut Milk
| Feature | Homemade Coconut Milk | Store-Bought Coconut Milk |
|---|---|---|
| Ingredients | Just coconut and water (plus optional flavor) | Often includes stabilizers, preservatives, gums |
| Taste | Fresh, rich, and naturally sweet | Can be bland or processed in flavor |
| Texture | Customizable—thick or thin | Consistent but less natural |
| Shelf Life | 4–5 days in fridge | 6–12 months unopened |
| Cost | Economical in bulk | Varies, but often more expensive per use |
| Nutritional Value | Pure and unprocessed | Can lose nutrients during processing |
In the end, homemade coconut milk offers better flavor, nutrition, and control—especially for those wanting a cleaner lifestyle.
FAQs about Coconut Milk Recipe
1. Can I use shredded coconut instead of fresh?
Yes! Just make sure it’s unsweetened and soak it in warm water before blending for better results.
2. Is coconut milk keto-friendly?
Absolutely. Coconut milk is low in carbs and high in healthy fats, making it ideal for a keto diet.
3. Why does homemade coconut milk separate?
Natural separation happens because homemade milk doesn’t contain stabilizers. Just shake well before each use.
4. Can I use a food processor instead of a blender?
A high-speed blender works best, but a food processor can work if you blend a bit longer for a creamy consistency.
5. Can I boil homemade coconut milk?
Yes, you can cook with it! Just simmer gently to avoid curdling, especially in acidic recipes.
Conclusion
Making coconut milk at home is simpler than you might think, and the benefits are too good to pass up. It’s fresher, healthier, and totally customizable—plus, you get the bonus of using every part of the coconut with no waste. Whether you’re cooking up a storm, blending your favorite smoothie, or pampering your skin, homemade coconut milk is a wholesome addition to your lifestyle.
So the next time you’re eyeing that can in the grocery store, remember: You’ve got the power to make something better right in your own kitchen. Go ahead, give it a try—you’ll never look back.


