Coconut Milk Recipe: If you’ve ever tasted fresh, homemade coconut milk, you know it’s a game-changer. Forget the canned stuff – making coconut milk at home is not only surprisingly simple but also way more flavorful and pure.
Whether you’re dairy-free, vegan, or just looking to experiment in your kitchen, this step-by-step guide will show you exactly how to make your own rich, creamy coconut milk from scratch.
And no worries – you don’t need fancy equipment or a gourmet kitchen. Just a few simple ingredients, a blender, and a little bit of patience.
What is Coconut Milk?
Coconut milk is a creamy, milky-white liquid extracted from the grated pulp of mature coconuts. It’s not the same as coconut water – that’s the clear liquid found inside young, green coconuts. Coconut milk is made by blending coconut meat with water, then straining it to extract the milk. Depending on how much water you add, you can get a thick or thin consistency. It’s widely used in Southeast Asian, Caribbean, and South Indian cuisines and has become a staple for plant-based and dairy-free eaters around the world.
What makes coconut milk so special? It’s rich, slightly sweet, and incredibly versatile. It brings a luxurious texture to curries, stews, smoothies, baked goods, and even coffee. Plus, it’s packed with healthy fats – mainly medium-chain triglycerides (MCTs) – that are known to support energy and metabolism. Making it at home gives you full control over the thickness, flavor, and ingredients – no preservatives, gums, or added sugar.
Why Make Coconut Milk at Home?
There are a few good reasons to ditch the store-bought versions and go the homemade route:
- Freshness: Store-bought coconut milk often contains preservatives, stabilizers, and added sugar. Homemade versions are fresh and natural.
- Customizable: Want it creamier? Add less water. Want it lighter? Add more. The control is in your hands.
- Economical: Especially if you buy coconuts in bulk or use desiccated coconut, making your own can be cheaper.
- Sustainability: Fewer cans = less waste. Bonus if you’re using every part of the coconut.
And let’s not forget – homemade coconut milk just tastes better. It has a natural, rich coconut flavor that outshines most commercial products.
Types of Coconut Milk: Thick vs. Thin
When you make coconut milk at home, you’ll discover there are two types:
- Thick Coconut Milk: This is the first press of the grated coconut meat with very little water. It’s creamier and richer – perfect for curries or desserts.
- Thin Coconut Milk: This is the second (or third) extraction, made by adding more water to the leftover coconut pulp and straining again. It’s ideal for soups or lighter dishes.
Depending on your dish, you might want to use one or both types. And the great part is – you can make both from the same coconut!
Health Benefits of Coconut Milk
Aside from its rich flavor, coconut milk offers a number of nutritional perks:
- Rich in Healthy Fats: Especially MCTs, which may support weight loss and brain function.
- Lactose-Free: Ideal for those who are lactose intolerant or vegan.
- Contains Electrolytes: Including potassium, magnesium, and phosphorus.
- Anti-Inflammatory Properties: Thanks to lauric acid, which also has antimicrobial benefits.
While coconut milk is high in calories and fat, it can be part of a balanced diet when consumed in moderation. The homemade version gives you all the benefits without additives.
Coconut Milk vs. Coconut Cream: What’s the Difference?
The terms are often used interchangeably, but they’re not the same.
- Coconut Milk: Contains more water and has a thinner consistency.
- Coconut Cream: Has less water and more fat, making it much thicker and richer.
You can actually make both at home – coconut cream is simply the thicker layer that rises to the top of homemade coconut milk after it’s chilled.
Best Coconuts to Use for Homemade Coconut Milk
Your end product depends a lot on the coconut you start with:
- Fresh Mature Coconuts: Best for rich, flavorful milk. Look for heavy coconuts with lots of water inside.
- Frozen Grated Coconut: A good alternative if you don’t want to crack coconuts yourself.
- Desiccated/Shredded Coconut: Widely available, shelf-stable, and still delivers great-tasting milk.
Avoid using sweetened shredded coconut as it alters the flavor and nutritional content. Always go for unsweetened, organic if possible.
List of Ingredients You’ll Need
Here’s your simple ingredient list:
- 1 whole mature coconut or 2 cups of unsweetened desiccated coconut
- 4 cups of hot water (not boiling)
Optional:
- A pinch of salt
- Vanilla extract or dates for flavoring (if making for smoothies/desserts)
That’s it – no preservatives, no gums, no hidden additives. Just pure coconut goodness.
Essential Tools and Equipment
You don’t need much. Here’s what will come in handy:
- A blender (high-speed is best)
- A cheesecloth, nut milk bag, or fine mesh strainer
- A bowl
- A glass jar or airtight container for storage
- A grater (if using fresh coconut)
Having the right tools makes the whole process quicker and cleaner, so gather everything before you start.
Step-by-Step Guide to Making Coconut Milk
Step 1: Breaking and Peeling the Coconut
First, grab your coconut like you’re about to do something legendary. Give it a firm crack with the back of a heavy knife or small hammer. The shell will split—patience, not brute force, wins. Drain the coconut water (sip it like a tropical blessing), then pry out the white flesh. Peel off the thin brown skin if you want a smoother milk.
Step 2: Grating the Coconut Flesh
Now, grate the coconut flesh. You can use a traditional hand grater (respect to our ancestors) or a food processor if your arms are tired. The goal is fine, fluffy coconut shreds.
Step 3: Blending the Coconut
Place the grated coconut in a blender. Add warm water—just enough to help it blend. Blend until it looks creamy, like a thick coconut smoothie. The aroma alone feels like vacation.
Step 4: Straining the Milk
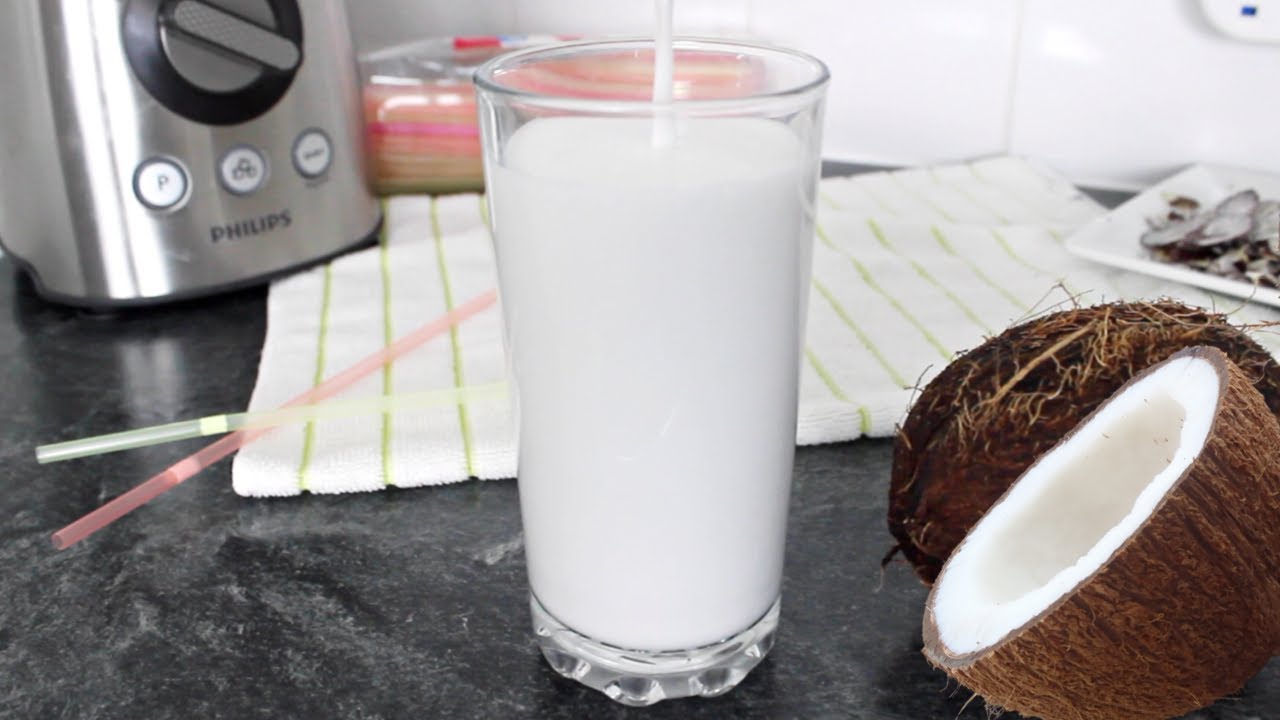
Pour the blended mixture through a cheesecloth, nut milk bag, or clean kitchen cloth. Squeeze gently. The milk that flows out is pure coconut gold.
Step 5: Storing Coconut Milk
Store in a clean glass jar and refrigerate. Use within 3 days. Shake before use—real ingredients separate, just like life sometimes, and that’s okay.
How to Make Thick Coconut Milk
If you’re after that rich, velvety coconut milk used in decadent curries or creamy desserts, you’ll want to make thick coconut milk. The process is nearly the same as the standard method, but here’s how to tweak it:
- Use less water – Instead of 4 cups, use about 2 cups of hot water for every 2 cups of fresh or desiccated coconut.
- Blend thoroughly – Let it run for an extra minute or two until the mixture is extremely creamy.
- Strain well – Use a fine cheesecloth or nut milk bag and squeeze out all the liquid.
What you get is a rich, cream-like milk that’s perfect for sauces, curries, or even dairy-free whipped cream. If you refrigerate it, the fat will rise to the top and solidify – this is coconut cream, which you can scoop and use just like dairy cream!
How to Make Thin Coconut Milk
Thin coconut milk is ideal when you need a lighter liquid – think soups, rice dishes, or beverages. To make it:
- Take the leftover coconut pulp from the first (thick milk) straining.
- Add another 2 to 3 cups of hot water.
- Blend again for 1-2 minutes.
- Strain as before.
This second extract is much lighter in both texture and fat content but still has great flavor. It’s especially handy if you don’t want your dishes to be overly rich or calorie-dense.
Tips for the Best Coconut Milk Texture and Flavor
To get the most out of your homemade coconut milk, keep these expert tips in mind:
- Use hot (but not boiling) water to extract more milk and flavor.
- Blend for at least 2-3 minutes – the longer you blend, the more fat and flavor are extracted.
- Strain twice if you want an ultra-smooth milk with no grit.
- Don’t discard the leftover pulp! Dry it out and blend it into smoothies or baked goods – zero waste.
- Add a pinch of salt to enhance flavor (especially for savory dishes).
- For sweet applications like smoothies or desserts, consider blending in a date or two, or a dash of vanilla extract.
These little tweaks can take your coconut milk from good to gourmet.
How to Store Homemade Coconut Milk Properly
Fresh coconut milk doesn’t last as long as the store-bought version because it doesn’t have preservatives – and that’s a good thing. But you still need to store it right:
- Refrigerate immediately after making it.
- Use airtight glass containers – mason jars work perfectly.
- Shake before using, as the fat will naturally separate and rise to the top.
- Use within 3 to 5 days for best quality.
Pro tip: label your jar with the date so you always know when you made it.
How Long Does Coconut Milk Last?
Homemade coconut milk typically lasts:
- 3 to 5 days in the refrigerator
- Up to 1 month in the freezer
After about 3 days, you may notice a sour smell or change in texture – that’s your cue it’s time to make a fresh batch. If it smells off or looks curdled, it’s best to discard it.
Can You Freeze Coconut Milk?
Yes – coconut milk freezes surprisingly well!
Here’s how:
- Pour it into ice cube trays for portioned use.
- Once frozen, transfer cubes into a freezer bag or airtight container.
- When you need it, just thaw the cubes in the fridge overnight or add them straight to hot dishes.
Note: Frozen coconut milk may separate slightly when thawed. A quick blend or shake can bring it back to its creamy self.
Creative Ways to Use Homemade Coconut Milk
So, you’ve made a jar of this creamy, dreamy stuff. Now what? The possibilities are endless.
In Cooking
- Thai curries and soups (Tom Kha Gai, Massaman curry)
- Creamy pasta sauces
- Coconut rice
In Baking
- Substitute for dairy in muffins, cakes, and pancakes
- Make coconut whipped cream
- Coconut-based custards or puddings
In Drinks
- Smoothies and protein shakes
- Coffee or matcha lattes (yes, it froths!)
- Homemade hot chocolate with a tropical twist
For Skin and Hair
- Use as a base for DIY face masks or hair conditioners
- Add to your bath for a nourishing soak
Coconut milk is like a Swiss Army knife in your kitchen and bathroom – nourishing, delicious, and versatile.
Common Mistakes to Avoid
Even though making coconut milk is simple, a few mistakes can trip you up:
- Using boiling water – this can “cook” the coconut and change the flavor.
- Not blending long enough – under-blending means less flavor and lower yield.
- Too much or too little water – this affects texture and concentration.
- Forgetting to refrigerate immediately – coconut milk spoils fast without preservatives.
- Using sweetened coconut – this adds unwanted sugar to your milk.
Avoid these slip-ups and you’ll get perfect coconut milk every single time.
Coconut Milk Substitutes
Can’t make coconut milk or ran out at the last minute? Here are a few quick alternatives:
- Almond milk – lighter, with a nutty flavor.
- Oat milk – great for baking and coffee.
- Cashew milk – thick and creamy.
- Evaporated milk (for non-vegan recipes)
You can also buy canned coconut milk in a pinch, but check the label for additives.
FAQs about Coconut Milk Recipe
1. Can I make coconut milk without a blender?
Yes! You can grate the coconut finely and mix it with hot water, then squeeze through a cheesecloth. The blender just makes the process faster and more efficient.
2. Is homemade coconut milk healthier than canned?
Absolutely. Homemade coconut milk is free from preservatives, gums, added sugars, and BPA-lined cans. It’s just pure coconut and water.
3. Why is my coconut milk separating?
That’s totally normal! Coconut milk naturally separates into cream and water when left to sit. Just shake or stir it before using.
4. Can I use dry coconut flakes instead of fresh coconut?
Yes, just make sure they’re unsweetened. Rehydrate them in hot water before blending for best results.
5. How do I make coconut milk creamier?
Use less water, blend longer, and strain well. Also, using fresh coconut instead of dried will give you a richer result.
Conclusion
Homemade coconut milk isn’t just a trend – it’s a return to fresh, wholesome, and sustainable cooking. Whether you’re adding it to your morning smoothie, simmering a creamy curry, or whipping up a dairy-free dessert, the difference in taste and quality is undeniable. And the best part? It takes less than 30 minutes from start to finish. With just a coconut and some hot water, you’ve got a delicious, versatile staple that elevates any dish. Go ahead and try it once – we promise, you’ll never go back to the canned stuff again.