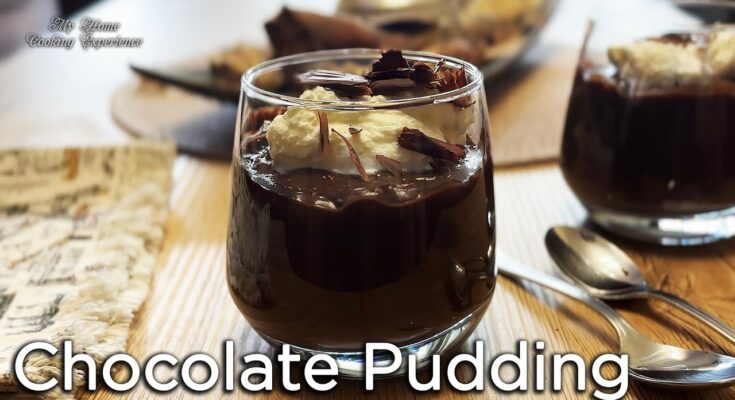
Chocolate Pudding Recipe: Who doesn’t love a rich and creamy bowl of chocolate pudding? It’s one of those desserts that instantly feels like a warm hug. While store-bought options might save you time, nothing beats the flavor of homemade chocolate pudding. With just a few simple ingredients and an easy-to-follow recipe, you can whip up a luscious dessert that’s perfect for any occasion.
Whether you’re looking to satisfy a sudden sweet tooth or impress your guests, this step-by-step guide will walk you through creating a chocolate pudding so divine it will become your go-to dessert.
Ingredients Needed
Before we dive into the process, let’s gather everything we need. Here’s a breakdown of the ingredients:
- 2 cups of whole milk (or dairy-free alternative)
- 1/2 cup granulated sugar
- 1/4 cup unsweetened cocoa powder
- 3 tablespoons cornstarch (or 4 tablespoons all-purpose flour)
- 1/4 teaspoon salt
- 1 teaspoon vanilla extract
- 1/2 cup semi-sweet or dark chocolate chips (or chopped chocolate)
Ingredient Notes:
- Use high-quality cocoa powder and chocolate for the best results.
- Adjust sugar to your taste if you prefer less sweetness.
- For a richer pudding, replace half of the milk with heavy cream.
Kitchen Tools Required
Here’s a list of kitchen tools you’ll need to make the pudding:
- Medium saucepan
- Whisk
- Measuring cups and spoons
- Mixing bowls
- Spatula
- Heatproof container or serving bowls
If you’re missing any of these, get creative! A fork can substitute for a whisk, and any small pot will do in place of a saucepan.
How to Make Chocolate Pudding
Step 1: Preparing Your Ingredients
Preparation is the key to a seamless cooking experience. Start by measuring out your milk, sugar, cocoa powder, cornstarch, and salt. Make sure everything is within reach.
Why? Because once you begin cooking, things can move quickly. Having everything ready ensures you won’t overcook or burn the pudding. Remember the phrase “mise en place” – it’s a chef’s best friend.
Step 2: Mixing the Dry Ingredients
In a mixing bowl, combine the sugar, cocoa powder, cornstarch, and salt. Whisk them together until they’re evenly blended.
This step is crucial because it prevents clumps of cocoa or cornstarch in your pudding. Imagine biting into a clump—yikes! Taking a few minutes to mix thoroughly ensures a smoother texture later.
Step 3: Adding the Wet Ingredients
Gradually add 1/2 cup of milk to the dry ingredients while whisking. This forms a thick paste and helps dissolve the dry ingredients without lumps. Slowly pour in the rest of the milk while continuing to whisk.
Pro tip: Whisking continuously as you add the liquid is the secret to avoiding lumps and achieving that silky consistency.
Step 4: Cooking the Pudding Base
Pour the mixture into your saucepan and set it over medium heat. Stir constantly to prevent sticking. As the pudding warms up, it will begin to thicken.
You’ll know it’s ready when the mixture coats the back of your spoon and holds its shape when you draw a line through it. Don’t rush this step; patience pays off!
Step 5: Adding the Chocolate
Once your pudding base has thickened, it’s time to add the star ingredient—chocolate! Remove the saucepan from heat and stir in the chocolate chips or chopped chocolate.
Let the heat of the pudding melt the chocolate as you stir. This step not only infuses the pudding with a deeper chocolate flavor but also gives it a glossy, velvety finish. Add the vanilla extract and stir again to combine.
Tips for Best Results:
- Use semi-sweet or dark chocolate for a balanced flavor.
- Avoid milk chocolate unless you prefer a very sweet pudding.
- Stir thoroughly to ensure no chocolate chunks remain.
Step 6: Cooling the Pudding
Pour the hot pudding into a heatproof bowl or individual serving dishes. To prevent a skin from forming on the surface, press a piece of plastic wrap directly onto the pudding.
Let the pudding cool at room temperature for about 20–30 minutes before transferring it to the refrigerator. Chill for at least 2 hours to set. Patience is key—your pudding will thicken and become even creamier as it cools.
Quick Cooling Tip: If you’re in a hurry, place the bowl of pudding in a larger bowl filled with ice water to speed up the cooling process.
Step 7: Serving Suggestions
Now comes the fun part—serving your chocolate pudding! You can enjoy it as is or take it up a notch with some creative toppings and pairings.
Topping Ideas:
- Whipped cream and chocolate shavings
- Fresh berries (strawberries, raspberries, or cherries)
- Crushed cookies or graham crackers
- A drizzle of caramel or salted caramel sauce
Pairing Suggestions:
- Serve alongside a warm brownie for the ultimate chocolate indulgence.
- Use it as a filling for pies or trifles.
- Layer it with crushed cookies and whipped cream for a parfait.
Variations of Chocolate Pudding
Chocolate pudding is versatile, and you can easily customize it to suit different tastes and dietary needs.
Vegan/Dairy-Free Option:
- Use almond milk, oat milk, or coconut milk instead of regular milk.
- Replace chocolate chips with dairy-free chocolate.
Flavored Variations:
- Add a pinch of cinnamon or cayenne for a spicy twist.
- Stir in a splash of your favorite liqueur, like Kahlúa or Baileys.
- Mix in a teaspoon of instant espresso powder for a mocha flavor.
Different Chocolate Types:
- For a white chocolate version, swap dark chocolate for white chocolate and reduce the sugar slightly.
- Use milk chocolate for a sweeter, creamier pudding.
Storage and Leftovers
If you have leftover pudding (lucky you!), here’s how to keep it fresh and delicious:
- Refrigeration: Store in an airtight container in the fridge for up to 3–4 days.
- Reheating: Warm the pudding gently in the microwave or on the stove, stirring frequently. Add a splash of milk if it’s too thick.
- Creative Uses for Leftovers:
- Spread it between layers of cake as a filling.
- Freeze it in popsicle molds for a chocolatey frozen treat.
Healthier Alternatives
Want to enjoy chocolate pudding guilt-free? Here are some ideas to make it lighter:
- Use low-fat or skim milk instead of whole milk.
- Swap sugar with natural sweeteners like honey, maple syrup, or stevia.
- Replace half of the cocoa powder with dark chocolate for added antioxidants.
Common Mistakes to Avoid
Making pudding seems simple, but a few missteps can ruin the texture or flavor. Here are common pitfalls and how to dodge them:
- Overcooking: Cooking pudding for too long can cause it to separate or become rubbery. Stick to low-medium heat and remove it as soon as it thickens.
- Skipping the Whisking: Constant stirring is essential for a smooth, lump-free pudding.
- Using Low-Quality Chocolate: Your pudding is only as good as the chocolate you use. Invest in a good-quality brand for the best results.
FAQs about Chocolate Pudding Recipe
1. What are the key ingredients for making chocolate pudding?
The essential ingredients for chocolate pudding include cocoa powder, sugar, milk, cornstarch, and vanilla extract. For a richer flavor, you can also add dark chocolate and a pinch of salt.
2. How do you thicken chocolate pudding?
Cornstarch is the most common thickener for chocolate pudding. Mix it with a small amount of milk to create a slurry before adding it to the hot mixture to prevent lumps.
3. Can I make chocolate pudding without dairy?
Yes, you can make dairy-free chocolate pudding by substituting the milk with almond milk, coconut milk, or another plant-based milk of your choice.
4. Is chocolate pudding gluten-free?
Chocolate pudding can be gluten-free, but always check the labels of your ingredients, especially cornstarch and chocolate, to ensure they are not processed in facilities that handle gluten.
5. How long does it take to make chocolate pudding?
It typically takes about 10-15 minutes to cook chocolate pudding on the stove, plus several hours for chilling if you prefer it cold.
6. Can chocolate pudding be made in advance?
Absolutely! Chocolate pudding can be made up to 2-3 days in advance and stored in the refrigerator, covered to prevent a skin from forming on top.
7. How can I serve chocolate pudding?
Chocolate pudding is versatile and can be served plain or topped with whipped cream, chocolate shavings, berries, or a sprinkle of cinnamon for extra flavor.
Conclusion
Congratulations! You’ve mastered the art of making chocolate pudding from scratch. From its rich, velvety texture to the intense chocolate flavor, this homemade treat is a true crowd-pleaser. Whether you’re making it for yourself or sharing it with loved ones, this recipe is bound to become a favorite in your dessert repertoire.
So, what are you waiting for? Grab your whisk and dive into the world of homemade chocolate pudding!


