Chocolate Pancakes Recipe: Who doesn’t love a fluffy stack of pancakes? Now imagine those same golden brown cakes but with a rich, chocolatey twist. Chocolate pancakes aren’t just a sweet treat; they’re a full-blown breakfast experience. Whether you’re making them for a weekend brunch, a birthday breakfast, or just to treat yourself, they never disappoint. The beauty of chocolate pancakes lies in their versatility – you can make them rich and indulgent or keep things lighter with a few healthy swaps. Either way, they’re delicious, easy to prepare, and perfect for anyone with a sweet tooth.
They bring together the cozy comfort of classic pancakes with the decadent taste of chocolate. Plus, they’re a great way to sneak in some cocoa flavor without going overboard. Ready to turn your breakfast into dessert? Let’s dive into everything you need to make these fluffy, chocolate-packed pancakes from scratch.
Why You’ll Love This Recipe
This recipe for chocolate pancakes is more than just tasty – it’s reliable, quick, and beginner-friendly. Here’s what makes it a standout:
- Simple Ingredients: No fancy stuff here. You probably already have most of these in your kitchen.
- Rich Flavor: Thanks to the cocoa powder and optional chocolate chips, every bite is packed with chocolatey goodness.
- Fluffy Texture: With just the right balance of baking powder and milk, these pancakes are airy yet moist.
- Customizable: Add bananas, nuts, berries, or even a drizzle of peanut butter to make them your own.
- Kid-Approved: Kids LOVE these, and you can even make fun shapes with pancake molds to keep breakfast playful.
They also store well, meaning you can make a big batch and enjoy them throughout the week. Whether you’re an experienced cook or just starting, this recipe is almost foolproof and super satisfying.
Tips Before You Start Cooking
Before you jump in, here are a few golden tips to make sure your chocolate pancakes turn out perfect:
- Use Room Temperature Ingredients: Cold milk or eggs can throw off the batter’s consistency. Let them sit out for a few minutes before mixing.
- Don’t Overmix the Batter: Stir just until combined. Overmixing can make your pancakes dense and chewy instead of light and fluffy.
- Let the Batter Rest: Give it 5-10 minutes to sit. This lets the flour hydrate and the baking powder to activate.
- Non-Stick Pans Are Key: You don’t want half your pancake sticking to the pan, so use a non-stick skillet or griddle.
- Keep Heat Medium: Too high and your pancakes will burn outside and stay raw inside. Slow and steady wins the race here.
Alright, ready to get cooking? Let’s gather our ingredients first.
List of Ingredients You’ll Need
Basic Dry Ingredients
These form the structure of your pancake and bring in that rich chocolate base:
- 1 cup (120g) all-purpose flour
- 1/3 cup (35g) unsweetened cocoa powder
- 2 tbsp granulated sugar (adjust to taste)
- 1 tsp baking powder
- 1/2 tsp baking soda
- Pinch of salt
Using a good-quality cocoa powder makes a big difference here. For extra richness, opt for Dutch-processed cocoa powder.
Wet Ingredients
These help bind everything and give moisture to your pancakes:
- 1 cup (240ml) milk (any kind – dairy or non-dairy like almond or oat milk)
- 1 large egg
- 2 tbsp melted butter or oil (vegetable or coconut oil work well)
- 1 tsp vanilla extract
Melt the butter but let it cool slightly before mixing, so it doesn’t cook the egg when added.
Optional Add-ins and Toppings
- 1/3 cup chocolate chips or chunks
- Fresh fruits like strawberries or bananas
- Whipped cream
- Maple syrup or chocolate syrup
- Chopped nuts (e.g., walnuts, pecans)
These are where you can get creative and add a personal touch to your pancakes!
Tools and Equipment You’ll Need
To make things easier and smoother, have these tools ready:
- Mixing bowls (one for dry, one for wet ingredients)
- Measuring cups and spoons
- Whisk or fork
- Rubber spatula
- Non-stick skillet or griddle
- Ladle or measuring cup (for pouring batter)
- Turner or spatula (for flipping pancakes)
Having everything in place before you start makes the whole process faster and more fun.
Step-by-Step Guide to Making Chocolate Pancakes
Step 1: Gather and Measure All Ingredients
Begin by gathering all your ingredients: flour, cocoa powder, sugar, baking powder, salt, milk, eggs, melted butter or oil, and vanilla extract. Measure everything accurately to ensure the pancakes turn out soft and balanced in flavor.
Step 2: Mix the Dry Ingredients
In a large bowl, whisk together flour, cocoa powder, sugar, baking powder, and salt. This evenly distributes the cocoa and leavening agents, preventing lumps in the batter.
Step 3: Whisk the Wet Ingredients
In a separate bowl, whisk together milk, eggs, melted butter or oil, and vanilla extract until smooth. Mixing wet ingredients separately helps create a uniform batter.
Step 4: Combine Wet and Dry Mixtures
Pour the wet ingredients into the dry ingredients and gently stir until just combined. The batter should be slightly lumpy. Overmixing can lead to dense pancakes.
Step 5: Preheat and Grease Your Pan
Heat a non-stick pan or griddle over medium heat. Lightly grease with butter or oil. The pan is ready when a drop of water sizzles lightly.
Step 6: Cook the Pancakes
Pour batter onto the hot pan using a ladle or measuring cup. Cook until bubbles form on the surface and the edges begin to set.
Step 7: Flip the Pancakes Correctly
Flip carefully and cook the other side until fully set and slightly golden. The second side cooks faster, so keep an eye on it.
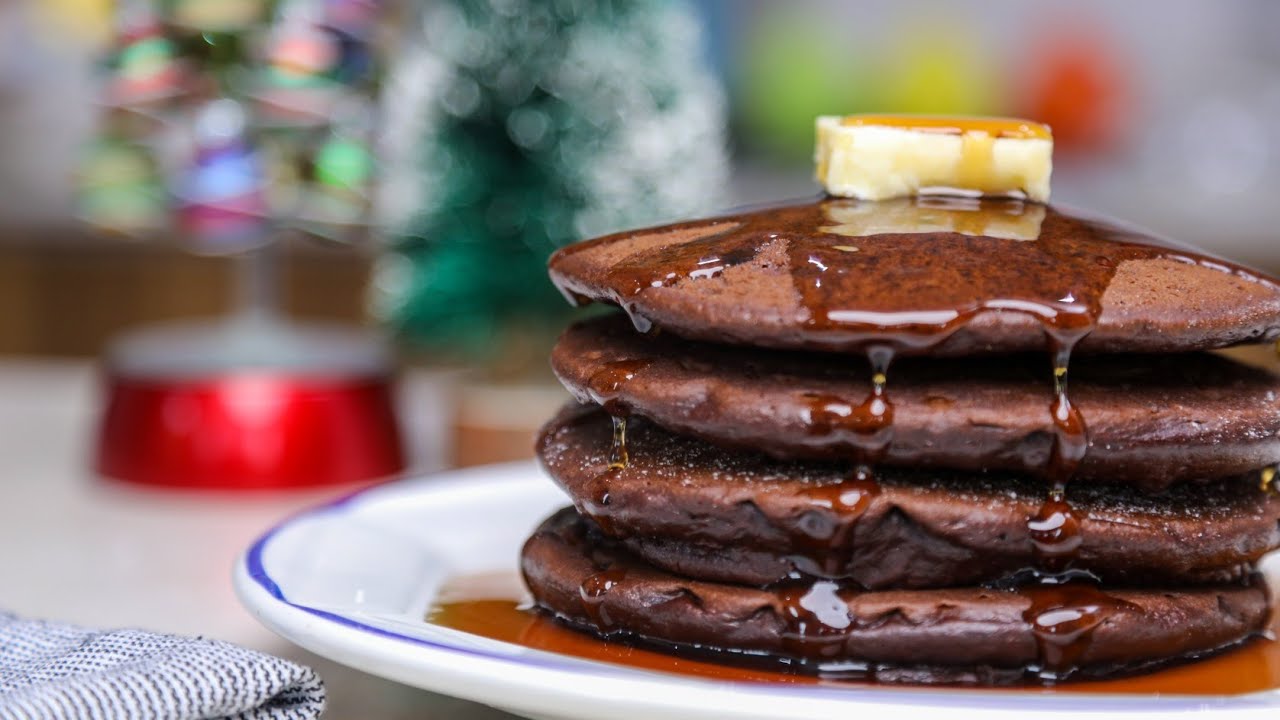
Step 8: Stack, Garnish, and Serve
Stack the pancakes and garnish with chocolate chips, syrup, whipped cream, or fresh fruit. Serve warm and enjoy.
Rich, fluffy, and chocolatey—these pancakes are a breakfast treat everyone will love 🥞🍫
Best Toppings for Chocolate Pancakes
You’ve made a gorgeous stack — now what goes on top? Here are some topping ideas that perfectly complement the rich chocolate flavor:
Fruity Combos:
- Sliced bananas + strawberries
- Mixed berries + a dollop of Greek yogurt
- Cherries + dark chocolate drizzle
Nutty Goodness:
- Crushed pecans or walnuts
- Almond butter or peanut butter
- Toasted coconut flakes
Sweet Treats:
- Mini marshmallows for a s’mores feel
- Caramel sauce
- Chocolate shavings + whipped cream
Mix and match to keep things interesting each time you make them.
Storing and Reheating Tips
Got leftovers? No problem! Chocolate pancakes store surprisingly well, and you can enjoy them again without sacrificing flavor or texture.
To Store:
- Allow pancakes to cool completely
- Stack with parchment paper between each one
- Store in an airtight container in the fridge for up to 3 days
To Freeze:
- Freeze individually on a baking sheet first
- Then transfer to a ziplock bag or container
- Freeze for up to 2 months
To Reheat:
- Microwave: 20–30 seconds per pancake
- Toaster: Gives a crisp edge (perfect for thinner pancakes)
- Oven: 300°F for 5–7 minutes, wrapped in foil for even heating
This makes weekday breakfasts a breeze — just reheat and serve.
Gluten-Free or Vegan Alternatives
Want to make this recipe gluten-free or vegan? Easy!
Gluten-Free Version:
- Use a 1:1 gluten-free flour blend (look for xanthan gum)
- Make sure your baking powder is labeled gluten-free
Vegan Version:
- Swap milk with almond, soy, or oat milk
- Replace egg with 1 tbsp ground flaxseed + 3 tbsp water (let sit for 5 min)
- Use oil instead of butter
These versions taste just as good and are perfect if you’re cooking for guests with dietary needs.
Common Mistakes to Avoid
Even simple recipes can go wrong if you’re not careful. Here are some of the most common mistakes people make when cooking chocolate pancakes — and how to avoid them:
1. Overmixing the Batter
This is pancake mistake #1. When you stir too much, the gluten in the flour develops, which leads to dense and chewy pancakes. You want your pancakes fluffy, not tough. Mix just until the dry ingredients are moistened. A few lumps are totally fine.
2. Skipping the Rest Time
Letting the batter rest for at least 5–10 minutes is important. It gives the flour time to fully hydrate and lets the baking powder activate. That’s how you get those gorgeous, fluffy results.
3. Cooking on High Heat
Cranking the heat might seem like it’ll get you pancakes faster, but it usually ends with burnt outsides and raw centers. Stick to medium or medium-low heat for even cooking.
4. Not Greasing the Pan Enough (or Too Much)
You want a light coating of oil or butter — too little and your pancakes will stick, too much and they’ll fry instead of cook evenly. Use a paper towel to wipe excess oil for a smooth surface.
5. Flipping Too Early or Too Often
Be patient! Flip only when the bubbles form and the edges look set. Flipping too soon can lead to a gooey mess. And don’t flip more than once — it squeezes out air and makes them flat.
Avoiding these mistakes will guarantee a stack of pancakes that are fluffy, flavorful, and cooked to perfection.
How to Make Chocolate Pancakes Extra Fluffy
Want those pancakes to be thick and cloud-like? Here’s how to achieve next-level fluffiness:
- Use Buttermilk Instead of Regular Milk:
The acidity reacts with baking soda to create a lift. No buttermilk? Mix 1 cup of milk with 1 tbsp of vinegar or lemon juice and let it sit for 5 minutes. - Separate the Egg and Whip the Whites:
This is a secret from old-school cooks. Separate the egg, whip the white until soft peaks form, and fold it into the batter last. It adds amazing airiness. - Don’t Skip the Resting Period:
Letting the batter rest for 10 minutes lets the flour absorb moisture and creates a fluffier texture. - Use Fresh Baking Powder:
Baking powder loses strength over time. Make sure yours is fresh for maximum puffiness. - Don’t Press Down When Cooking:
Pressing the pancake with a spatula squashes all the air inside. Let it rise naturally as it cooks.
When you follow these tips, every bite will be like eating a fluffy chocolate cloud — totally worth the effort.
Chocolate Pancakes vs. Regular Pancakes
You might be wondering: “What’s the real difference between chocolate pancakes and the classic ones?”
Well, here’s a quick comparison:
| Feature | Regular Pancakes | Chocolate Pancakes |
|---|---|---|
| Base Flavor | Mild, buttery | Rich, cocoa-infused |
| Color | Golden brown | Deep brown, almost like cake |
| Texture | Light and fluffy | Dense and moist (yet still airy) |
| Sweetness Level | Mild | Slightly sweeter (or adjustable) |
| Pairing Toppings | Maple syrup, fruit, butter | Chocolate syrup, cream, berries |
Chocolate pancakes offer a bolder flavor that leans more into the dessert zone, while regular pancakes are more neutral — better for savory toppings too.
You can even combine both by swirling chocolate into regular pancake batter for a marbled effect. It’s the best of both worlds!
Fun Variations to Try
Chocolate pancakes are great as-is, but once you’ve mastered the basics, why not experiment? Here are a few exciting twists you can try:
1. Chocolate Banana Pancakes
Mash a ripe banana into your batter. Adds natural sweetness and a soft, moist texture.
2. Mocha Pancakes
Add 1 tsp of instant coffee to the batter for a hint of espresso. Perfect for coffee lovers!
3. Chocolate Protein Pancakes
Mix in a scoop of chocolate protein powder and reduce the flour slightly. Great for post-workout meals.
4. Red Velvet Pancakes
Add a little red food coloring and cream cheese drizzle. Ideal for special occasions like Valentine’s Day.
5. S’mores Pancakes
Top with mini marshmallows, crushed graham crackers, and chocolate chips. Toast under the broiler for a real campfire vibe.
Try different combinations each time, and you’ll never get bored of this recipe.
Kid-Friendly Serving Ideas
If you’re making chocolate pancakes for kids, here are a few fun (and adorable) ideas to make breakfast exciting:
- Animal Faces: Use banana slices, berries, and whipped cream to create fun pancake animals.
- Mini Pancake Stacks: Make small pancakes and serve them on skewers for a bite-sized treat.
- Topping Bars: Let kids choose their own toppings from a “breakfast bar” setup. Include fruits, sprinkles, mini chocolate chips, and syrup.
- Shaped Pancakes: Use cookie cutters or molds to create heart, star, or dinosaur shapes.
- Pancake Sandwiches: Spread peanut butter or Nutella between two mini pancakes for a tasty snack.
These ideas turn ordinary breakfasts into magical moments that kids will remember.
FAQs about Chocolate Pancakes Recipe
1. Can I make the batter the night before?
Yes! Store the batter in the fridge overnight. Just give it a gentle stir in the morning and let it come to room temperature before cooking.
2. Can I use hot chocolate mix instead of cocoa powder?
You can, but the result will be sweeter and less rich. Hot chocolate mix contains sugar and milk powder, so adjust your recipe accordingly.
3. How do I make pancakes without eggs?
Replace each egg with 1 tbsp ground flaxseed + 3 tbsp water (let it sit for 5 mins). This works well for vegan diets too.
4. Can I add fruit to the batter?
Absolutely! Blueberries, sliced bananas, or even raspberries work great. Just be gentle when folding them in to avoid breaking them up.
5. Why are my pancakes sticking to the pan?
Your pan may not be non-stick, hot enough, or properly greased. Make sure the surface is slick with a small amount of oil and preheated before adding the batter.
Conclusion
Chocolate pancakes are more than just a meal — they’re an experience. Rich, warm, fluffy, and endlessly customizable, they’re perfect for lazy weekends, birthday breakfasts, or just because you need a little chocolate in your life. With this step-by-step guide, you’re all set to make the best chocolate pancakes from scratch. Whether you go classic with syrup or fancy with fresh berries and whipped cream, one thing’s for sure: your breakfast game is about to level up.
Don’t wait for a special occasion — treat yourself today.


