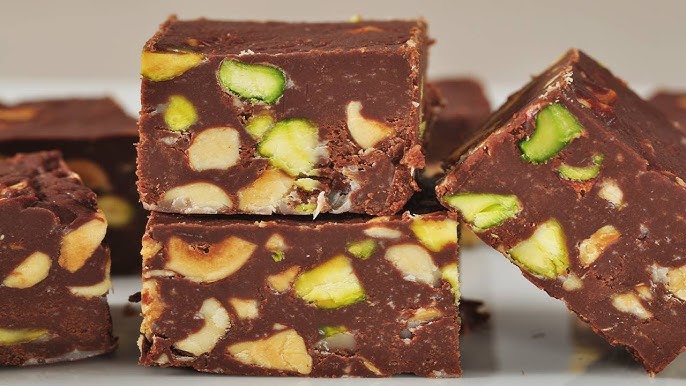
Chocolate Fudge Recipe: Chocolate fudge is a timeless dessert that never fails to impress. Whether you’re preparing for a festive gathering, gifting something sweet, or simply indulging yourself, this rich, creamy treat is always a hit. The best part? It’s surprisingly easy to make at home! Follow this step-by-step guide to whip up a batch of chocolate fudge that will melt in your mouth and wow your taste buds.
Ingredients Required
To make classic chocolate fudge, you’ll need the following:
- Basic Ingredients:
- 2 cups of semi-sweet chocolate chips.
- 1 can (14 ounces) of sweetened condensed milk.
- 1/4 cup of unsalted butter.
- 1 teaspoon of vanilla extract.
- Optional Add-Ins:
- 1/2 cup of chopped nuts (walnuts or almonds).
- Sprinkles or sea salt for garnish.
Substitutions:
- Swap semi-sweet chocolate chips for milk or dark chocolate depending on your taste.
- Use coconut milk for a dairy-free version.
Equipment You’ll Need
Essential Tools:
- Medium saucepan or a microwave-safe bowl.
- Wooden spoon or heat-resistant spatula.
- Measuring cups and spoons.
- An 8×8-inch square pan.
Optional Tools:
- Double boiler for even chocolate melting.
- Parchment paper for easy removal.
How to Make Chocolate Fudge – Step by Step Guide
Step 1: Preparing Your Workspace
Before diving into the recipe, it’s crucial to prep your workspace. Here’s how:
- Clean and Organize: Ensure your kitchen is tidy, and gather all ingredients and tools.
- Line the Pan: Use parchment paper to line your 8×8-inch pan, leaving extra paper hanging over the edges for easy lifting later.
- Pre-Measure Ingredients: This step ensures a smooth cooking process without any delays.
Step 2: Melting the Chocolate
Melting the chocolate properly is key to achieving a silky fudge consistency.
- Microwave Method:
- Place chocolate chips, condensed milk, and butter in a microwave-safe bowl.
- Heat in 30-second intervals, stirring between each until fully melted.
- Stovetop Method:
- Use a medium saucepan on low heat.
- Stir constantly to prevent burning, ensuring all ingredients melt smoothly.
Pro Tip: Avoid overheating the chocolate as it can seize and become grainy.
Step 3: Combining Ingredients
Once the chocolate mixture is melted:
- Remove from heat or microwave.
- Stir in the vanilla extract and any additional ingredients (e.g., nuts or caramel).
- Mix until the texture is smooth and well-combined.
This step is crucial for creating a uniform flavor and texture in the fudge.
Step 4: Cooking the Fudge
Cooking is where the magic happens:
- Transfer the mixture back to the stovetop or microwave if it needs more heat.
- Stir continuously to avoid lumps.
- Test the mixture’s readiness by observing its thickness—it should be smooth yet firm enough to hold its shape.
Step 5: Setting the Fudge
Now it’s time to pour your fudge:
- Pour the warm mixture into the prepared pan.
- Use a spatula to spread it evenly.
- Sprinkle toppings like sea salt or sprinkles for added flair.
Let the fudge cool at room temperature for 2 hours or refrigerate for faster setting.
Step 6: Cutting the Fudge
Once set:
- Lift the fudge out of the pan using the parchment paper edges.
- Use a sharp knife to cut clean squares or a cookie cutter for fun shapes.
- Wipe the knife between cuts to keep the edges neat.
Flavor Variations
Get creative with these ideas:
- Nutty Fudge: Add pecans or hazelnuts for crunch.
- Spicy Fudge: A dash of cinnamon or cayenne pepper adds warmth.
- Mint-Chocolate Fudge: Stir in peppermint extract for a refreshing twist.
Troubleshooting Common Issues
- Grainy Fudge: Stir longer or heat more gently to dissolve sugar properly.
- Soft Fudge: Extend the cooling time or cook a bit longer.
Tips for Storing Fudge
- Store in an airtight container at room temperature for up to 2 weeks.
- For longer storage, freeze fudge pieces with parchment between layers.
Creative Ways to Serve Fudge
- Arrange on a dessert platter with fruits and cookies.
- Wrap pieces individually in parchment for thoughtful gifts.
FAQs about Chocolate Fudge Recipe
1. What are the key ingredients in a chocolate fudge recipe?
Chocolate fudge typically requires chocolate chips or chopped chocolate, sweetened condensed milk, butter, and vanilla extract. Some variations might include nuts, marshmallows, or other add-ins for extra flavor and texture.
2. How do I prevent my chocolate fudge from being too hard?
To ensure your fudge doesn’t turn out too hard, avoid overcooking the mixture. Cook it just until it reaches the soft ball stage, which is between 234-240°F (112-115°C). Using a candy thermometer can help you monitor the temperature accurately.
3. Can I make chocolate fudge without a candy thermometer?
Yes, you can make fudge without a candy thermometer by using the cold water test. Drop a small amount of fudge into cold water. If it forms a soft ball that flattens when removed, it’s ready.
4. Is it necessary to refrigerate chocolate fudge?
While not strictly necessary, refrigerating chocolate fudge can help it set properly and enhance its texture. It also extends the fudge’s shelf life.
5. How long does chocolate fudge last?
Chocolate fudge can last up to 1-2 weeks at room temperature if stored in an airtight container. In the refrigerator, it can last up to 3 weeks. For longer storage, you can freeze it for up to 3 months.
6. Can I use white chocolate instead of dark chocolate in fudge?
Yes, you can substitute white chocolate for dark or milk chocolate in most fudge recipes. Keep in mind that white chocolate has a different fat content and sweetness level, which can affect the texture and flavor of your fudge.
7. What is the best way to cut chocolate fudge?
For clean cuts, use a sharp knife heated under hot water and then dried. Cut the fudge while it is cold, cleaning the knife between cuts to ensure smooth, even pieces.
Conclusion
Making chocolate fudge at home is as satisfying as it is delicious. With a few basic ingredients and simple steps, you can create a treat that rivals any store-bought version. So, roll up your sleeves and give it a try—you might just discover a new favorite dessert!


