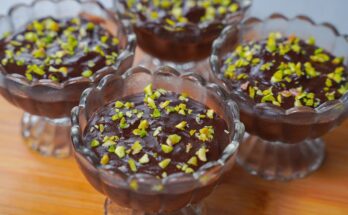
Chocolate Covered Peanuts Recipe: There is something incredibly satisfying about chocolate covered peanuts. They hit that sweet spot between crunchy, salty, and sweet in a way that feels almost unfair to other snacks.
One bite gives you the rich smoothness of chocolate, and the next gives you that roasted peanut crunch that keeps the snack from feeling too heavy. It is the kind of treat that works almost everywhere.
You can serve it at parties, pack it into lunch boxes, bring it as a homemade gift, or keep a jar in the kitchen for those moments when you want “just a little something” and end up reaching for a handful more.
Ingredients You’ll Need
The beauty of this recipe is that the ingredient list is short, but every ingredient matters. When a recipe only has a few moving parts, quality becomes the star of the show. You are not hiding behind layers of frosting, fillings, or flavor extracts here. The peanuts and chocolate are front and center, so choosing them well makes a real difference. This is one of those cases where “simple” does not mean “careless.” A few small decisions can change the flavor, texture, and finish of your final batch.
Here is the basic ingredient list you will need for classic chocolate covered peanuts:
- 2 cups roasted peanuts
- 1 1/2 to 2 cups chocolate (milk chocolate, dark chocolate, or semi-sweet chocolate)
- 1 teaspoon coconut oil or vegetable oil (optional, for smoother melting)
- Pinch of sea salt (optional, especially if using unsalted peanuts)
Optional ingredients for extra flavor:
- 1/2 teaspoon vanilla extract
- Pinch of cinnamon
- A dusting of cocoa powder
- Crushed pretzels or sprinkles for topping
This is the kind of recipe that rewards balance. If the peanuts are too salty and the chocolate is too sweet, the overall flavor can feel loud rather than delicious. If the chocolate is too bitter and the peanuts are bland, the snack may feel flat. Think of the ingredients as a small band. Each one has a role, and when they play well together, the whole thing sounds better. In the next sections, we will break down each part so you know exactly what to choose and why it matters.
Peanuts
Peanuts are the backbone of this recipe, so they deserve more attention than just being tossed into a bowl and forgotten. The best option for most home cooks is dry-roasted peanuts because they already have that rich, nutty flavor and crisp texture that holds up beautifully under melted chocolate. You can use salted or unsalted peanuts, but each creates a slightly different result. Salted peanuts give you a stronger sweet-and-salty contrast, while unsalted peanuts let the chocolate take center stage and create a smoother, more dessert-like finish.
Whole peanuts are the classic choice, especially if you want that candy-shop look. They coat nicely and create small bite-sized clusters or individual pieces that are easy to snack on. That said, you can also use peanut halves if that is what you have available. Just keep in mind that smaller pieces tend to clump together more easily during coating. If you want a neat, polished result, whole roasted peanuts are the safest bet.
Freshness matters more than many people realize. Old peanuts can taste stale or oily, and once they are covered in chocolate, that stale flavor does not magically disappear. It lingers. Before using them, smell the peanuts and taste one or two. They should be crunchy, fragrant, and pleasantly nutty, not soft or bitter. If needed, you can freshen them up by spreading them on a baking sheet and warming them in the oven for a few minutes. Think of it as waking them up before the chocolate arrives.
Chocolate
Chocolate is not just the coating here. It is half the identity of the recipe. That means the type you choose has a huge impact on flavor, texture, and appearance. Milk chocolate gives you a sweeter, creamier finish and is often the most crowd-pleasing choice, especially for kids or anyone who prefers a classic candy-style taste. Dark chocolate adds a deeper, more intense flavor with a slightly more grown-up feel. Semi-sweet chocolate sits comfortably in the middle and is one of the most flexible choices for this recipe.
You can use chocolate chips, chopped chocolate bars, or melting wafers. Chocolate bars usually melt more smoothly and often taste better, while chocolate chips are convenient and easy to measure. Melting wafers are especially useful if you want a glossy finish and easier handling, since they are designed for coating. Whichever form you choose, aim for a chocolate you would enjoy eating on its own. That is the easiest rule to follow. If the chocolate tastes waxy or overly sugary before melting, it will not suddenly become magical later.
One helpful tip is to add a small amount of coconut oil or neutral vegetable oil while melting. This can improve the flow of the chocolate and make coating easier, especially if your chocolate seems thick. Do not overdo it, though. Too much oil can thin the chocolate so much that it feels greasy or does not set well. Good chocolate should melt into something silky, not something that looks like soup. The goal is a coating that clings to the peanuts, not one that runs away from them.
Optional Add-Ins and Finishing Touches
Once you have the basics down, this recipe becomes a fun little playground for flavor. Optional add-ins can turn your batch from simple and classic into something that feels custom-made for a holiday, a party, or a gift tin. A tiny pinch of sea salt over freshly coated peanuts adds a sharp pop that makes the chocolate taste richer. It is a small detail, but it works like the final brushstroke on a painting. Suddenly, the whole thing feels more complete.
You can also experiment with warm spices like cinnamon or even a touch of pumpkin spice during colder months. These additions do not need to be dramatic. A little goes a long way, and the goal is to support the peanut-chocolate combination, not overpower it. Vanilla extract can deepen the sweetness, while a dusting of cocoa powder adds a more elegant finish for dark chocolate versions. If you want more texture, crushed pretzels or very finely chopped nuts can be sprinkled over the coated peanuts before they set.
For a festive look, sprinkles are a playful option, especially if you are making these for a birthday party, movie night, or holiday tray. Just remember that extras should feel intentional. Too many toppings can make the peanuts hard to handle and can distract from the clean flavor that makes them so addictive in the first place. The best finishing touches are like accessories with a good outfit. They should enhance the look and flavor, not compete with the star of the show.
Equipment You Need Before You Start
One reason this recipe is so approachable is that the equipment list is short and realistic. You do not need a candy shop setup or a countertop full of appliances. A few common kitchen tools will do the job well. The main things you need are a mixing bowl, a microwave-safe bowl or double boiler, a spatula or spoon, and a baking tray or plate lined with parchment paper. That is really the core of it. These tools help you melt, stir, coat, and set the peanuts without turning the process into chaos.
If you are melting the chocolate in the microwave, use short intervals and stir between each round. A microwave-safe bowl is essential here. If you prefer more control, a double boiler works beautifully because it melts the chocolate gently and reduces the chance of scorching. A silicone spatula is especially helpful because it scrapes the bowl clean and folds the peanuts into the chocolate evenly. This matters more than it sounds. You want all the peanuts coated, not half-dipped and forgotten in the corner of the bowl.
Parchment paper is another small hero in this recipe. It keeps the coated peanuts from sticking as they cool, and it makes cleanup much easier. You can use wax paper in a pinch, but parchment is usually more reliable. If you want extra precision, a fork or slotted spoon can help lift coated peanuts out of the bowl and separate excess chocolate. None of this is fancy, but together these tools make the process smoother. Good kitchen results often come from smart setup, not expensive gear.
How to Choose the Best Peanuts for This Recipe
Choosing the right peanuts is one of those small decisions that shapes the entire final result. The best peanuts for this recipe are roasted, crunchy, and fresh. Raw peanuts are not ideal unless you plan to roast them yourself first, because they do not have the rich developed flavor that makes chocolate covered peanuts so satisfying. Roasting brings out the natural oils and nuttiness, giving the peanuts that deep flavor that stands up to sweet chocolate.
The next decision is salted versus unsalted. There is no single right answer here, but there is a right answer for the result you want. Salted peanuts create more contrast and often feel more snack-like, almost like something you would put in a bowl during a movie. Unsalted peanuts are softer in flavor and let the chocolate take the lead, which can make the finished treat feel a bit more refined. If you are serving a wide group, lightly salted peanuts are often the safest middle ground.
Texture matters too. Avoid peanuts that feel soft or chewy, because once coated in chocolate, they will not magically crisp up. They need to already have that satisfying bite. It is also a good idea to check for broken pieces, especially if presentation matters. Whole peanuts create a more uniform batch and are easier to coat neatly. Think of your peanuts like the bricks in a small house. If the structure starts uneven, the finished look will reflect that. Better peanuts make better candy, plain and simple.
How to Choose the Right Chocolate
The right chocolate depends on the flavor profile you want, but quality should always guide the choice. For a classic snack that feels close to what many people remember from candy jars and packaged treats, milk chocolate is often the best fit. It is creamy, sweet, and easy to love. For a richer and slightly less sugary version, dark chocolate is excellent. It adds complexity and balances the natural richness of the peanuts. Semi-sweet chocolate lands right in the comfort zone for many home cooks because it offers sweetness without becoming overwhelming.
When shopping, look at the ingredient list if possible. Chocolate with a decent cocoa content and fewer unnecessary fillers tends to melt better and taste smoother. Cheap chocolate can sometimes seize, turn grainy, or develop a dull finish. That does not mean you need luxury chocolate from a boutique shop, but it is worth choosing a brand you trust. A recipe this simple puts every flavor under a spotlight, so there is nowhere for poor-quality chocolate to hide.
You should also think about texture after setting. Some chocolates harden with a firm snap, while others stay softer at room temperature. That is not always bad, but it changes the eating experience. If you want a candy-style coating that feels polished and holds up well, melting wafers or good coating chocolate can be very practical. If you want a more homemade, rustic treat with a softer finish, regular chopped chocolate bars work beautifully. Either way, the best choice is the one that tastes good and coats cleanly.
Preparing Your Workspace for Easy Coating
A little preparation before melting the chocolate can make the entire process feel calmer and cleaner. This recipe moves quickly once the chocolate is ready, so it helps to set everything out ahead of time. Start by lining a tray, large plate, or cutting board with parchment paper. Then measure your peanuts and chocolate so you are not scrambling with sticky hands later. Have your spoon or spatula nearby, and make sure the surface where the coated peanuts will cool is clear and ready.
This step may sound basic, but it is where a lot of kitchen frustration can be avoided. Melted chocolate does not like delays, water droplets, or disorganization. If you stop halfway through to search for parchment paper or a clean spoon, the chocolate can start thickening before you finish coating the peanuts. It is a bit like trying to assemble furniture while still looking for the screws. The work becomes harder than it needs to be.
Another smart move is to keep the peanuts dry and at room temperature. Moisture is not your friend here. Even a little water can cause melted chocolate to seize and become grainy. If you have just washed a bowl, dry it thoroughly before using it. A tidy workspace also helps you separate the coated peanuts more easily once they are on the tray. The more prepared you are before melting begins, the more professional the final result will feel.
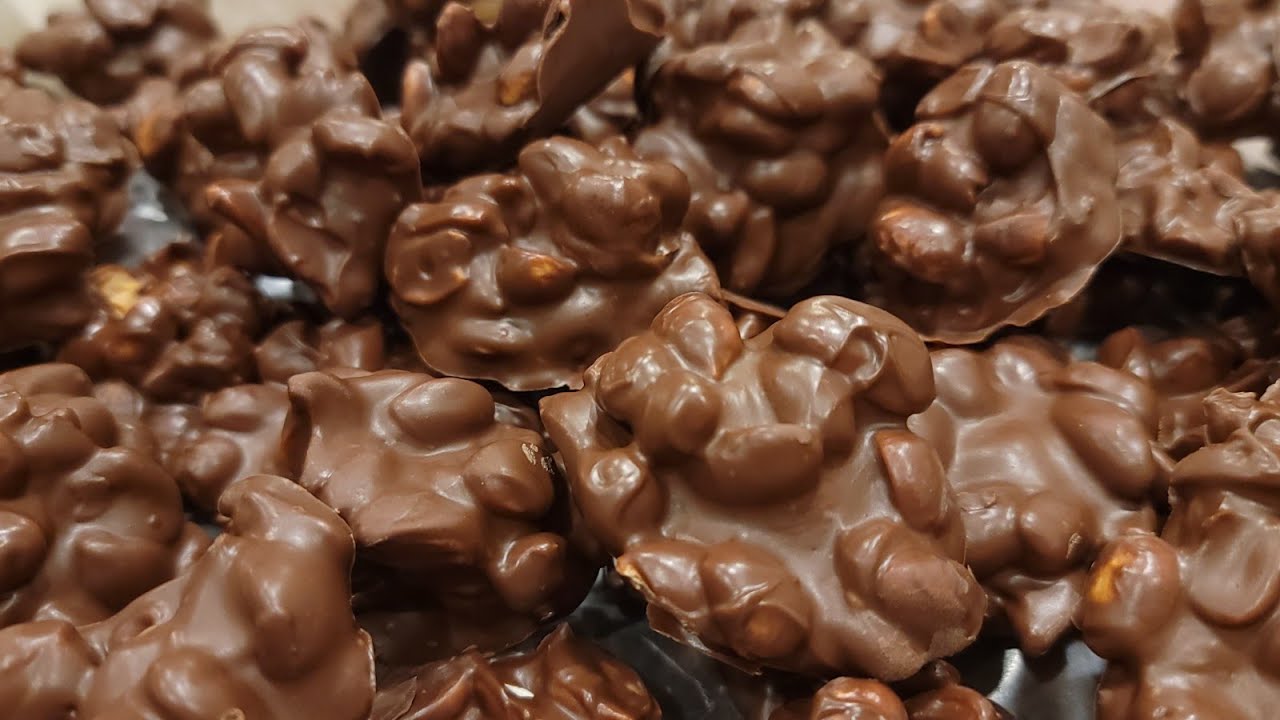
Step-by-Step Guide for Chocolate Covered Peanuts
Step 1 – Prepare Your Ingredients and Workspace
Measure the peanuts and chocolate before you begin. Line a tray or plate with parchment paper so the coated peanuts will not stick while setting. Having everything ready makes the process faster and helps the chocolate stay smooth while you work.
Step 2 – Melt the Chocolate Properly
Chop the chocolate into small pieces if needed and place it in a heat-safe bowl. Melt it gently in the microwave using short intervals or over a bowl of simmering water, stirring often until smooth. Avoid overheating, because burnt chocolate becomes thick and difficult to coat evenly.
Step 3 – Coat the Peanuts Evenly
Add the peanuts to the melted chocolate and stir well until every peanut is coated. Use a spoon or spatula to mix thoroughly and make sure the chocolate covers them evenly. If you want a thicker coating, you can let the first layer set and repeat the process with more melted chocolate.
Step 4 – Separate and Set the Coated Peanuts
Scoop small clusters or individual chocolate-covered peanuts onto the prepared parchment paper. Try to separate them as much as possible so they do not stick into one large mass. Let them sit at room temperature or place them in the refrigerator to set faster.
Step 5 – Cool, Serve, and Store
Once the chocolate has hardened completely, the peanuts are ready to serve. Store them in an airtight container in a cool place or in the refrigerator if your kitchen is warm. Enjoy them as a snack, dessert topping, or homemade treat.
Flavor Variations to Try
Once you master the classic recipe, flavor variations open the door to all kinds of creativity. One of the easiest twists is to use dark chocolate and sea salt, which creates a more intense and sophisticated flavor profile. The bitterness of the chocolate and the saltiness of the peanuts work together beautifully, almost like they were designed to keep each other in check. It is a little sharper, a little bolder, and ideal for people who prefer less sweetness.
Another popular option is milk chocolate with a drizzle of white chocolate. This version feels festive and visually appealing, especially for parties or holiday gift boxes. You can also stir a small pinch of cinnamon into the chocolate for warmth, or even a tiny bit of espresso powder to deepen the flavor without making it taste like coffee. Those small additions can make the recipe feel more layered while still keeping the peanut-and-chocolate pairing at the center.
For a fun snack-style variation, try mixing in crushed pretzels or a light dusting of cocoa powder after coating. You could even create themed versions for different seasons, using colored sprinkles or flavored chocolate. The key is to keep the balance intact. Peanuts and chocolate are already doing a lot of heavy lifting, so any added flavor should support them rather than steal the spotlight. A good variation feels like a remix of a favorite song, not a completely different track.
Common Mistakes and How to Avoid Them
One of the most common mistakes is overheating the chocolate. This can make it grainy, scorched, or stiff, which turns a simple recipe into a frustrating one very quickly. The safest approach is to melt slowly, stir often, and stop heating when the chocolate is almost melted. Residual heat can finish the job. Chocolate is delicate, and treating it gently gives you that smooth, glossy coating everyone wants.
Another mistake is introducing water or moisture into the process. Even a small amount can cause chocolate to seize. That is why dry bowls, dry spoons, and dry peanuts matter so much. It may sound fussy, but it is really just a simple rule: keep things dry, and the chocolate behaves better. Skipping this step is like building on wet sand. Things may look fine for a minute, then suddenly go wrong.
People also sometimes crowd the tray or rush the coating step. This leads to giant clumps rather than neat pieces. While clusters can be delicious, accidental clusters are different from intentional ones. A little spacing on the tray gives you more control over the final appearance. Finally, using stale peanuts or low-quality chocolate is a mistake that no amount of technique can fully hide. Since the ingredient list is short, every ingredient gets noticed. Choose well, handle carefully, and the recipe almost takes care of itself.
FAQs about Chocolate Covered Peanuts Recipe
1. What type of peanuts should I use?
Roasted peanuts are usually the best choice because they have a richer flavor and a crisp texture. Salted or unsalted peanuts can both work, depending on whether you want a sweet-salty taste or a sweeter result.
2. What type of chocolate works best?
Milk chocolate, dark chocolate, and white chocolate all work well. The choice depends on your personal taste, and you can even mix different types for variety.
3. How do I melt the chocolate without burning it?
Melt the chocolate slowly in short microwave intervals or over a bowl of simmering water. Stir often and avoid high heat so the chocolate stays smooth.
4. Can I make the coating thicker?
Yes, you can coat the peanuts once, let them set, then dip or toss them in more melted chocolate for a thicker layer.
5. Why are my chocolate-covered peanuts clumping together?
This usually happens when they are not separated quickly enough after coating. Spoon them onto parchment paper in small portions before the chocolate starts to set.
6. Do I need to refrigerate them?
Not always. If your kitchen is cool, they can set at room temperature. In warmer conditions, refrigerating them helps the chocolate harden faster and stay firm.
7. How should I store chocolate-covered peanuts?
Store them in an airtight container in a cool, dry place or in the refrigerator if the weather is warm. This helps keep the chocolate firm and fresh.
8. How long do they last?
Chocolate-covered peanuts can usually last for about 1 to 2 weeks when stored properly in an airtight container.
9. Can I add other ingredients?
Yes, you can add a sprinkle of sea salt, cocoa powder, crushed cookies, or even a second chocolate drizzle for extra flavor and texture.
Conclusion
This chocolate covered peanuts recipe proves that a great homemade snack does not need to be complicated. With just a few ingredients and a clear process, you can create something crunchy, sweet, rich, and genuinely satisfying. The recipe works because it respects simplicity. It does not try to do too much. Instead, it lets two familiar ingredients come together in a way that feels comforting and a little irresistible.
Once you make a batch successfully, it becomes one of those dependable recipes you return to again and again. It is simple enough for beginners, but still good enough to impress people. And maybe that is the best kind of recipe of all. It is not flashy. It is just reliably delicious. In a world full of complicated desserts, homemade chocolate covered peanuts are a reminder that sometimes the simplest treats are the ones people remember most.