Chocolate Chips Cookies Recipe: Chocolate chip cookies aren’t just a dessert—they’re an emotion. Think about it: how often do you hear people say that a warm cookie makes them feel better after a long day? Their popularity comes from their perfect balance of flavors and textures. The sweetness of sugar, the richness of butter, the depth of vanilla, and the slight bitterness of chocolate all come together in one bite. It’s comfort food at its finest.
They’re also incredibly versatile. You can make them chewy, crispy, thick, or thin depending on your preference. Plus, they’re quick to whip up. Unlike cakes or pastries that require hours of preparation, cookies can be mixed and baked in under 30 minutes. This accessibility makes them a favorite for both beginners and experienced bakers.
But perhaps the biggest reason chocolate chip cookies are so loved is the nostalgia they bring. Many of us grew up eating them at home, sharing them with friends, or buying them from bakeries. Each bite carries a sense of warmth and childhood memories.
A Short History of Chocolate Chip Cookies
The story of chocolate chip cookies begins in the 1930s in Massachusetts. Ruth Wakefield, the owner of the Toll House Inn, wanted to create a new type of dessert for her guests. She decided to break a bar of Nestlé semi-sweet chocolate into small chunks and add them to her cookie dough, expecting the chocolate to melt completely. Instead, the chocolate pieces held their shape, giving birth to the first-ever chocolate chip cookie.
The recipe quickly gained popularity, especially after Nestlé started printing it on their chocolate packaging. Soon, chocolate chip cookies became a household name across America. Today, they’re one of the most baked and consumed cookies in the world, with countless variations and adaptations.
Ingredients You’ll Need
Essential Baking Ingredients
To make classic chocolate chip cookies, you’ll need some pantry staples:
- All-purpose flour – the base of your cookie dough.
- Baking soda – helps the cookies rise slightly and spread evenly.
- Salt – enhances flavor and balances sweetness.
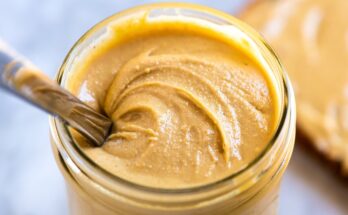
- Unsalted butter – provides richness and creates a tender texture.
- Granulated sugar – for sweetness and crisp edges.
- Brown sugar – adds moisture, chewiness, and a slight caramel flavor.
- Eggs – bind the ingredients and add structure.
- Vanilla extract – enhances the overall flavor profile.
Each ingredient plays a critical role. For instance, using brown sugar instead of all granulated sugar makes the cookies softer and chewier. Butter not only provides flavor but also affects the texture—using melted butter results in denser cookies, while softened butter creates a fluffier texture.
Choosing the Best Chocolate Chips
Not all chocolate chips are created equal. You can choose between semi-sweet, milk, dark, or even white chocolate. Semi-sweet chocolate chips are the most common choice because they provide a balanced sweetness. Dark chocolate chips are perfect for those who love a more intense flavor, while milk chocolate chips make cookies sweeter and creamier.
Another option is to chop up a chocolate bar instead of using pre-made chips. This creates irregular chunks, giving your cookies pools of melted chocolate rather than uniform bites. Many bakers swear by this method for a gourmet touch.
Optional Add-ins for Extra Flavor
If you want to take your cookies to the next level, you can mix in additional ingredients:
- Nuts – walnuts, pecans, or almonds add a delightful crunch.
- Dried fruits – raisins, cranberries, or cherries give a chewy and tart twist.
- Sea salt flakes – sprinkle on top before baking for a sweet-and-salty contrast.
- Coconut flakes – for added sweetness and texture.
The beauty of chocolate chip cookies is that you can make them your own. Whether you like them simple and classic or loaded with extras, the base recipe allows for endless creativity.
Tools and Equipment Required
Basic Baking Tools
While you don’t need a professional kitchen setup, having the right tools makes baking much easier. At the very least, you’ll need:
- Mixing bowls (one large, one medium, one small)
- A sturdy whisk or hand mixer
- Wooden spoon or silicone spatula
- Baking sheet
- Parchment paper or silicone baking mat
Must-Have Kitchen Appliances
An electric hand mixer or stand mixer will make creaming butter and sugar much quicker and more efficient. Although you can mix by hand, using a mixer ensures the ingredients are well incorporated, resulting in a better dough texture.
An oven thermometer is also a handy tool since many ovens run hotter or cooler than the set temperature. Baking cookies at the correct temperature is crucial to achieving the right texture.
Measuring Tools for Accuracy
Baking is both an art and a science, and accuracy matters. Invest in:
- Measuring cups (for dry ingredients)
- Measuring spoons
- A digital kitchen scale (especially helpful for flour and butter)
Measuring ingredients properly prevents common mistakes such as overly dry dough (too much flour) or overly spread-out cookies (too little flour).
Step-by-Step Guide to Making Chocolate Chip Cookies
Step 1 – Preparing the Dough
The first step in baking chocolate chip cookies is getting your dough ready. Start by measuring out all your ingredients before you begin. This practice, called mise en place, ensures you don’t miss anything.
In a medium bowl, whisk together your flour, baking soda, and salt. Set it aside. In a separate large mixing bowl, cream together your softened butter, granulated sugar, and brown sugar until light and fluffy. This process is crucial because it incorporates air, giving your cookies a soft texture.
Next, add in the eggs one at a time, mixing well after each addition. Stir in the vanilla extract. At this point, your wet mixture should be smooth and creamy.
Now, gradually add the dry ingredients to the wet mixture. Mix slowly to avoid overworking the dough. Overmixing can result in tough cookies, which nobody wants. Continue until you have a thick, smooth dough.
The dough should be soft but not sticky. If it feels too sticky, add a tablespoon of flour at a time until it reaches the right consistency. This dough forms the foundation of your cookies, so take your time to get it right.
Step 2 – Mixing Wet and Dry Ingredients
This stage is where the magic really starts to happen. Once you’ve prepared the base dough, it’s time to carefully combine the wet and dry ingredients so the cookie dough comes together perfectly.
Start by slowly adding your flour mixture (from Step 1) into the bowl with your creamed butter, sugar, eggs, and vanilla. Don’t dump it all in at once; instead, add it gradually in two or three batches. This ensures that the flour is evenly distributed and reduces the risk of lumps forming.
As you mix, use a spatula or the lowest setting on your mixer. Overmixing at this stage is a common mistake many bakers make. The more you mix, the more the gluten in the flour develops, and this can make your cookies dense and tough rather than soft and chewy. The goal is to mix only until the flour disappears into the dough.
Once combined, you’ll notice that your dough is thick and slightly sticky but not overly wet. This is the sweet spot for cookie dough consistency. If the dough looks too dry and crumbly, you may have added a little too much flour—simply add a teaspoon of milk to bring it back to balance. On the other hand, if it feels too wet, a small sprinkle of flour can fix the issue.
This step may seem simple, but it’s the foundation of the cookie’s final texture. Think of it like building a house—if the foundation isn’t right, the whole structure will suffer. A properly mixed dough ensures cookies that are soft, flavorful, and perfectly shaped.
Step 3 – Folding in Chocolate Chips
Now comes the best part—adding the chocolate chips! This is what turns plain dough into the delicious treat we all love.
Pour in your chocolate chips (or chopped chocolate chunks if you opted for a more rustic look). Using a spatula or wooden spoon, gently fold the chocolate into the dough. Folding is different from mixing; you’re carefully incorporating the chocolate without overworking the dough. This ensures the chips are evenly spread throughout, giving you melty chocolate in every bite.
The type of chocolate you choose here makes a huge difference. Semi-sweet chips are the classic choice, but don’t be afraid to experiment. Dark chocolate adds a richer taste, milk chocolate makes the cookies sweeter, and white chocolate provides a creamy contrast. Some bakers even mix two or three types of chocolate for a more complex flavor profile.
Another tip is to save a handful of chocolate chips to press onto the tops of your cookie dough balls before baking. This not only makes the cookies look picture-perfect but also guarantees a few visible, gooey chocolate pools after baking.
At this stage, your dough should look irresistible—thick, chunky, and filled with chocolate. If you’re like most people, you might be tempted to sneak a spoonful. And yes, while it’s not recommended to eat raw dough because of raw eggs and flour, it’s hard to resist!
Step 4 – Scooping and Shaping the Cookies
Shaping your cookies properly is key to ensuring they bake evenly. Start by lining a baking sheet with parchment paper or a silicone baking mat to prevent sticking.
Use a cookie scoop or tablespoon to portion out equal amounts of dough. This step is important because if the cookies are uneven in size, they won’t bake consistently—some will end up undercooked while others will be overdone.
Roll each scoop of dough gently into a ball. Place the dough balls on your baking sheet, leaving enough space (about 2 inches) between each one. Remember, cookies spread as they bake, so crowding them together will result in one giant cookie slab instead of neat individual cookies.
If you want your cookies to have that perfect bakery-style look, slightly flatten each ball with your fingers and press a few extra chocolate chips on top. This makes them look professional and ensures a picture-worthy finish.
For even more flavor, you can chill the dough balls in the fridge for at least 30 minutes before baking. Chilling helps solidify the butter in the dough, which means the cookies will spread less in the oven, resulting in thicker, chewier cookies with more depth of flavor. Some bakers even recommend chilling overnight for the best results.
This step sets the stage for the final transformation. With perfectly shaped dough balls ready to go, you’re just minutes away from freshly baked cookies.
Step 5 – Baking to Perfection
Baking is the most crucial step, and getting it right makes all the difference between okay cookies and bakery-level cookies.
Preheat your oven to 350°F (175°C). Make sure it’s fully heated before you place the cookies inside—baking in a cold oven can affect how they spread and cook. If possible, use an oven thermometer to double-check the accuracy of the temperature.
Place your prepared baking sheet in the center rack of the oven. Bake the cookies for 10–12 minutes, depending on your preferred texture. For soft and chewy cookies, take them out when the edges are lightly golden but the centers still look slightly underbaked. Don’t worry—they’ll continue to cook on the hot tray as they cool. If you prefer crispier cookies, leave them in for an extra 2–3 minutes until the centers are fully set.
The smell of fresh cookies filling your kitchen will let you know you’re on the right track. Once baked, remove the tray from the oven and let the cookies cool on the sheet for 5 minutes before transferring them to a wire rack. This cooling step allows the cookies to firm up without breaking apart.
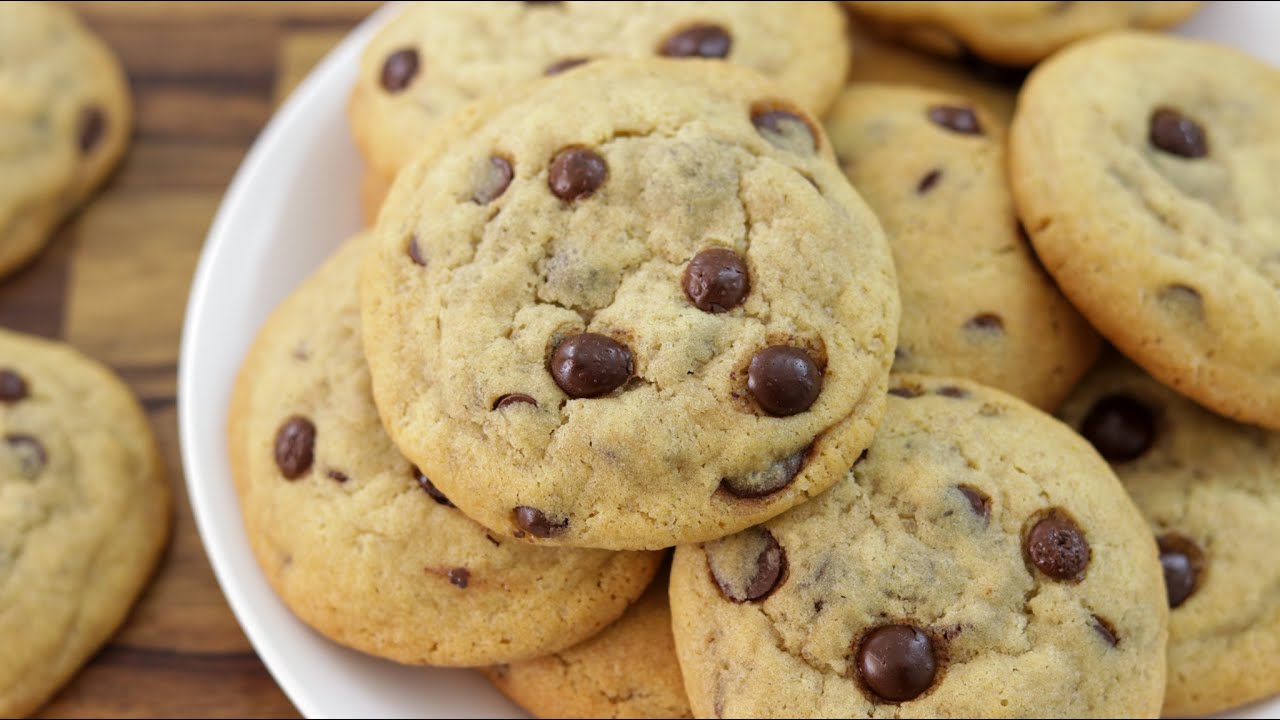
Congratulations—you’ve just baked the perfect batch of chocolate chip cookies! Soft, chewy, golden-brown, and full of melty chocolate goodness, they’re ready to be enjoyed with a glass of milk, a cup of coffee, or simply on their own.
Tips and Tricks for the Perfect Chocolate Chip Cookies
Even though the recipe is simple, small tweaks can take your cookies from good to outstanding. Here are some tried-and-true tips:
How to Get Chewy Cookies
- Use more brown sugar than white sugar for added moisture.
- Chill the dough before baking to reduce spreading.
- Slightly underbake the cookies and let them finish cooking as they cool.
How to Make Crispy Cookies
- Use more granulated sugar than brown sugar.
- Melt the butter before mixing—it creates thinner, crispier cookies.
- Bake a few minutes longer for a crunchier texture.
Common Mistakes to Avoid
- Overmixing the dough – makes cookies tough.
- Adding too much flour – results in dry, cakey cookies.
- Skipping the chill time – can cause cookies to spread too much.
- Baking at the wrong temperature – leads to unevenly cooked cookies.
With these tricks in mind, you’ll be able to customize your cookies exactly how you like them, whether soft, gooey, crispy, or crunchy.
Variations of Chocolate Chip Cookies
One of the reasons chocolate chip cookies never go out of style is because of their versatility. The classic recipe is just the beginning—you can experiment with flavors, textures, and add-ins to create your own signature cookie. Here are some of the most popular and delicious variations:
Double Chocolate Chip Cookies
If you’re a true chocolate lover, double chocolate chip cookies are a dream come true. These cookies are made by adding cocoa powder to the dough, giving the base a rich chocolate flavor, and then mixing in chocolate chips on top. The result? A fudgy, brownie-like cookie that’s soft in the center and packed with gooey chocolate.
For an even more indulgent treat, try using a mix of dark and milk chocolate chips. The balance of bitterness and sweetness creates a flavor explosion in every bite. Pair these cookies with a glass of cold milk, and you’ll be in dessert heaven.
Oatmeal Chocolate Chip Cookies
Oatmeal chocolate chip cookies combine the wholesome texture of oats with the sweetness of chocolate chips. They’re slightly chewier than classic cookies and have a nutty, hearty flavor that makes them feel a little healthier (even though they’re still wonderfully indulgent).
To make these, simply substitute part of the flour with rolled oats. You can also add raisins, walnuts, or cinnamon for extra depth of flavor. These cookies are perfect for breakfast on the go, a quick snack, or a cozy evening treat.
Vegan Chocolate Chip Cookies
For those who prefer plant-based desserts, vegan chocolate chip cookies are a fantastic option. Instead of butter, use coconut oil or vegan margarine. Replace eggs with flaxseed or chia seed “eggs” (a mixture of seeds and water that mimics the texture of eggs).
The result is just as delicious as traditional cookies—soft, chewy, and full of chocolatey goodness. Many people can’t even tell the difference! Vegan cookies are also a great option if you’re baking for a group with mixed dietary needs.
Storing and Preserving Chocolate Chip Cookies
Freshly baked cookies are irresistible, but what if you want to enjoy them later? Proper storage ensures your cookies stay just as delicious days—or even weeks—after baking.
Short-Term Storage Tips
If you plan to eat your cookies within a few days, store them in an airtight container at room temperature. Add a slice of bread inside the container—the bread helps keep the cookies soft and chewy by maintaining moisture. Just make sure to replace the bread slice every couple of days.
Freezing Cookie Dough
Freezing cookie dough is a game-changer. Scoop your dough into balls, place them on a baking sheet, and freeze until solid. Then transfer them into a zip-top bag or airtight container. This way, you can bake a fresh batch of cookies anytime you want—simply pop the frozen dough balls straight into the oven and bake for an extra 2–3 minutes.
This method is perfect for portion control (bake just one or two cookies at a time) and for surprise guests. Imagine offering freshly baked cookies at a moment’s notice—it’s always a win!
How to Reheat Cookies for Freshness
If your cookies have gone a little stale, don’t worry—you can bring them back to life. Warm them in the oven at 300°F (150°C) for about 5 minutes, or pop them in the microwave for 10–15 seconds. The heat softens the cookies and makes the chocolate gooey again, almost like they just came out of the oven.
Serving Ideas and Pairings
While cookies are delicious on their own, pairing them with the right food or drink can elevate the experience. Here are some fun serving ideas:
Pairing with Beverages
- Milk – The classic choice. The cool creaminess of milk balances the sweetness of cookies.
- Coffee – A strong espresso or latte pairs wonderfully with the richness of chocolate.
- Hot Chocolate – For true chocolate fanatics, doubling down with hot cocoa is a treat.
- Tea – Earl Grey or chai tea can add a sophisticated twist to your cookie moment.
Using Cookies in Desserts
Chocolate chip cookies aren’t just snacks—they can be the star of other desserts too. Try these ideas:
- Crush cookies to make a base for cheesecake.
- Use them as sandwich cookies with ice cream in the middle.
- Layer them into parfaits with whipped cream and fruit.
- Crumble them into milkshakes for extra crunch.
Creative Presentation Ideas
If you’re serving cookies at a party or gathering, presentation matters. Stack them on a rustic wooden tray, serve them in mason jars, or tie a few together with a ribbon as edible gifts. Add a sprinkle of sea salt on top right before serving for a gourmet touch.
Nutritional Information of Chocolate Chip Cookies
Of course, cookies are treats, not health foods—but it’s still good to know what’s inside each bite.
Calories and Macronutrients
On average, one homemade chocolate chip cookie (about 2–3 inches wide) contains:
- Calories: 150–200
- Carbohydrates: 20–25g
- Fat: 7–10g
- Protein: 2–3g
The exact values depend on your ingredients and portion size. Cookies made with more butter and sugar will naturally have higher calories, while smaller cookies or those with oats and nuts may have slightly more fiber and protein.
Healthier Alternatives for Baking
If you want to enjoy cookies more often without the guilt, here are some easy swaps:
- Use whole wheat flour instead of all-purpose flour.
- Replace part of the sugar with maple syrup or honey.
- Substitute butter with coconut oil or Greek yogurt.
- Add nuts, seeds, or oats for extra nutrients and fiber.
- Use dark chocolate instead of milk chocolate for less sugar and more antioxidants.
These swaps won’t make cookies a diet food, but they’ll add more nutrition while keeping the treat enjoyable.
FAQs about Chocolate Chips Cookies Recipe
1. Can I make the dough ahead of time?
Yes! You can refrigerate cookie dough for up to 3 days or freeze it for up to 3 months. This makes it easy to bake fresh cookies whenever you want.
2. How do I make my cookies softer?
Use more brown sugar than white sugar, chill the dough before baking, and slightly underbake the cookies for a chewy center.
3. Can I use white chocolate instead of milk chocolate?
Absolutely! White chocolate chips or chunks add a creamy sweetness that pairs beautifully with the classic cookie base.
4. How long can I freeze cookie dough?
Cookie dough can be frozen for up to 3 months. Just scoop it into balls, freeze them on a tray, then store them in an airtight bag or container.
5. What’s the secret to bakery-style cookies?
Chilling the dough, using high-quality chocolate, and slightly underbaking are the keys to achieving those thick, gooey, bakery-style cookies.
Conclusion
Chocolate chip cookies are more than just baked goods—they’re a universal comfort food. Whether you prefer them soft and chewy, thin and crispy, or packed with extras, the beauty of this recipe is that you can make it entirely your own. By following the step-by-step guide, paying attention to little details like mixing, chilling, and baking times, and experimenting with fun variations, you’ll always end up with cookies that impress.
So the next time you’re craving something sweet, don’t reach for a store-bought pack. Instead, grab your ingredients, preheat your oven, and create a batch of homemade chocolate chip cookies. Trust me—your kitchen will smell amazing, your taste buds will thank you, and you might even make some lasting memories while sharing them with friends and family.