Chocolate Chip Scone Recipe: Who doesn’t love a warm, buttery scone packed with gooey chocolate chips? This Chocolate Chip Scone recipe is the perfect balance of crumbly, soft, and sweet. Whether you’re a seasoned baker or a beginner in the kitchen, this guide will walk you through every step of the process. From picking the right ingredients to shaping the dough just right — we’re covering it all!
Let’s roll up our sleeves and get into the delicious details.
What Are Chocolate Chip Scones?
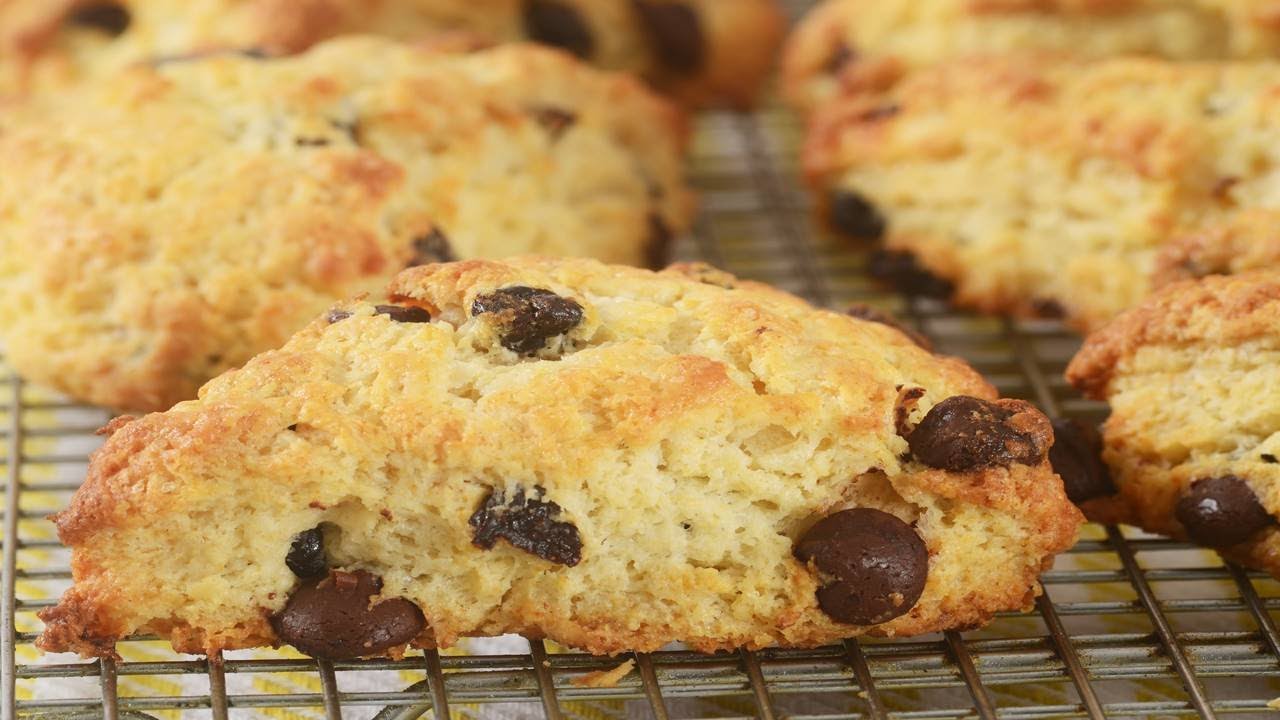
Chocolate chip scones are a sweet twist on the traditional British scone — buttery, slightly crumbly, and baked until golden brown. Instead of currants or raisins, this version is packed with chocolate chips, making it perfect for dessert, breakfast, or a midday snack.
Unlike cookies, scones have a firmer texture and are less sweet, which makes the chocolate really shine. Some people describe them as the love child of biscuits and cookies, and honestly, they’re not wrong. These scones are typically enjoyed with coffee or tea, and they freeze well, making them great for meal prepping or entertaining guests on short notice.
What sets these apart from store-bought scones is the freshness and flavor you get from quality ingredients and proper technique. No preservatives, no odd texture—just tender, melt-in-your-mouth goodness. Think of these as your secret weapon for impressing brunch guests or treating yourself on a lazy Sunday morning.
Why You’ll Love This Recipe
Let’s be real — we’ve all tried dry, crumbly scones that were more disappointing than delightful. But this recipe? Total game-changer. Here’s why it’ll become your go-to:
- Super Easy: No fancy equipment, just a bowl, spoon, and your hands.
- Customizable: Swap in dark chocolate, white chocolate, or even nuts.
- Perfect Texture: Buttery and crumbly outside, soft and tender inside.
- Make-Ahead Friendly: Store in the fridge or freezer for fresh scones anytime.
- Impressive Yet Simple: Great for brunch, dessert, or gifting!
Whether you’re baking for the holidays, a tea party, or just because — this recipe is bound to earn rave reviews.
Tools and Equipment You’ll Need
Before you dive in, make sure you’ve got these kitchen essentials ready:
- Mixing bowls (large and medium)
- Pastry cutter or fork
- Measuring cups and spoons
- Whisk
- Baking sheet
- Parchment paper or silicone baking mat
- Bench scraper or sharp knife
- Cooling rack
Pro tip: Cold tools (especially your bowl and pastry cutter) help keep the butter from melting, giving you flakier scones.
List of Ingredients You’ll Need
Dry Ingredients
- 2 cups (250g) all-purpose flour
- 1/4 cup (50g) granulated sugar
- 1 tablespoon baking powder
- 1/2 teaspoon salt
These create the structure and base flavor for your scones. Make sure your flour is spooned and leveled, not packed, to avoid dense results.
Wet Ingredients
- 1/2 cup (1 stick or 113g) unsalted butter, cold and cubed
- 2/3 cup (160ml) heavy cream or buttermilk
- 1 large egg
- 1 teaspoon vanilla extract
Cold butter is the magic behind those flaky layers. Cream or buttermilk adds richness and moisture, while the egg helps with structure and color.
Chocolate and Extras
- 1 cup (170g) semi-sweet chocolate chips
- Optional: 1-2 tablespoons coarse sugar for topping
You can use mini chips, chunks, or a mix for different textures. Want a bit of crunch? A coarse sugar sprinkle on top does the trick.
How to Choose the Best Chocolate Chips
Choosing the right chocolate chips can make or break your scones. Go for quality brands that melt nicely but still hold some shape. Semi-sweet is the classic choice, but you can mix things up with:
- Milk chocolate for sweeter scones
- Dark chocolate for richness
- White chocolate for a creamy contrast
- Chocolate chunks for larger bites
Avoid chocolate that’s too waxy or low-quality — it won’t give you that luxurious melt you’re after.
Step-by-Step Guide to Making Chocolate Chip Scones
Let’s walk through each part in detail so you get picture-perfect scones every time.
Step 1: Preheat Your Oven
Start by preheating your oven to 400°F (200°C). A hot oven is essential for creating those tall, flaky scones with a crisp golden exterior and soft, tender interior. Line a baking sheet with parchment paper for an easy cleanup.
Step 2: Prepare the Dry Ingredients
In a large bowl, whisk together 2 cups of all-purpose flour, 1/3 cup of granulated sugar, 1 tablespoon of baking powder, and ½ teaspoon of salt. This ensures all the leavening agents and sugar are evenly distributed.
Step 3: Cut in the Butter
Add ½ cup (1 stick) of cold unsalted butter, cut into small cubes. Using a pastry cutter or your fingertips, work the butter into the flour until the mixture resembles coarse crumbs with a few pea-sized pieces of butter remaining.
Step 4: Add the Wet Ingredients
In a separate bowl, whisk together ½ cup of heavy cream, 1 large egg, and 1 teaspoon of vanilla extract. Pour this mixture into the dry ingredients and stir gently until just combined. The dough should be slightly sticky but not overly wet.
Step 5: Fold in the Chocolate Chips
Add ½ cup of chocolate chips—semi-sweet or dark—for a rich, sweet bite in every piece. Mix lightly to avoid overworking the dough.
Step 6: Shape the Dough
Turn the dough onto a lightly floured surface and shape it into a round disk about 1 inch thick.
Step 7: Cut into Triangles
Using a sharp knife or bench scraper, cut the disk into 8 even wedges.
Step 8: Chill Before Baking
Place the scones on the prepared baking sheet and refrigerate for 15 minutes. Chilling helps them hold their shape and rise beautifully.
Step 9: Bake to Golden Perfection
Brush the tops with cream or milk for a glossy finish. Bake for 15–18 minutes, or until golden brown.
Step 10: Let Them Cool
Cool on a wire rack for 10 minutes. Serve warm or at room temperature—crumbly, buttery, and dotted with melted chocolate bliss.
Baking Tips for Perfect Scones
Scones may seem simple, but small details make a big difference. Here are a few pro tips to ensure bakery-level results every time:
- Keep Ingredients Cold: Especially the butter and cream. Cold fat = flakier scones.
- Don’t Overmix: Handle the dough gently to keep it tender.
- Use Fresh Leavening: Baking powder loses potency after a few months. Test yours before baking.
- Chill Before Baking: It firms the dough and stops butter from melting too early.
- Rotate the Pan Midway: For even browning, turn your baking sheet halfway through the bake.
Remember: baking is a balance of science and art. Once you get the hang of it, you’ll be tweaking and customizing like a pro.
Serving Suggestions
Chocolate chip scones are versatile little treats. Here’s how you can elevate the experience:
- With Butter or Clotted Cream: Classic combo, especially warm.
- Drizzled with Glaze: Mix powdered sugar and milk for a quick icing.
- Alongside Fresh Berries: A tangy counterbalance to all the sweetness.
- Paired with Coffee or Tea: Scones were born for sipping companions.
- As Dessert: Top with whipped cream and a scoop of vanilla ice cream.
Hosting brunch? These pair beautifully with fruit salads, yogurt parfaits, or even scrambled eggs. Want to really impress your guests? Offer two varieties—chocolate chip and blueberry!
How to Store Your Scones
Scones are best enjoyed fresh, but they store surprisingly well if you do it right:
Room Temperature:
- Store in an airtight container
- Line with a paper towel to absorb moisture
- Good for up to 2 days
Refrigerator:
- Store in an airtight container
- Keeps fresh for 4–5 days
- Reheat in a 300°F oven for 5–7 minutes
Avoid Microwaves: They make scones rubbery and sad. Always reheat in the oven or toaster oven.
Freezing and Reheating Instructions
Scones freeze beautifully! Here’s how to freeze both baked and unbaked versions:
To Freeze Baked Scones:
- Let them cool completely.
- Wrap individually in plastic wrap.
- Place in a freezer-safe bag.
- Freeze for up to 3 months.
To reheat, bake from frozen at 350°F for 10–12 minutes or until warm.
To Freeze Unbaked Scones:
- Shape and cut the dough.
- Place the wedges on a tray and freeze until solid (about 1 hour).
- Transfer to a freezer-safe bag and label.
Bake from frozen at 400°F, adding 2–3 extra minutes to the total bake time.
Perfect for lazy weekends or last-minute guests!
Common Mistakes to Avoid
Even experienced bakers make scone mistakes. Avoid these pitfalls to nail it every time:
- Using warm butter: Melts into the dough = greasy texture.
- Overmixing the dough: Leads to tough, dense scones.
- Skipping the chill step: You’ll get flat, spread-out scones.
- Adding too many chocolate chips: Tempting, but it throws off the dough-to-chip ratio.
- Cutting with a dull knife: Squishes the dough instead of slicing cleanly.
Think of scones like a house of cards—if you rush it or overdo one step, the whole thing collapses. Slow and steady wins this race.
How to Make It Vegan or Gluten-Free
Vegan Version:
- Butter: Use plant-based butter (stick, not tub)
- Cream: Substitute full-fat coconut milk or oat cream
- Egg: Use a flax egg (1 tbsp flaxseed + 3 tbsp water)
- Chocolate Chips: Use dairy-free chips like Enjoy Life brand
Gluten-Free Version:
- Flour: Use a 1:1 gluten-free flour blend with xanthan gum
- Mix Gently: GF dough can be more delicate—don’t overwork
Both versions may have a slightly different texture, but they’re still super tasty and satisfying. You might even forget they’re allergy-friendly!
Fun Variations to Try
Want to take this basic recipe up a notch? Try these creative spins:
- Double Chocolate: Add 2 tbsp cocoa powder to the dry mix.
- Orange Chocolate: Add 1 tbsp orange zest and a splash of orange juice.
- Peanut Butter Chip: Replace half the chocolate with peanut butter chips.
- Espresso Chip: Mix in 1 tsp instant espresso powder with the dry ingredients.
- Mint Chocolate: Stir in some chopped Andes mints for a refreshing twist.
The possibilities are endless. Once you’ve nailed the base recipe, experiment like crazy!
FAQs about Chocolate Chip Scone Recipe
1. Can I use milk instead of cream in scones?
Yes, but cream adds more richness. If using milk, choose whole milk and expect a slightly less tender crumb.
2. Why did my scones come out flat?
Probably due to warm butter, overmixing, or skipping the chill step. Keep everything cold and follow the steps closely.
3. Can I use self-rising flour instead of all-purpose?
You can, but skip the baking powder and salt in the recipe to adjust for it.
4. Are scones supposed to be sweet?
Traditionally, scones are mildly sweet. This version is a dessert-style twist with chocolate chips, making it sweeter than classic British scones.
5. Can I double the recipe?
Absolutely! Just make sure not to overcrowd the baking sheet and chill the dough thoroughly before baking.
Conclusion
There you have it — your ultimate guide to making perfect chocolate chip scones from scratch. This recipe hits the sweet spot between easy and impressive, delicious and versatile. Whether you’re treating yourself on a slow Sunday morning or baking up a storm for a gathering, these scones will never disappoint.
Make them once, and they’ll become part of your regular baking rotation. Just remember: keep the butter cold, don’t overmix, and always sneak a few chocolate chips for yourself before folding them in.
Happy baking!