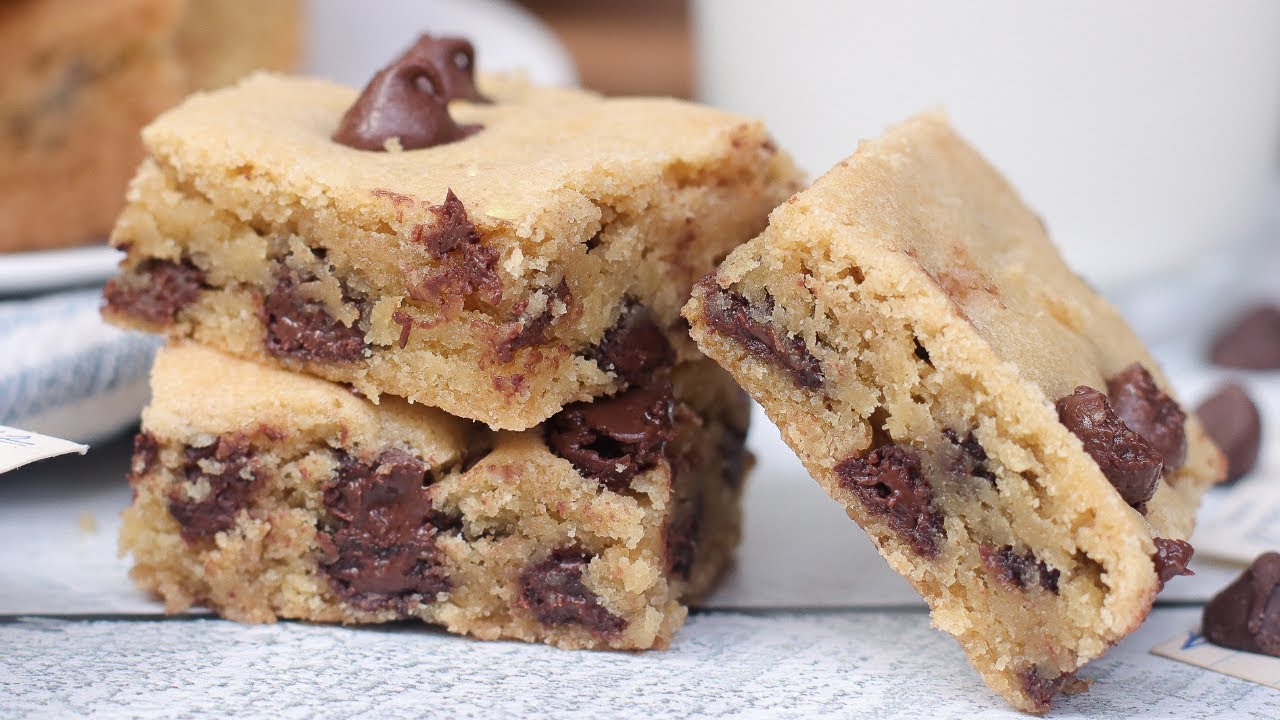
Chocolate Chip Bars Recipe: Who doesn’t love the warm, gooey goodness of a fresh-baked chocolate chip bar? Whether you’re baking for a party, prepping snacks for the week, or just craving something sweet and satisfying, chocolate chip bars are a go-to classic. Easier than cookies (yes, really!) and just as delicious, they offer the perfect balance between chewy, soft, and chocolatey. In this step-by-step guide, you’ll learn everything you need to know—from gathering your ingredients to slicing that first heavenly square.
So, grab your apron. Let’s get baking.
Ingredients You’ll Need
Before you dive into baking, you need to make sure your kitchen is fully stocked. Chocolate chip bars rely on simple pantry staples, and chances are, you already have most of them on hand.
Essential Ingredients:
- 1 cup (2 sticks) unsalted butter, softened
- 1 cup packed brown sugar
- 1/2 cup granulated white sugar
- 2 large eggs
- 2 teaspoons vanilla extract
- 2 1/4 cups all-purpose flour
- 1/2 teaspoon baking soda
- 1/2 teaspoon salt
- 2 cups semi-sweet chocolate chips
Optional Add-Ins:
- 1/2 cup chopped walnuts or pecans
- 1/2 cup shredded coconut
- 1/4 cup toffee bits
- 1/4 teaspoon cinnamon for a subtle spice
- 1/2 cup white or dark chocolate chunks for extra decadence
Substitution Tips:
- No brown sugar? Use white sugar and a tablespoon of molasses.
- Out of butter? Try using coconut oil or margarine, though texture may change slightly.
- Want it egg-free? Use flax eggs (1 tbsp ground flax + 3 tbsp water = 1 egg).
- Gluten-free? Substitute with a 1:1 gluten-free flour blend.
Getting your ingredients ready beforehand is key. Measure everything out ahead of time for a stress-free experience. Trust me—future you will thank you.
Baking Equipment You’ll Need
While you don’t need fancy tools, having the right equipment can make the process smoother and more enjoyable.
Basic Tools:
- Mixing bowls (one large, one medium)
- Measuring cups and spoons
- Wooden spoon or rubber spatula
- Hand mixer or stand mixer (optional but helpful)
Essential Baking Tools:
- 9×13 inch baking dish or pan
- Parchment paper (for easy removal)
- Cooling rack
- Offset spatula (for spreading batter evenly)
Bonus Tools (Optional):
- Cookie scoop (for even distribution)
- Silicone baking mat (alternative to parchment paper)
- Glass measuring cup (for liquids)
Having these tools handy means you won’t have to run around the kitchen mid-recipe. Lay everything out before you begin for maximum ease and minimal mess.
Understanding the Basics of Chocolate Chip Bars
Let’s pause a second and understand what sets chocolate chip bars apart from their cookie cousins. The same basic ingredients, sure, but the form and technique make all the difference.
Texture Differences:
Chocolate chip bars are thicker, softer, and often chewier than cookies. Baking them in a pan helps retain moisture, which gives you that rich, dense bite in every square.
No Scooping Necessary:
Unlike cookies, there’s no need to portion out individual blobs of dough. Just spread everything into one pan and bake. It’s practically foolproof.
More Versatile:
You can add a lot more to chocolate chip bars—layers of peanut butter, swirls of Nutella, or even chopped candies. They hold their shape and flavor beautifully.
If you’ve ever felt intimidated by cookies burning or spreading too much—chocolate chip bars are your low-stress baking BFF.
Step-by-Step Guide to Making Chocolate Chip Bars
Let’s get into the fun part—baking! Here’s a breakdown of each step, so you don’t miss a thing.
Preparation Tips Before You Start
- Bring butter and eggs to room temperature for easier mixing.
- Pre-measure your ingredients to streamline the process.
- Line your baking pan with parchment for easier removal.
- Preheat your oven so it’s hot and ready when you are.
Step 1: Preheat Your Oven
Set your oven to 350°F (175°C). A properly preheated oven is key for even baking. It helps your chocolate chip bars rise evenly and develop that irresistible golden crust without overbaking.
Step 2: Grease and Prep Your Baking Dish
Line an 8×8-inch or 9×9-inch square baking dish with parchment paper, leaving a bit of overhang on the sides for easy lifting later. Lightly grease it with butter or cooking spray to prevent sticking.
Step 3: Mix the Wet Ingredients
In a large mixing bowl, cream together the softened butter, brown sugar, and white sugar until light and fluffy. This step traps air into the batter for a softer, chewier texture. Add the eggs one at a time, mixing after each addition. Then stir in the vanilla extract—it’s the secret to that bakery-style aroma.
Step 4: Blend in the Dry Ingredients
In a separate bowl, whisk together flour, baking powder, and salt. Gradually fold this into the wet mixture until fully combined. Avoid overmixing; it can make your bars dense instead of soft and chewy.
Step 5: Fold in the Chocolate Chips
Add the chocolate chips—semi-sweet, milk, or dark, depending on your mood. Use a spatula to gently fold them in so they’re evenly distributed throughout the dough.
Step 6: Spread the Batter Evenly in the Pan
Scoop the batter into the prepared baking dish and use a spatula to smooth the top. Make sure it’s evenly spread to ensure consistent baking.
Step 7: Bake to Perfection
Place the dish in the center rack and bake for 25–30 minutes, or until the edges are golden and the center looks just set. A toothpick inserted should come out mostly clean, with a few moist crumbs clinging to it.
Step 8: Cool and Slice
Allow the bars to cool completely in the pan. This helps them firm up and makes cutting easier. Use the parchment overhang to lift them out, then cut into squares.
Step 9: Store or Serve Fresh
Serve warm for that gooey, melt-in-your-mouth delight, or store in an airtight container for up to four days. They also freeze beautifully—perfect for a quick snack, dessert, or sweet pick-me-up any day.
Expert Tips for the Best Chocolate Chip Bars
Want next-level bars every single time? Here’s what experienced bakers swear by:
- Don’t skip the salt. It balances the sweetness and deepens flavor.
- Use brown sugar for extra moisture and chew.
- Chill your dough (optional) for thicker, bakery-style bars.
- Don’t overmix the dough once the flour goes in—this can make the bars dense.
- Top with flaky sea salt before baking for a gourmet twist.
- Use high-quality chocolate—it really makes a difference in flavor.
And remember, baking is part science, part art. Don’t be afraid to adjust things to match your taste and texture preference.
Optional Mix-Ins and Variations
Ready to go off-script? These chocolate chip bars are a blank canvas for creativity.
Tasty Mix-Ins:
- Crushed Oreos
- Peanut butter chips
- Toffee bits
- Dried cranberries or cherries
- Mini marshmallows
Flavor Twists:
- Salted Caramel Swirl: Drizzle caramel sauce on top before baking
- Mocha Bars: Add a teaspoon of espresso powder
- S’mores Bars: Layer crushed graham crackers and marshmallows
Dietary Variations:
- Vegan: Use vegan butter, flax eggs, and dairy-free chocolate
- Gluten-Free: Substitute all-purpose flour with gluten-free flour blend
- Low-Sugar: Use coconut sugar or a sugar substitute
Have fun with it. Your kitchen, your rules.
How to Store and Keep Chocolate Chip Bars Fresh
There’s nothing worse than biting into a dried-out bar the next day. The good news? Chocolate chip bars are super easy to store, and if done right, they can taste just as good—if not better—the day after baking.
Room Temperature Storage
- Let the bars cool completely before storing.
- Place them in an airtight container, separating layers with parchment or wax paper.
- Keep them at room temperature in a cool, dry spot—away from direct sunlight or heat sources.
Shelf life: 3 to 4 days
Pro tip: Pop a slice of bread into the container to keep bars soft (the bread will go stale, not the bars).
Refrigeration
Refrigerating is a great option if you like your bars a bit firmer or want to extend their shelf life.
- Wrap each bar in plastic wrap or foil for added protection.
- Store in a sealed container to prevent them from absorbing odors from the fridge.
Shelf life: Up to 1 week
Bonus: Chilled bars are perfect for making ice cream sandwiches.
Freezing for Long-Term Storage
Chocolate chip bars freeze beautifully. Here’s how to do it right:
- Wrap each bar tightly in plastic wrap.
- Place the wrapped bars into a freezer-safe zip-top bag or airtight container.
- Label with the date.
Freezer shelf life: Up to 3 months
To serve: Thaw at room temperature for 30–60 minutes or microwave in short bursts (10–15 seconds).
With smart storage, your batch of bars can be ready for lunchboxes, after-dinner cravings, or even unexpected guests.
Pairing Ideas for Chocolate Chip Bars
Sure, chocolate chip bars are amazing on their own. But pairing them with the right beverage or dessert? Now we’re talking a whole new level of indulgence.
Drinks That Pair Perfectly:
- Cold milk – the all-time classic. Nothing complements warm chocolate like it.
- Hot coffee or espresso – balances the sweetness with a rich, bitter edge.
- Vanilla almond milk – great for a dairy-free twist.
- Hot chocolate – go full chocolate-on-chocolate.
Dessert Pairings:
- Vanilla or caramel ice cream – serve bars warm for a molten effect.
- Fruit compote – berries, bananas, or apples create a sweet-tart contrast.
- Whipped cream – a simple, airy topping that never fails.
- Chocolate drizzle or ganache – yes, it’s extra, but it’s also irresistible.
When it comes to pairings, think balance. The richness of the bars loves to meet fresh, creamy, or lightly acidic elements.
Serving Suggestions
Let’s be honest—you can serve these chocolate chip bars any way you like. But if you want to get fancy or just make them extra special, here are some creative serving ideas.
Everyday Snack or Dessert:
- Slice into small squares for party platters or potlucks.
- Add to school lunches for a midday surprise.
- Bring them to the office and be everyone’s favorite coworker.
Dressed-Up Dessert:
- Cut bars diagonally for a more elegant presentation.
- Stack 2–3 bars with whipped cream in between—mini dessert towers!
- Dust with powdered sugar or cocoa powder for a bakery-style touch.
Holiday and Celebration Ideas:
- Cut into fun shapes with cookie cutters.
- Top with sprinkles or crushed peppermint for a festive vibe.
- Serve on a cake stand or tray lined with parchment for a rustic look.
With a little creativity, these humble bars can become the highlight of your dessert table.
Troubleshooting Baking Problems
Even the best bakers run into problems. Here’s a quick fix guide for common chocolate chip bar issues:
Bars Are Too Dry or Crumbly
- Overbaking is the #1 culprit. Always check around the 25-minute mark.
- Measure flour accurately—too much flour = dry bars. Spoon and level instead of scooping.
- Use brown sugar for added moisture.
Bars Are Too Soft or Undercooked
- Your oven might be running cooler than it says—use an oven thermometer.
- Make sure bars are fully cooled before slicing; they firm up as they cool.
Uneven Baking
- Spread the dough evenly in the pan.
- Rotate your baking pan halfway through for consistent heat.
Chocolate Chips Sinking to the Bottom
- Toss chips in a bit of flour before folding them in. This helps suspend them in the batter.
Bars Sticking to the Pan
- Use parchment paper to avoid this altogether.
- Grease your pan thoroughly with butter or nonstick spray.
Learning from little mishaps only makes you a better baker. Keep notes, tweak as you go, and before you know it—you’ll have your perfect method dialed in.
FAQs about Chocolate Chip Bars Recipe
1. Can I use margarine instead of butter?
Yes, but butter gives the bars a richer flavor. If you use margarine, make sure it’s not “light” or spreadable—those have added water and can affect texture.
2. How do I make the bars extra gooey?
Slightly underbake them by 2–3 minutes and use more brown sugar than white sugar. Also, enjoy them warm for the ultimate gooey experience.
3. Can I double the recipe?
Absolutely! Just use a larger pan (like a sheet pan) or make two separate batches. You may need to adjust the baking time.
4. Can I use different types of chocolate?
Yes! Mix semi-sweet with milk chocolate, dark chocolate chunks, or even mini M&Ms. Get creative with your chocolate game.
5. Are these freezer-friendly?
Totally. Wrap tightly and store in an airtight container. They’ll last up to 3 months in the freezer and taste just as delicious once thawed.
Conclusion
Chocolate chip bars are a dessert lover’s dream—soft, chewy, chocolatey, and easy enough for beginners. Whether you’re baking a batch for friends, prepping for the holidays, or just satisfying a sweet craving, this go-to recipe has you covered.
With the right ingredients, a few pro tips, and a little creativity, you can make bars that rival any bakery’s. Try different mix-ins, share them with someone you love, or hoard them for yourself (no judgment here).
Now it’s your turn—go preheat that oven and bake something amazing. You’ve got this.