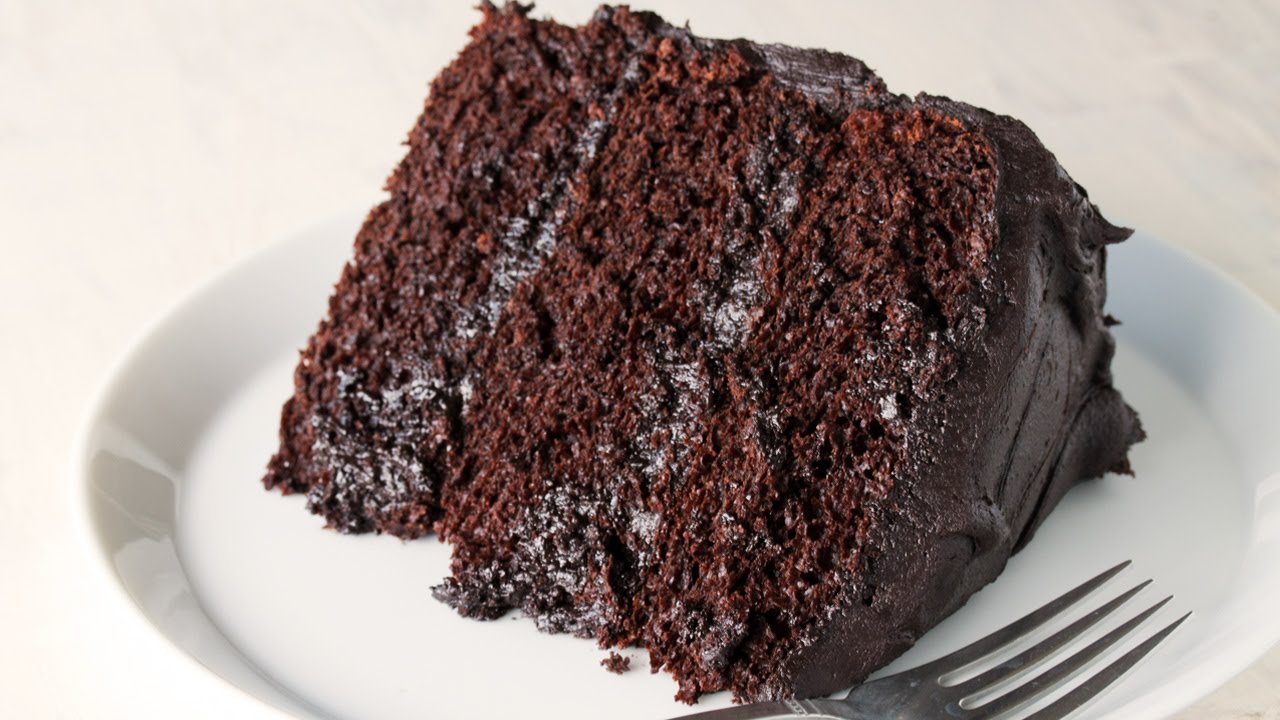
Chocolate Cake Recipe: There’s something timeless and irresistible about a slice of rich, moist chocolate cake. Whether it’s a birthday party, a holiday gathering, or just a treat-yourself moment on a cozy evening, chocolate cake delivers comfort and joy in every bite. What makes it even better? When it’s homemade—with love, care, and real ingredients you can trust. If you’re looking for the ultimate chocolate cake recipe that’s foolproof, flavorful, and full of rich cocoa goodness, you’ve landed in the right place.
This guide walks you through every single step, from choosing the best ingredients to baking, frosting, and finally serving the perfect chocolate cake. Whether you’re a beginner or an experienced home baker, this step-by-step breakdown will help you bake like a pro. Let’s get started!
Why Everyone Loves a Classic Chocolate Cake
Chocolate cake holds a special place in our hearts and kitchens. It’s comforting, nostalgic, and nearly impossible to resist. From the soft crumb texture to the deep cocoa flavor, it appeals to all ages. It’s also one of the most versatile desserts—you can dress it up with ganache and berries for a fancy dinner, or keep it simple with a dusting of powdered sugar.
What makes chocolate cake universally loved is the combination of rich taste and fluffy texture. The chocolate flavor—especially when intensified with high-quality cocoa or melted chocolate—satisfies cravings like no other dessert can. Plus, it pairs beautifully with so many toppings and fillings, from buttercream to cream cheese frosting, or even peanut butter and caramel.
The best part? Making a great chocolate cake doesn’t require you to be a pastry chef. With the right recipe and guidance (which you’re getting right now), anyone can do it.
What Makes This Chocolate Cake Recipe Special
Unlike many recipes that leave out key tips or use processed shortcuts, this recipe focuses on using fresh, wholesome ingredients and techniques that guarantee success. It’s been tested for texture, flavor, moisture balance, and ease—because let’s be honest, no one wants a dry or flat cake.
Here’s what makes this recipe stand out:
- Simple Ingredients: You probably already have most of them in your pantry.
- Perfect Moisture: The balance of milk, butter, and eggs gives it a soft, moist crumb.
- Deep Flavor: We use a combination of cocoa powder and optional melted chocolate.
- Foolproof Method: Easy-to-follow steps that anyone can master.
- Customizable: Easily make it gluten-free, vegan, or double-layered.
Let’s break down everything you’ll need before jumping into the baking magic.
Tools You’ll Need to Make the Perfect Chocolate Cake
Having the right tools makes baking easier and more enjoyable. Here’s a checklist to help you prepare:
Mixing Tools
- Large mixing bowls (at least two)
- Hand mixer or stand mixer
- Silicone spatula
Baking Essentials
- Two 9-inch round cake pans
- Parchment paper (optional but recommended)
- Wire cooling rack
- Oven thermometer (if your oven tends to run hot or cold)
Measuring Tools
- Dry measuring cups
- Liquid measuring cup
- Measuring spoons
- Kitchen scale (for even more accuracy)
Being organized with your tools upfront will save time and stress as you bake.
List of Ingredients You’ll Need
A cake is only as good as what goes into it. Let’s start with the full list:
Dry Ingredients
- 1 ¾ cups all-purpose flour
- ¾ cup unsweetened cocoa powder (Dutch-processed preferred)
- 2 cups granulated sugar
- 1 ½ tsp baking powder
- 1 ½ tsp baking soda
- ½ tsp salt
Wet Ingredients
- 2 large eggs, room temperature
- 1 cup whole milk
- ½ cup vegetable oil or melted butter
- 2 tsp pure vanilla extract
- 1 cup boiling water (for deeper cocoa flavor)
Optional Add-Ins and Toppings
- ½ cup chocolate chips (for extra gooeyness)
- Chopped nuts or berries
- Whipped cream or frosting (recipe below)
These ingredients are easy to find but together create something truly spectacular. Always use fresh baking powder and soda—these can make or break your rise.
Tips for Choosing the Best Ingredients
Not all ingredients are created equal. Here’s how to pick the best:
- Flour: Stick with all-purpose for balance. If using cake flour, reduce the amount slightly.
- Cocoa Powder: Dutch-processed gives a deeper flavor, while natural cocoa is lighter and tangier.
- Sugar: Regular white granulated sugar works great, but you can experiment with brown sugar for added moisture.
- Eggs: Room temperature eggs blend better and hold air for a fluffier cake.
- Milk: Whole milk is best for richness, but almond or oat milk works for dairy-free versions.
- Oil vs. Butter: Oil creates more moisture, while butter adds flavor. A mix of both is ideal!
With quality ingredients, you’re already halfway to baking a masterpiece.
Step-by-Step Guide to Make Chocolate Cake
Now, let’s dive into the baking process. Follow these steps closely:
Step 1: Preheat Your Oven and Prepare the Pans
Set your oven to 350°F (175°C). Grease two 9-inch cake pans with butter or cooking spray. Line the bottoms with parchment paper for easy removal.
Step 2: Mix the Dry Ingredients
In a large bowl, sift together the flour, cocoa powder, sugar, baking powder, baking soda, and salt. Whisk them together to combine evenly.
Step 3: Cream Butter and Sugar
If using butter instead of oil, beat the butter and sugar together until light and fluffy—about 3-4 minutes. This creates air pockets, making the cake tender.
Step 4: Add the Eggs and Vanilla
Add the eggs one at a time, mixing well after each. Then stir in the vanilla extract.
Step 5: Combine Wet and Dry Ingredients
Slowly alternate adding the dry mix and milk into your butter mixture (or oil mix), stirring just until combined. Don’t overmix—overmixing can lead to a dense cake.
Step 6: Add Boiling Water
Carefully pour in the boiling water while mixing slowly. The batter will become thin—this is normal. It helps bloom the cocoa powder and create a richer taste.
Step 7: Pour Batter into Cake Pans
Divide the batter evenly between the two pans. Tap them gently on the counter to remove air bubbles.
Step 8: Bake to Perfection
Place the pans in the preheated oven and bake for 30–35 minutes. Don’t open the oven door early!
Step 9: Check for Doneness
Insert a toothpick in the center—if it comes out clean or with a few crumbs, it’s ready.
Step 10: Let the Cake Cool Properly
Remove the cakes from the oven and let them cool in pans for 10 minutes. Then transfer them to a wire rack to cool completely.
Step-by-Step Guide to Make Chocolate Frosting
A rich and creamy frosting takes your chocolate cake from good to unforgettable. Here’s how to make a luscious chocolate buttercream that spreads like silk and tastes like heaven.
Ingredients for the Frosting
- 1 cup (2 sticks) unsalted butter, softened
- 3 ½ cups powdered sugar, sifted
- ½ cup unsweetened cocoa powder
- ½ tsp salt
- 2 tsp pure vanilla extract
- ¼ cup heavy cream or milk (adjust for desired consistency)
- Optional: 4 oz melted dark chocolate (for extra richness)
Step 1: Melt the Chocolate (Optional)
If you’re adding melted chocolate, gently melt it over a double boiler or in the microwave (in 15-second bursts). Let it cool slightly before adding to the frosting mixture.
Step 2: Cream Butter and Sugar
In a large bowl, beat the softened butter for 2–3 minutes until fluffy and pale. Gradually add in the sifted powdered sugar and cocoa powder. Mix slowly at first, then increase the speed to avoid a sugar cloud.
Step 3: Combine and Whip to Perfection
Add the salt, vanilla extract, and cream. Beat for 3–5 more minutes until light, smooth, and spreadable. If using melted chocolate, fold it in at the end. If it’s too thick, add a tablespoon more cream. If it’s too thin, add a bit more powdered sugar.
That’s it! You now have a professional-style chocolate frosting ready to slather over your cake layers.
Assembling and Frosting the Cake
Assembling your cake is where the fun really begins. You’re turning simple layers into a work of art—and trust me, it’s easier than it looks.
- Level the Cakes (Optional): If your cakes have domed tops, use a serrated knife to trim them so they stack evenly.
- Place the First Layer: Put one cake layer on a cake stand or serving plate. Spread a generous amount of frosting on top, smoothing it out with an offset spatula.
- Add the Second Layer: Place the second cake layer gently over the first. Press slightly to secure.
- Frost the Top and Sides: Use a thin layer of frosting (called a crumb coat) to trap loose crumbs. Chill for 15 minutes, then apply a thicker layer of frosting over the top and sides.
Use swirling motions or straight lines—whatever design you like. Don’t worry if it’s not perfect. Homemade charm goes a long way.
Decorating Tips for a Beautiful Finish
Want your chocolate cake to look as good as it tastes? Here are some easy decorating ideas:
- Sprinkles or Chocolate Shavings: Sprinkle around the edges or center.
- Fresh Berries: Strawberries, raspberries, or blueberries add a fresh, tart contrast.
- Ganache Drip: Pour a simple chocolate ganache over the top for a professional drip effect.
- Piping: Use a piping bag to add frosting rosettes or borders.
- Edible Flowers: These give an elegant, natural touch.
Don’t overdo it—sometimes less is more when it comes to decoration. Focus on one or two elements for a polished look.
Serving Suggestions
A slice of chocolate cake is a treat on its own, but pairing it with a few extras can take things to the next level:
- A scoop of vanilla ice cream
- Drizzle of warm caramel or ganache
- Whipped cream and fresh berries
- Glass of cold milk or a cup of coffee
If you’re serving at a party, slice the cake in advance and serve on individual plates for easy presentation. Add a dusting of powdered sugar or a mint leaf for a fancy touch.
Storage Instructions
Homemade chocolate cake stores beautifully if done right:
- Room Temperature: Store under a cake dome or in an airtight container for up to 2 days.
- Refrigerator: Wrap tightly and refrigerate for up to 5 days. Let it come to room temp before serving for best flavor.
- Freezer: You can freeze unfrosted cake layers for up to 2 months. Wrap in plastic wrap and aluminum foil. Thaw overnight in the fridge before frosting.
Frosted cake can also be frozen in slices. Just wrap them well to avoid freezer burn.
Common Mistakes to Avoid
Even seasoned bakers run into issues. Here are a few pitfalls to dodge:
- Overmixing the batter: This can make your cake tough. Mix just until combined.
- Underbaking or overbaking: Always test for doneness with a toothpick and don’t rely solely on time.
- Hot cake + frosting = disaster: Always cool your cakes completely before frosting.
- Skipping the crumb coat: This thin base layer of frosting locks in crumbs and makes your final coat smoother.
- Using cold ingredients: Room temperature eggs, milk, and butter mix better and give better rise.
Learning from mistakes is part of the fun, but avoiding these will save your cake!
How to Make It Vegan or Gluten-Free
Don’t let dietary restrictions stop you from enjoying chocolate cake! Here’s how to tweak the recipe:
For Vegan Chocolate Cake:
- Eggs: Use flax eggs (1 tbsp ground flax + 3 tbsp water = 1 egg).
- Milk: Substitute with almond, oat, or soy milk.
- Butter: Use vegan butter or coconut oil.
- Chocolate: Ensure it’s dairy-free.
For Gluten-Free Chocolate Cake:
- Use a gluten-free 1:1 baking flour blend.
- Double-check that your baking powder and cocoa are gluten-free.
- Be gentle when mixing—gluten-free batters can be more delicate.
You’ll still get a rich, fluffy cake with all the chocolatey goodness—minus the allergens.
FAQs about Chocolate Cake Recipe
Q1: Can I use this recipe to make cupcakes instead of a cake?
Absolutely! This batter makes about 24 standard-sized cupcakes. Bake them at 350°F (175°C) for 18–22 minutes.
Q2: Why did my cake sink in the middle?
That often happens if the oven door was opened too early, or if there was too much leavening agent. Follow the recipe closely and avoid peeking until near the end.
Q3: Can I double the recipe for a larger cake?
Yes! You can double it for a layered 9×13-inch cake or more layers. Just adjust baking times and monitor doneness with a toothpick.
Q4: What’s the best cocoa powder for this recipe?
Dutch-processed cocoa gives a deeper, smoother flavor, but natural cocoa works well too—just expect a slightly tangier taste.
Q5: Can I use this recipe for cake pops or layered cakes?
Definitely! This recipe is versatile and works beautifully for layered cakes, cake pops, or even trifles. It holds its shape and moisture well.
Conclusion
Baking a chocolate cake from scratch might seem intimidating at first, but with the right ingredients, tools, and this step-by-step guide, it’s totally doable—and incredibly rewarding. From that first spoonful of batter to the last bite of moist, decadent cake, it’s an experience filled with joy (and a lot of chocolate). Whether you’re baking for a celebration or just to satisfy your sweet tooth, this recipe has you covered.
So preheat that oven, tie on your apron, and get ready to wow your friends, family—or just yourself. Happy baking!