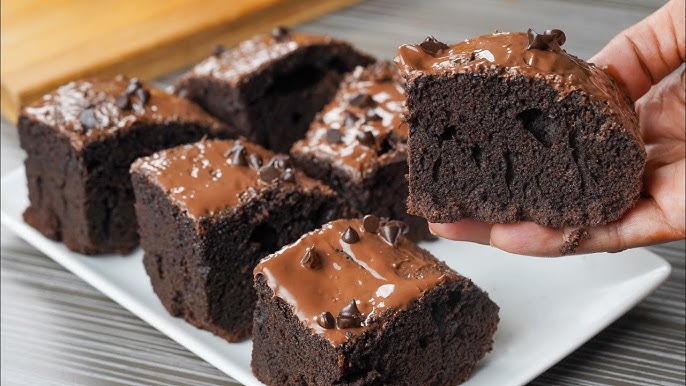
Chocolate Brownies Recipe: Brownies. Just the name is enough to make your mouth water, right? There’s something timeless and universally comforting about a pan of freshly baked chocolate brownies. They strike that perfect balance between cake and fudge, with a rich chocolatey flavor that feels like a warm hug on a plate.
Whether you’re craving a gooey, chewy brownie that sticks to your fingers or a light, cakey square that melts in your mouth, you’re in the right place. This guide is here to walk you through everything you need to know about making the best brownies of your life—from selecting the right ingredients to slicing that perfect square.
Brownies are one of the easiest and most rewarding treats to bake. With just a few ingredients and one bowl, you can whip up something truly indulgent. Perfect for parties, bake sales, or just satisfying that late-night chocolate craving.
Let’s not waste another second. Grab your apron—because we’re diving into the ultimate step-by-step chocolate brownie recipe that’s beginner-friendly, super customizable, and guaranteed to impress.
List of Ingredients You’ll Need
Creating the perfect brownie starts with the right ingredients. While the basic recipe is simple, the quality and balance of your ingredients will make a massive difference in taste and texture.
Basic Ingredients
Here’s your core list—these will give you that classic rich, fudgy brownie everyone craves:
- 1/2 cup (1 stick) unsalted butter
- 1 cup granulated sugar
- 2 large eggs
- 1 teaspoon vanilla extract
- 1/3 cup unsweetened cocoa powder
- 1/2 cup all-purpose flour
- 1/4 teaspoon salt
- 1/4 teaspoon baking powder
Optional Add-Ins for Customization
Want to give your brownies a little personality? Try tossing in any of these goodies:
- 1/2 cup chocolate chips (dark, milk, or white)
- 1/2 cup chopped walnuts or pecans
- Swirl of peanut butter or caramel
- Crushed Oreos or pretzels
- A pinch of espresso powder (enhances chocolate flavor!)
Ingredient Substitutions
Don’t have everything on hand? Here are a few swaps that still work:
- Butter ➝ Use coconut oil or margarine for a dairy-free version.
- Granulated sugar ➝ Try coconut sugar or brown sugar for a deeper flavor.
- All-purpose flour ➝ You can use a 1:1 gluten-free baking blend.
- Eggs ➝ Replace with 1/4 cup applesauce or mashed banana per egg (vegan alternative).
Essential Tools for Making Brownies
Before you dive into baking, make sure your kitchen is stocked with the right tools. Good equipment can make the process smoother and even improve your final results.
Kitchen Tools Checklist
You don’t need anything fancy, but having these essentials on hand will help a lot:
- Mixing bowls – One large for wet ingredients, one medium for dry.
- Measuring cups and spoons – Accurate measurements are key to good baking.
- Whisk and spatula – For smooth mixing and scraping the bowl clean.
- 8×8 or 9×9 inch baking pan – The size affects thickness, so adjust baking time accordingly.
- Parchment paper – Makes it super easy to remove brownies from the pan.
- Oven thermometer (optional) – Ensures your oven is baking at the correct temp.
- Toothpick or skewer – For checking doneness without cutting into the brownies.
Tips for Prep Work
- Room temperature ingredients work best. If your eggs are cold, place them in a bowl of warm water for a few minutes.
- Grease your pan well or line it with parchment paper to avoid sticking.
- Preheat your oven to 350°F (175°C) before you start mixing. Brownies need even heat from the start.
Setting yourself up right from the beginning makes a huge difference. Less mess, more brownie bliss.
Step-by-Step Guide to Making Chocolate Brownies
Now for the fun part: baking! Follow these detailed steps to make brownies that are rich, gooey, and full of flavor.
Step 1: Prepare Your Baking Pan
Line your pan with parchment paper or lightly grease it with butter or oil. This makes removing the brownies much easier once they’ve cooled. For extra clean edges, let the parchment overhang the sides so you can lift the whole brownie slab out in one go.
Step 2: Melt the Chocolate and Butter
In a medium saucepan or microwave-safe bowl, melt 1/2 cup (1 stick) unsalted butter over low heat. Once melted, remove from the heat and stir in 1/3 cup unsweetened cocoa powder. This step creates the base for your rich, chocolatey flavor.
Want even more decadence? You can also melt in 1/2 cup of chopped chocolate or chocolate chips at this point for extra gooeyness.
Step 3: Mix the Wet Ingredients
Add 1 cup granulated sugar to your melted chocolate mixture and whisk until combined. The mixture should look glossy. Let it cool slightly, then add 2 eggs, one at a time, whisking well after each addition. Stir in 1 teaspoon vanilla extract.
Step 4: Sift and Mix the Dry Ingredients
In a separate bowl, sift together 1/2 cup all-purpose flour, 1/4 teaspoon salt, and 1/4 teaspoon baking powder. Sifting helps avoid lumps and ensures even mixing.
Step 5: Combine Wet and Dry Mixtures
Gently fold the dry ingredients into the wet chocolate mixture using a spatula. Be careful not to overmix—just stir until everything is combined. Overmixing can make your brownies tough instead of tender.
Step 6: Add Nuts, Chips, or Extras (Optional)
This is your chance to make your brownies truly your own. Fold in your favorite mix-ins like:
- 1/2 cup chocolate chips for more melty bites
- 1/2 cup chopped nuts for a crunchy texture
- A swirl of peanut butter or Nutella for extra richness
Just don’t go overboard—you don’t want to overwhelm the batter.
Step 7: Pour the Batter Into the Pan
Scrape the brownie batter into your prepared baking pan, smoothing the top with your spatula. If you want picture-perfect brownies, tap the pan gently on the counter to level the batter and release air bubbles.
Step 8: Bake the Brownies
Bake in a preheated oven at 350°F (175°C) for about 20 to 25 minutes. Check them at the 20-minute mark. Insert a toothpick in the center—if it comes out with moist crumbs (not wet batter), they’re done.
Remember, underbaking gives you fudgier brownies, while longer baking makes them cakier. Choose your texture and adjust the time accordingly.
Step 9: Cool and Cut Perfectly
This step is crucial—don’t skip it! Let your brownies cool completely in the pan on a wire rack for at least 30–45 minutes. Cutting too soon results in a gooey mess.
Once cooled, lift the brownies out using the parchment paper, then cut into clean squares using a sharp knife. For neat edges, wipe the knife between cuts.
Tips for Making Fudgy, Chewy, or Cakey Brownies
Everyone has their brownie preference. Some like them super fudgy and dense, while others go for a lighter, cakier bite. The beauty is—you can customize your brownie texture by tweaking just a few ingredients or techniques.
For Fudgy Brownies
- Use more fat than flour. Stick with a higher ratio of butter to flour. Our base recipe already leans fudgy.
- Skip the baking powder or reduce it to almost none. This limits how much the batter rises.
- Don’t overbake. Pull them out when a toothpick comes out with a few moist crumbs.
For Chewy Brownies
- Use brown sugar or a mix of white and brown. The molasses in brown sugar adds chewiness.
- Add an extra egg yolk. The fat helps create a chewier texture.
- Mix longer to develop gluten, which gives a bit of structure and stretch.
For Cakey Brownies
- Add a bit more flour (try 2/3 cup instead of 1/2).
- Increase baking powder slightly to give them more lift.
- Beat the eggs longer to whip in more air—this helps the batter rise and feel lighter.
With just a few simple changes, you can dial in the perfect texture. Try making small batches with different adjustments until you find your sweet spot.
Common Mistakes and How to Avoid Them
Brownies are simple, but there are a few common mistakes that can mess with your results. Don’t worry—most of these are easy to fix or prevent altogether.
1. Overbaking
Probably the number one mistake. Brownies continue to cook after they come out of the oven, so pull them out before they look fully set. Look for slightly puffed edges and a center that still jiggles a bit.
Tip: A toothpick should come out with moist crumbs, not wet batter.
2. Using the Wrong Chocolate
Cheap chocolate = bland brownies. Use good-quality cocoa powder and real butter for the best flavor. Avoid compound chocolate or chocolate-flavored chips.
Tip: Adding a little espresso powder (about 1/2 tsp) can enhance chocolate flavor without making the brownies taste like coffee.
3. Overmixing the Batter
Once you add the flour, go easy. Overmixing develops gluten, which can make your brownies tough instead of tender and chewy.
Tip: Use a spatula to fold just until the flour disappears.
4. Cutting Too Soon
We get it—it’s hard to wait. But cutting warm brownies turns them into a gooey mess. Let them cool fully before slicing for clean, neat edges.
Tip: For even neater squares, chill the brownies in the fridge for 20 minutes before cutting.
Avoiding these slip-ups will make your brownies look and taste like they came from a professional bakery.
How to Store Brownies for Maximum Freshness
You’ve just baked the perfect batch. Now how do you keep them tasting fresh for as long as possible?
Short-Term Storage (1–3 Days)
- Store brownies in an airtight container at room temperature.
- Place a slice of bread or a tortilla in the container to keep moisture in—the brownies will absorb it and stay soft.
- Avoid refrigerating unless your kitchen is hot, as it can dry them out.
Long-Term Storage (Up to 3 Months)
Brownies freeze beautifully!
- Cut them into squares.
- Wrap each square in plastic wrap and then in aluminum foil.
- Place them in a zip-top freezer bag and label it.
- To thaw, leave at room temperature for a few hours or microwave for 10–15 seconds.
Whether you want to prep ahead or enjoy leftovers later, storing brownies right helps keep them soft, moist, and rich for days—or even weeks.
Brownie Variations to Try
Brownies are the ultimate canvas for creativity. Once you master the basic recipe, you can start experimenting with different flavors, textures, and toppings.
1. Vegan Brownies
Replace eggs with flaxseed meal (1 tbsp flaxseed + 3 tbsp water per egg), and use plant-based butter. Choose dairy-free chocolate chips. These can be just as fudgy and delicious as traditional ones!
2. Gluten-Free Brownies
Use a 1:1 gluten-free flour blend in place of all-purpose flour. Almond flour also works but will give a softer texture.
3. Peanut Butter Swirl Brownies
Drop spoonfuls of peanut butter on top of the brownie batter before baking and swirl with a knife. Adds a rich, nutty flavor that pairs perfectly with chocolate.
4. Oreo Brownies
Crush a few Oreos and mix them into the batter, or layer them between two layers of brownie mix. Adds crunch and creaminess!
5. Salted Caramel Brownies
Drizzle caramel sauce over the batter and sprinkle lightly with sea salt before baking. The sweet-and-salty combo is unbeatable.
These variations are a great way to make your brownies stand out and impress guests—or just treat yourself to something different!
Serving Suggestions
Brownies are delicious on their own, but if you want to level up your dessert game, there are countless ways to serve them that’ll impress everyone—whether it’s a fancy dinner or a midnight snack.
1. Classic with a Glass of Milk
Nothing beats the simplicity of warm brownies and a cold glass of milk. It’s nostalgic, comforting, and always hits the spot.
2. Brownie Sundaes
Transform your brownies into a decadent dessert by adding:
- A scoop of vanilla or chocolate ice cream
- Warm chocolate fudge or caramel sauce
- A sprinkle of chopped nuts
- Whipped cream and a cherry on top
You can even slice warm brownies and layer them in a sundae glass for a brownie parfait!
3. As a Dessert Base
Use brownies as a base for other desserts:
- Trifles: Layer with pudding and whipped cream.
- Cakes: Stack brownie layers with frosting.
- Ice Cream Sandwiches: Slice and freeze brownie squares, then sandwich ice cream between them.
4. Brownie Bites for Parties
Bake your batter in mini muffin tins for bite-sized brownies. They’re perfect for parties, buffets, or lunchbox treats.
5. Dusted with Powdered Sugar or Cocoa
A light dusting of powdered sugar or cocoa powder adds a classy touch without extra sweetness.
Get creative—you can never go wrong with chocolate. And brownies are the perfect canvas for experimenting with flavors, toppings, and combinations.
Nutritional Information (Estimation)
Here’s a rough estimate of the nutritional breakdown for one standard brownie square (based on 16 squares per 8×8 pan, without mix-ins):
| Nutrient | Amount |
|---|---|
| Calories | 180-200 kcal |
| Total Fat | 10g |
| Saturated Fat | 6g |
| Cholesterol | 35mg |
| Sodium | 80mg |
| Carbohydrates | 24g |
| Sugar | 18g |
| Protein | 2g |
| Fiber | 1g |
Note: These values will vary based on the ingredients you use and any extras like chocolate chips or nuts.
Fun Facts About Brownies
- Brownies were an accident! One theory says a baker forgot to add baking powder and ended up with a dense, fudgy treat. Lucky us!
- The first known brownie recipe appeared in the 1897 Sears, Roebuck catalog.
- There’s a National Brownie Day in the U.S.—celebrated every year on December 8th!
- Fudgy brownies vs. cakey brownies is one of the most hotly debated dessert topics in baking circles.
- Brownies are so loved, they’re even part of NASA space food!
Whether you love the history or just the taste, brownies have become one of the most iconic desserts around the world.
Cleaning Up After Baking
Let’s be honest—baking is fun, but cleaning up? Not so much. Here are a few tips to make cleanup easier:
1. Soak Sticky Dishes Right Away
Don’t let batter dry out on your mixing bowls or spatulas. Fill them with warm, soapy water as soon as you’re done using them.
2. Use Parchment Paper
It makes lifting brownies out easier and means almost no mess in your pan!
3. Wipe Down as You Go
Cleaning the counter between steps helps avoid a big mess at the end.
4. One-Bowl Hack
If you melt the butter and mix everything in the same pot or bowl, you’ll have fewer dishes to wash. Score!
A clean kitchen after brownies? Yes, it’s possible—and it makes your next baking session even more inviting.
FAQs about Chocolate Brownies Recipe
1. Can I double this brownie recipe?
Yes! Just double all the ingredients and use a 9×13 inch baking pan. You may need to increase the baking time by 5–10 minutes—just keep an eye on the center.
2. How can I make my brownies more chocolaty?
Add melted dark chocolate to the batter or mix in chocolate chips. A little espresso powder also enhances the chocolate flavor.
3. What’s the best way to cut brownies cleanly?
Let them cool completely, then chill them in the fridge for 20 minutes. Use a sharp knife and wipe it clean between each cut.
4. Can I use cocoa powder instead of chocolate?
Yes! This recipe uses cocoa powder for rich chocolate flavor. Just be sure it’s unsweetened, high-quality cocoa.
5. How do I fix underbaked brownies?
Put them back in the oven at 300°F (150°C) and bake in 5-minute intervals. Cover with foil if the edges are already baked to prevent overcooking.
Final Thoughts
Chocolate brownies are the ultimate homemade treat—simple, satisfying, and endlessly customizable. Whether you love them rich and fudgy or light and cakey, the perfect brownie is just a few steps away.
With this detailed, step-by-step guide, you now have everything you need to make brownies that are even better than the ones from a box (yes, really!). Remember, the more you bake, the better you’ll get—so keep experimenting, have fun in the kitchen, and most importantly, don’t forget to lick the spoon.
Now, go preheat that oven and make something sweet—you’ve earned it.


