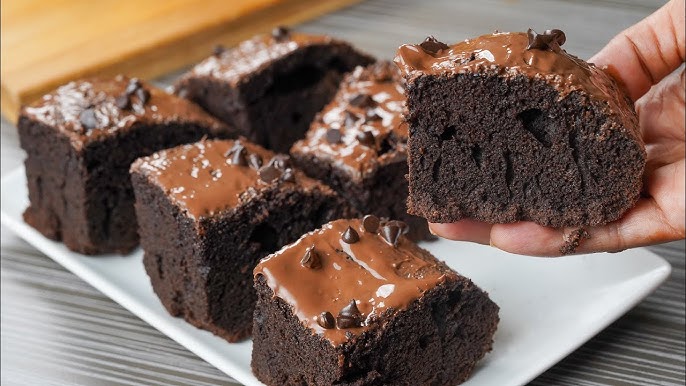
Chocolate Brownies Recipe: There’s something magical about biting into a rich, gooey chocolate brownie, right? Whether you’re sinking your teeth into a chewy corner piece or savoring the soft, fudgy center, brownies hit that perfect sweet spot between indulgent and comforting. They’re the kind of treat that brings back childhood memories, shows up at every bake sale, and never fails to impress at parties.
But let’s be honest—making brownies from scratch can feel intimidating if you’re used to the boxed mix. The good news? It’s easier than you think, and the results are so worth it. When you learn to bake brownies step-by-step, you unlock the door to a world of warm, chocolaty goodness anytime you want. Plus, you get to control every little detail—from the kind of chocolate you use to the level of fudginess you crave.
In this ultimate guide, we’re diving deep into everything you need to know to make the perfect batch of homemade brownies. We’ll start with the ingredients, go through each baking step in detail, troubleshoot common problems, and even explore fun variations to try. So roll up those sleeves and get ready to bake your best brownies ever!
What Makes a Brownie Perfect?
Before we dive into the ingredients and steps, let’s talk brownie science for a second. What actually makes a brownie amazing? Is it the crackly top? The dense, fudgy interior? Or that rich cocoa hit that melts on your tongue?
Well, it’s all about balance. A great brownie should be:
- Moist but not gooey
- Rich in chocolate flavor without being overly sweet
- Soft in the center with slightly crisp edges
- Dense and chewy (for fudgy fans) or light and airy (for cakey fans)
So which are you—fudgy or cakey? If you love the kind that almost melts in your mouth, fudgy brownies are your jam. But if you prefer a slightly lighter, more structured dessert, cakey brownies might be your thing. Good news: this recipe will show you how to tweak it either way.
It also comes down to technique. Overmix the batter, and you get tough brownies. Use too much flour, and they turn cakey. But when you get it just right? Game changer.
Ingredients You’ll Need
Let’s talk ingredients. The beauty of brownies is that they don’t require fancy stuff. You probably have most of these in your kitchen already. Still, quality matters. Better ingredients = better brownies.
Pantry Staples
- All-purpose flour – Just a bit helps with structure.
- Granulated sugar – For sweetness and that shiny top crust.
- Unsweetened cocoa powder – Go for Dutch-processed if you want a richer color.
- Salt – A pinch balances the sweetness.
- Vanilla extract – Brings out the chocolate flavor.
Fresh Ingredients
- Unsalted butter (1/2 cup or 1 stick) – Gives brownies a rich, creamy texture.
- Eggs (2 large) – Help bind everything together.
- Semi-sweet or dark chocolate (1/2 cup chopped or chips) – This is where the chocolate magic happens!
Optional Add-Ins
- Chopped walnuts or pecans
- Chocolate chips (milk, dark, or white)
- Peanut butter swirls
- Espresso powder (just a pinch to enhance flavor)
These optional ingredients allow you to put your own spin on the classic. Want a crunch? Add nuts. Want something extra gooey? Toss in more chocolate chips.
Tools and Equipment
You don’t need a fancy kitchen setup, but a few basic tools will make your brownie-baking life a whole lot easier.
Essential Tools
- Mixing bowls – One for dry, one for wet ingredients.
- Whisk or hand mixer – For combining everything smoothly.
- Measuring cups and spoons – Precision matters!
- 8×8 or 9×9 inch baking pan – The classic brownie size.
- Spatula – To fold in ingredients gently.
Optional but Helpful
- Parchment paper – For easy removal and clean-up.
- Kitchen scale – Helps ensure ingredient accuracy.
- Cooling rack – Prevents soggy bottoms as they cool.
Trust me, having the right gear can make or break the baking process—especially when it comes to baking evenly and not overdoing it.
Prepping Before You Bake
Okay, now that your ingredients and tools are lined up, let’s talk prep. This step is crucial but often overlooked. If you prep right, everything else will flow smoothly.
Prepping the Pan
First, line your baking pan with parchment paper or lightly grease it with butter or nonstick spray. This prevents sticking and makes it super easy to lift the brownies out once they’re cooled.
Pro tip: Let the parchment hang over the edges of the pan to create “handles.”
Preheating the Oven
Always preheat! Brownies need consistent heat from the start to cook evenly. Preheat your oven to 350°F (175°C) while you’re prepping the batter.
Mise en Place (Everything in Place)
This means measuring all your ingredients before you start mixing. It sounds fussy, but it actually saves time and keeps you from missing steps—especially helpful when you’re dealing with melted chocolate that can seize up fast.
Step-by-Step Brownie Recipe
Ready to bake? Here’s where the magic happens. Follow these steps carefully, and you’ll get that irresistible, bakery-style brownie every single time.
Step 1: Melting the Chocolate and Butter
In a medium saucepan over low heat, melt 1/2 cup unsalted butter and 1/2 cup semi-sweet or dark chocolate chips (or chopped chocolate). Stir constantly until smooth and fully combined. Don’t rush this step—burnt chocolate is no one’s friend.
Pro tip: You can also do this in the microwave in 30-second bursts, stirring in between. Just make sure it doesn’t overheat.
Once it’s melted, let it cool for a couple of minutes. Adding eggs to hot butter can scramble them, and no one wants that in their brownies.
Step 2: Mixing in the Sugar
Once the chocolate mixture has slightly cooled, stir in 1 cup of granulated sugar. This is what gives brownies their glossy top. Stir until well combined. The sugar should melt slightly into the warm mixture, which is key to that signature crackly crust on top.
Want an extra deep flavor? You can mix in 1 teaspoon of espresso powder at this stage—it won’t make your brownies taste like coffee, but it will seriously boost the chocolate flavor.
Step 3: Adding the Eggs
Add 2 large eggs, one at a time, beating well after each addition. This step adds richness and binds the ingredients together. Don’t skip the beat—it’s what makes your brownies rise just enough without becoming cakey.
Then, mix in 1 teaspoon of vanilla extract for a layer of warm, aromatic depth.
Step 4: Incorporating the Dry Ingredients
In a separate bowl, whisk together:
- 2/3 cup all-purpose flour
- 1/4 cup unsweetened cocoa powder
- 1/4 teaspoon salt
Gently fold the dry ingredients into the wet batter using a spatula or wooden spoon. Don’t overmix. Just stir until you no longer see flour streaks. Overmixing at this point can lead to tough, dry brownies.
The batter should be thick and glossy—resist the temptation to add more liquid!
Step 5: Optional Add-ins
Now’s your time to get creative. Fold in up to 1/2 cup of your favorite add-ins, like:
- Chopped nuts (walnuts, almonds, pecans)
- Extra chocolate chips
- White chocolate chunks
- Caramel bits
- Crushed Oreos or candy bars
Want to impress? Try swirling in peanut butter, Nutella, or cream cheese. Just drop spoonfuls on top of the batter and swirl gently with a knife.
Step 6: Pouring into the Pan
Pour the batter into your prepped 8×8-inch pan. Use a spatula to smooth the top evenly—this ensures even baking and helps create that picture-perfect top crust.
Optional touch: Sprinkle sea salt or chocolate chips on top for added texture and flavor.
Step 7: Baking to Perfection
Slide your pan into the preheated 350°F (175°C) oven and bake for 25 to 30 minutes.
Here’s the trick: Start checking at the 25-minute mark. Insert a toothpick in the center—if it comes out with a few moist crumbs (not wet batter), they’re done. If it comes out completely clean, they may be slightly overbaked.
Fudgy brownies? Pull them out at around 25–26 minutes.
Cakier brownies? Let them go closer to 30–32 minutes.
Remember, brownies keep cooking slightly even after you pull them from the oven. Slightly underdone = chewy heaven.
Step 8: Cooling and Cutting
This step is a game-changer. Let the brownies cool in the pan for at least 30 minutes before cutting. If you rush it, they’ll fall apart or turn gummy.
For cleaner cuts:
- Let them cool completely
- Use a sharp knife
- Wipe the blade between each slice
Want super-defined squares? Pop the cooled brownies in the fridge for 20 minutes before slicing.
Pro Tips for Perfect Brownies Every Time
Want to level up your brownie game? Keep these tips in your back pocket:
- Use room temperature eggs and butter – This helps everything mix more evenly.
- Don’t overmix – Especially after adding the flour. Stir just until incorporated.
- Avoid opening the oven door while baking – It lets out heat and can mess up the texture.
- Let them cool fully – Patience pays off. Warm brownies are messy to cut and finish baking as they sit.
Bonus tip: For extra fudginess, replace a tablespoon or two of flour with cocoa powder.
How to Customize Your Brownies
Brownies are a blank canvas for creativity. Here are some fun ways to switch things up:
Add Flavors:
- Mint extract for peppermint brownies
- Orange zest for a citrus twist
- Chili powder or cayenne for a Mexican hot chocolate vibe
Add Texture:
- Swirls: Peanut butter, caramel, or cream cheese
- Crunch: Pretzels, toffee bits, or cereal like Rice Krispies
Make Them Vegan or Gluten-Free:
- Use flax eggs or applesauce instead of regular eggs
- Swap flour with almond flour or gluten-free blend
- Use coconut oil or vegan butter in place of dairy
You don’t need to stick to tradition—your brownies, your rules.
Common Mistakes to Avoid
Even though brownies are one of the easiest desserts to make, a few simple mistakes can turn them into a dry, crumbly mess or a soggy, undercooked disaster. Let’s break down the most common brownie-baking blunders—and how to avoid them.
1. Overmixing the Batter
This is probably the biggest culprit behind dense, tough brownies. When you overmix flour into the batter, you develop too much gluten, which makes the final product chewy in the worst way. The moment the flour disappears, stop mixing. Seriously—put the spoon down.
2. Using Cold Ingredients
Trying to mix cold eggs or butter into warm chocolate? Recipe for disaster. Cold eggs can cause the chocolate to seize, turning it into a lumpy mess. Always use room temperature eggs and softened butter unless the recipe tells you otherwise.
3. Overbaking
Repeat after me: slightly underbaked is better than overbaked. Brownies continue to cook as they cool, so pulling them out at the right time is crucial. If you wait until the toothpick comes out totally clean, chances are you’ve baked them too long.
4. Cutting Too Soon
I get it—you want to dig in immediately. But cutting hot brownies is like slicing cake fresh out of the oven: it’s going to fall apart. Give them time to set. Pop them in the fridge for cleaner, sharper slices.
5. Not Prepping the Pan Properly
If you skip greasing the pan or forget to line it with parchment paper, you’ll regret it later. There’s nothing worse than delicious brownies stuck to the pan. Always prep before pouring in the batter.
Storing Your Brownies
Got leftovers? First of all, congrats on not eating the whole pan in one sitting. Second, let’s make sure those extra brownies stay just as fresh and fudgy tomorrow (or next week).
Room Temperature Storage
For short-term storage (up to 4 days), keep brownies in an airtight container at room temperature. Layer them with parchment or wax paper if you’re stacking. This helps keep the tops from sticking.
Refrigeration
Want to extend their shelf life by a few days? Store them in the fridge. The texture will become slightly firmer and chewier, which some people actually prefer. Just be sure they’re in a sealed container to avoid absorbing fridge smells.
Freezing Brownies
Yes, brownies freeze beautifully. Here’s how:
- Let them cool completely.
- Cut into squares.
- Wrap each piece tightly in plastic wrap.
- Place in a freezer-safe zip-top bag.
They’ll keep for up to 3 months. When you’re ready to eat, thaw at room temp or pop in the microwave for 15–20 seconds for a warm treat.
How to Serve Chocolate Brownies
Okay, so you’ve baked the perfect batch. Now what? While brownies are pretty incredible on their own, there are so many ways to dress them up and serve them like a pro.
1. Classic and Simple
Nothing wrong with grabbing a brownie and going to town. Enjoy it plain with a glass of milk or a hot cup of coffee. It’s timeless.
2. A la Mode
Want to impress guests—or just yourself? Warm up a brownie and serve it with a scoop of vanilla ice cream. Drizzle with chocolate or caramel sauce, and you’ve got yourself a 5-star dessert.
3. Brownie Sundae Bar
Hosting a party? Set up a brownie sundae bar with:
- Ice cream options
- Whipped cream
- Chopped nuts
- Sprinkles
- Fruit
- Hot fudge
Let guests build their own masterpiece.
4. Brownie Trifle
Layer brownie chunks with whipped cream, pudding, and berries in a glass for an Instagram-worthy dessert. Bonus: you can use slightly overbaked or dry brownies this way.
5. With Coffee or Wine
Yes, wine! Pair rich, dark chocolate brownies with a bold red like Cabernet Sauvignon or a port for a grown-up indulgence. Coffee also makes the chocolate flavor pop even more.
Chocolate Brownie Variations
Once you’ve nailed the classic version, it’s time to mix it up! Here are a few fun and delicious brownie twists you can try next:
Salted Caramel Brownies
Swirl in homemade or store-bought salted caramel sauce before baking. Sprinkle a little flaky sea salt on top after baking for that perfect sweet-salty combo.
Peanut Butter Swirl Brownies
Melt peanut butter slightly and drizzle it over the top of the batter. Use a knife to create beautiful swirls before baking. It’s rich, nutty, and completely addictive.
Espresso Infused Brownies
Add 1 teaspoon of instant espresso powder to the batter to boost the chocolate flavor and add a subtle coffee kick. Perfect for grown-up palates.
Mint Chocolate Brownies
Stir in chopped mint chocolate candies (like Andes mints) or a splash of mint extract. Great for the holidays or whenever you’re craving something refreshing.
Cheesecake Brownies
Drop dollops of sweetened cream cheese over the top of the brownie batter and swirl before baking. It’s a decadent combo that’s always a crowd-pleaser.
Why Homemade Wins Over Box Mix
Sure, boxed brownies are convenient, and yes, they can be pretty tasty. But when you make brownies from scratch, you get full control over every ingredient—and the difference is noticeable.
Better Ingredients
You get to pick the quality of your chocolate, the richness of your butter, and how much sugar goes into the mix. No preservatives, no weird additives—just pure, rich flavor.
Customizable
Love fudgy brownies? You can tweak the ratios to make them exactly how you like. Want to add a caramel swirl or make them gluten-free? Go for it.
Satisfaction
There’s just something satisfying about baking from scratch. The smell, the process, the “I made this!” moment—it’s therapeutic, creative, and rewarding.
FAQs about Chocolate Brownies Recipe
1. How do I make brownies more fudgy?
Use less flour, more butter, and skip the baking powder. Also, don’t overbake—pull them out when the center is just set.
2. Can I double this recipe for a larger crowd?
Absolutely! Double all the ingredients and use a 9×13-inch pan. Add 5–10 minutes to the baking time, but keep an eye on them.
3. What’s the best way to cut clean brownie squares?
Cool completely, chill for 20 minutes, then use a sharp knife. Wipe the knife between cuts for super clean edges.
4. Can I make brownies without eggs?
Yes! Use flax eggs (1 tbsp flaxseed + 2.5 tbsp water per egg) or applesauce as a substitute. The texture might change slightly, but it works.
5. How long will homemade brownies stay fresh?
They’ll stay fresh at room temperature for 3–4 days, in the fridge for about a week, and in the freezer for up to 3 months.
Conclusion
There you have it—your complete, step-by-step guide to making the best chocolate brownies of your life. From understanding fudgy vs. cakey, to nailing the ingredients, to customizing your creation, you now have everything you need to become a brownie pro.
So what are you waiting for? Grab your whisk, preheat that oven, and treat yourself (and your lucky friends or family) to a warm, chocolatey slice of happiness. And remember, baking isn’t just about following rules—it’s about having fun, experimenting, and making something you love.
Whether you’re baking for a crowd, prepping for a cozy night in, or just need a little chocolate therapy, this brownie recipe has got your back.