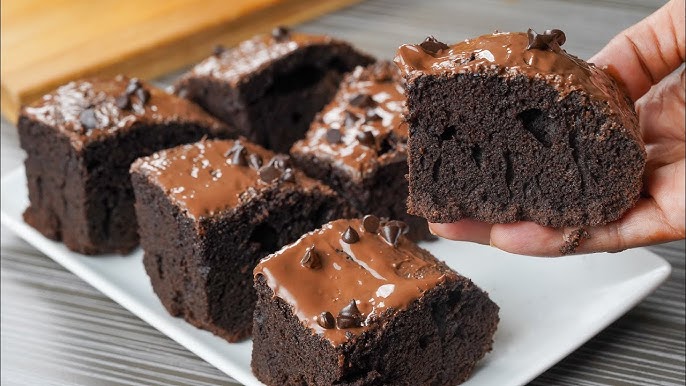
Chocolate Brownies Recipe: There’s something absolutely magical about chocolate brownies. That rich, gooey texture. The intense chocolate flavor. The slightly crisp edges with a soft, chewy center. Whether you’re baking for a special occasion, a family gathering, or just treating yourself, brownies never disappoint.
Why do we love them so much? It’s simple. Brownies are the perfect intersection between cake and fudge. They’re easy to make, customizable, and an instant crowd-pleaser. You don’t need fancy techniques or rare ingredients—just a little love for chocolate and a basic understanding of baking.
In this step-by-step guide, you’ll learn exactly how to make the best homemade chocolate brownies. This isn’t just any recipe—this is a no-fail, mouthwatering formula for success. Whether you’re a beginner or a seasoned home baker, follow along as we break down each part of the process with precision, passion, and a sprinkle of sweetness.
Ingredients You’ll Need
Let’s get real: a good brownie starts with great ingredients. You don’t need a massive list—just a handful of pantry staples, each playing a critical role in flavor and texture.
Dry Ingredients
- All-Purpose Flour (½ cup): This provides structure but keeps the brownies soft and chewy. Use too much and they turn cakey, so measure carefully.
- Unsweetened Cocoa Powder (⅔ cup): The heart of the brownie. Go for high-quality cocoa—it gives your brownies a deep, rich flavor.
- Granulated Sugar (1 cup): Besides sweetness, sugar also helps with that classic crackly top.
- Salt (½ tsp): A pinch of salt balances the sweetness and enhances the chocolate flavor.
- Baking Powder (optional, ¼ tsp): If you prefer a slightly cakier texture, you can add baking powder—but skip it for fudgy brownies.
Wet Ingredients
- Large Eggs (2): Eggs bind the ingredients and contribute to the texture. For extra fudgy brownies, don’t overbeat them.
- Unsalted Butter (½ cup, melted): Butter gives the brownies richness and depth. Always melt it before mixing.
- Vanilla Extract (1 tsp): It enhances all the other flavors—don’t skip it.
Optional Add-ins and Toppings
These are for personalization. Mix and match based on your cravings:
- Chocolate Chips or Chunks: Add them to the batter for gooey chocolate pockets.
- Nuts (like Walnuts or Pecans): Adds crunch and depth.
- Sea Salt Flakes: Sprinkle on top before baking for a fancy, flavor-popping twist.
- Caramel Drizzle or Peanut Butter Swirl: Drizzle or swirl these into the batter before baking for a gourmet vibe.
With these ingredients in your kitchen, you’re already halfway to brownie heaven.
Tools You’ll Need
Making brownies doesn’t require a commercial kitchen setup, but having the right tools makes everything smoother and more fun.
Here’s what you’ll need:
- Mixing Bowls: One large and one medium for wet and dry ingredients.
- Measuring Cups and Spoons: Precision is key, especially for flour and cocoa powder.
- Whisk and Spatula: A whisk for mixing the wet ingredients and a spatula for folding everything together.
- Baking Pan: An 8×8 or 9×9-inch square pan is perfect. Metal pans yield crispier edges than glass or ceramic.
- Parchment Paper: Line your pan to make removal and cleanup a breeze.
Optional but helpful:
- Cooling Rack: Speeds up the cooling process.
- Offset Spatula or Knife: For smooth spreading of the batter and clean slicing after baking.
Before we dive into mixing and baking, make sure you’ve got everything ready and organized. This makes the whole process much smoother and more enjoyable.
Step-by-Step Guide to Making Chocolate Brownies
Let’s get to the heart of this delicious journey. Follow these steps closely and you’ll bake brownies so good, people will think you bought them from a fancy bakery.
Step 1 – Preheat Your Oven
Always, always start by preheating your oven. Set it to 350°F (175°C).
Why is this important?
A properly preheated oven ensures even baking from the start. If you toss your brownies into a cold oven, the batter heats unevenly and can result in dry edges and undercooked centers.
Pro Tip: Place the oven rack in the center to allow for even heat circulation.
Step 2 – Prepare the Baking Pan
Now line your square baking pan (8×8 or 9×9 inches) with parchment paper. Let the paper hang over the sides so you can easily lift the brownies out after baking.
Alternatively, you can:
- Grease the pan with butter or non-stick spray if you don’t have parchment.
- Lightly dust it with cocoa powder to avoid a white flour coating.
This step helps with clean removal and prevents sticking. Trust me—you don’t want to wrestle brownies out of a pan.
Step 3 – Mix the Dry Ingredients
In a medium-sized mixing bowl, sift together the dry ingredients:
- ½ cup all-purpose flour
- ⅔ cup unsweetened cocoa powder
- 1 cup granulated sugar
- ½ tsp salt
- (Optional) ¼ tsp baking powder if you want them slightly cakey
Why sift? Sifting breaks up any lumps—especially in cocoa powder—and ensures all the dry ingredients mix evenly. You want a smooth batter with no powdery pockets.
After sifting, gently whisk the ingredients together. Be careful not to spill the cocoa—it’s notorious for making a mess. Once combined, set the bowl aside. You’ve now got a uniform dry base for your brownies, ready to meet the wet ingredients.
Pro tip: If you’re doubling the recipe, still mix your dry ingredients in a separate bowl to keep things balanced and avoid clumping when combining.
Step 4 – Mix the Wet Ingredients
Grab a large mixing bowl—it’s time to work on the magic part of this recipe.
Add the following:
- 2 large eggs
- ½ cup melted unsalted butter (let it cool slightly before adding)
- 1 tsp vanilla extract
Start by whisking the eggs thoroughly until they’re light and slightly frothy. This helps build structure and gives your brownies that shiny, crackled top.
Now slowly pour in the melted butter while continuing to whisk. You don’t want the eggs to cook, so make sure the butter isn’t too hot.
Finally, mix in the vanilla extract. It may seem like a minor addition, but vanilla brings out the richness in the chocolate and gives your brownies a more balanced flavor profile.
Whisk everything together until it looks smooth, creamy, and golden. This mixture is the glue that holds your brownies together—and the flavor foundation they’ll build on.
Optional add-in: If you want an extra-deep flavor, add 1 tsp of instant espresso powder. It doesn’t make the brownies taste like coffee—it just intensifies the chocolate.
Step 5 – Combine Wet and Dry Ingredients
Now it’s time to bring it all together.
Take your bowl of dry ingredients and slowly add it to the wet mixture, about a third at a time. Use a spatula (not a whisk) to fold everything together gently.
Why a spatula? Because whisking can overmix the batter, leading to tough, dry brownies. Folding keeps things airy and smooth.
As you mix, you’ll notice the batter getting thick—this is normal. Brownie batter is denser than cake batter and should have a glossy, rich texture.
Important Tips:
- Don’t overmix! Stop once you don’t see any more flour streaks.
- If adding chocolate chips or nuts, fold them in at this stage. Aim for about ½ to 1 cup of add-ins, depending on your taste.
This step is where the real transformation begins. You’re no longer looking at ingredients—you’re looking at future brownies. Fudgy, gooey, chocolatey heaven in the making.
Step 6 – Add Optional Mix-ins
Here’s where things get fun—customizing your brownies to match your cravings.
Whether you want extra chocolate, crunch, or a flavor twist, here are some incredible mix-ins to fold into your brownie batter:
- Chocolate Chips or Chunks (½ to 1 cup): These melt into gooey pockets and amplify the chocolate flavor. You can use semi-sweet, dark, or even white chocolate.
- Chopped Nuts (½ cup): Walnuts and pecans are classic choices. They add a delightful crunch and nutty contrast to the rich, fudgy texture.
- Marshmallows: If you love rocky road brownies, toss in some mini marshmallows. They’ll puff up and caramelize slightly in the oven.
- Peanut Butter Swirl: Drop spoonfuls of peanut butter into the batter and gently swirl it with a knife before baking. It adds a salty, creamy twist.
- Caramel Drizzle: Same method—swirl in caramel before baking for ribbons of sweetness.
- Sea Salt Flakes: Sprinkle a pinch over the top of the batter before baking to balance the sweetness and elevate the chocolate flavor.
Mix-ins should be gently folded in right after the dry and wet ingredients are fully combined. Overmixing at this stage can deflate the batter and affect texture, so go easy.
Want to go bold? Try crushed cookies, toffee bits, or even a splash of bourbon. The sky’s the limit.
Step 7 – Pour Batter Into Pan
Now it’s time to transfer that luscious, chocolatey batter into your prepared baking pan.
Steps:
- Scrape the batter into the pan using a spatula.
- Spread it evenly into the corners and edges. Use an offset spatula or the back of a spoon to level the top.
- If you’re topping with anything (like extra chocolate chips, nuts, or sea salt), now’s the time to sprinkle it on.
This is the moment when your kitchen starts to smell like a dessert café. Don’t skip the parchment paper—it makes lifting out and cutting the brownies 10x easier later on.
Pro tip: Tap the pan gently on the counter once or twice. This releases any trapped air bubbles and helps the batter settle evenly.
Step 8 – Bake to Perfection
Slide the pan into your preheated oven at 350°F (175°C) and set a timer for 25 to 30 minutes.
Here’s how to know when they’re done:
- Fudgy Brownies: Bake for about 25 minutes. The center will look slightly underdone but will firm up as it cools.
- Cakey Brownies: Go for 30–32 minutes. A toothpick inserted in the center should come out with just a few moist crumbs.
Avoid overbaking—they’ll dry out quickly. The sweet spot is when the edges pull away slightly from the pan, and the top has a beautiful, shiny, crackled crust.
Resist the urge to open the oven too early; it drops the temperature and can cause uneven baking.
Step 9 – Cool and Slice
Once out of the oven, place the pan on a cooling rack and let the brownies rest for at least 30 minutes to 1 hour.
Why wait? Hot brownies are gooey and fragile. Cooling helps them set properly, develop flavor, and slice cleanly.
To remove them:
- Grab the parchment overhang and lift the whole slab out.
- Place it on a cutting board.
- Use a sharp knife to slice. For cleaner cuts, wipe the blade between each slice.
Want perfect edges? Chill the brownies in the fridge for 30 minutes before slicing.
Brownie Slicing Tips:
- For 9 square brownies: 3×3 grid
- For 12 smaller bars: 3×4 grid
- For bite-sized: 4×4 grid (16 pieces)
Step 10 – Serve and Enjoy
You did it! Your brownies are ready to devour. Serve them warm, room temp, or chilled—there’s no wrong way.
Here are a few ways to enjoy them:
- With Ice Cream: A scoop of vanilla or salted caramel ice cream on warm brownies? Game-changer.
- Drizzled with Sauce: Chocolate ganache, caramel, or even raspberry sauce takes them to the next level.
- As a Dessert Bar: Add to a dessert table at parties or wrap individually for favors or snacks.
Whether it’s for a late-night treat, bake sale, or weekend indulgence, these brownies will win over anyone who takes a bite.
Tips for the Perfect Brownies
Even though brownies are one of the easiest desserts to make, there are a few secret tricks that separate good brownies from legendary ones. If you’re aiming for that irresistible texture and deep flavor, don’t skip these pro tips.
1. Fudgy vs. Cakey – Know What You Want
This recipe leans toward fudgy brownies, but if you prefer a lighter, cake-like texture, you can tweak it easily.
- For fudgy brownies: Use more butter and less flour. Stick with melted butter and don’t add baking powder.
- For cakey brownies: Add ¼ tsp of baking powder and use 3 eggs instead of 2. Whip the eggs well to incorporate air.
Small ingredient changes make a big difference—so decide what kind of brownie experience you’re craving.
2. Don’t Overmix the Batter
Once you combine the wet and dry ingredients, mix just until combined. Overmixing develops the gluten in the flour and makes the brownies tough or rubbery. We want tender, melt-in-your-mouth bites—not bread!
Use a spatula and gently fold everything together. A few tiny lumps are fine, and they’ll bake out.
3. Use Quality Ingredients
Brownies are simple, so the quality of each ingredient really matters:
- Cocoa powder: Go for unsweetened, high-quality cocoa like Ghirardelli, Hershey’s Special Dark, or Dutch-processed cocoa.
- Butter: Unsalted and fresh gives you full control of the salt levels.
- Vanilla extract: Pure vanilla, not imitation. The flavor boost is worth it.
You’ll taste the difference in every bite.
4. Use the Right Pan
Brownies bake best in metal square pans (8×8 or 9×9 inches). Glass or ceramic pans retain heat differently and can overbake the edges before the center is set.
If using glass, lower the oven temperature by 25°F to avoid overbaking.
5. Don’t Skip the Cooling Time
It’s tempting to dig in right away—but let your brownies rest. Cooling allows the structure to set and the chocolate flavors to deepen. You’ll also get cleaner cuts, especially if you chill them before slicing.
Common Mistakes to Avoid
Even a simple recipe can go sideways if you’re not careful. Let’s break down the most common brownie mistakes—and how to avoid them.
1. Overbaking
This is the number one reason for dry, crumbly brownies. Remember:
- Brownies keep baking after you remove them from the oven.
- Always check for moist crumbs on a toothpick—not a clean stick.
Pull them out slightly underbaked. The residual heat will finish the job.
2. Using Cold Ingredients
Don’t use cold eggs or butter right from the fridge.
- Cold eggs don’t mix evenly and can curdle the butter.
- Cold butter won’t mix well and can cause a greasy batter.
Let all ingredients come to room temperature before mixing for best results.
3. Substituting Key Ingredients
Avoid swapping ingredients unless the recipe specifically calls for it.
- Oil instead of butter? Not ideal here. You’ll lose the richness and flavor that butter provides.
- Skipping eggs? You’ll mess up the structure. For egg-free versions, use proper substitutes like flax eggs or commercial egg replacers.
- Too much flour? Easy mistake. Always spoon and level your flour—don’t scoop directly with the measuring cup.
Stick to the recipe as written for perfect results.
4. Not Measuring Accurately
This isn’t the time to eyeball things. Use measuring cups and level off dry ingredients with a knife. A little too much flour or cocoa can completely change the texture.
Variations You Can Try
Brownies are a blank canvas for creativity. Once you master the base recipe, here are a few fun variations to spice things up.
Nutty Brownies
Add ½ to 1 cup of chopped walnuts, pecans, or almonds into the batter. Toast the nuts beforehand for extra flavor. These add crunch and balance the richness.
Double Chocolate Brownies
Love chocolate? Add ½ cup of chocolate chips or chunks directly into the batter, or melt ¼ cup of chocolate with the butter. These turn your brownies into a chocoholic’s dream.
Peanut Butter Swirl Brownies
Swirl ¼ cup of creamy peanut butter into the top of the batter before baking. Use a knife to create beautiful marbled patterns. The salty-sweet combo is unbeatable.
Vegan or Gluten-Free Brownies
- Vegan: Use flax eggs (1 tbsp flaxseed meal + 3 tbsp water per egg), plant-based butter, and dairy-free chocolate.
- Gluten-free: Substitute a 1:1 gluten-free baking flour. Avoid almond or coconut flour unless the recipe is designed for it.
Mocha Brownies
Add 1 tsp of espresso powder to the batter to intensify the chocolate and add a subtle coffee kick.
Salted Caramel Brownies
Drizzle caramel sauce over the batter and sprinkle with sea salt flakes before baking. You’ll get gooey caramel swirls and a sweet-savory explosion.
The possibilities are endless—experiment and make the recipe your own.
Storage and Shelf Life
You’ve baked the perfect batch of brownies—but what if you have leftovers (as rare as that may be)? Don’t worry, brownies store well and can taste even better the next day if stored correctly.
Storing at Room Temperature
Brownies are best stored at room temperature if you plan to eat them within 3–4 days.
- How to store: Place them in an airtight container. You can stack them with parchment paper between layers to prevent sticking.
- Flavor tip: Letting brownies sit overnight helps the flavors meld and makes the texture even fudgier.
Keep them away from direct sunlight, heat, or humidity. A cool, dark place like a pantry is perfect.
Storing in the Refrigerator
If you want them to last a little longer—up to a week—refrigerate your brownies.
- Wrap them tightly in plastic wrap or store in a sealed container.
- They’ll firm up in the fridge, so if you prefer them soft, warm them for 10–15 seconds in the microwave before serving.
Freezing Brownies for Longer Shelf Life
Brownies freeze extremely well, making them perfect for prepping ahead or saving extra portions.
Here’s how to do it:
- Let the brownies cool completely.
- Wrap individual squares tightly in plastic wrap.
- Place the wrapped squares in a freezer-safe bag or airtight container.
- Label with the date and freeze for up to 3 months.
To enjoy again, thaw overnight in the fridge or for a few hours at room temperature. You can even microwave them straight from the freezer for 30–45 seconds for a warm, gooey treat.
Pro Tip: Freeze uncut brownie slabs for the best texture upon thawing, then slice as needed.
Nutritional Information (Per Serving)
Here’s a general breakdown for a single serving (1 brownie from a 9-piece batch) of classic chocolate brownies. Keep in mind this will vary slightly based on your ingredients and portion size.
| Nutrient | Amount |
|---|---|
| Calories | ~230–260 kcal |
| Total Fat | ~12–14g |
| Saturated Fat | ~7g |
| Carbohydrates | ~30g |
| Sugar | ~22g |
| Protein | ~3–4g |
| Fiber | ~2g |
| Sodium | ~90–110mg |
Important Note: This nutritional data is an estimate based on traditional ingredients. Adding extras like nuts, chocolate chips, or caramel will increase calorie and fat content.
If you need exact macros for dietary reasons, it’s best to plug your ingredient list into a nutritional calculator.
FAQs about Chocolate Brownies Recipe
1. How do I make brownies more fudgy?
Use more butter and less flour. Avoid baking powder and don’t overbake. Also, underbaking slightly will keep them moist and dense.
2. Can I double the recipe?
Absolutely! Just use a 9×13-inch pan and adjust the baking time to 35–40 minutes. Keep an eye on the edges and center for doneness.
3. Can I use oil instead of butter?
Technically yes, but butter gives richer flavor and a better texture. If substituting, use the same amount of vegetable or canola oil.
4. Why did my brownies turn out dry?
Overbaking is the most common cause. Check doneness earlier and remove them when the center is just set. Also, measure your flour properly.
5. What’s the best way to cut brownies cleanly?
Let them cool completely, use a sharp knife, and wipe the blade between each cut. For extra clean slices, chill them in the fridge first.
Conclusion
There you have it—the ultimate step-by-step guide to baking perfect chocolate brownies from scratch. Whether you’re craving a fudgy midnight snack, impressing guests with a dessert spread, or simply enjoying the act of baking something sweet and satisfying, this recipe has you covered.
With basic ingredients, easy steps, and endless room for creativity, brownies are a timeless classic you’ll return to again and again. Follow the tips, avoid the common mistakes, and don’t be afraid to get playful with mix-ins and flavors.
Because at the end of the day, brownies aren’t just dessert—they’re a warm, chocolatey hug in every bite.
So preheat that oven, grab your whisk, and get ready to bake your way into brownie bliss.