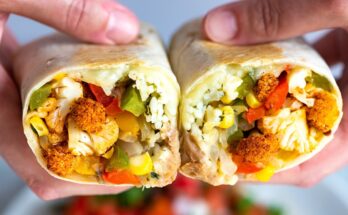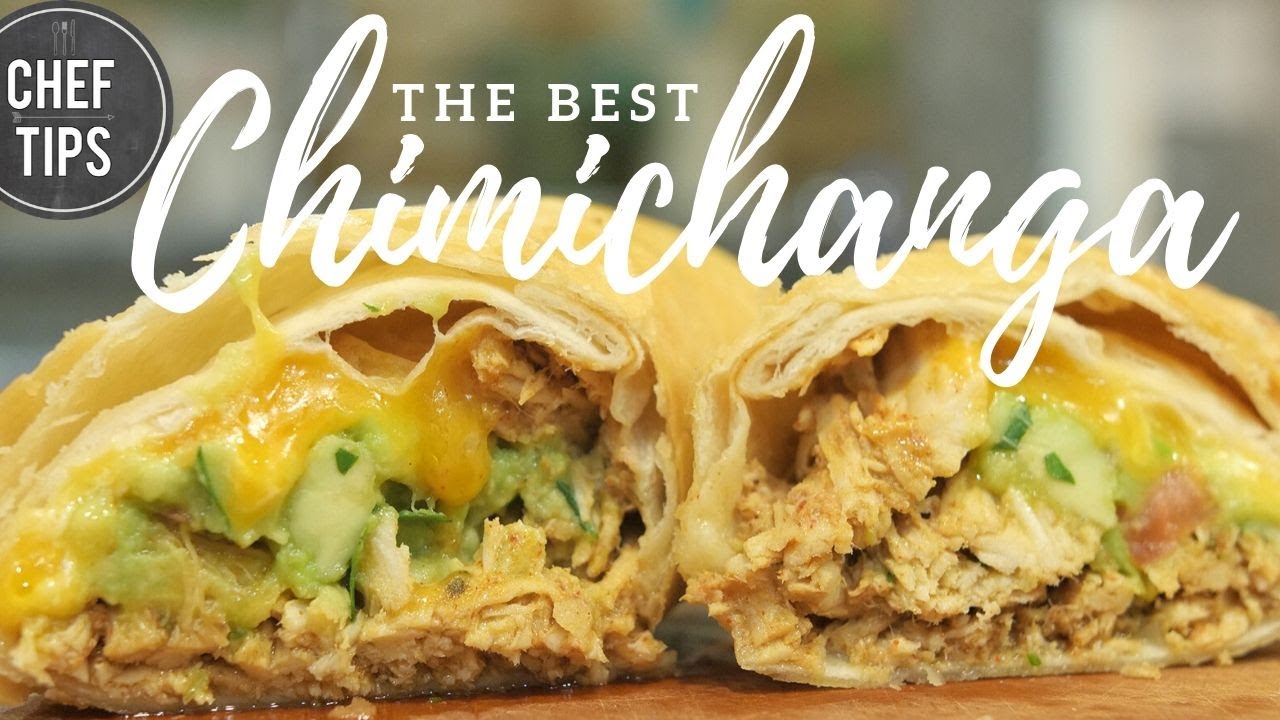
Chimichanga Recipe: Ever heard of a deep-fried burrito? Well, that’s basically a chimichanga! Crispy on the outside, juicy and flavorful on the inside, chimichangas are a beloved Tex-Mex specialty. They’re thought to have originated in the southwestern U.S. (Arizona or Texas, depending on who you ask), possibly by accident when a burrito fell into hot oil. Today, they’re enjoyed worldwide with endless variations.
Whether you’re craving a hearty meal or want to impress guests, a well-made chimichanga will never disappoint. Let’s dive into the process!
Ingredients for Chimichanga
Here’s what you’ll need to make delicious chimichangas. Feel free to customize based on your taste preferences.
Primary Ingredients:
- Flour tortillas (large, burrito-sized)
- Meat (shredded chicken, ground beef, or steak)
- Cheese (shredded cheddar, Monterey Jack, or a Mexican blend)
- Rice and beans (optional)
- Spices: Chili powder, cumin, garlic powder, paprika, salt, and pepper
Optional Ingredients for Variations:
- Sautéed onions and bell peppers
- Jalapeños for extra heat
- Avocado or guacamole
- Sour cream, salsa, or pico de gallo
Kitchen Tools and Equipment Needed
To make the cooking process smooth and stress-free, gather these tools in advance:
- Large frying pan or deep fryer
- Tongs or slotted spoon (for frying)
- Baking sheet (if opting to bake)
- Skillet (for cooking the filling)
- Sharp knife and cutting board
- Mixing bowls
- Paper towels (to absorb excess oil)
Pro tip: A kitchen thermometer is handy for monitoring oil temperature when frying. This ensures perfectly crisp chimichangas every time.
Preparing the Ingredients
Now that you have everything ready, it’s time to prep your ingredients!
1. Season the Meat:
Season your chicken, beef, or vegetarian protein with your favorite blend of spices. A basic Tex-Mex seasoning includes chili powder, cumin, paprika, and garlic powder. Let the meat marinate for at least 15 minutes to absorb the flavors.
2. Prepare the Tortillas:
Warm your flour tortillas slightly to make them more pliable. You can do this by microwaving them for 20 seconds or lightly heating them on a dry skillet.
3. Sauté the Vegetables (if using):
Heat a small amount of oil in a skillet, then sauté onions, bell peppers, or other veggies of your choice. Cook until they become soft and slightly caramelized.
Cooking the Filling
Here’s where the magic happens—making that irresistible chimichanga filling.
- Cook the Meat: In a skillet, add a bit of oil and cook your seasoned meat over medium heat until fully cooked. Shred or dice the meat into smaller pieces if needed.
- Add Vegetables and Spices: Mix in your sautéed veggies and additional spices for a well-rounded filling. Stir until everything is evenly coated in seasoning.
- Incorporate Cheese (optional): Stir in some shredded cheese for a gooey, melty texture. Let it melt slightly before turning off the heat.
Tip: Don’t overfill your tortillas; otherwise, they may burst during cooking!
Assembling the Chimichanga
Now it’s time to assemble your masterpiece. Here’s how to do it step by step:
- Lay Out the Tortilla: Place the warm tortilla flat on a clean surface.
- Add the Filling: Spoon the cooked meat and veggies onto the center of the tortilla. Add cheese, rice, and beans if desired.
- Fold the Tortilla: Fold in the sides of the tortilla, then roll it up tightly like a burrito. Make sure the ends are tucked in to keep everything secure.
Cooking Methods: Fried vs. Baked Chimichanga
You’ve got two main options for cooking: frying or baking. Each method has its own perks.
- Deep-Fried Chimichangas: This is the traditional method and results in a perfectly crispy, golden exterior.
- Baked Chimichangas: A healthier option with fewer calories. Baking still gives you a crunch, especially if you brush the tortillas with oil.
Let’s explore both methods in detail.
Deep-Frying the Chimichanga
- Heat the Oil: Fill a deep pot or fryer with oil (about 3 inches deep). Heat to 350°F (175°C).
- Fry in Batches: Gently place the rolled chimichanga into the oil. Fry for 3-4 minutes per side until golden brown and crispy.
- Drain Excess Oil: Use tongs to remove the chimichanga and let it drain on paper towels.
Safety Tip: Be careful when handling hot oil. Always use a thermometer to maintain a consistent temperature.
Baking the Chimichanga
If you prefer a lighter version, baking is a great alternative. Here’s how to do it:
- Preheat the Oven: Set your oven to 400°F (200°C). While it preheats, line a baking sheet with parchment paper or lightly grease it to prevent sticking.
- Prepare the Chimichangas: Brush each assembled chimichanga with oil or melted butter. This helps create a crispy, golden-brown surface.
- Bake: Place the chimichangas on the baking sheet, seam-side down. Bake for 20-25 minutes, flipping halfway through for even browning. They should be crispy and golden when done.
- Check for Doneness: Remove from the oven and let them cool slightly before serving. The tortilla should be crisp and slightly flaky.
Garnishing and Topping Ideas
Once your chimichangas are cooked to perfection, it’s time to elevate them with toppings! Adding garnishes gives them a burst of color, flavor, and texture.
Popular Garnish Ideas:
- Guacamole: Creamy and rich, guacamole adds a fresh, cooling contrast to the crispy chimichanga.
- Sour Cream: A dollop of tangy sour cream balances out the spice.
- Salsa or Pico de Gallo: Adds vibrant flavors and a juicy bite.
- Shredded Lettuce and Diced Tomatoes: For a refreshing crunch.
- Grated Cheese: Sprinkle extra cheese on top if you’re a cheese lover!
For a restaurant-style presentation, arrange the chimichangas on a plate, drizzle with sauces, and add a few sprigs of cilantro for color.
Serving Suggestions
Wondering what pairs well with chimichangas? Here are a few suggestions to complete your meal:
Side Dishes:
- Spanish Rice: Flavored with tomatoes, onions, and spices.
- Refried Beans: A classic side that complements any Tex-Mex dish.
- Corn on the Cob: Grilled and topped with butter or Mexican-style street corn seasoning.
- Chips and Queso: Crunchy tortilla chips served with a hot, cheesy dip.
Beverage Pairings:
- Horchata: A refreshing rice milk drink with cinnamon.
- Margaritas: A classic cocktail, either frozen or on the rocks.
- Iced Tea or Lemonade: A simple, refreshing option.
Chimichanga Variations
If you’re feeling adventurous, try out these creative variations to customize your chimichangas:
- Vegetarian Chimichanga: Skip the meat and use black beans, sautéed mushrooms, and plenty of cheese for a filling vegetarian option.
- Seafood Chimichanga: Swap the meat for shrimp or crab, seasoned with lime, garlic, and cilantro for a coastal twist.
- Breakfast Chimichanga: Fill the tortilla with scrambled eggs, breakfast sausage, and hash browns for a hearty morning meal.
- Sweet Chimichanga: Try a dessert version filled with sweetened cream cheese and fruit, then dusted with cinnamon sugar after frying.
The possibilities are endless!
Tips and Tricks for Perfect Chimichangas
Want to achieve chimichanga perfection every time? Keep these tips in mind:
- Avoid Overfilling: Too much filling can cause the tortilla to burst open during cooking.
- Secure the Tortilla: Make sure the edges are tucked in tightly to prevent leaks.
- Monitor Frying Temperature: Use a thermometer to maintain a steady oil temperature. If the oil is too hot, the chimichangas may burn; if it’s too cool, they’ll absorb excess oil and become soggy.
- Don’t Skip the Oil Brushing (for Baking): It helps create that irresistible crispy texture in the oven.
Small details like these make a big difference!
Storage and Reheating
If you have leftover chimichangas (which is rare because they’re so delicious), here’s how to store and reheat them properly.
Storage Tips:
- Wrap cooled chimichangas in foil or plastic wrap.
- Store them in an airtight container in the refrigerator for up to 3 days.
Freezing Instructions:
- Place wrapped chimichangas in a freezer-safe bag.
- Freeze for up to 3 months.
Reheating Methods:
- Oven: Preheat to 375°F (190°C) and bake for 15-20 minutes until heated through.
- Air Fryer: Reheat at 350°F (175°C) for 8-10 minutes to restore crispiness.
- Microwave: While convenient, microwaving may result in a soggier tortilla. To avoid this, wrap in a paper towel and heat in short bursts.
Nutritional Information
Chimichangas are undeniably delicious, but they can also be calorie-dense due to frying and cheese. Here’s a rough breakdown:
- Calories: 500-700 per serving (depending on size and ingredients)
- Protein: 20-30 grams
- Carbohydrates: 50-70 grams
- Fat: 20-40 grams
For a healthier version, opt for baked chimichangas and use lean protein, whole wheat tortillas, and reduced-fat cheese.
FAQs about Chimichanga Recipe
What is a chimichanga?
A chimichanga is a popular Mexican dish consisting of a tortilla wrapped around a filling, typically including meat, cheese, and beans. The wrapped tortilla is then deep-fried until crispy.
How do I prevent the tortilla from unwrapping while frying?
To keep the tortilla from unwrapping during frying, secure it with toothpicks after rolling. Make sure the ends are tucked in tightly. Remove the toothpicks after frying.
What are some common fillings for chimichangas?
Common fillings include shredded beef, chicken, pork, or seasoned beans. These are often combined with ingredients like cheese, rice, or vegetables.
Can I make a vegetarian chimichanga?
Yes, vegetarian chimichangas can be made using beans, cheese, tofu, or a mix of vegetables as the filling. Spice it up with Mexican seasoning for flavor.
Is there a way to make chimichangas healthier?
To make a healthier version, consider baking instead of frying. You can also use lean meats, low-fat cheese, and increase the amount of vegetables in the filling.
What sauces go well with chimichangas?
Popular sauces include salsa, guacamole, sour cream, and queso. Choose one or mix them to enhance the flavor of your chimichanga.
How can I store leftover chimichangas?
Leftover chimichangas can be stored in the refrigerator for up to three days. Reheat them in the oven or microwave for best results.
Conclusion
And there you have it—a step-by-step guide to making the perfect chimichanga! From preparing the filling to choosing your cooking method, each step plays a role in achieving a dish that’s crispy, flavorful, and satisfying. Now it’s your turn to get creative with toppings, fillings, and side dishes.
So, what are you waiting for? Give this recipe a try, and treat yourself to a Tex-Mex feast!