Chili Garlic Sauce Recipe: There are some condiments that sit quietly in the fridge, waiting for the occasional sandwich or snack night. Then there is chili garlic sauce, the bold, fiery jar that can wake up almost any meal with one spoonful.
It is spicy, garlicky, tangy, and deeply savory all at once. Think of it as the little black dress of your kitchen or the secret guitar riff in your favorite song—it fits almost anywhere and instantly makes everything more interesting.
Whether you are stirring it into noodles, brushing it over grilled chicken, folding it into marinades, or mixing it into mayo for a fast dipping sauce, this sauce earns its keep fast.
What Makes Homemade Chili Garlic Sauce Better Than Store-Bought
Store-bought chili garlic sauce is convenient, no doubt about that. You twist the lid, grab a spoon, and dinner gets a quick shot of heat. But convenience is not always the same thing as quality. A lot of commercial sauces are built for shelf stability first and flavor second, which means they can end up tasting overly processed, too salty, or strangely flat. Some brands push the vinegar so hard that it takes over the whole jar. Others rely on preservatives and thickeners that mute the freshness you actually want from a sauce like this. Homemade takes that problem off the table and hands the control back to you.
The biggest advantage is flavor clarity. When you make chili garlic sauce at home, every ingredient still has a voice. The chilies taste fruity, sharp, smoky, or grassy depending on the type you use. The garlic has real bite. The vinegar adds lift instead of shouting over everything. Even the texture feels more natural. You can keep it coarse and rustic for a more traditional feel, or blend it until smooth and glossy for a cleaner finish. That freedom matters, especially when you want a sauce that matches your cooking style instead of forcing your food to adapt to a generic store formula.
Cost is another quiet win. A homemade batch often gives you more sauce for less money, especially if chilies are in season where you live. And unlike store jars, your version does not have to be locked into one flavor profile. Want a sweeter edge? Add a little extra sugar. Want a sharper kick? Use more vinegar. Want deeper savoriness? A pinch more salt or a splash of soy can take it in that direction. It becomes your sauce, not just a copy of a label. Once you start making it from scratch, it feels less like a recipe and more like a kitchen staple you can shape any way you like.
Ingredients You’ll Need
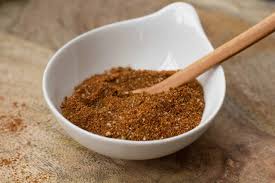
A great chili garlic sauce recipe starts with a short, practical ingredient list. Nothing here is complicated, but each item has a real job to do. The chilies provide the heat and body, garlic brings the signature punch, vinegar adds acidity and helps preserve the sauce, sugar balances the sharp edges, and salt pulls everything into focus. Water helps the mixture blend and cook evenly. Some cooks add oil, but this version keeps the base clean and versatile, so you can use it in stir-fries, dipping sauces, marinades, and noodle dishes without the texture getting too heavy.
Here is the full ingredient list you will need for a classic homemade batch:
- 250 grams fresh red chilies
- 12 to 15 garlic cloves
- 1/3 cup white vinegar or rice vinegar
- 2 tablespoons sugar
- 1 1/2 teaspoons salt
- 1/4 cup water
- 1 tablespoon tomato paste (optional, for color and body)
- 1 teaspoon sesame oil or neutral oil (optional, for a smoother finish)
That is the foundation. The beauty of this list is that it is flexible without becoming confusing. You can swap white vinegar for rice vinegar if you want a slightly softer tang. You can reduce the number of hot chilies and replace some with mild red peppers if you want the sauce more flavorful than fiery. You can add a touch of tomato paste if you want a richer red color, though it is not essential. What matters most is using fresh ingredients, especially the garlic and chilies, because they shape the final flavor more than anything else. A tired clove of garlic or a soft, aging chili will show up in the taste.
This ingredient list also keeps the recipe beginner-friendly. You do not need stabilizers, specialty powders, or unusual additives. A straightforward sauce often tastes better because it leaves room for the chilies and garlic to shine. Once you get comfortable with the basic version, you can start adjusting it like a musician improvising on a familiar melody. But first, build a strong base. That is where the best homemade sauces begin.
Fresh Ingredients
The fresh ingredients are the heart of this sauce, and they deserve a little attention before you dive in. First up are the fresh red chilies, which give the sauce its color, personality, and heat. Not all red chilies taste the same. Some are sharp and aggressive, while others have a sweeter, almost fruity note behind the fire. That means the type you choose will shape the final result in a big way. Red jalapeños, Fresno peppers, cayenne peppers, or Thai red chilies can all work, either alone or in combination. Mixing varieties is often the easiest way to build a sauce with both depth and heat instead of pure burn.
Then comes garlic, the ingredient that turns this from a simple chili sauce into a true chili garlic sauce. Use fresh, firm cloves with tight skin and no green shoots if possible. Garlic that is old or sprouting can taste bitter, and in a sauce this simple, there is nowhere for that bitterness to hide. Fresh garlic adds a sharp, savory warmth that softens beautifully once cooked. It is not just background flavor here. It is one of the co-stars, standing shoulder to shoulder with the chilies.
If you decide to make a milder version, fresh red bell pepper can also help. It stretches the sauce, adds natural sweetness, and keeps that bright red color without increasing the heat. That little trick is especially useful if you are cooking for a family or anyone who likes flavor more than intensity. Fresh ingredients are not just a line item on a shopping list in this recipe. They are the whole personality of the sauce. Choosing good ones is like choosing good coffee beans or ripe tomatoes—the better the starting point, the more alive the final result feels.
Pantry Staples
The pantry ingredients may look humble, but they do the quiet structural work that makes the sauce stable, balanced, and delicious. Vinegar is one of the most important. It adds brightness, helps preserve the sauce, and keeps the flavor from feeling heavy. White vinegar gives a sharper, cleaner acidity, while rice vinegar offers a gentler edge. Neither is wrong. It simply depends on the finish you want. A bolder sauce benefits from white vinegar, while a slightly smoother, more rounded version leans nicely toward rice vinegar.
Sugar plays an equally important role, even though some people are tempted to skip it. That would be a mistake. Sugar does not make the sauce sweet in a candy-like way. It softens the rough corners. Garlic and chilies can both be intense, and vinegar can be piercing. A little sugar acts like a referee, making sure no one ingredient dominates the match. Even two tablespoons can change the entire feel of the finished sauce, turning it from harsh into balanced.
Salt is the final flavor anchor. It sharpens the taste of the chilies, makes the garlic feel fuller, and keeps the sauce from tasting flat. Then there is water, which helps the ingredients blend into a smoother base and gives you better control during cooking. Optional additions like tomato paste and a touch of oil are useful but not mandatory. Tomato paste can enrich the color and add body, while a teaspoon of oil helps the sauce feel silkier. These pantry staples may not sound glamorous, but they are the support beams holding up the whole recipe. Without them, the sauce would taste loud but messy. With them, it tastes intentional.
Kitchen Tools That Make the Process Easier
You do not need a professional kitchen to make great homemade chili garlic sauce, but the right tools can make the job cleaner, faster, and a lot less frustrating. At minimum, you need a knife, cutting board, blender or food processor, saucepan, spoon, and a clean jar for storage. That sounds basic, because it is. This is one of those recipes where technique matters more than expensive equipment. Still, having the right setup can turn a slightly messy project into something smooth and enjoyable.
A sharp knife is more important than people think. Cutting chilies with a dull blade bruises them and makes prep slower. A sturdy cutting board is also essential, and it helps to keep one specifically for strong ingredients like garlic and chilies so the smell does not cling to everything else. A blender or food processor is where the sauce really starts to come together. A blender gives a smoother finish, while a food processor leaves a slightly chunkier texture. Both work well, so use what you have. If neither is available, a mortar and pestle can do the job, though the final sauce will be more rustic and textured.
For cooking, a small or medium saucepan works best. It gives the sauce enough room to bubble gently without splattering too much. A wooden spoon or heat-safe spatula helps you stir while the mixture thickens. And do not overlook the storage jar. A clean glass jar with a tight lid is ideal because it does not hold onto stains and odors the way plastic sometimes does. These tools may sound ordinary, but they support every step of the process. Good cooking often works that way. It is less about flashy equipment and more about a few reliable pieces that help you stay in control from start to finish.
Choosing the Right Chilies for Flavor and Heat
The chilies you pick will decide whether your sauce tastes bold and balanced or just wildly hot. That is why choosing them carefully matters. Many people assume all red chilies do the same job, but that is like saying all apples taste alike. Some chilies are bright and fruity, some are earthy, some are sharp, and some hit your tongue like a lightning bolt. A good chili garlic sauce should not only be spicy. It should have character. The goal is not just heat for heat’s sake. The goal is a sauce you actually want to eat again.
Fresno chilies are a great starting point because they bring color and moderate heat with a pleasant sweetness. Red jalapeños are another good option, especially if you want something milder and more rounded. Thai red chilies are much hotter, so they are perfect if you want the sauce to have serious fire. Cayenne peppers can also work, especially when mixed with milder chilies. Blending chili types is often the smartest move because it gives you layers. One variety contributes body, another adds brightness, and a third brings the kick. That mix is what gives homemade sauce a more complex flavor than many one-note bottled versions.
It also helps to think about seeds and membranes. Most of the heat lives there, so removing some will lower the intensity without stripping the peppers of their flavor. That gives you more control over the final result. Taste matters just as much as spice level, maybe more. A sauce that is painfully hot but bland gets old fast. A sauce that combines warmth, aroma, brightness, and depth becomes something you reach for constantly. Choosing chilies is really about setting the personality of the sauce before you even turn on the stove.
Mild, Medium, and Hot Chili Options
If you are not sure which chilies to use, it helps to break them into three easy categories: mild, medium, and hot. Mild options include red bell peppers and red jalapeños. These are useful when you want the sauce flavorful but approachable. They are especially good for people who enjoy spice in small doses or want a condiment that the whole household can use. Bell peppers on their own will not give you a true chili garlic sauce, but blending them with hotter chilies creates a softer, fuller sauce with better body.
Medium-heat chilies include Fresno peppers and some varieties of cayenne. These are often the sweet spot for home cooks because they deliver a lively kick without overwhelming every other flavor. The sauce still feels exciting, but you can spoon it over eggs, dumplings, or grilled meat without needing a glass of milk nearby. Medium chilies are a great base if you want balance and broad usability.
Then there are the hot options, like Thai red chilies or bird’s eye chilies. These are for people who want real intensity. Just a small amount can change the entire batch, so it is smart to mix them into milder peppers rather than using them all alone unless you know exactly how much heat you enjoy. Think of hot chilies as strong espresso: a little adds depth and drama, too much can make the whole thing harsh. The smartest approach for many home cooks is a blend—mostly medium chilies, a few hot ones, and perhaps one mild pepper for body. That combination gives you a sauce with flavor first and heat right behind it, which is exactly where the best sauces live.
How Garlic Changes the Character of the Sauce
Garlic is not just an add-on here. It is what gives the sauce its swagger. Without garlic, you would have a decent chili sauce. With garlic, you get something deeper, warmer, and more addictive. Garlic has a way of filling in the spaces between sharp heat and bright acidity, making the sauce taste more complete. At first bite, the chilies grab your attention, but garlic is what keeps the flavor lingering. It gives the sauce that savory backbone that makes it work with noodles, fried rice, grilled meat, roasted vegetables, and even simple toast with eggs.
Fresh garlic starts out pungent and aggressive, almost like it is daring the other ingredients to keep up. But once it is blended and gently cooked, that rough edge softens into something richer and sweeter without losing its identity. That transformation is one of the best parts of making this recipe from scratch. You get to taste the garlic move from raw punch to cooked depth. It is a bit like watching onions caramelize or coffee bloom in hot water. The ingredient opens up and reveals more of itself.
The amount of garlic also changes the mood of the sauce. Use just a few cloves, and the sauce leans more toward chili-forward. Use a dozen or more, and garlic becomes unmistakable, almost luxurious. That is the version many people fall in love with because it feels bold without being complicated. Garlic turns a hot condiment into something with texture and personality. In many ways, it is the bridge between heat and comfort. That is why a proper chili garlic sauce recipe should never be shy about using it.
Preparing the Ingredients Before You Start
Good prep makes this recipe easier, safer, and more consistent. Before you start blending or cooking anything, take a few minutes to organize your ingredients. That may sound small, but in a recipe built on strong flavors and fast movement, prep is what keeps things from turning chaotic. Chilies can irritate your skin, garlic gets sticky, and once the sauce starts cooking, you do not want to stop midway to measure vinegar or hunt for salt. A little setup up front saves you from a lot of scrambling later.
Start by rinsing the chilies well and patting them dry. Remove the stems, then decide how much heat you want to keep. For a hotter sauce, leave most of the seeds and membranes intact. For a milder one, scrape some out. Peel the garlic cloves and set them aside. Measure the vinegar, sugar, salt, and water into small bowls or cups so everything is ready to go. That approach may feel restaurant-like, but it works because it reduces guesswork. When you are dealing with a sauce that can thicken quickly, having ingredients prepped and waiting is a real advantage.
This stage is also the moment to think about ventilation. Cooking blended chilies can release strong fumes, so opening a window or switching on a kitchen fan is smart. Some people even wear gloves while cutting hot peppers, especially if they know their skin is sensitive. That is not being dramatic. It is just practical. Prep is where the recipe quietly wins or loses. A calm, organized start leads to a smoother process and a better final jar of sauce.
Washing, Peeling, and Cutting Tips
The simplest kitchen habits often have the biggest payoff, and that is especially true when preparing chilies and garlic. Wash the chilies under cool running water and dry them thoroughly so extra moisture does not thin your sauce more than necessary. Once they are dry, trim off the stems and slice them into smaller pieces. They do not need to be diced perfectly because the blender will do most of the work, but smaller pieces help the machine run more evenly. If you are using very hot peppers, touching your face afterward is a bad idea, so washing your hands well—or wearing gloves—can save you a lot of regret.
Peeling garlic is easier if you press each clove lightly with the flat side of a knife. The skin loosens quickly, and the clove is ready to use. Try to remove any green shoot in the center if the garlic is older, since that can bring bitterness. Keep the cloves whole or halve the larger ones so they blend more smoothly. At this point, you can also decide whether you want a chunkier or smoother final texture. Roughly cut ingredients tend to produce a slightly more rustic sauce, while smaller cuts make blending easier and more uniform.
These cutting tips may sound modest, but they directly affect how the sauce comes together. Even blending, controlled heat, and cleaner flavor all start here. Cooking is often like building a house—the final look gets all the attention, but the foundation does the real work. Proper washing, peeling, and cutting do not just make the recipe neater. They help the sauce taste brighter, blend better, and cook more evenly from the first minute to the last.
Step-by-Step Guide for Chili Garlic Sauce
The step-by-step method below is designed to keep things practical and clear. Each stage builds on the one before it, so by the end, you have a jar of sauce that tastes vivid, balanced, and homemade in the best possible way.
Step 1 – Prep the Chilies and Garlic
Wash the chilies thoroughly and remove the stems. Peel the garlic cloves and roughly chop them if needed. Depending on your heat preference, you can remove some of the chili seeds for a milder sauce or leave them in for a hotter result.
Step 2 – Blend the Base
Add the chilies, garlic, a little vinegar, and a small amount of water to a blender or food processor. Blend until you get a coarse or smooth mixture, depending on the texture you want. The vinegar helps preserve the sauce and adds a bright tangy flavor.
Step 3 – Cook the Sauce Slowly
Pour the blended mixture into a saucepan and place it over low to medium heat. Add salt, a little sugar, and more vinegar if needed. Let the sauce cook gently, stirring often, until it thickens slightly and the raw garlic flavor softens.
Step 4 – Balance the Flavor
Taste the sauce and adjust the seasoning. Add more salt for depth, more sugar to reduce sharpness, or more vinegar for extra tang. The goal is a balanced sauce that is spicy, garlicky, and slightly tangy.
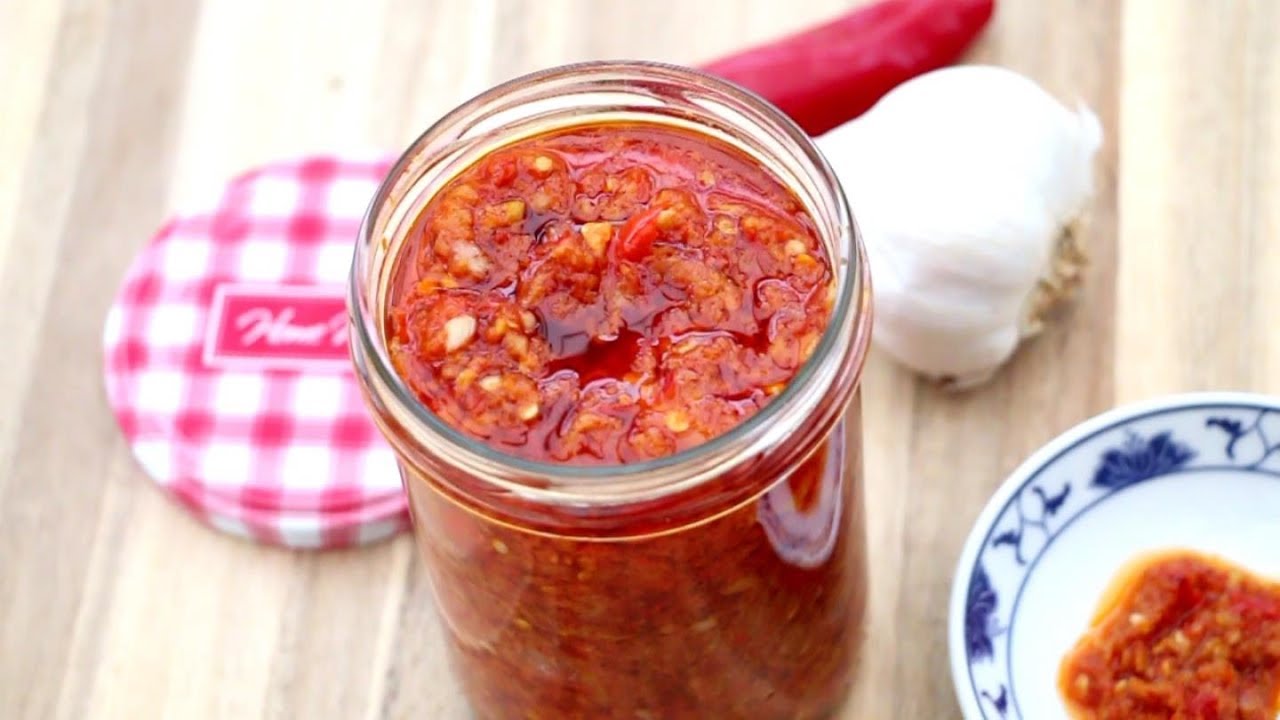
Step 5 – Cool, Bottle, and Store
Remove the sauce from the heat and let it cool completely. Transfer it to a clean jar or bottle and seal it tightly. Store the chili garlic sauce in the refrigerator and use it as needed for dipping, cooking, marinating, or drizzling over your favorite dishes.
Common Mistakes to Avoid
A few common mistakes can turn a promising batch of chili garlic sauce into something rough, bitter, or unbalanced. One of the biggest is using chilies without thinking about their flavor profile. Heat alone is not enough. If you use only extremely hot chilies, the sauce may become punishing rather than enjoyable. Another mistake is underestimating the garlic. Too little, and the sauce lacks depth. Garlic that is old or overcooked can push the sauce in the wrong direction fast.
Cooking at too high a temperature is another frequent issue. High heat can make the sauce reduce too quickly, scorch the sugars, and create bitterness in the garlic. A gentle simmer gives you more control and better flavor. Skipping the tasting step is also risky. Even a tested recipe needs a small adjustment now and then because ingredients vary. That spoonful of tasting at the end is not optional. It is the moment where good becomes great.
Poor storage habits can also shorten the life of the sauce. Using a dirty spoon in the jar, sealing it too hot, or storing it in a poorly cleaned container can affect both taste and freshness. These mistakes are easy to avoid once you know them. Homemade sauce is forgiving, but it still rewards attention. Treat it with care, and it will taste far better than something pulled off a shelf.
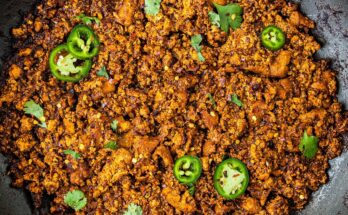
Best Ways to Use Chili Garlic Sauce
Once you have a jar of this sauce in the fridge, it starts showing up in all kinds of meals. That is part of its charm. It is not a single-purpose condiment. It is a flavor booster that can move from breakfast to dinner without missing a beat. Stir a spoonful into fried rice, drizzle it over scrambled eggs, toss it with noodles, or mix it into a marinade for chicken or tofu. It can sharpen soups, wake up roasted vegetables, and turn a basic dipping sauce into something memorable.
One of the best uses is mixing it with everyday ingredients. Stir it into mayonnaise for burgers and sandwiches. Blend it into yogurt for a cooling but spicy dip. Add it to soy sauce, honey, or lime juice for a fast glaze or dressing. In those combinations, the sauce becomes a flavor engine. It does not just add heat. It adds complexity. That is why so many people get hooked on keeping a jar around.
It also works beautifully with simple foods. A bowl of plain rice, crispy potatoes, grilled corn, or even avocado toast can transform with a dab of chili garlic sauce. That is when you know a condiment is doing real work. It is not hiding mediocre food. It is lifting everyday food into something brighter and more exciting. A good homemade jar rarely lasts long because it finds its way into everything.
Storage Tips and Shelf Life
Homemade chili garlic sauce stores best in a clean, airtight glass jar in the refrigerator. Under good conditions, it will usually keep well for about 2 to 3 weeks. The vinegar and salt help preserve it, but this is still a fresh homemade sauce, not a commercially stabilized product. Keeping the jar clean is essential. Always use a clean spoon when scooping from it, because introducing crumbs or moisture can shorten its life quickly.
You may notice the sauce thickens slightly after chilling, which is normal. If it becomes firmer than you like, let it sit at room temperature for a few minutes before using it, or stir in a tiny splash of warm water. Watch for obvious signs of spoilage such as off smells, mold, or unusual bubbling when the sauce is cold. Those are signs to discard it. Most batches disappear long before that happens, especially once people in the house discover how useful it is.
Freezing is also an option. Small portions frozen in an ice cube tray work especially well because you can thaw only what you need. That trick is handy for meal prep and keeps the sauce ready for quick weeknight cooking. A homemade sauce like this is all about making future meals easier, and proper storage helps it stay fresh, safe, and delicious every step of the way.
FAQs about Chili Garlic Sauce Recipe
1. What is chili garlic sauce?
Chili garlic sauce is a spicy, flavorful condiment made from fresh or dried chilies, garlic, vinegar, and seasonings. It is commonly used as a dipping sauce, cooking ingredient, or marinade.
2. Is chili garlic sauce very spicy?
It can be mildly spicy or very hot depending on the type and amount of chilies used. You can control the heat by reducing the seeds or choosing milder peppers.
3. Can I use dried chilies instead of fresh ones?
Yes, dried chilies can be used. They should usually be soaked in warm water first to soften them before blending.
4. Why is vinegar added to chili garlic sauce?
Vinegar adds tangy flavor and also helps preserve the sauce. It balances the heat and sharp garlic taste very well.
5. How do I make the sauce smoother?
Blend it for longer and add a little extra liquid if needed. Straining the sauce can also help create a smoother texture.
6. How long does homemade chili garlic sauce last?
When stored in a clean airtight jar in the refrigerator, it can last for about 1 to 2 weeks, depending on the ingredients and cleanliness during preparation.
7. Can I make it sweeter?
Yes, you can add a little sugar or honey to balance the heat and acidity. This is useful if you prefer a sweeter chili sauce.
8. What can I use chili garlic sauce for?
It is great for noodles, rice dishes, stir-fries, marinades, sandwiches, grilled meats, or as a dipping sauce.
9. Can I freeze chili garlic sauce?
Yes, you can freeze it in small portions for longer storage. This helps preserve the flavor and makes it easy to use whenever needed.
Conclusion
The real beauty of this recipe is control. You decide how spicy it should be, how smooth or chunky the texture should feel, and how sharp or mellow the finish should be. That kind of flexibility makes the sauce feel personal, not generic. Once you make it once, you start understanding how small changes shape the result, and that is where the recipe becomes truly yours.
From noodles and stir-fries to eggs, marinades, and dipping sauces, this homemade chili garlic sauce earns a place in the fridge fast. It is practical, bold, and endlessly useful. One batch can transform a week of meals, and every spoonful reminds you that simple ingredients, treated well, can create something unforgettable.