Chili Dog Recipe: There’s something absolutely magical about a well-made chili dog. It’s the kind of comfort food that brings together juicy hot dogs, warm fluffy buns, and spicy, savory chili in a way that’s impossible to resist.
Whether you’re cooking for a backyard gathering, game day, or just treating yourself to a classic indulgence, this ultimate chili dog recipe will walk you through every step—from simmering the chili to perfectly assembling your dogs.
What is a Chili Dog?
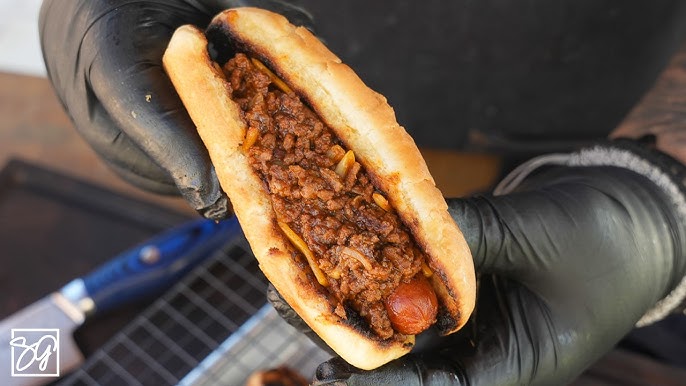
A chili dog is basically a hot dog that’s taken up several notches. At its core, it’s a grilled or steamed hot dog nestled in a soft bun, then generously topped with a rich, meaty chili. But the real charm is in the details. That chili isn’t just any ordinary bowl of beans—it’s typically bean-free, thick, and packed with savory spices and ground meat. Top it off with chopped onions, shredded cheese, or even jalapeños, and you’ve got yourself a handheld masterpiece of flavor.
The Popularity of Chili Dogs in American Cuisine
Chili dogs are as American as baseball and apple pie. They gained massive popularity in the early 20th century and have remained a beloved staple at diners, food trucks, and ballparks ever since. Some cities even claim their own regional variations—Detroit’s Coney dog, for example, or the Texas chili dog. Regardless of where you’re from, one thing’s for sure: chili dogs are here to stay.
Ingredients You’ll Need
Getting your ingredients right is the key to nailing that authentic chili dog flavor. Let’s break it down.
For the Chili
- 1 lb ground beef
- 1 small onion, finely chopped
- 2 cloves garlic, minced
- 1 tablespoon tomato paste
- 1 cup beef broth
- 1 can (8 oz) tomato sauce
- 1 tablespoon chili powder
- 1 teaspoon cumin
- ½ teaspoon paprika
- ½ teaspoon oregano
- Salt and pepper to taste
This chili should be rich and thick enough to spoon on top without dripping all over. The flavors deepen with time, so if you can, make it a few hours ahead.
For the Hot Dogs and Assembly
- 6 beef hot dogs (or your favorite kind)
- 6 hot dog buns
- 1 cup shredded cheddar cheese
- ½ cup chopped onions
- Optional: pickled jalapeños, sour cream, mustard
Go for high-quality hot dogs—ones with a snap when you bite into them. As for the buns, soft and sturdy is what you’re after so they don’t fall apart under the weight of the chili.
Tools and Equipment Required
Kitchen Essentials for Making Chili Dogs
You don’t need anything fancy, but having the right tools makes the process smoother:
- A medium saucepan (for the chili)
- A skillet or grill pan (for the hot dogs)
- A baking sheet (for toasting the buns)
- A wooden spoon (for stirring)
- Tongs (for flipping hot dogs)
- Serving plates or trays
And if you really want to go the extra mile? A slow cooker can help keep your chili warm for hours during a party.
Step-by-Step Instructions
Let’s dive into the good stuff. Follow these steps to create your perfect chili dog.
Step 1: Prepare the Chili
Start by heating a bit of oil in a saucepan over medium heat. Add the chopped onions and garlic and sauté until translucent. Toss in the ground beef and cook until browned. Once the meat is cooked, stir in the tomato paste, followed by the tomato sauce and beef broth.
Now it’s time to season—add your chili powder, cumin, paprika, oregano, salt, and pepper. Stir everything together, reduce the heat, and let it simmer for about 20–30 minutes. You want it thick and flavorful, not soupy. If it gets too thick, just add a splash of broth or water.
Step 2: Cook the Hot Dogs
While the chili is simmering, it’s time to get those hot dogs sizzling. You can grill them for a smoky flavor, pan-fry them for a crispy outside, or simply boil them if you’re short on time. Whatever your method, just make sure they’re heated through and have a bit of char for added flavor.
Step 3: Toast the Buns
This step might seem small, but it makes a huge difference. Split the buns and place them on a baking sheet. Toast them in a 375°F oven for 5–7 minutes or until slightly golden and warm. A toasted bun adds structure and stops it from getting soggy too fast.
Step 4: Assemble the Chili Dogs
Now for the fun part! Place a hot dog in each bun. Spoon a generous amount of chili over the top—enough to coat, but not so much it floods the bun. Sprinkle on shredded cheese while the chili is still hot so it melts beautifully. Add chopped onions or jalapeños if desired.
Step 5: Add Toppings and Serve
This is where you can get creative. A drizzle of mustard, a dollop of sour cream, a few jalapeño slices—go wild or keep it classic. Serve your chili dogs hot, ideally with a side of fries, coleslaw, or a crisp pickle.
Tips for the Best Chili Dogs
Choosing the Right Sausages
The star of any chili dog is the sausage. While you might think “a hot dog is a hot dog,” that’s not quite the case. Choosing the right one can seriously elevate your chili dog game. Beef hot dogs are the classic choice—they’re juicy, flavorful, and pair perfectly with the richness of the chili. But you can also experiment with pork, turkey, or even plant-based options if that’s your thing.
Look for all-beef franks with natural casings if you want that iconic snap when you bite into them. Avoid the overly processed, rubbery varieties—they’ll just get lost under all the chili and toppings. Smoked or grilled dogs add an extra layer of flavor that’s hard to beat, and they hold their own beautifully against the boldness of the chili.
Spice Level and Flavor Adjustments
The great thing about homemade chili is that it’s fully customizable. Like it hot? Add a diced jalapeño or a splash of hot sauce while the chili simmers. Prefer a smoky flavor? Try using chipotle powder or smoked paprika instead of regular paprika. You can even sneak in a dash of cocoa powder or a splash of coffee to deepen the flavor (yes, it sounds weird—but trust the process).
Don’t forget to taste and adjust your seasoning before serving. A bit more salt, a pinch of sugar to balance acidity, or even a dash of vinegar can completely transform a bland chili into something crave-worthy. And if your chili ends up too spicy? Stir in a spoonful of sour cream or a splash of cream to mellow it out.
FAQs about Chili Dog Recipe
Can I make the chili in advance?
Absolutely! In fact, the chili tastes even better the next day after the flavors have had time to meld. Just store it in the fridge in an airtight container for up to 3 days, or freeze it for up to 2 months.
What are the best buns to use?
Go for soft yet sturdy buns that can handle a juicy hot dog and a generous helping of chili. Potato rolls or brioche buns work great. Toasting them helps prevent sogginess.
Can chili dogs be frozen?
It’s best to freeze the chili separately and assemble the chili dogs fresh when you’re ready to eat. Reheat the chili thoroughly, cook the hot dogs, and toast the buns before assembling.
How can I make a vegetarian version?
Swap out the beef for plant-based ground meat or cooked lentils in your chili, and use veggie dogs instead of beef franks. The rest of the process is exactly the same—just as tasty, and totally meat-free.
What sides go well with chili dogs?
Classic sides include French fries, onion rings, coleslaw, baked beans, and potato salad. For something lighter, try a green salad or grilled corn on the cob.
Conclusion and Serving Ideas
There’s just something special about chili dogs. They’re messy, indulgent, and unapologetically delicious. From the first bite to the last, a good chili dog hits all the right notes—meaty, spicy, cheesy, and satisfying. Whether you’re grilling out in the backyard, serving up a casual dinner, or trying to impress friends at a weekend cookout, this step-by-step recipe gives you everything you need to master the art of the perfect chili dog.
For serving, consider pairing your chili dogs with:
- Crispy French fries or curly fries
- Pickles or coleslaw for some tangy crunch
- A cold beer, root beer, or lemonade
- A napkin (or five) — because things are gonna get messy!
And don’t forget, chili dogs aren’t just a meal—they’re an experience. So don’t rush it. Take your time, enjoy the process, and most importantly, dig in.

