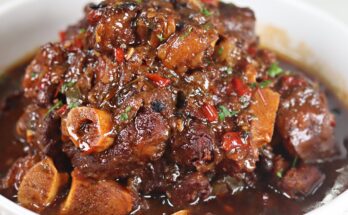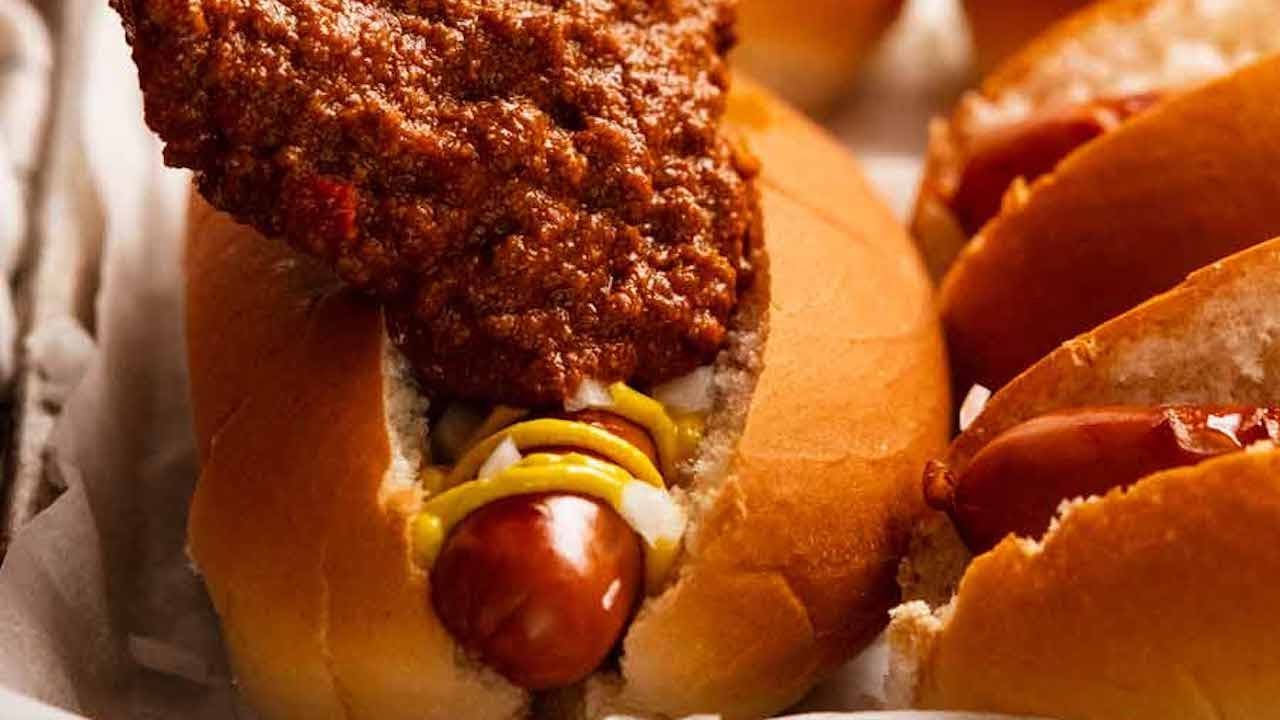
Chili Dog Chili Recipe: There’s something nostalgic about biting into a juicy chili dog dripping with spicy, meaty chili. Whether you’re throwing a backyard BBQ, prepping for game day, or just craving comfort food, a good chili dog never fails. And let’s be honest: the real star of any chili dog is the chili. This isn’t just your basic hot dog topper; we’re talking rich, hearty, and slow-simmered chili that packs a punch.
In this ultimate guide, you’ll learn exactly how to make the perfect chili for chili dogs—one that clings to the bun, enhances the flavor of your dog, and earns you serious cooking points. So roll up your sleeves and grab a napkin… it’s about to get deliciously messy!
What Makes Chili Dog Chili Different?
You might be thinking: Isn’t all chili the same? Not quite. Chili dog chili is a special kind of chili—it’s designed not to overwhelm the hot dog but to complement it. That means it’s typically thicker, smoother, and less chunky than a bowl chili. The flavors are bold but balanced, and the texture is more sauce-like so it stays put on your hot dog bun without turning it into mush.
Unlike chili con carne, which may contain beans, large tomato chunks, and vegetables, chili dog chili is meat-forward, finely textured, and heavily seasoned with chili powder, cumin, garlic, and onion. It’s like the supporting actor that secretly steals the show.
Why You’ll Love This Recipe
Here’s why this homemade chili dog chili will become your go-to recipe:
- Fast & Easy: You can whip this up in under an hour.
- Customizable: Adjust the spice level, swap the protein, or go bean-free.
- Freezer-Friendly: Make a big batch and freeze leftovers.
- Crowd-Pleaser: Ideal for parties, BBQs, or family dinners.
- Authentic Flavor: Deep, smoky, meaty, and perfectly seasoned.
This is the kind of chili that elevates your hot dog from average to unforgettable.
Perfect Pairing: Why Chili & Hot Dogs Go So Well Together
Let’s break down this culinary love affair: The smoky, salty bite of a hot dog combined with a rich, spiced meat chili is a match made in food heaven. The textures—soft bun, snappy dog, and hearty chili—create a mouthful of pure satisfaction. When topped with shredded cheese, chopped onions, or even jalapeños, you get a layered flavor experience that’s downright addictive.
Think of it like this: the hot dog is the canvas, and chili is your masterpiece.
List of Ingredients You’ll Need
For the Chili Base
- 1 lb ground beef (80/20 recommended)
- 1 small yellow onion, finely chopped
- 3 cloves garlic, minced
- 1 (6 oz) can tomato paste
- 1 cup beef broth (or water)
- 1 tablespoon chili powder
- 1 teaspoon ground cumin
- 1 teaspoon smoked paprika
- 1 teaspoon Worcestershire sauce
- ½ teaspoon cayenne pepper (optional)
- Salt and black pepper to taste
- 1 tablespoon olive oil
For the Hot Dogs
- 6–8 all-beef hot dogs
- 6–8 hot dog buns (split-top or standard)
Optional Toppings
- Shredded cheddar cheese
- Chopped raw onions
- Sliced jalapeños
- Pickled red onions
- Mustard or ketchup (if you’re into that)
- Crushed tortilla chips
Kitchen Tools Required
- Large skillet or saucepan
- Cutting board and sharp knife
- Wooden spoon or spatula
- Measuring spoons and cups
- Grater (if shredding cheese)
- Grill pan or boiling pot (for hot dogs)
Step-by-Step Guide to Making Chili Dog Chili
Step 1: Prepare the Ingredients
Start by chopping the onion and garlic finely. Since this chili is meant to go on a hot dog, texture matters. You want small, uniform pieces that blend seamlessly into the meat sauce. Measure your spices and open your cans so you’re ready to go.
Pro Tip: Prep everything before turning on the stove. This makes cooking faster and stress-free.
Step 2: Cook the Ground Beef
Heat olive oil in a large skillet over medium heat. Add the ground beef and break it up with a wooden spoon. Cook until browned and no longer pink, about 6–8 minutes. Drain excess fat if needed—but leave a little for flavor.
Why it matters: Browning the beef develops flavor. Don’t rush this step!
Step 3: Add Aromatics
Stir in your chopped onions and garlic. Sauté for 3–5 minutes until the onion becomes translucent and fragrant. This base is what gives your chili its rich aroma and depth.
Watch closely: Garlic can burn quickly—stir frequently and keep the heat moderate.
Step 4: Season the Chili
Time to spice things up. Add chili powder, cumin, smoked paprika, cayenne (if using), salt, and black pepper. Stir for 1–2 minutes to toast the spices. Then, stir in the tomato paste and Worcestershire sauce. Mix well to combine.
Quick tip: Toasting spices in the fat boosts their flavor and creates a more cohesive chili.
Step 5: Simmer the Chili
Pour in the beef broth and stir until everything is combined. Bring to a gentle simmer and cook uncovered for 20–30 minutes, stirring occasionally. The chili should thicken and become rich and saucy.
Texture check: You want it thick enough to stay on a hot dog without running everywhere. If it’s too thin, simmer longer.
Step 6: Prepare Your Hot Dogs
While your chili simmers, cook your hot dogs. You can boil, grill, or pan-sear them—whatever you prefer. Toast the buns lightly on a skillet or under the broiler for extra flavor and a crisp texture.
Personal favorite: A pan-seared hot dog gives a crispy exterior and juicy interior—total win.
Step 7: Assemble the Chili Dogs
Place the hot dogs in the buns, spoon a generous amount of chili over each one, and top with your favorite toppings. Whether it’s cheese, onions, jalapeños, or all of the above, now’s the time to go wild.
Serving idea: Serve with fries, chips, or a cold beer on the side.
Tips for the Best Chili Dog Chili
If you want next-level chili dogs that leave people asking for seconds (and thirds), keep these expert tips in mind:
- Use high-quality ground beef: 80/20 is ideal—it has enough fat for flavor without being greasy. Lean beef tends to dry out and won’t give you that rich mouthfeel.
- Finely chop everything: The chili should be smooth and saucy, not chunky. Finely chopped onions and garlic help the texture stay cohesive and perfect for hot dogs.
- Simmer low and slow: Even if you’re short on time, don’t skip the simmering step. Letting the chili cook for at least 30 minutes brings the spices together and thickens the sauce beautifully.
- Customize the heat: Love spicy? Crank up the cayenne or toss in a diced jalapeño. Want it mild? Go easy on the chili powder and skip the cayenne altogether.
- Toast those buns: A lightly toasted bun holds up better to the chili and adds a subtle crunch that makes every bite better.
- Let the chili rest: If you’ve got the time, let the chili sit for 10–15 minutes before serving. It thickens up even more and the flavors meld together perfectly.
Remember: Good chili isn’t just about flavor—it’s about texture, richness, and how well it complements the hot dog. Follow these tips and you’re golden.
How to Serve Chili Dog Chili
There’s more than one way to enjoy this flavor-packed chili! Of course, it’s made for hot dogs, but don’t stop there. Here’s how to serve it like a pro:
- Classic Style: Hot dog + chili + shredded cheddar + chopped onions = perfection.
- Loaded Chili Dog Bar: Great for parties—set out bowls of toppings and let guests build their own.
- Chili Cheese Fries: Pour leftovers over a mountain of fries and top with cheese. Instant comfort food!
- Chili Nachos: Layer tortilla chips, chili, cheese, jalapeños, and sour cream for a spicy, shareable snack.
- Sloppy Chili Sandwich: Pile chili onto a toasted bun like a Sloppy Joe for a messy but delicious meal.
Serving this chili with cold drinks, crunchy sides like chips, or even a simple salad can turn a basic meal into a full-blown feast.
Variations to Try
One of the best parts about chili dog chili is how adaptable it is. Here are some tasty twists to consider:
Spicy Version
Add:
- 1 diced jalapeño or serrano pepper (with or without seeds)
- Extra cayenne pepper or hot sauce to taste
- Chipotle powder for smoky heat
Pro tip: Top with pepper jack cheese for an extra kick.
Vegetarian Chili Dog Chili
Swap the beef for:
- Plant-based ground meat (like Beyond or Impossible)
- Lentils or black beans (mashed slightly for thickness)
Use vegetable broth instead of beef broth, and you’re good to go.
Cheesy Chili Dog Chili
Stir in ½ cup of shredded sharp cheddar or American cheese directly into the chili after simmering for a gooey, cheesy flavor explosion.
Want it cheesier? Use nacho cheese sauce instead of shredded cheese on top of your hot dog.
Make-Ahead and Storage Tips
Got leftovers or planning ahead for a big crowd? This chili is your best friend.
- Make-Ahead: Prepare the chili 1–2 days in advance and store in an airtight container in the fridge. The flavors actually improve as it sits.
- Fridge Storage: Lasts up to 5 days in the refrigerator.
- Freezer Storage: Freeze for up to 3 months in portioned containers or zip bags. Thaw overnight in the fridge before reheating.
- Batch Cooking Tip: Double or triple the recipe and freeze in meal-sized portions for quick weeknight dinners.
This chili reheats like a dream, making it ideal for meal prep or big parties.
How to Reheat Without Losing Flavor
Reheating chili can be tricky if you don’t want it to dry out or burn. Here’s how to do it right:
Stovetop Method
- Place chili in a saucepan over medium-low heat.
- Add a splash of water or broth if it’s too thick.
- Stir frequently until heated through (about 10 minutes).
Microwave Method
- Put chili in a microwave-safe dish and cover loosely.
- Heat in 45-second intervals, stirring in between.
- Add a little liquid if needed to loosen it up.
Avoid overheating—it can dull the spices or make it too thick. Always taste and adjust seasoning after reheating.
Common Mistakes to Avoid
Even simple recipes can go sideways if you’re not careful. Here’s what NOT to do when making chili dog chili:
- Using chunky ingredients: Remember, this chili is for hot dogs. Big chunks of meat or veggies will make it awkward to eat.
- Skimping on seasoning: Bland chili = sad hot dogs. Taste as you go and adjust the salt, spices, and heat level.
- Skipping the simmer: Rushing the cooking time means the flavors won’t develop properly, and your chili might be watery.
- Overloading the hot dog: More isn’t always better. Too much chili and you’ll have a soggy, falling-apart mess.
- Serving cold buns or dogs: Make sure everything is hot and toasty before assembling.
Master these pitfalls and your chili dogs will always be a hit.
Nutritional Information (Approximate per Chili Dog with Bun and Toppings)
| Nutrient | Amount (approx.) |
|---|---|
| Calories | 450–600 kcal |
| Protein | 20–25g |
| Carbohydrates | 30–40g |
| Fat | 25–35g |
| Fiber | 2–4g |
| Sodium | 800–1000mg |
Note: These numbers can vary depending on the type of hot dog, bun, and toppings used.
FAQs about Chili Dog Chili Recipe
1. What’s the best meat to use for chili dog chili?
Ground beef (80/20) is the classic choice, but you can also use ground turkey, pork, or plant-based meat alternatives. Avoid lean beef—it can make your chili too dry.
2. Can I make this ahead of time?
Absolutely! Chili dog chili tastes even better after a day in the fridge. Make it a day ahead, store it properly, and reheat when you’re ready to serve.
3. Can I freeze leftover chili?
Yes! This chili freezes beautifully. Store it in airtight containers or freezer bags for up to 3 months. Thaw overnight in the fridge and reheat gently on the stove.
4. Is it too spicy for kids?
You control the spice. Just skip the cayenne and reduce chili powder slightly for a more kid-friendly version. It’ll still be flavorful without the heat.
5. What buns go best with chili dogs?
Split-top or bakery-style hot dog buns hold chili best. Avoid thin, flimsy buns—they’ll fall apart under all that deliciousness. Toasting helps them stay sturdy.
Conclusion
Homemade chili dog chili takes your backyard BBQ or weeknight dinner to the next level. It’s meaty, flavorful, and customizable to your taste buds—spicy, mild, cheesy, or even vegetarian. When done right, it hugs the hot dog just enough to stay in place without overpowering it, letting every bite shine. Whether you’re prepping for a party or just craving comfort food, this step-by-step guide gives you everything you need to make chili dogs that people won’t stop talking about.
Try it once, and you’ll never go back to canned chili again. Promise.