Chiles en Nogada Recipe: If you’ve ever had a bite of Chiles en Nogada, you already know it’s not just a dish—it’s an experience. From the first creamy bite of the walnut sauce to the sweet and savory picadillo filling and the mild heat of the poblano pepper, this iconic Mexican dish is a celebration of flavor, culture, and color.
Whether you’re preparing it for Independence Day, a family reunion, or just to explore traditional Mexican cuisine, this step-by-step guide will walk you through everything you need to make a perfect Chiles en Nogada at home.
The History Behind Chiles en Nogada
Chiles en Nogada dates back to the early 19th century in Puebla, Mexico. Legend has it that nuns from the Santa Monica Convent created the dish to honor General Agustín de Iturbide after signing the Treaty of Córdoba, which granted Mexico independence from Spain. What makes this story even more interesting is that the dish was designed to reflect the colors of the newly independent Mexican flag—green (poblano chile), white (nogada sauce), and red (pomegranate seeds).
Over time, it became a traditional dish served during Mexican Independence Day celebrations in September. Today, Chiles en Nogada is considered a gourmet masterpiece and a symbol of Mexican pride. Each family has their own twist, but the classic recipe is still celebrated as a national treasure.
Why Chiles en Nogada is So Special
So what makes Chiles en Nogada so unique? It’s the perfect blend of sweet and savory flavors, the vibrant presentation, and the depth of history behind each bite. The dish is labor-intensive, often taking several hours to prepare, but the final result is absolutely worth it. Unlike other Mexican dishes, this one combines seasonal fruits with ground meat, creating a complex yet balanced taste. And then, there’s the creamy walnut sauce—so rich and velvety that it melts in your mouth.
This dish also offers a culinary challenge, ideal for home cooks who want to take their skills to the next level. It’s not just about following steps; it’s about mastering flavors, presentation, and timing. When you serve Chiles en Nogada, you’re not just serving food—you’re telling a story.
List of Ingredients You’ll Need
Main Ingredients
- 6 large poblano peppers
For the Picadillo (Filling)
- 1 lb ground beef or pork (or a mix of both)
- 1/2 onion, finely chopped
- 2 garlic cloves, minced
- 2 ripe tomatoes, finely chopped
- 1/2 cup raisins
- 1/2 cup chopped almonds (or pine nuts)
- 1 small apple, peeled and diced
- 1 small pear, peeled and diced
- 1 small peach or plantain, diced
- 1/2 tsp cinnamon
- 1/4 tsp cloves
- Salt and pepper to taste
- 2 tbsp vegetable oil
For the Nogada Sauce
- 1 cup shelled walnuts (preferably fresh)
- 1/2 cup milk (or heavy cream)
- 1/2 cup queso fresco or cream cheese
- 1 tbsp sugar (optional)
- A splash of sherry or white wine (optional)
- Salt to taste
- 1/4 tsp cinnamon (optional)
Garnishes
- Pomegranate seeds (from 1 large pomegranate)
- Fresh parsley leaves (chopped or whole)
Kitchen Tools and Utensils Required
To successfully prepare Chiles en Nogada, make sure you have the following tools:
- Blender or food processor (for the nogada sauce)
- Large skillet (for the picadillo)
- Baking sheet (for roasting peppers)
- Plastic bag or kitchen towel (for steaming peppers)
- Cutting board and sharp knife
- Medium saucepan (optional, for softening walnuts)
- Serving plates for presentation
Preparation can be a bit of a project, so having everything set up before you start will make your cooking experience smoother and more enjoyable.
How to Choose the Best Poblano Peppers
Your choice of poblano peppers can make or break this dish. Look for large, firm peppers with smooth, shiny skin and no soft spots or wrinkles. Ideally, they should be big enough to stuff easily but not so large that they become difficult to roast evenly.
Here’s what to keep in mind:
- Color: Deep, dark green indicates freshness.
- Size: Choose wide, straight peppers for easier stuffing.
- Texture: They should feel firm but not too hard.
Don’t worry if they have a few bumps or curves; imperfections are normal. Just avoid any that have signs of mold or softness.
Preparation Tips Before Cooking
Before you jump into the main cooking steps, here are a few pro tips to help you prep like a pro:
- Soak the walnuts: To remove bitterness, soak shelled walnuts in hot water for at least 2–3 hours or overnight. Peel them for a creamier sauce.
- Roast and peel peppers ahead of time: This can save a lot of time on the day you serve the dish.
- Chop everything uniformly: It makes the filling cook evenly and improves texture.
- Have all your ingredients measured and ready (mise en place) before starting the recipe to stay organized.
Taking the time to prepare will reduce stress and help you enjoy the process a lot more.
Step-by-Step Guide to Making Chiles en Nogada
Step 1: Roasting and Peeling the Poblano Peppers
Roast poblano peppers directly over an open flame or under a broiler, turning until the skins are blistered and blackened. Transfer them to a bowl, cover, and let steam for 10 minutes. This loosens the skins. Gently peel off the charred skin, make a small slit, and carefully remove seeds while keeping the pepper whole.
Step 2: Preparing the Picadillo Filling
Heat oil in a pan and sauté finely chopped onion and garlic until soft. Add ground meat and cook until browned. Stir in chopped tomatoes, apple, pear, raisins, almonds, and spices such as cinnamon and clove. Simmer until the mixture is flavorful and slightly dry. Season with salt to taste and let cool.
Step 3: Stuffing the Peppers
Carefully fill each peeled poblano with the picadillo mixture, packing gently so the pepper holds its shape without tearing. Set aside once filled.
Step 4: Making the Nogada Sauce
Soak walnuts in milk, then peel off their skins for a smooth sauce. Blend the walnuts with cream, milk, queso fresco, and a pinch of salt until thick and silky. The sauce should be rich but pourable.
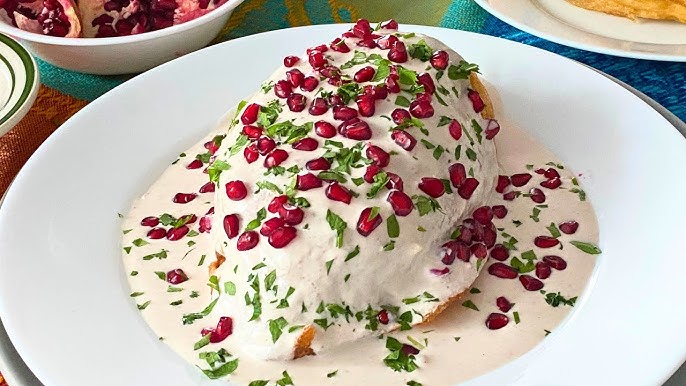
Step 5: Plating and Garnishing
Place stuffed peppers on a serving plate and generously spoon the nogada sauce over them. Garnish with fresh pomegranate seeds and chopped parsley for a beautiful finish.
Elegant, festive, and full of contrast—chiles en nogada is a true celebration on a plate 🇲🇽✨
To Fry or Not to Fry: Traditional vs. Modern Versions
Traditionally, Chiles en Nogada are battered and fried, giving them a rich, crispy texture. But today, many opt for a lighter, fresher version without frying.
Classic version:
- The stuffed peppers are dipped in whipped egg batter (called capeado) and then fried until golden brown.
- This adds richness but can also make the dish heavier.
Modern (non-fried) version:
- No frying required—simply roast, stuff, sauce, and serve.
- It’s healthier, quicker, and lets the other flavors shine.
Whichever way you choose, the dish remains delicious. If it’s your first time making it, try the non-fried version for simplicity. You can always experiment with frying later.
How to Balance Flavors in Chiles en Nogada
This dish is all about harmony—sweet, savory, spicy, creamy, and tart all coming together. But balance is key.
Tips to get it just right:
- Sweetness: The fruit in the picadillo brings natural sweetness. Don’t overdo it with added sugar.
- Savory: Ground meat and spices ground the dish. Taste the picadillo and adjust salt and pepper before stuffing.
- Creamy vs. tart: The nogada sauce should be creamy and slightly nutty. Pomegranate seeds provide that bright contrast.
- Texture: Mix soft fruits with crunchy nuts for an exciting mouthfeel.
Tweak as you go. Taste everything before assembling and don’t be afraid to adjust. Cooking is all about experimenting and making it your own.
Best Side Dishes to Serve With Chiles en Nogada
While Chiles en Nogada is a showstopper on its own, you can elevate your meal with thoughtful sides. Here are some ideas:
- Mexican white rice: Light and fluffy, it balances the richness of the sauce.
- Tortillas: Warm corn tortillas for those who want to scoop up extra sauce.
- Black beans or refried beans: A hearty, protein-packed side that complements the flavors.
- Light salad: A simple lettuce, cucumber, and avocado salad with lime dressing for a fresh touch.
- Mexican crema or extra sauce: On the side, in case your guests want more.
Keep your sides simple and let the star dish shine!
Storage and Reheating Tips
Chiles en Nogada is a great make-ahead dish, but it’s best served fresh. If you need to store it:
- Refrigerate stuffed but unsauced peppers in an airtight container for up to 2 days.
- Keep nogada sauce separate and store it in a sealed container in the fridge.
- To reheat, warm the peppers gently in a microwave or oven, then add the sauce cold or at room temperature.
- Do not freeze—the texture of the fruits and sauce will suffer.
You can prep everything a day ahead, making it easier to assemble and serve when needed.
Common Mistakes to Avoid
Making Chiles en Nogada isn’t hard, but it is detail-oriented. Avoid these common pitfalls:
- Over-roasting peppers: Burnt skin = bitter flavor.
- Skipping walnut peeling: Skins can add a bitter taste to the sauce.
- Watery sauce: Be careful with adding too much milk or cream.
- Overstuffing peppers: It makes them hard to close or plate neatly.
- Not tasting as you go: Each component needs its own seasoning.
Take your time, taste everything, and don’t rush the process.
Vegetarian or Vegan Alternatives
Want to enjoy Chiles en Nogada without the meat or dairy? You’re in luck!
Vegetarian filling ideas:
- Use lentils, quinoa, or textured vegetable protein (TVP) instead of ground meat.
- Add more nuts, dried fruits, and even mushrooms for texture.
Vegan nogada sauce:
- Swap out dairy for plant-based options like soaked cashews, almond milk, and vegan cream cheese.
- Skip cheese entirely and blend soaked walnuts with almond milk and a pinch of sugar.
Same great flavor, no animal products needed.
When and Where to Serve Chiles en Nogada
Traditionally, Chiles en Nogada is served in September for Mexican Independence Day (Sept 16), but it’s also perfect for:
- Holidays or birthdays
- Special dinner parties
- Romantic dinners (the colors are stunning!)
- Cultural food nights or potlucks
It’s a labor of love, which makes it extra meaningful for important events.
FAQs about Chiles en Nogada Recipe
1. Can I make Chiles en Nogada ahead of time?
Yes! You can prepare the picadillo and sauce ahead. Roast and peel the peppers in advance, and assemble the dish just before serving.
2. Is Chiles en Nogada spicy?
Not really. Poblano peppers are mild, and the sweet filling and creamy sauce tone down any heat.
3. What can I use instead of walnuts?
You can try almonds or cashews for a similar creamy texture, but walnuts are traditional.
4. Can I freeze leftovers?
It’s not recommended. The fruit and dairy elements don’t freeze well and can become mushy or separate when thawed.
5. How many people does this recipe serve?
This recipe makes about 6 stuffed peppers, which is perfect for 6 people as a main dish.
Conclusion
Chiles en Nogada isn’t just a meal—it’s a culinary journey through Mexican history, culture, and flavor. While it takes time and effort, the end result is more than worth it. From the tender roasted poblano to the sweet-savory filling and creamy walnut sauce, every bite is an explosion of textures and tastes.
Whether you’re making this dish to celebrate your heritage, try something new, or impress your guests, follow this guide step-by-step, and you’ll create something truly unforgettable.
Now, grab those peppers, prep your ingredients, and let’s get cooking!