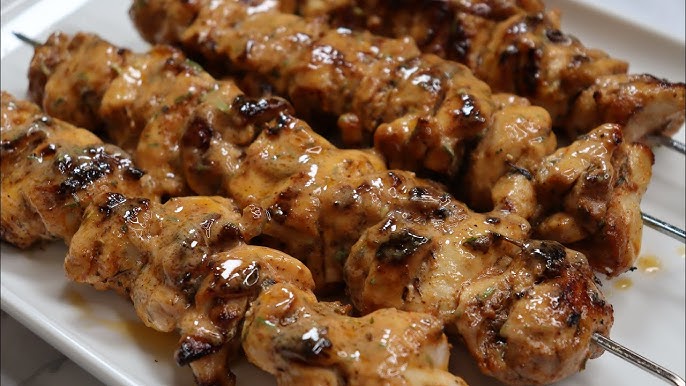
Chicken Skewers Recipe: Chicken skewers, known by many names across the globe like kebabs, brochettes, or satay, are a culinary treasure that transcends borders. They are beloved for their simplicity, versatility, and the way they bring people together around grills, stoves, or open flames. Whether you’re in a bustling street market in Southeast Asia or enjoying a backyard BBQ in the U.S., chicken skewers are a reliable delight.
Their global appeal lies in their ability to be adapted with local spices, cooking styles, and presentation. From the spicy charm of Indian tandoori skewers to the sweet-savory punch of Japanese yakitori, these handheld delights cater to every palate. Plus, they’re incredibly efficient: minimal prep, quick cook time, and endless possibilities.
Perfect for Any Occasion
Chicken skewers aren’t just tasty—they’re practical. Hosting a party? They’re bite-sized and portable, perfect for mingling guests. Need a quick dinner? They cook up fast and pair well with rice, salad, or bread. Even picky eaters often warm up to these tasty sticks of joy because you can customize the flavor exactly to your liking.
Ingredients Needed for Chicken Skewers
Essential Ingredients
To start with, let’s gather the essentials. Here’s what you’ll need for a classic chicken skewer recipe:
- Chicken (Breast or Thigh) – 500 grams, boneless, skinless
- Olive Oil – 2 tablespoons
- Garlic – 3 cloves, minced
- Lemon Juice – 2 tablespoons
- Paprika – 1 teaspoon
- Salt and Pepper – to taste
- Wooden or Metal Skewers
These basic ingredients are enough to make flavorful skewers that’ll make your mouth water. But the beauty lies in customization—add your twist!
Optional Add-Ons and Substitutes
To make your skewers pop with color and flavor, here are some optional add-ins:
- Bell Peppers (Red, Yellow, Green) – diced into chunks
- Red Onions – sliced into thick wedges
- Zucchini or Mushrooms – sliced for variety
- Yogurt or Coconut Milk – as a base for creamy marinades
- Herbs and Spices – cumin, turmeric, oregano, or chili flakes for extra kick
Don’t have olive oil? Swap it with avocado or canola oil. Out of fresh garlic? Garlic powder can be a backup. Adapt it to what you have—cooking should be fun, not stressful!
Choosing the Right Chicken
Breast vs. Thigh: What’s Best?
Choosing between chicken breast and thigh often comes down to personal preference and texture. Chicken breast is leaner and has a mild flavor, making it ideal if you’re watching your fat intake. It’s also quicker to cook, which can be handy for weeknight dinners.
On the other hand, chicken thighs are juicier and richer in flavor due to their higher fat content. They’re also a bit more forgiving if you accidentally overcook them—a great option for beginners or if you’re cooking on high heat.
For skewers, thigh meat is generally preferred by chefs because it retains moisture well on the grill or in the oven, ensuring each bite is succulent and flavorful.
Preparing Chicken for Skewers
Preparation is key for even cooking and great taste. Here’s how to prep your chicken:
- Trim any excess fat or sinew.
- Cut into uniform chunks – about 1 to 1.5 inches. This ensures they cook evenly.
- Pat dry with paper towels. Moisture on the surface can prevent the marinade from sticking well.
Once cut, your chicken is ready to soak up all those delicious flavors in the marinade.
Marinade Magic
Ingredients for the Marinade
A good marinade not only flavors your meat but also tenderizes it. Here’s a basic Mediterranean-style marinade:
- 2 tablespoons olive oil
- 2 tablespoons lemon juice
- 3 cloves garlic, minced
- 1 teaspoon paprika
- 1 teaspoon dried oregano
- Salt and pepper to taste
Want to explore different cuisines? Try soy sauce, honey, and ginger for an Asian flair, or yogurt with turmeric and cumin for an Indian twist.
How Long Should You Marinate?
Marination is where the magic happens. For the best results, marinate your chicken for at least 30 minutes, but if time allows, go for 4 to 8 hours in the refrigerator. This gives the acids and spices ample time to penetrate the meat and enhance its flavor.
Avoid over-marinating, especially in acidic mixtures, as this can make the chicken mushy. A good rule of thumb: more spice, less acid if you’re leaving it overnight.
Assembling the Skewers
Cutting and Skewering Techniques
Once your chicken is marinated, it’s time to build your skewers. Here’s how:
- Alternate chicken with veggies like bell peppers and onions for flavor and visual appeal.
- Leave a little space between each piece on the skewer—this helps the heat circulate and cook the meat evenly.
- If using wooden skewers, soak them in water for at least 30 minutes before grilling to prevent burning.
Balancing Flavors and Colors
Think of each skewer as a mini-meal. Combining different colors and textures not only looks great but also adds layers of taste. Red peppers bring sweetness, onions add zing, and the chicken ties it all together. It’s like creating a work of edible art—delicious and Instagram-worthy!
Cooking Methods for Chicken Skewers
Grilling for the Classic Taste
Grilling is the most traditional and arguably the most delicious method for cooking chicken skewers. The open flame imparts a smoky flavor that’s hard to beat. Here’s how to grill them perfectly:
- Preheat your grill to medium-high heat.
- Brush the grill grates with oil to prevent sticking.
- Place the skewers directly on the grill.
- Cook for 10-15 minutes, turning every few minutes to ensure all sides are evenly charred and the internal temperature reaches 165°F (74°C).
The result? Juicy, tender chicken with slightly crisp edges and beautifully charred vegetables. Perfect for summer BBQs or when you want to impress guests with minimal effort.
Baking for Indoor Simplicity
No grill? No problem! You can easily bake your chicken skewers in the oven and still get fantastic results.
- Preheat your oven to 400°F (200°C).
- Line a baking sheet with foil or parchment paper.
- Place the skewers on the sheet, spacing them out evenly.
- Bake for 20-25 minutes, flipping halfway through.
For a grilled finish, turn on the broiler for the last 3-5 minutes of cooking. This adds a crispy, charred touch that mimics the grill without stepping outside.
Pan-Searing for Quick Fixes
Short on time or cooking for one? A skillet or grill pan is your best friend. It’s fast, efficient, and delivers flavor in minutes.
- Heat a bit of oil in a non-stick skillet or grill pan over medium-high heat.
- Add the skewers, making sure not to crowd the pan.
- Cook for about 10-12 minutes, turning frequently until the chicken is golden and fully cooked.
This method is great for apartment dwellers or when you’re craving skewers but don’t want to fire up the grill or oven.
Serving Suggestions
Perfect Side Dishes
Chicken skewers are incredibly versatile, and pairing them with the right sides can elevate your meal. Here are some crowd-pleasers:
- Rice Pilaf or Basmati Rice – absorbs the marinade juices and rounds out the meal.
- Grilled Vegetables – zucchini, eggplant, and corn go great with skewers.
- Greek Salad – a refreshing mix of cucumbers, tomatoes, feta, and olives.
- Flatbread or Pita – to wrap around the chicken with a dollop of hummus or tzatziki.
Want to go lighter? A crisp green salad with a lemon vinaigrette works wonders too.
Dipping Sauces That Elevate Flavor
A good dip takes skewers from delicious to divine. Here are a few to consider:
- Tzatziki Sauce – cool and creamy with cucumber and garlic.
- Peanut Sauce – perfect for Asian-inspired skewers.
- Chimichurri – a zesty herb sauce that adds a punch.
- Spicy Mayo – for a modern, tangy kick.
You can even create a mini sauce station if you’re hosting guests—let everyone pick their favorite flavor!
Storage and Reheating Tips
How to Store Leftovers
If you’ve got leftovers, you’re in luck—they make for fantastic next-day meals. Here’s how to store them properly:
- Refrigerate in an airtight container for up to 3-4 days.
- Freeze for up to 2 months. Just make sure to wrap the skewers tightly in foil and place them in a freezer-safe bag.
Remove the skewers from the sticks if you’re short on space. They’re easier to store that way and reheat more evenly too.
Reheating Without Drying Out
Reheating skewers without drying them out is crucial. Here’s the best way to do it:
- Microwave: Cover with a damp paper towel and heat in 30-second intervals.
- Oven: Reheat at 350°F (175°C) for about 10 minutes, covered in foil.
- Stovetop: Add a splash of water to a skillet and reheat covered for a few minutes.
Avoid high heat, which can make the chicken tough. Gentle warming is key to keeping things juicy.
FAQs about Chicken Skewers Recipe
Can I use chicken breast or thighs for skewers?
Absolutely! Both work great, but chicken thighs are juicier and more forgiving if overcooked. Chicken breasts give a leaner option—just don’t overdo the grill time.
How long should I marinate chicken for skewers?
For best flavor? At least 30 minutes. But if you’ve got time, marinate for 2–4 hours. Overnight? Even better. More flavor, more wow.
Do I need to soak wooden skewers?
Yes! Soak wooden skewers in water for at least 30 minutes before grilling. Otherwise, you’re serving charred toothpicks—not a vibe.
Can I bake chicken skewers instead of grilling?
Heck yes. Just preheat your oven to 400°F (200°C) and bake for 20–25 minutes, flipping halfway. Bonus: no need to stand over a hot grill.
What veggies go well with chicken skewers?
Think bell peppers, red onions, cherry tomatoes, and zucchini. Bright colors, bold flavors, and they roast beautifully.
How do I know the chicken is cooked through?
Use a meat thermometer. Chicken should hit 165°F (74°C) at the thickest point. No thermometer? Cut into a piece—no pink, no problem.
Conclusion
Chicken skewers are the ultimate crowd-pleaser. They’re fast, flavorful, and endlessly customizable, making them ideal for weeknight dinners, party platters, or just about any meal. With the right marinade, fresh ingredients, and your preferred cooking method, you’ll have a dish that looks gourmet but is incredibly easy to make.
So, what are you waiting for? Grab those skewers and get cooking. Whether grilled, baked, or seared, they’re sure to become a staple in your kitchen.