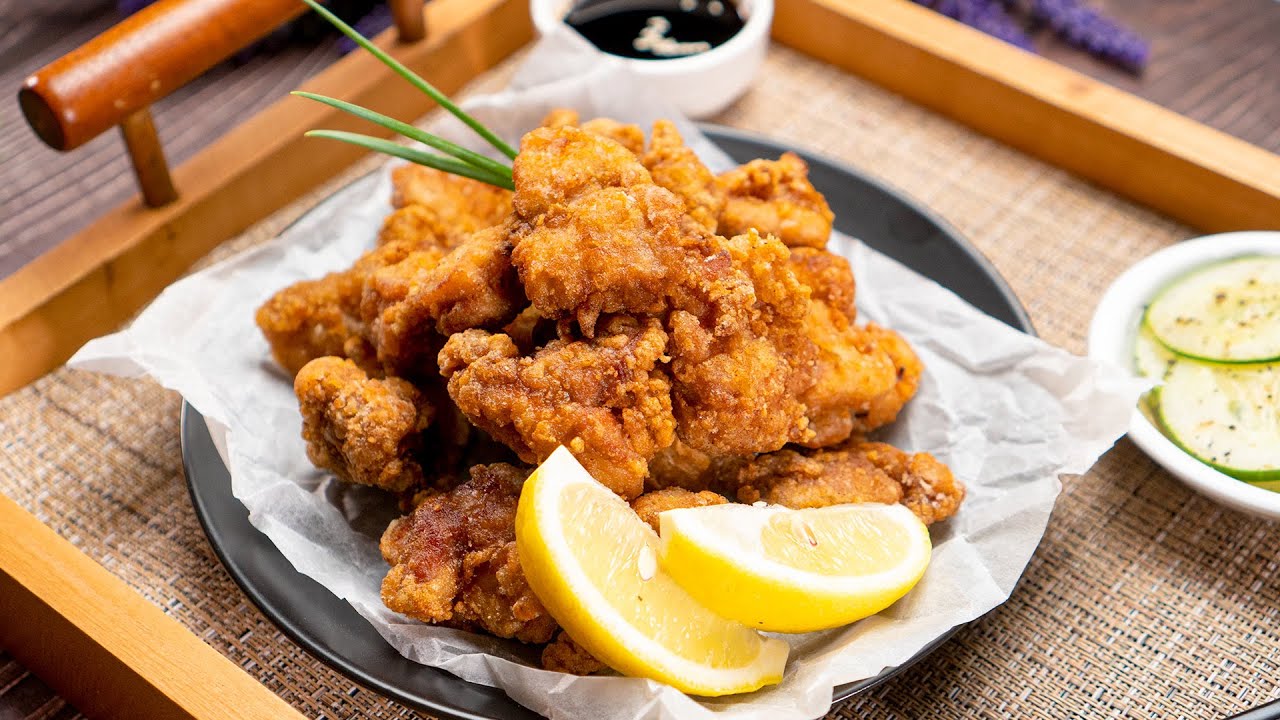
Chicken Karaage Recipe: If you’ve ever bitten into a piece of Chicken Karaage, you know exactly why it’s a Japanese favorite. That crisp outer shell that gives way to juicy, flavorful chicken inside? It’s nothing short of magic. Karaage isn’t just another fried chicken recipe—it’s a cultural staple, often found in bento boxes, izakayas, and home kitchens across Japan. While it looks simple, perfecting Karaage is all about the little details: the right marinade, the perfect cut, the best oil temperature. And today, I’m walking you through the entire process so you can master it at home.
You don’t need to travel to Tokyo to get authentic Karaage. With this detailed, humanized guide, you’ll have everything you need to recreate the real deal right in your kitchen. Ready to take your fried chicken game to the next level?
The History Behind Chicken Karaage
Chicken Karaage (唐揚げ) originated in Japan, but its roots go back further to Chinese cooking techniques. The word “karaage” itself refers to the method of deep-frying without batter, often marinating beforehand for added flavor. In the 1920s and ’30s, as chicken became more accessible in Japan, local chefs began experimenting with frying marinated cuts, and thus, Chicken Karaage was born.
By the 1950s, Karaage was popping up in convenience stores, lunchboxes, and izakayas (Japanese pubs). It’s no exaggeration to say that every region—and even every family—has their own spin on it. Today, it’s not just popular in Japan. From food trucks in Los Angeles to restaurants in London, Chicken Karaage has become an international favorite. The reason? Its unbeatable combo of crunch and umami-rich flavor.
Why You’ll Love This Recipe
Still not convinced? Let me tell you why this recipe is a game-changer.
- Ultra Crispy Outside: Thanks to potato starch and a double-frying method.
- Tender & Juicy Inside: The marinade locks in flavor and moisture.
- Easy to Make: No complicated ingredients or techniques.
- Versatile: Serve it with rice, toss it in a wrap, or make it a party snack.
Once you make this once, it’ll be on your dinner rotation—guaranteed. It’s the kind of dish that makes people stop and ask, “Whoa, how did you make this?”
List of Ingredients You’ll Need
Here’s what you’ll need to make classic Chicken Karaage:
For the Chicken:
- 1.5 lbs (700g) boneless chicken thighs (with skin, cut into bite-sized pieces)
- Salt & pepper to taste
For the Marinade:
- 2 tablespoons soy sauce
- 2 tablespoons sake (Japanese rice wine)
- 1 tablespoon mirin (sweet rice wine)
- 2 teaspoons grated fresh ginger
- 2 cloves garlic, minced
- 1 teaspoon sesame oil (optional for added aroma)
For the Coating:
- 1/2 cup potato starch (preferred for crispiness, can sub with cornstarch)
- 1/4 cup all-purpose flour (optional for added texture)
For Frying:
- Vegetable oil (enough for deep frying, preferably canola or sunflower oil)
Garnishes (Optional):
- Lemon wedges
- Japanese mayo
- Shichimi togarashi (Japanese chili powder)
Substitution Tips:
- Can’t find mirin? Use a 1:1 mix of sugar and sake.
- No sake? Dry white wine or even a splash of rice vinegar can work in a pinch.
- Watching gluten? Use tamari instead of soy sauce and a gluten-free starch.
Getting quality chicken is key. Go for thighs, not breasts. Thighs are fattier, more flavorful, and much harder to overcook.
Recommended Kitchen Tools
Having the right tools makes the whole process smoother—and way less messy.
Must-Haves:
- Deep frying pan or wok
- Wire rack or paper towel-lined plate (for draining)
- Mixing bowls (glass or stainless steel)
- Tongs or chopsticks (for flipping)
- Thermometer (for oil temp control)
Nice-to-Haves:
- Kitchen scale (for accurate measuring)
- Marinade container with lid (easy fridge storage)
- Oil splatter guard (your stovetop will thank you)
- Air fryer (for alternative cooking method)
These tools won’t just help you fry—they’ll help you fry like a pro.
Step-by-Step Chicken Karaage Recipe
Let’s dive into the fun part. Follow these steps exactly, and you’ll have restaurant-quality Karaage on your plate.
Step 1: Cut the Chicken Right
Start with boneless chicken thighs for maximum juiciness. Trim off excess fat and cut the meat into bite-sized chunks—around 1½ inches each. Uniform pieces ensure even cooking and that signature crunch in every bite.
Step 2: Make the Marinade
In a bowl, mix soy sauce, sake (or rice wine), minced garlic, grated ginger, and a touch of sesame oil. This combo gives that deep umami flavor Karaage is known for.
Step 3: Let it Marinate (Timing Tips)
Add the chicken pieces to the marinade, toss well, and refrigerate for 30 minutes to 1 hour. Any longer and the meat may get too salty, so timing is key.
Step 4: Prepare the Coating
Combine potato starch (or cornstarch) with a bit of flour in a bowl. Coat each chicken piece thoroughly—this is what makes it crispy.
Step 5: Heat the Oil (Temperature Tips)
In a deep pan, heat oil to 170°C (340°F). The right temperature keeps the chicken crispy without burning.
Step 6: Double Fry for Crispiness
Fry the chicken once until light golden (about 3–4 minutes), remove, rest briefly, then fry again at 190°C (375°F) for another minute. The second fry gives it that restaurant-style crunch.
Step 7: Let it Rest and Serve
Drain on paper towels, sprinkle with salt or a dash of lemon, and serve hot. Enjoy your golden, juicy Chicken Karaage—crispy outside, tender inside, and bursting with flavor.
Tips for Extra Crispy Karaage
Want that “crack when you bite” Karaage every time? These pro tips will get you there:
- Use Potato Starch: It’s more granular than cornstarch and gives a rougher, crispier surface.
- Double Fry: As mentioned—don’t skip this. It’s non-negotiable.
- Let It Rest Between Fries: This dissipates moisture and firms up the outer layer.
- Avoid Overcrowding: Fry in small batches so oil temp stays steady.
- Dry Your Chicken Before Coating: Wet chicken = soggy crust.
Bonus: Want to add a pop of flavor? Throw in a bit of rice vinegar to your marinade for a subtle tang. It’s not traditional—but it works.
The Best Oils for Deep Frying
Choosing the right oil is more important than you think. The wrong one can either ruin your flavor or smoke out your kitchen.
Here are the top picks:
| Oil Type | Smoke Point | Flavor Profile | Best For |
|---|---|---|---|
| Canola Oil | 400°F | Neutral | Budget-friendly frying |
| Peanut Oil | 450°F | Slightly nutty | Crisp texture |
| Sunflower Oil | 440°F | Light and clean | Healthy option |
| Rice Bran Oil | 450°F | Slightly earthy | Authentic Japanese vibe |
Avoid oils like olive oil or butter—they burn too fast and alter the flavor profile of your Karaage.
What to Serve with Chicken Karaage
Karaage is versatile—it can be the main dish or part of a feast. Here are some killer combos:
Traditional Japanese Sides:
- Steamed white rice
- Miso soup
- Pickled vegetables (Tsukemono)
- Shredded cabbage with sesame dressing
Fusion Combos:
- Karaage tacos (with spicy slaw)
- Karaage rice bowl with teriyaki drizzle
- Karaage bao buns with cucumber and hoisin
Dipping Sauces:
- Japanese mayo with a squeeze of lemon
- Ponzu (citrus soy)
- Spicy mayo or Sriracha
- Honey garlic glaze
Get creative! Karaage plays well with both traditional and modern twists.
How to Store and Reheat Leftovers
Let’s be honest: leftover fried chicken is rare. But if you do manage to save some, here’s how to keep it crispy:
Storing:
- Let the Karaage cool completely before storing
- Use an airtight container
- Store in the fridge for up to 3 days or freeze for up to a month
Reheating Tips:
- Oven/Toaster Oven: 180°C (350°F) for 10–12 minutes. Use a wire rack if possible.
- Air Fryer: 180°C (350°F) for 5–6 minutes.
- Avoid the microwave—it’ll make it soggy and sad.
Pro tip: Reheat only the amount you plan to eat. Fried food doesn’t like being reheated twice.
Making Chicken Karaage in an Air Fryer
Trying to cut down on oil? Air frying can work—with a few tweaks.
How to Do It:
- Preheat your air fryer to 200°C (390°F)
- Spray both the basket and chicken with a light layer of oil
- Air fry for 10–12 minutes, flipping halfway
- Optional: air fry an extra 2–3 minutes for more color
Is it as crispy as deep-fried? Not quite. But it’s still shockingly good and way less messy.
Gluten-Free or Keto-Friendly Variations
No need to miss out if you’re avoiding gluten or carbs.
Gluten-Free Karaage:
- Use tamari instead of soy sauce
- Swap potato starch with arrowroot or tapioca starch
Keto Karaage:
- Skip flour completely—just use pork rinds or crushed almond flour as coating
- Avoid mirin (too much sugar), use a drop of stevia or monk fruit instead
It’s still flavorful and crispy—with just a bit of creativity.
Pairing Drinks with Karaage
Whether you’re enjoying it as a snack or dinner, a good drink takes the experience to the next level.
Best Beverages:
- Cold Japanese beer (Asahi, Sapporo)
- Green tea (hot or iced)
- Sake (try a dry Junmai)
- Sparkling water with lemon
Want something non-traditional? Try Karaage with a ginger beer—that sweet-spicy combo is chef’s kiss.
FAQs about Chicken Karaage Recipe
1. Can I use chicken breast instead of thighs?
Yes, but thighs are juicier and more flavorful. If using breast, marinate longer and fry for a shorter time to avoid drying out.
2. Is it okay to skip the mirin or sake?
Yes, but the flavor won’t be as deep. Substitute with dry white wine or rice vinegar mixed with a bit of sugar if needed.
3. Can I make Karaage ahead of time?
You can marinate in advance and even fry once, then do the second fry right before serving for max crispiness.
4. What’s the best way to keep Karaage warm before serving?
Place it in a 100°C (210°F) oven on a wire rack until ready to serve. Keeps it warm and crisp.
5. What makes Karaage different from American fried chicken?
Karaage is usually marinated before frying, uses a starch-based coating (not flour-heavy), and is double-fried for a unique light, crispy texture.
Conclusion
There you have it—a full guide to making authentic Japanese Chicken Karaage that’s crispy, juicy, and packed with flavor. Whether you’re frying it traditionally or testing out an air fryer version, the key is in the prep, the marinade, and those little frying details. Trust me—once you get the hang of it, you’ll want to make this on repeat.
This recipe isn’t just a meal; it’s a moment. A bite of comfort. A taste of Japan. And now, it’s yours to enjoy.

