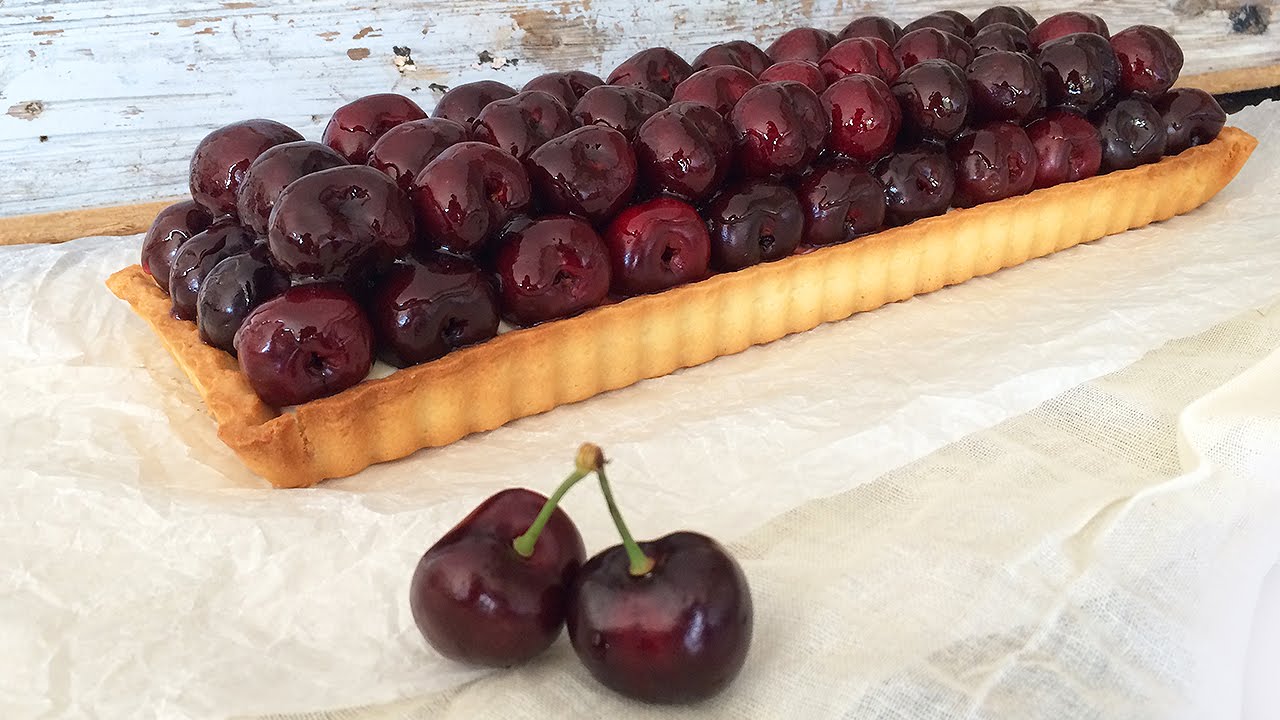
Cherry Tart Recipe: There’s something magical about the combination of buttery crust, sweet-tart cherries, and that glossy, irresistible finish. Cherry tarts are a timeless dessert that can make any occasion feel special—from summer picnics to holiday dinners. Whether you’re an experienced home baker or a complete newbie in the kitchen, this step-by-step cherry tart recipe will guide you through making the perfect tart every single time.
Unlike store-bought versions, homemade cherry tarts let you control every flavor and texture. The crust is crisp yet tender, while the cherry filling bursts with juicy flavor in every bite. Best part? You don’t need to be a pastry chef to pull it off. All you need is a bit of patience, the right ingredients, and this detailed guide.
The History Behind This Classic Dessert
Cherry tarts have deep roots in European baking, especially in French and British cuisines. They were originally made with foraged sour cherries and rustic pastry doughs. Over the centuries, the recipe evolved into the elegant tart we know today, often topped with a shiny glaze or powdered sugar for extra flair. It’s a dessert that has stood the test of time—and for good reason!
Ingredients You’ll Need
Let’s get into the good stuff! Here’s everything you need to make a cherry tart from scratch.
For the Tart Crust
- 1 ½ cups (180g) all-purpose flour
- ½ cup (113g) unsalted butter, cold and cubed
- ¼ cup (50g) granulated sugar
- 1 large egg yolk
- 2–3 tablespoons cold water
- ¼ teaspoon salt
This classic pâte sucrée (sweet pastry dough) will give your tart a rich, buttery base that holds up perfectly to juicy fillings.
For the Cherry Filling
- 3 cups (500g) fresh or frozen cherries, pitted
- ½ cup (100g) granulated sugar
- 1 tablespoon cornstarch (for thickening)
- 1 tablespoon lemon juice
- 1 teaspoon vanilla extract
- 1 pinch of salt
Optional: A splash of almond extract to deepen the flavor.
Optional Toppings and Variations
- Powdered sugar (for dusting)
- Vanilla ice cream or whipped cream (for serving)
- Slivered almonds or toasted coconut (for texture)
- Cherry glaze or jam (for extra shine)
Having your ingredients ready and pre-measured (mise en place!) will make the whole process go much smoother.
Tools and Equipment Needed
Here’s what you’ll need for the best results:
- 9-inch tart pan with removable bottom
- Rolling pin
- Mixing bowls
- Saucepan
- Pastry blender or food processor
- Measuring cups and spoons
- Cooling rack
- Pastry brush (optional)
Having the right tools ensures that your tart looks as good as it tastes.
Step-by-Step Guide to Making Cherry Tart
Let’s dive into the baking process. Follow these steps closely and you’ll end up with a bakery-quality cherry tart!
Step 1: Preparing the Tart Crust
Begin by combining flour, sugar, and a pinch of salt in a bowl. Cut in cold butter until the mixture resembles coarse crumbs. Add a little cold water and mix just until the dough comes together. Press the dough into a tart pan, evenly covering the base and sides. Chill the crust for about 20 minutes to help it hold its shape during baking.
Step 2: Making the Cherry Filling
In a saucepan, combine pitted cherries, sugar, and a splash of lemon juice. Cook over medium heat until the cherries release their juices. Stir in cornstarch mixed with water and cook until the filling thickens and becomes glossy. Remove from heat and let it cool slightly.
Step 3: Assembling the Tart
Pour the prepared cherry filling into the chilled tart crust and spread it evenly. Smooth the top with a spoon to ensure even baking and a neat finish.
Step 4: Baking the Tart to Perfection
Bake the tart in a preheated oven until the crust turns golden brown and the filling bubbles gently. This usually takes about 35–40 minutes. Keep an eye on the edges and cover them lightly if they brown too quickly.
Step 5: Cooling and Serving
Allow the tart to cool completely before slicing. This helps the filling set properly. Serve as is or with a dusting of powdered sugar or a scoop of vanilla ice cream for an elegant finish.
Sweet, tangy, and beautifully balanced, this cherry tart is a dessert that never disappoints 🍒🥧
Pro Tips for the Best Cherry Tart
Want to level up your tart game? Here are some must-know tips to get bakery-level results at home.
Tips for Preventing a Soggy Bottom:
- Always blind bake your tart crust if using juicy fillings.
- Use a metal tart pan with a removable bottom for better heat distribution.
- Brush the crust with a light egg wash after blind baking—it creates a barrier between the crust and the filling.
How to Make the Crust Extra Flaky:
- Use cold butter and don’t overwork the dough.
- Chill the dough before and after rolling.
- Bake in the lower third of your oven for crispier results.
Sweet vs. Tart Cherries:
- Tart cherries (like Montmorency) give a more traditional flavor.
- Sweet cherries (like Bing) are delicious too—just reduce the sugar slightly.
- You can also do a 50/50 blend for the best of both worlds!
Common Mistakes to Avoid
Even simple desserts can go sideways. Here’s how to avoid the most common cherry tart fails.
1. Overbaking the Tart
Baking too long can dry out the filling or burn the crust. Always set a timer and check on it early. The filling should bubble just slightly when it’s done.
2. Using Canned Cherries Without Draining
Canned cherries can be fine in a pinch, but make sure to drain the syrup and adjust sugar levels. Too much liquid = soggy crust.
3. Not Chilling the Dough
Warm dough = tough crust. Always chill your dough after mixing and after placing it in the tart pan. Trust the process.
Serving Suggestions
A cherry tart is beautiful and flavorful on its own, but how and when you serve it can elevate the entire experience. Here are some ideas that will make your cherry tart the centerpiece of any meal or celebration.
Best Times to Serve Cherry Tart:
- After-dinner dessert – It’s light enough to finish a meal without feeling heavy.
- Brunch treat – Pair it with coffee or tea for a luxurious mid-morning bite.
- Holiday or celebration – Great for Valentine’s Day, Christmas, or birthdays.
- Picnics and garden parties – It’s easy to slice, serve, and transport.
Pairing Options:
- With Ice Cream: Vanilla ice cream is a classic pairing. The cold, creamy texture complements the tart beautifully.
- With Whipped Cream: A dollop of homemade whipped cream adds richness without overpowering the tart cherry flavor.
- With Coffee or Tea: A hot beverage balances out the cold dessert for a cozy experience.
Want to impress guests? Serve individual mini cherry tarts with a sprig of mint on top. It’s all in the details!
Storing and Freezing Tips
You don’t have to finish your cherry tart in one go—although no one would blame you if you did. Here’s how to keep leftovers fresh and delicious.
How to Store Leftover Cherry Tart:
- Room Temperature: Store at room temp (covered) for up to 1 day.
- Refrigerator: Store in the fridge, wrapped or in an airtight container, for 3–4 days.
- Reheating: Warm slices in a low oven (300°F/150°C) for 10 minutes for a fresh-baked taste.
Freezing Instructions:
Yes, you can freeze cherry tart!
- Let the tart cool completely.
- Wrap tightly in plastic wrap and then aluminum foil.
- Freeze for up to 2 months.
- To serve, thaw in the fridge overnight and warm gently before eating.
You can also freeze the tart dough separately. Just flatten into a disk, wrap, and freeze for up to 3 months.
Nutritional Information
While cherry tart is a treat, it’s always good to know what you’re putting in your body. Here’s a general estimate per slice (based on 8 slices per tart):
| Nutrient | Approximate Amount |
|---|---|
| Calories | 280–320 kcal |
| Total Fat | 14g |
| Saturated Fat | 8g |
| Carbohydrates | 38g |
| Sugars | 20g |
| Fiber | 2g |
| Protein | 3g |
Note: Nutritional values vary depending on the specific ingredients and portion sizes.
Want to lighten it up? Use less sugar in the filling or try a whole wheat crust for added fiber.
Gluten-Free or Vegan Cherry Tart Option
If you follow a special diet, you can still enjoy a delicious cherry tart. Here’s how to adapt the recipe:
Gluten-Free Tart Crust:
- Use a gluten-free all-purpose flour blend (make sure it contains xanthan gum or add ½ tsp yourself).
- Keep everything else the same, but add 1 extra tablespoon of cold water if needed.
Vegan Cherry Tart:
- Replace butter with vegan butter or solid coconut oil.
- Use a flax egg (1 tbsp ground flax + 3 tbsp water) instead of egg yolk.
- Ensure your sugar is vegan (some are processed using bone char).
These swaps still result in a tasty, golden crust and flavorful filling—no compromise required.
Cherry Tart Decoration Ideas
If you love to show off your baking on social media or just want to make your tart look extra fancy for guests, here are a few easy decoration ideas:
- Powdered Sugar Dusting – Classic and elegant.
- Whipped Cream Rosettes – Pipe them around the edge using a star tip.
- Glazed Fresh Cherries – Add whole cherries on top for a bold, fresh look.
- Slivered Almonds or Pistachios – Adds crunch and visual contrast.
- Edible Flowers – Totally Insta-worthy and perfect for spring events.
Don’t be afraid to get creative. The best part of making a tart is making it your own.
Cherry Tart Variations
Once you’ve mastered the basic cherry tart, you’ll want to experiment with these fun variations:
Mini Cherry Tarts:
- Use a muffin tin and line each cup with a small round of tart dough.
- Bake for 15–20 minutes or until golden and bubbly.
- Perfect for parties, buffets, or gifting!
Chocolate Cherry Tart:
- Add a thin layer of melted dark chocolate to the base of the baked crust before adding the filling.
- Or, mix chocolate chips into the filling itself for a decadent twist.
Cherry Almond Tart:
- Mix ¼ teaspoon almond extract into the filling.
- Sprinkle slivered almonds over the top before baking.
- Almond and cherry are a flavor match made in heaven!
FAQs about Cherry Tart Recipe
Can I Use Frozen Cherries?
Yes! Just thaw them first and drain off excess liquid to avoid a soggy filling.
What If I Don’t Have a Tart Pan?
You can use a pie dish. The edges won’t be as sharp, but it’ll still taste amazing.
Can I Use Store-Bought Pie Crust?
Totally. It saves time and still works well—just blind bake it first!
How Do I Pit Cherries Without a Pitter?
Use a metal straw or chopstick—push the pit out from the stem side. It works like magic.
Can I Make the Tart Ahead of Time?
Absolutely! Make it a day in advance and store it in the fridge. Serve chilled or lightly warmed.
Conclusion
So there you have it—the ultimate cherry tart recipe, made simple and stress-free. Whether you’re baking for a special occasion or just want to treat yourself, this dessert delivers every single time. With its buttery crust, juicy cherry filling, and endless customization options, it’s bound to become a favorite in your baking rotation.
Don’t be afraid to experiment with flavors, shapes, or decorations. Baking is as much about fun and creativity as it is about following a recipe. So grab your ingredients, preheat that oven, and let’s bake something beautiful.
Happy baking!