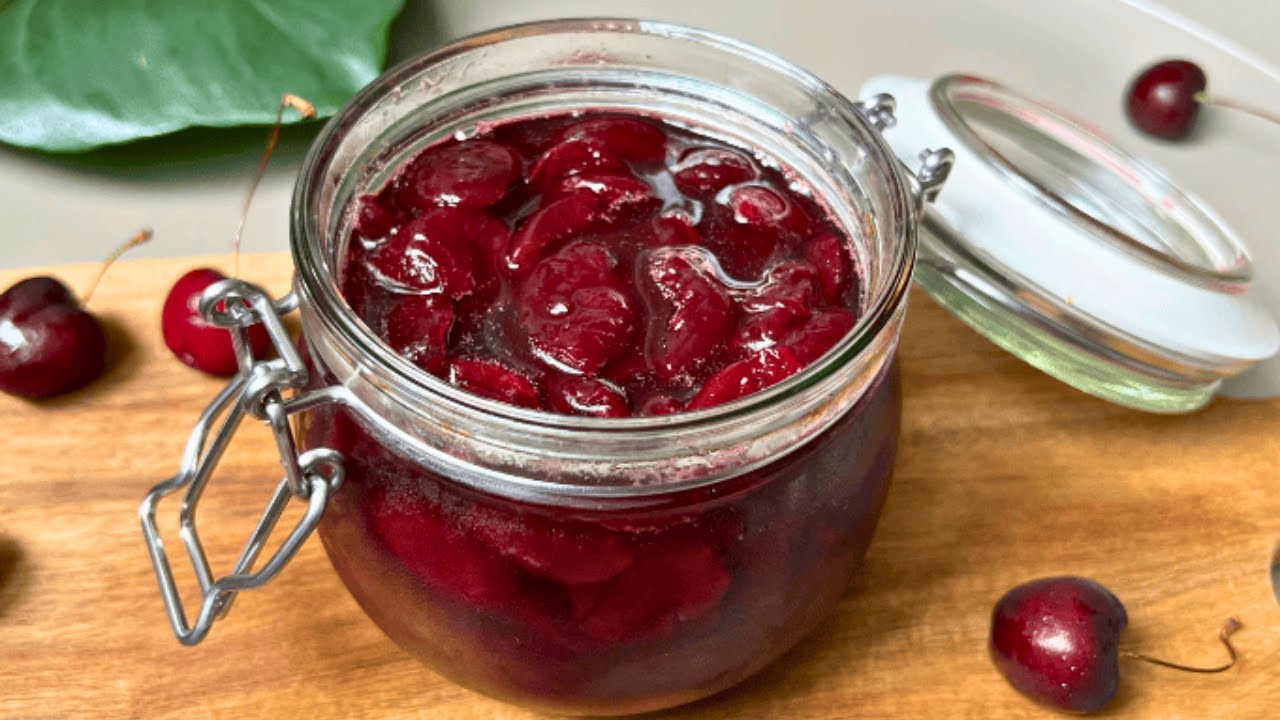
Cherry Preserves Recipe: There’s something magical about opening a jar of homemade cherry preserves. The vibrant color, the rich taste of sun-ripened cherries, and the perfect balance of sweet and tart flavors make it a year-round favorite.
Whether you’re spreading it on toast, spooning it over pancakes, or sneaking a spoonful straight from the jar (we won’t judge), cherry preserves are a must-have in every kitchen.
Let’s dive into a complete, easy-to-follow guide that will show you how to make cherry preserves from scratch—even if you’ve never canned anything before.
List of Ingredients You’ll Need
When it comes to making the perfect batch of cherry preserves, it all starts with the right ingredients. Keep it simple, fresh, and flavorful. Here’s everything you’ll need:
Main Ingredients:
- Fresh Cherries – 4 cups (pitted and halved). Bing cherries or sour cherries both work—more on that later.
- Granulated Sugar – 2 ½ to 3 cups, depending on your desired sweetness.
- Lemon Juice – 2 tablespoons, freshly squeezed. This helps balance the flavor and adds natural pectin.
- Water – Optional, ¼ cup if you want a thinner consistency.
Optional Add-ins for Flavor Variation:
- Vanilla Extract – ½ teaspoon for a warm, smooth taste.
- Almond Extract – A few drops can really enhance the cherry flavor.
- Cinnamon Stick – Adds depth and warmth during the cooking process.
- Lemon Zest – Boosts freshness and aroma.
You don’t need fancy or expensive ingredients—just a handful of high-quality basics will do. Remember, the better your cherries, the better your preserves.
Tools and Equipment Needed
Don’t worry, you won’t need a professional kitchen to pull this off. Most of what you need is probably already in your cabinets. Here’s a quick checklist:
Basic Kitchen Tools:
- Large heavy-bottomed saucepan or pot
- Wooden spoon or heat-proof spatula
- Mixing bowls
- Measuring cups and spoons
- Ladle
Canning Supplies (Optional but Recommended):
- Sterilized glass jars with lids (half-pint or pint size)
- Jar funnel (helps pour without spilling)
- Tongs or jar lifter
- Clean towels
- Water bath canner (for long-term storage)
Having the right tools makes the entire process smoother and safer. If you’re just making a small batch to keep in the fridge, you can skip the canning step—but for pantry storage, sterilized jars are a must.
Choosing the Best Cherries
Picking the right cherries is the first step to crafting a delicious preserve. Here’s what you need to know:
Sweet vs. Tart Cherries:
- Sweet Cherries (like Bing or Rainier) are rich, deep in color, and have a mellow flavor.
- Tart Cherries (like Montmorency) are sour and bright red, often used in pies and preserves for their sharpness and pectin content.
Tart cherries tend to make preserves with more body and natural thickness. But don’t worry—you can still use sweet cherries with a bit of lemon juice or pectin if needed.
Fresh or Frozen – Which Works Better?
- Fresh Cherries: Always preferred if in season—usually available during late spring through early summer.
- Frozen Cherries: A great backup option! Just make sure they’re pitted and thawed completely. Drain excess liquid to avoid a watery preserve.
Ripeness matters too—overripe cherries can make your preserves mushy, while underripe ones can be too tart. Aim for firm, bright cherries with no bruises or mold.
Preparing the Cherries
Now that you’ve got the best cherries, let’s get them ready for the pot. This is the part where things get a little messy—but also really fun!
Step 1: Wash Thoroughly
Rinse the cherries in cold water. Don’t soak them for too long—just enough to clean off dirt or chemicals. Dry them with a clean towel or paper towels.
Step 2: Pit and Halve
This part takes time, but it’s worth it. You can use a cherry pitter for quick results or do it by hand with a knife. Be careful—it gets juicy!
Pro tip: Wear an apron. Cherry juice stains everything.
Cut each cherry in half for easier cooking and to help the sugars and juices release evenly.
Step 3: Measure Accurately
You’ll want about 4 cups of pitted, halved cherries for this recipe. This gives you enough volume to get a few good jars while keeping things manageable.
The Role of Sugar in Cherry Preserves
Let’s talk sugar. Besides sweetening your preserves, it plays a major role in texture, preservation, and flavor enhancement.
Why Sugar is Important:
- Preservation – Sugar helps prevent bacteria and mold growth.
- Texture – It thickens the mixture as it cooks with the fruit juices.
- Color and Flavor – It enhances the cherry’s natural color and deepens the taste.
How Much Sugar Should You Use?
For this recipe, 2½ to 3 cups is ideal for 4 cups of cherries. If you’re using sour cherries, you may want to increase the sugar slightly to balance the tartness.
Can You Use Sugar Alternatives?
Absolutely—but with caution. Here are a few options:
- Honey – Adds a floral sweetness, but can change texture.
- Maple Syrup – A richer, earthier flavor.
- Coconut Sugar – Lower glycemic index but may darken the preserves.
- Stevia or Monk Fruit – Use specially designed low-sugar pectin if going sugar-free.
Keep in mind, sugar-free preserves won’t last as long and will need to be refrigerated.
Adding Lemon Juice: Why It Matters
You might think lemon juice is just there for flavor, but it actually plays a bigger role than you’d expect. It’s not just a splash of citrus—it’s a key ingredient for safe preservation and the perfect texture.
Why Lemon Juice is Essential:
- Boosts Natural Pectin: Cherries are naturally low in pectin, the substance that helps fruit preserves thicken. Lemon juice enhances the natural pectin already present and ensures your preserve gels properly.
- Balances Flavor: Cherry preserves can be overly sweet if you’re not careful. The lemon cuts through the sweetness and brings a brighter, more balanced taste.
- Preservation Power: The acid in lemon juice helps keep the pH level low, which is important for preventing bacterial growth—especially if you’re canning the preserves.
Always use freshly squeezed lemon juice rather than bottled if you can. Fresh lemon juice contains more natural pectin and delivers a better taste.
Cooking the Preserves – Step-by-Step Guide
Here comes the exciting part—actually cooking your cherry preserves! This is where your kitchen starts to smell like a gourmet fruit shop. Just take your time, follow these steps, and enjoy the process.
Step 1: Combine Cherries and Sugar
In your large saucepan or pot, combine the pitted cherries and sugar. Stir them well to coat the cherries evenly. You don’t need to add water at this point unless your cherries are very dry.
If you’re using any optional flavorings like vanilla extract or cinnamon, wait until the cooking process starts before adding them.
Step 2: Let the Mixture Rest
Let the cherry and sugar mixture sit for about 30 minutes. This draws out the juices from the cherries, helping the sugar dissolve and kick-starting the syrup base for your preserves.
Pro tip: While it rests, give the mixture a gentle stir every 10 minutes.
Step 3: Start Cooking Over Medium Heat
Place your pot on the stove and bring the mixture to a gentle boil over medium heat. Stir often to prevent sticking or burning.
As the cherries break down, they’ll release more juices and the mixture will thicken. This can take 20–40 minutes, depending on the water content of your fruit.
Step 4: Skim Off the Foam
As your preserves begin to boil, you’ll notice foam forming on the surface. Skim this off using a spoon. It’s not harmful, but removing it improves the clarity and color of your final product.
Step 5: Check for Thickness
This is where patience pays off. You want the syrup to coat the back of a spoon and run slowly. But how do you really know when it’s done?
We’ll cover that next in the consistency section.
Testing for the Right Consistency
The key to great cherry preserves is getting the texture just right. Not too runny, not too thick—it should be spoonable but not watery.
Method 1: The Cold Plate Test
- Place a small plate in your freezer while your preserves cook.
- When you think the mixture is ready, spoon a little onto the cold plate.
- Wait 30 seconds, then run your finger through it.
If the line stays separated and the preserves wrinkle slightly, you’re done!
Method 2: Spoon Test
Dip a clean spoon into the preserves and hold it up sideways. If the syrup drips slowly and comes together in a “sheet” instead of separate drops, you’ve reached the gel stage.
Method 3: Thermometer Check
If you prefer precision, use a candy or digital thermometer. The gel point for preserves is around 220°F (104°C) at sea level.
Avoid overcooking—it can cause the sugars to caramelize, which changes both color and flavor.
Jar Sterilization Process
If you’re making a large batch or want to store your cherry preserves for months, sterilizing your jars is essential. It’s not as hard as it sounds, and it keeps your preserves safe from spoilage.
Why Sterilize Jars?
- Kills bacteria, mold, and yeast
- Prevents spoilage
- Ensures a tight vacuum seal
How to Sterilize Your Jars:
Water Bath Method (Most Common):
- Place your jars upright in a deep pot.
- Cover them completely with water.
- Bring to a boil and let them boil for 10 minutes.
- Keep the jars in hot water until you’re ready to fill them.
Oven Method:
- Preheat your oven to 275°F (135°C).
- Place jars on a baking tray and heat for 20 minutes.
- Boil the lids separately in water (never in the oven).
Never skip this step if you’re planning to store preserves at room temperature for months. If you’re just refrigerating for short-term use, sterilization is helpful but not critical.
Filling and Sealing the Jars
Once your preserves are ready and your jars are hot and sterile, it’s time to get them filled and sealed.
Step-by-Step:
- Use a funnel to ladle the hot cherry preserves into jars, leaving about ¼ inch of headspace.
- Wipe the rims with a clean, damp cloth to remove any sticky residue.
- Place the lids on and screw on the bands until they’re finger-tight—not too tight!
- Process the jars in a boiling water bath for 10 minutes if long-term storage is your goal.
You’ll hear the satisfying “pop” of the lids sealing as they cool.
Important Tips:
- Never reuse lids—they may not seal properly.
- Let the jars sit undisturbed for 12–24 hours after sealing.
- Label each jar with the date and ingredients.
Cooling and Storage
After sealing, let the jars cool completely at room temperature. Don’t try to rush this process by placing them in the fridge—natural cooling helps with proper sealing.
Storage Tips:
- Store in a cool, dark place (pantry or cupboard).
- Use within 12 months for best quality.
- Once opened, refrigerate and use within 3–4 weeks.
If a jar didn’t seal properly, just refrigerate and use it within a few weeks—still delicious, just not shelf-stable.
Ways to Use Cherry Preserves
You’ve put in the effort, and now you’ve got this beautiful batch of cherry preserves—what next? This isn’t just something to spread on toast (though it’s amazing that way). Cherry preserves are surprisingly versatile and can be used in so many delicious ways, both sweet and savory.
1. Classic Breakfast Pairings
- Toast & Bagels: Of course, the simplest and most satisfying way is a thick layer of preserves on warm buttered toast or cream cheese-slathered bagels.
- Pancakes & Waffles: Drizzle it over a stack of pancakes or waffles instead of syrup. It adds that fruity punch you didn’t know you were missing.
- Oatmeal & Yogurt: Stir a spoonful into a bowl of warm oatmeal or plain Greek yogurt. Instant flavor upgrade!
2. Baking with Preserves
- Filling for Pastries: Use cherry preserves in croissants, turnovers, or Danish pastries.
- Jam Thumbprint Cookies: A perfect use for those holiday treats. A dollop of cherry preserves in the center makes for a tangy twist.
- Cake Layers & Toppings: Layer between vanilla or chocolate cake for a cherry surprise, or spread on top of cheesecakes.
3. Savory Uses
Yes, you can even use cherry preserves in savory dishes!
- Glaze for Meats: Mix with balsamic vinegar or mustard and use it as a glaze for pork chops, chicken, or even grilled sausages.
- Cheese Boards: Serve it alongside brie, goat cheese, or blue cheese. The sweet/tart flavor pairs beautifully with creamy or salty cheeses.
- Sandwich Spread: Add a thin layer to turkey or ham sandwiches for a gourmet-style flavor kick.
4. Beverages & Desserts
- Cocktail Mixer: Swirl a spoonful into cocktails for color and fruity flavor.
- Ice Cream Topping: Warm it slightly and pour over vanilla ice cream.
- Smoothie Add-in: Blend a bit into your morning smoothie for extra natural sweetness.
Once you have a jar in the fridge, you’ll find yourself adding it to everything. It’s that addictive.
Tips for a Perfect Batch Every Time
Even the best cooks can sometimes run into issues when making preserves. Here are some tried-and-true tips to help you make the best cherry preserves possible—every single time.
1. Don’t Rush the Cooking
Give your preserves time to simmer and thicken. Rushing it on high heat can lead to burning or uneven texture. Slow and steady wins the flavor race.
2. Keep Stirring
Fruit and sugar mixtures love to stick and scorch if left unattended. Stir frequently, especially as the preserve thickens.
3. Adjust for Altitude
If you’re canning and live at a high elevation, remember to adjust your boiling water bath time. Add 1 minute for every 1,000 feet above sea level.
4. Avoid Over-Sweetening
Taste your cherries before adding sugar. If they’re super sweet already, you can reduce the sugar slightly. Always taste the mixture before boiling for a better flavor balance.
5. Experiment with Small Batches
Trying a new variation? Test it in a smaller batch before going all-in. It’s a great way to find your favorite add-ins like almond, vanilla, or spices.
6. Keep Equipment Clean
Sterilizing isn’t just for the jars. Make sure all tools—spoons, funnels, ladles—are squeaky clean to avoid introducing bacteria.
7. Label Everything
This seems small, but once your pantry has five different jars of red fruit preserves, you’ll wish you wrote the date and type on each one. Trust us!
Consistency, flavor, and safety come down to attention to detail. But once you get the hang of it, making cherry preserves becomes a fun seasonal tradition.
FAQs about Cherry Preserves Recipe
1. Can I use frozen cherries for preserves?
Yes! Frozen cherries are a great option, especially when fresh ones are out of season. Just be sure to thaw and drain them well before using to prevent excess water in your preserves.
2. How long do homemade cherry preserves last?
If properly sealed and stored in a cool, dark place, they can last up to 12 months. Once opened, keep them in the fridge and use within 3–4 weeks.
3. Can I reduce the sugar in this recipe?
You can, but it may affect the consistency and shelf-life. Try reducing it by ¼ to ½ cup and taste as you go. If you’re using less sugar, store the preserves in the fridge and consume sooner.
4. Do I need to add pectin?
Not necessarily. This recipe relies on lemon juice and slow cooking to thicken. However, if you want a firmer set or are using very sweet cherries, adding a little low-sugar pectin can help.
5. What’s the difference between jam and preserves?
Great question! Jam is usually made with mashed fruit, while preserves have larger fruit chunks or whole fruits. Preserves tend to be chunkier and more textured than jam.
Conclusion
There’s something incredibly satisfying about making your own cherry preserves. It’s a simple, comforting process that yields jars of vibrant, sweet-tart joy that you can enjoy for months—or gift to friends and family. From the rich aroma filling your kitchen to that first spoonful on a slice of toast, every step of this recipe is a reminder that the best things in life are often homemade.
Whether you’re new to preserves or a seasoned home canner, this cherry preserves recipe will never go out of style. It’s adaptable, flavorful, and full of homemade goodness. Grab those cherries, roll up your sleeves, and start your next kitchen adventure today. You won’t regret it.