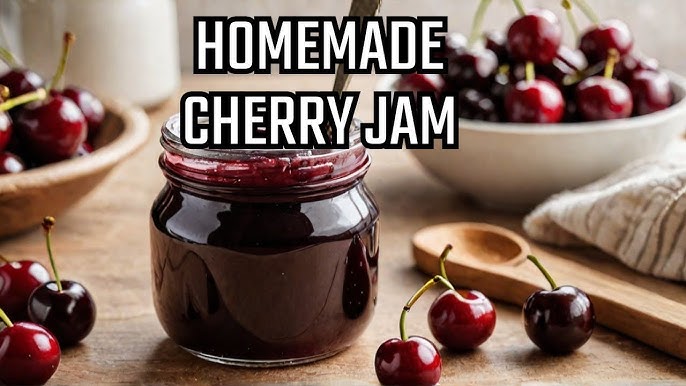
Cherry Jam Recipe: There’s something incredibly nostalgic and comforting about homemade jam. The sticky sweetness, the vibrant color, and the satisfaction of spreading it over a warm slice of toast—it all feels like a hug in a jar. Among all the jam flavors, cherry jam stands out for its rich flavor and deep red hue. It’s the perfect blend of tart and sweet, making it a favorite in many households.
So why not just buy cherry jam from the store? Well, store-bought jams often come with unnecessary preservatives, excess sugar, and sometimes even artificial flavors. Homemade jam, on the other hand, is pure, fresh, and exactly how you like it. When you make it yourself, you control every ingredient that goes into it. And believe me, the taste is worlds apart. Plus, making jam isn’t as complicated as it might seem—it’s more about patience and precision than culinary skill.
In this guide, I’ll walk you through every step of making cherry jam, from choosing the best cherries to sealing the jar. Whether you’re a first-timer or looking to refine your technique, this step-by-step cherry jam recipe has got you covered.
Ingredients You’ll Need
Before we jump into the process, let’s talk ingredients. At its core, cherry jam doesn’t require much—just a few simple things from your pantry and fridge. But don’t let the simplicity fool you; these ingredients pack a flavorful punch when combined the right way.
1. Fresh or Frozen Cherries: Fresh cherries are ideal during cherry season (late spring to early summer), but frozen ones work just as well if you want jam year-round. Make sure to pit them first, and if you’re using frozen cherries, thaw them thoroughly before starting.
2. Sugar: This not only sweetens the jam but also helps with preservation and thickening. Granulated white sugar works best here. The amount can vary depending on your preference and the sweetness of the cherries.
3. Lemon Juice: A splash of lemon juice is essential. It balances out the sweetness and brings out the cherry flavor even more. Plus, the acidity helps the jam set properly.
4. Optional: Pectin: Traditional cherry jam recipes often go without pectin because cherries have natural pectin in their skins. However, if you want a thicker, quicker-set jam, adding commercial pectin is totally fine.
That’s it—just four ingredients! It’s all about keeping things simple and letting the natural cherry flavor shine.
Tools and Equipment Required
Let’s talk tools. Making jam doesn’t require anything too fancy, but having the right equipment can make the process smoother and safer.
- Large Heavy-Bottomed Pot: You’ll need this for cooking the jam. A wide pot helps the jam cook evenly and reduces the chances of burning.
- Wooden Spoon or Heat-Resistant Spatula: Essential for stirring the mixture without scratching your cookware.
- Jar Funnel: Makes transferring the hot jam into jars less messy.
- Canning Jars with Lids: Mason jars are the gold standard. Make sure they’re clean and free of cracks.
- Tongs or Jar Lifter: To handle hot jars safely.
- Candy Thermometer (Optional): Helps you monitor the temperature, especially if you’re unsure whether the jam is ready.
- Ladle: For scooping the hot jam into jars.
If this sounds like a lot, don’t worry. Most of these items are likely already in your kitchen or easy to find at any store. Preparation is key—lay everything out before you start to keep the process smooth and stress-free.
Step-by-Step Instructions
Step 1: Prepping the Cherries
First things first: wash your cherries thoroughly to remove any dirt or residues. If you’re using fresh cherries, you’ll need to pit them. This can be a bit tedious, but it’s essential. You can use a cherry pitter if you have one, or do it manually by slicing the cherry and removing the pit with your fingers or a small knife.
Once pitted, roughly chop the cherries. You can leave them chunkier for a rustic texture or chop them finer if you like a smoother jam. If you prefer a smoother texture overall, you can also mash them slightly with a potato masher.
Step 2: Cooking the Fruit
Transfer the chopped cherries to your large pot and add sugar and lemon juice. If you’re using pectin, add it now according to the package instructions.
Start by cooking the mixture over medium heat, stirring frequently. The cherries will begin to break down and release their juices. Once the sugar dissolves, turn up the heat and bring the mixture to a rolling boil.
Let it boil for about 15–20 minutes, stirring occasionally to prevent sticking or burning. You’ll notice it thickening as it reduces.
Step 3: Checking for Doneness
To test if your jam is ready, you can use the “plate test.” Place a small plate in the freezer while your jam cooks. When you think it’s done, drop a small spoonful onto the cold plate. Wait a few seconds, then push it with your finger. If it wrinkles slightly and doesn’t flood back, it’s done. If it’s still runny, let it cook a few minutes longer.
You can also use a candy thermometer. Jam sets at around 220°F (105°C), so when your mixture hits this temperature, you’re good to go.
Step 4: Sterilizing the Jars
While your jam is finishing up, sterilize your jars. You can do this by boiling them in a large pot of water for 10 minutes or running them through the dishwasher on a hot cycle. Make sure they’re still hot when you fill them to avoid breakage.
Step 5: Filling and Sealing
Use your ladle and funnel to pour the hot jam into the sterilized jars, leaving about ¼ inch of space at the top. Wipe the rims with a clean, damp cloth, place the lids on top, and screw on the bands until they’re fingertip-tight.
If you plan to can your jam for long-term storage, process the filled jars in a boiling water bath for 10 minutes. Otherwise, let them cool at room temperature. Once cool, store in the fridge and use within 3–4 weeks.
Tips for Perfect Cherry Jam
Making cherry jam is part art, part science. While the process itself isn’t complicated, there are a few tips and tricks that can take your jam from good to great.
1. Balance the Sweetness: Not all cherries are created equal. Some are sweet (like Bing cherries), while others are tart (like Montmorency). Taste your cherries before adding sugar. You may need to adjust the sugar content based on how sweet or sour your cherries are.
2. Don’t Skip the Lemon Juice: Lemon juice not only enhances the flavor, but also helps with the setting process due to its natural pectin and acidity. If your jam tastes flat, a touch more lemon juice might be all it needs.
3. Stir Often: Jam has a sneaky tendency to stick to the bottom of the pot and burn, especially when it’s reaching the final boiling stage. Stir frequently and keep an eye on the heat.
4. Patience is Key: It might be tempting to rush the cooking process by cranking up the heat, but slow and steady wins the jam race. A rapid, high boil might cause scorching and uneven texture.
5. Use the Right Pot: A wide, heavy-bottomed pot allows the jam to evaporate more quickly and evenly, helping it to thicken better and faster.
6. Skim the Foam: As your jam boils, you might see some foam forming on top. Skim this off with a spoon for a cleaner finish and better presentation.
7. Don’t Overcook: Overcooked jam can become stiff and overly thick. Keep an eye on it, and once it starts to gel (via plate test or thermometer), it’s time to pull it off the heat.
Perfect jam is about hitting that sweet spot—pun intended—between taste, texture, and spreadability. Follow these tips and you’ll be well on your way to jam-making success.
Storing Your Cherry Jam
Once your cherry jam is ready and jarred, storage becomes the next big step. Proper storage ensures your hard work doesn’t go to waste and allows you to enjoy your jam for months to come.
Short-Term Storage: If you’re not canning your jam (i.e., not processing it in a boiling water bath), store it in the refrigerator. Homemade cherry jam stored in the fridge typically lasts up to 3-4 weeks. Make sure the jar is tightly sealed after every use.
Long-Term Storage: For a shelf-stable version, use the water bath canning method. Process the sealed jars in a boiling water bath for about 10-15 minutes, then let them cool undisturbed at room temperature. Properly sealed jars can last up to 12 months in a cool, dark place.
Labeling: Always label your jars with the date and contents. This helps you keep track of how old the jam is and ensures you use the oldest batch first.
Check for Spoilage: Even if your jam is canned, check it before use. If you see mold, an off smell, or the lid has popped up, discard it immediately.
Proper storage practices not only preserve flavor and texture but also ensure your jam remains safe to eat. It’s the final but crucial part of your jam-making journey.
Common Mistakes to Avoid
Cherry jam making is fun and rewarding, but there are a few common pitfalls that beginners (and sometimes even seasoned cooks) fall into. Let’s go over some of them so you can steer clear.
1. Not Using Ripe Cherries: Under-ripe cherries don’t have the depth of flavor or the natural sugars you need. Overripe ones can lead to an overly mushy texture and faster spoilage. Choose firm, ripe cherries with vibrant color.
2. Skipping Sterilization: Sterilizing your jars is non-negotiable. It kills off bacteria and prevents contamination. Even a small lapse here can cause your jam to spoil or ferment.
3. Improper Sealing: Make sure the rims of your jars are clean before sealing, and always use new lids if you’re canning. A bad seal will ruin your jam’s shelf life.
4. Using Too Much Sugar (or Not Enough): While sugar is necessary for preservation and consistency, too much can make the jam overly sweet and mask the cherry flavor. Too little can prevent it from setting or make it go bad faster. Follow a tested recipe or adjust sugar to taste carefully.
5. Overcooking or Undercooking: Overcooked jam becomes rubbery, while undercooked jam may remain too runny. Use the plate test or thermometer to get it just right.
6. Not Labeling Jars: Forgetting to label jars may not affect the taste, but it can lead to confusion later, especially if you make multiple types of jam.
Avoiding these common mistakes will make your jam-making smoother and the final product even more enjoyable.
Creative Ways to Use Cherry Jam
Cherry jam isn’t just for toast. In fact, there are dozens of delicious and creative ways to incorporate it into meals and desserts that go far beyond breakfast.
1. Swirl into Yogurt or Oatmeal: Add a dollop of cherry jam to your morning yogurt or oatmeal. It adds sweetness, color, and a fruity punch that turns a simple breakfast into something special.
2. Glaze for Meats: Cherry jam makes an excellent glaze for meats like pork, chicken, or duck. Combine it with a bit of balsamic vinegar or mustard for a savory-sweet kick.
3. Cheese Board Companion: Pair cherry jam with a wedge of brie or sharp cheddar. The sweet and tart flavors play beautifully with rich, creamy cheeses.
4. Jam-Filled Desserts: Use it as a filling in thumbprint cookies, cakes, or tarts. It’s especially good in linzer cookies or as a layer in sponge cakes.
5. Mix into Salad Dressings: Blend a spoonful into a vinaigrette for a fruity twist. It’s great over spinach, goat cheese, and walnut salads.
6. Ice Cream Topping: Warm cherry jam over low heat and drizzle it on vanilla or chocolate ice cream. Trust me, it’s a game-changer.
7. Homemade Cherry BBQ Sauce: Yes, you can add it to your BBQ sauce for a sweet-tart edge that takes ribs or burgers to another level.
With a jar of cherry jam in your fridge or pantry, the possibilities are endless. It’s a versatile ingredient that brings flavor and flair to both sweet and savory dishes.
FAQs about Cherry Jam Recipe
1. Can I use frozen cherries to make cherry jam?
Yes! Frozen cherries work just as well as fresh ones. Just make sure they are completely thawed before you start cooking. You may notice a little more liquid, so adjust your cooking time slightly to achieve the desired consistency.
2. Do I really need pectin for cherry jam?
Not necessarily. Cherries naturally contain some pectin, especially if you include the skins. If you prefer a firmer set or want to shorten the cooking time, adding commercial pectin can help—but it’s optional.
3. How long does homemade cherry jam last?
If properly canned, it can last up to 12 months in a cool, dark place. If you’re skipping the canning process and just refrigerating, it’s best used within 3–4 weeks.
4. Why is my cherry jam too runny?
Your jam might be undercooked, or the fruit may not have had enough natural pectin. Try cooking it a bit longer or doing the plate test to check doneness. You can also re-cook and add a bit of pectin to fix it.
5. Can I reduce the sugar in the recipe?
Yes, but it may affect the shelf life and texture. Sugar helps with preservation and setting, so if you cut it down significantly, store the jam in the refrigerator and use it up quickly.
Conclusion
So, there you have it—a complete, step-by-step guide to making homemade cherry jam that’s sweet, flavorful, and absolutely foolproof. From selecting the best cherries to sealing the final jar, each step is straightforward and totally doable, even for beginners.
Making jam at home is more than just a kitchen project. It’s a form of culinary self-care, a nod to tradition, and a small act of creativity all wrapped up in a glass jar. There’s something truly satisfying about crafting a product from scratch that you can enjoy every morning or share with friends and family. Plus, when cherry season hits, there’s no better way to preserve that summer flavor than by turning it into jam.
Whether you’re slathering it on toast, spooning it over ice cream, or giving it as a heartfelt homemade gift, cherry jam is a delicious addition to any pantry. And once you’ve mastered this recipe, you’ll probably never go back to store-bought again.
Ready to grab a spoon and taste the fruits of your labor? I bet you are.