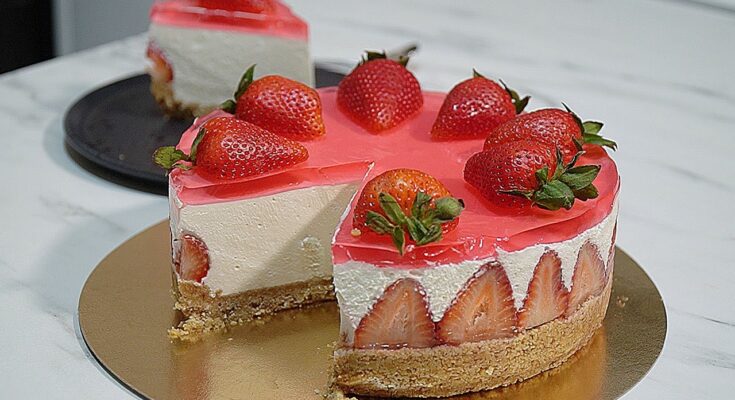
Cheesecake Filling Recipe: Cheesecake is one of those desserts that never goes out of style. Whether it’s for a casual get-together or a formal celebration, the creamy, rich filling paired with a buttery crust hits all the right notes. But what really makes or breaks a cheesecake? The filling. Nail the filling, and you’re on your way to dessert stardom.
Let’s be honest—cheesecake filling is where all the magic happens. It’s what gives the dessert its signature texture and taste. Done right, it’s smooth, luscious, and just sweet enough to leave you craving more. Mess it up, and you’re left with a cracked, lumpy disappointment.
This guide will take you through each step to ensure you make a cheesecake filling that’s nothing short of heavenly.
Ingredients You’ll Need
Before we dive into the actual steps, let’s gather all the necessary ingredients. Using the right ingredients—and knowing how each one contributes—is crucial for that rich, creamy texture we all love.
Core Ingredients for a Classic Cheesecake Filling
These are the foundation of a traditional cheesecake:
- Cream Cheese (4 packages, 8 oz each) – Room temperature. This is the star of the show. It gives cheesecake its creamy texture.
- Granulated Sugar (1 cup) – Adds sweetness and helps with the smooth consistency.
- Sour Cream (1 cup) – Adds tang and keeps the filling moist.
- Vanilla Extract (2 tsp) – Enhances flavor and adds aroma.
- Large Eggs (4) – Bind the filling together and help it set during baking.
Optional Add-ins for Flavor Twists
Want to spice up your cheesecake game? Try these optional ingredients:
- Lemon Zest or Juice – For a citrusy kick.
- Melted Chocolate or Cocoa Powder – For a rich chocolate cheesecake.
- Pumpkin Puree and Spices – Perfect for fall-themed desserts.
- Fruit Purees – Strawberry or raspberry swirls can add flavor and color.
Tools and Equipment
Having the right tools on hand makes the process a lot smoother—literally and figuratively.
Kitchen Essentials for a Smooth Filling
Here’s what you’ll need:
- Stand Mixer or Hand Mixer – For a silky-smooth filling.
- Mixing Bowls – Preferably glass or stainless steel.
- Rubber Spatula – To scrape down the sides of the bowl.
- Measuring Cups and Spoons – Precision is key.
- Springform Pan – Ideal for cheesecakes due to easy release.
Pro Tips for Preparation Efficiency
- Bring all your ingredients to room temperature—especially the cream cheese and eggs. This helps everything blend better and avoids lumps.
- Pre-measure your ingredients. This streamlines the mixing process.
- Use a mixer on low to medium speed to avoid incorporating too much air, which causes cracks.
Step-by-Step Cheesecake Filling Instructions
Now for the fun part—making that velvety cheesecake filling from scratch.
Step 1 – Preparing the Cream Cheese
Start by placing your room-temperature cream cheese into the mixing bowl. Using your hand or stand mixer, beat it on medium speed for about 2-3 minutes until it’s smooth and free of lumps.
Why this matters: Beating the cream cheese first ensures that when you add other ingredients, everything incorporates smoothly. This is the foundation of your filling—get this wrong, and the texture will suffer.
Step 2 – Adding Sugar and Mixing
Slowly add the granulated sugar to the cream cheese. Continue mixing on medium speed until the sugar dissolves completely and the mixture becomes fluffy—this should take another 2-3 minutes.
Tip: Scrape down the sides of the bowl at least once to make sure everything is mixed evenly. Any stray lumps of cream cheese can ruin that perfect texture.
Step 3 – Incorporating Eggs Gradually
Add the eggs one at a time, beating on low speed after each addition. Don’t rush this part. Each egg should be fully incorporated before adding the next.
Why gradual addition works: Eggs add moisture and structure, but adding them too quickly can create a runny or curdled texture. Mixing slowly helps to avoid too much air, which is the enemy of a smooth, dense cheesecake.
Step 4 – Mixing in Sour Cream and Vanilla Extract
Once the eggs are fully blended in, add the sour cream and vanilla extract. Mix just until combined. Don’t overbeat.
Flavor boost: The sour cream adds tanginess and moisture, while vanilla rounds out the flavor with its subtle, sweet aroma. This combo is what makes your cheesecake taste like it came straight from a professional bakery.
Step 5 – Blending Until Silky Smooth
Give the filling one last mix on low speed to ensure it’s silky smooth. Check the texture—there should be no lumps, and it should flow like thick custard.
If you see any lumps or air bubbles, give it a few stirs by hand with a spatula. Don’t overdo it, though. Overmixing can lead to cracks when baking.
Visual checkpoint: The filling should coat the back of a spoon and hold its shape when swirled.
Pro Tips for a Perfect Cheesecake Filling
Avoiding Lumps and Air Bubbles
- Room temp ingredients are non-negotiable.
- Mix on low to medium speed—never high.
- Scrape the bowl often to prevent hidden lumps.
- Tap the bowl gently on the counter to release any trapped air.
Best Practices for Mixing and Baking
- If using a water bath (bain-marie), wrap your pan in foil to prevent leaks.
- Preheat your oven to the correct temperature—typically 325°F (163°C).
- Avoid opening the oven door while baking. Sudden temperature changes can cause cracks.
Baking the Cheesecake to Perfection
Once your filling is silky smooth and lump-free, it’s time to bake that beauty. But don’t just toss it in the oven and hope for the best—baking is an art, especially with cheesecakes. Here’s how to ensure it comes out creamy and flawless every time.
1. Prepare the Crust First: Before you even think about baking the filling, make sure your crust (graham cracker or otherwise) is prepped and pre-baked if needed. This creates a solid base and prevents sogginess.
2. Use a Water Bath: A water bath, or “bain-marie,” helps regulate the temperature around your cheesecake and adds steam to the oven. This is key for avoiding cracks and achieving that ultra-smooth texture. Wrap your springform pan in heavy-duty aluminum foil to prevent leaks, then place it in a larger pan filled with about 1 inch of hot water.
3. Bake at Low Temperature: Bake your cheesecake at 325°F (163°C) for 50–70 minutes. You’ll know it’s done when the outer edges are set, but the center still jiggles slightly like Jell-O. This gentle bake gives your filling time to set without overcooking.
4. Cool Gradually: Once done, turn off the oven and leave the cheesecake inside with the door slightly ajar for about an hour. This step prevents sudden temperature changes that could cause cracking.
5. Chill Overnight: Transfer your cheesecake to the fridge and let it chill for at least 4 hours, preferably overnight. This allows the filling to fully firm up and develop flavor.
Common Mistakes to Avoid
Let’s save you from learning these the hard way. Here are some cheesecake filling sins to steer clear of:
- Overmixing the Batter: More mixing = more air = cracks.
- Cold Ingredients: This creates lumps that refuse to blend.
- Skipping the Water Bath: Big no-no if you want a smooth, crack-free top.
- Opening the Oven Too Soon: Resist the urge to peek!
- Not Letting It Set: Slicing too early leads to a runny mess.
How to Add Flavors and Variations
The base filling is delicious on its own, but who doesn’t love a twist now and then? Try these easy add-ons for exciting flavor variations.
Chocolate Cheesecake: Mix in ½ cup of melted semi-sweet chocolate or ¼ cup of cocoa powder.
Lemon Cheesecake: Add 2 tablespoons of lemon juice and 1 tablespoon of lemon zest.
Berry Swirl Cheesecake: Add a swirl of pureed strawberries, blueberries, or raspberries just before baking.
Pumpkin Cheesecake: Add ¾ cup pumpkin puree and 1 teaspoon of pumpkin spice for a fall-inspired treat.
Just be mindful of how extra ingredients affect the texture—especially with liquid add-ins. You might need to adjust baking time slightly.
Storage and Freezing Tips
Cheesecake stores like a dream when done right.
Refrigerator Storage: Keep your cheesecake in an airtight container or covered with plastic wrap. It’ll stay fresh for up to 5 days.
Freezing Cheesecake: Want to save it for later? Cheesecake freezes beautifully. Wrap individual slices or the whole cake tightly in plastic wrap and foil, then store in a freezer bag. It’ll keep for up to 3 months. To serve, thaw in the fridge overnight.
Serving Tip: For the cleanest slices, use a hot knife and wipe it clean after each cut. It makes a huge difference in presentation.
FAQs about Cheesecake Filling Recipe
1. Can I use Greek yogurt instead of sour cream?
Yes, you can substitute Greek yogurt for sour cream in equal amounts. It will add a slightly tangier flavor but maintain a similar creamy texture.
2. Why did my cheesecake crack?
Cracks are usually due to overmixing, baking too fast, or cooling too quickly. Always mix on low speed and use a water bath for best results.
3. How do I know when my cheesecake is done?
The edges should be set, but the center should still jiggle slightly. It will continue to set as it cools.
4. Can I make cheesecake filling ahead of time?
Yes, you can prepare the filling up to 2 days in advance. Just store it in the fridge in an airtight container until you’re ready to bake.
5. How do I prevent lumps in the filling?
Make sure all ingredients are at room temperature and mix the cream cheese thoroughly before adding anything else.
Conclusion
Cheesecake filling might seem intimidating at first glance, but once you master the basics and follow each step carefully, it becomes second nature. The key lies in using room-temperature ingredients, mixing just enough to combine, baking low and slow, and chilling it thoroughly. Stick to this guide, and you’ll be crafting bakery-worthy cheesecakes in no time.
Don’t be afraid to get creative with flavors, toppings, and crusts. After all, the best part about cheesecake is how customizable it is. Whether you keep it classic or jazz it up with a swirl of chocolate or berries, one thing’s for sure: there won’t be leftovers.


