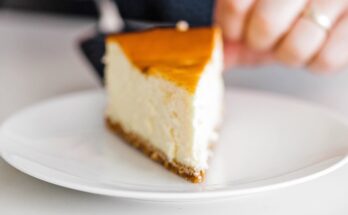
Cheesecake Factory Recipe: There is something almost magical about a Cheesecake Factory-style cheesecake. It is rich without being heavy, creamy without turning gluey, and sweet without knocking you over the head with sugar.
That balance is exactly why so many people order it again and again. Making it at home may sound intimidating at first, but once you break it down into manageable steps, it becomes surprisingly realistic.
In fact, it feels less like climbing a mountain and more like taking a scenic staircase one level at a time. Every stage matters, but none of them are too complicated when explained clearly.
What Makes a Cheesecake Factory-Style Cheesecake So Special
The reason this style of cheesecake stands out is simple: it delivers maximum creaminess with a clean, dense-yet-silky bite. Some cheesecakes lean airy and mousse-like, while others are so heavy they feel like a brick wrapped in sugar. A Cheesecake Factory-inspired cheesecake sits beautifully in the middle. It is substantial, yes, but also elegant. It has enough density to feel indulgent and enough softness to keep every forkful smooth. That texture is not an accident. It comes from careful ingredient choices, room-temperature mixing, and gentle baking.
The flavor profile matters just as much. A great cheesecake is not only sweet. It should carry a mild tang from the cream cheese and sour cream, a warm vanilla note, and just enough lemon to brighten the richness without making the dessert taste citrusy. Think of it like tuning an instrument. Too much sugar, and everything sounds flat. Too much acid, and the balance feels sharp. When the proportions are right, you get a dessert that tastes deep, rounded, and restaurant-worthy. That is why copycat versions often fail. They imitate the look, but not the structure and flavor layering.
Then there is the crust. A proper graham cracker crust should taste buttery, lightly caramelized, and slightly crisp at the edges. It should not be greasy, soggy, or too thick. It acts like the stage beneath the performance. You may not always think about it first, but the whole dessert depends on it. Paired with a lush filling and a smooth sour cream topping, the crust turns the cheesecake into a complete experience rather than just a soft filling in a pan.
What really sets this recipe apart is that it respects all those little details. From using a water bath to letting the cheesecake cool gradually, every technique here supports the final result. That is the secret behind the iconic finish: not one dramatic trick, but a chain of smart, simple decisions that work together.
Ingredients You’ll Need
Below is the complete list for this Cheesecake Factory copycat recipe. Keeping the ingredients organized by component makes the process much easier once you start baking. That way, you are not rummaging through the kitchen halfway through mixing batter with cream cheese on your hands and a springform pan waiting on the counter.
For the Graham Cracker Crust
- 2 cups graham cracker crumbs
- 5 tablespoons unsalted butter, melted
- 3 tablespoons granulated sugar
This crust is simple, but it plays a huge role in the overall dessert. Graham cracker crumbs bring that familiar honey-wheat sweetness, while melted butter binds everything into a firm, sliceable base. The sugar helps the crust toast nicely during the brief pre-bake, adding a slight caramel note. Press it evenly and firmly, and you have the kind of crust that supports the cheesecake without stealing the spotlight.
For the Cheesecake Filling
- 4 packages (8 ounces each) full-fat cream cheese, softened
- 1 1/4 cups granulated sugar
- 1 tablespoon cornstarch
- 1 cup sour cream, room temperature
- 2 teaspoons pure vanilla extract
- 1 teaspoon fresh lemon juice
- 4 large eggs, room temperature
This is where the magic lives. Full-fat cream cheese is essential because it creates the signature richness and body. Sugar sweetens without overwhelming, and a little cornstarch adds insurance by helping stabilize the filling. Sour cream contributes tang and smoothness, vanilla rounds out the flavor, and lemon juice quietly lifts everything in the background. Eggs are the structural backbone, so they need to be added carefully to avoid too much air, which can lead to cracking.
For the Sour Cream Topping
- 1 cup sour cream
- 2 tablespoons granulated sugar
- 1/2 teaspoon vanilla extract
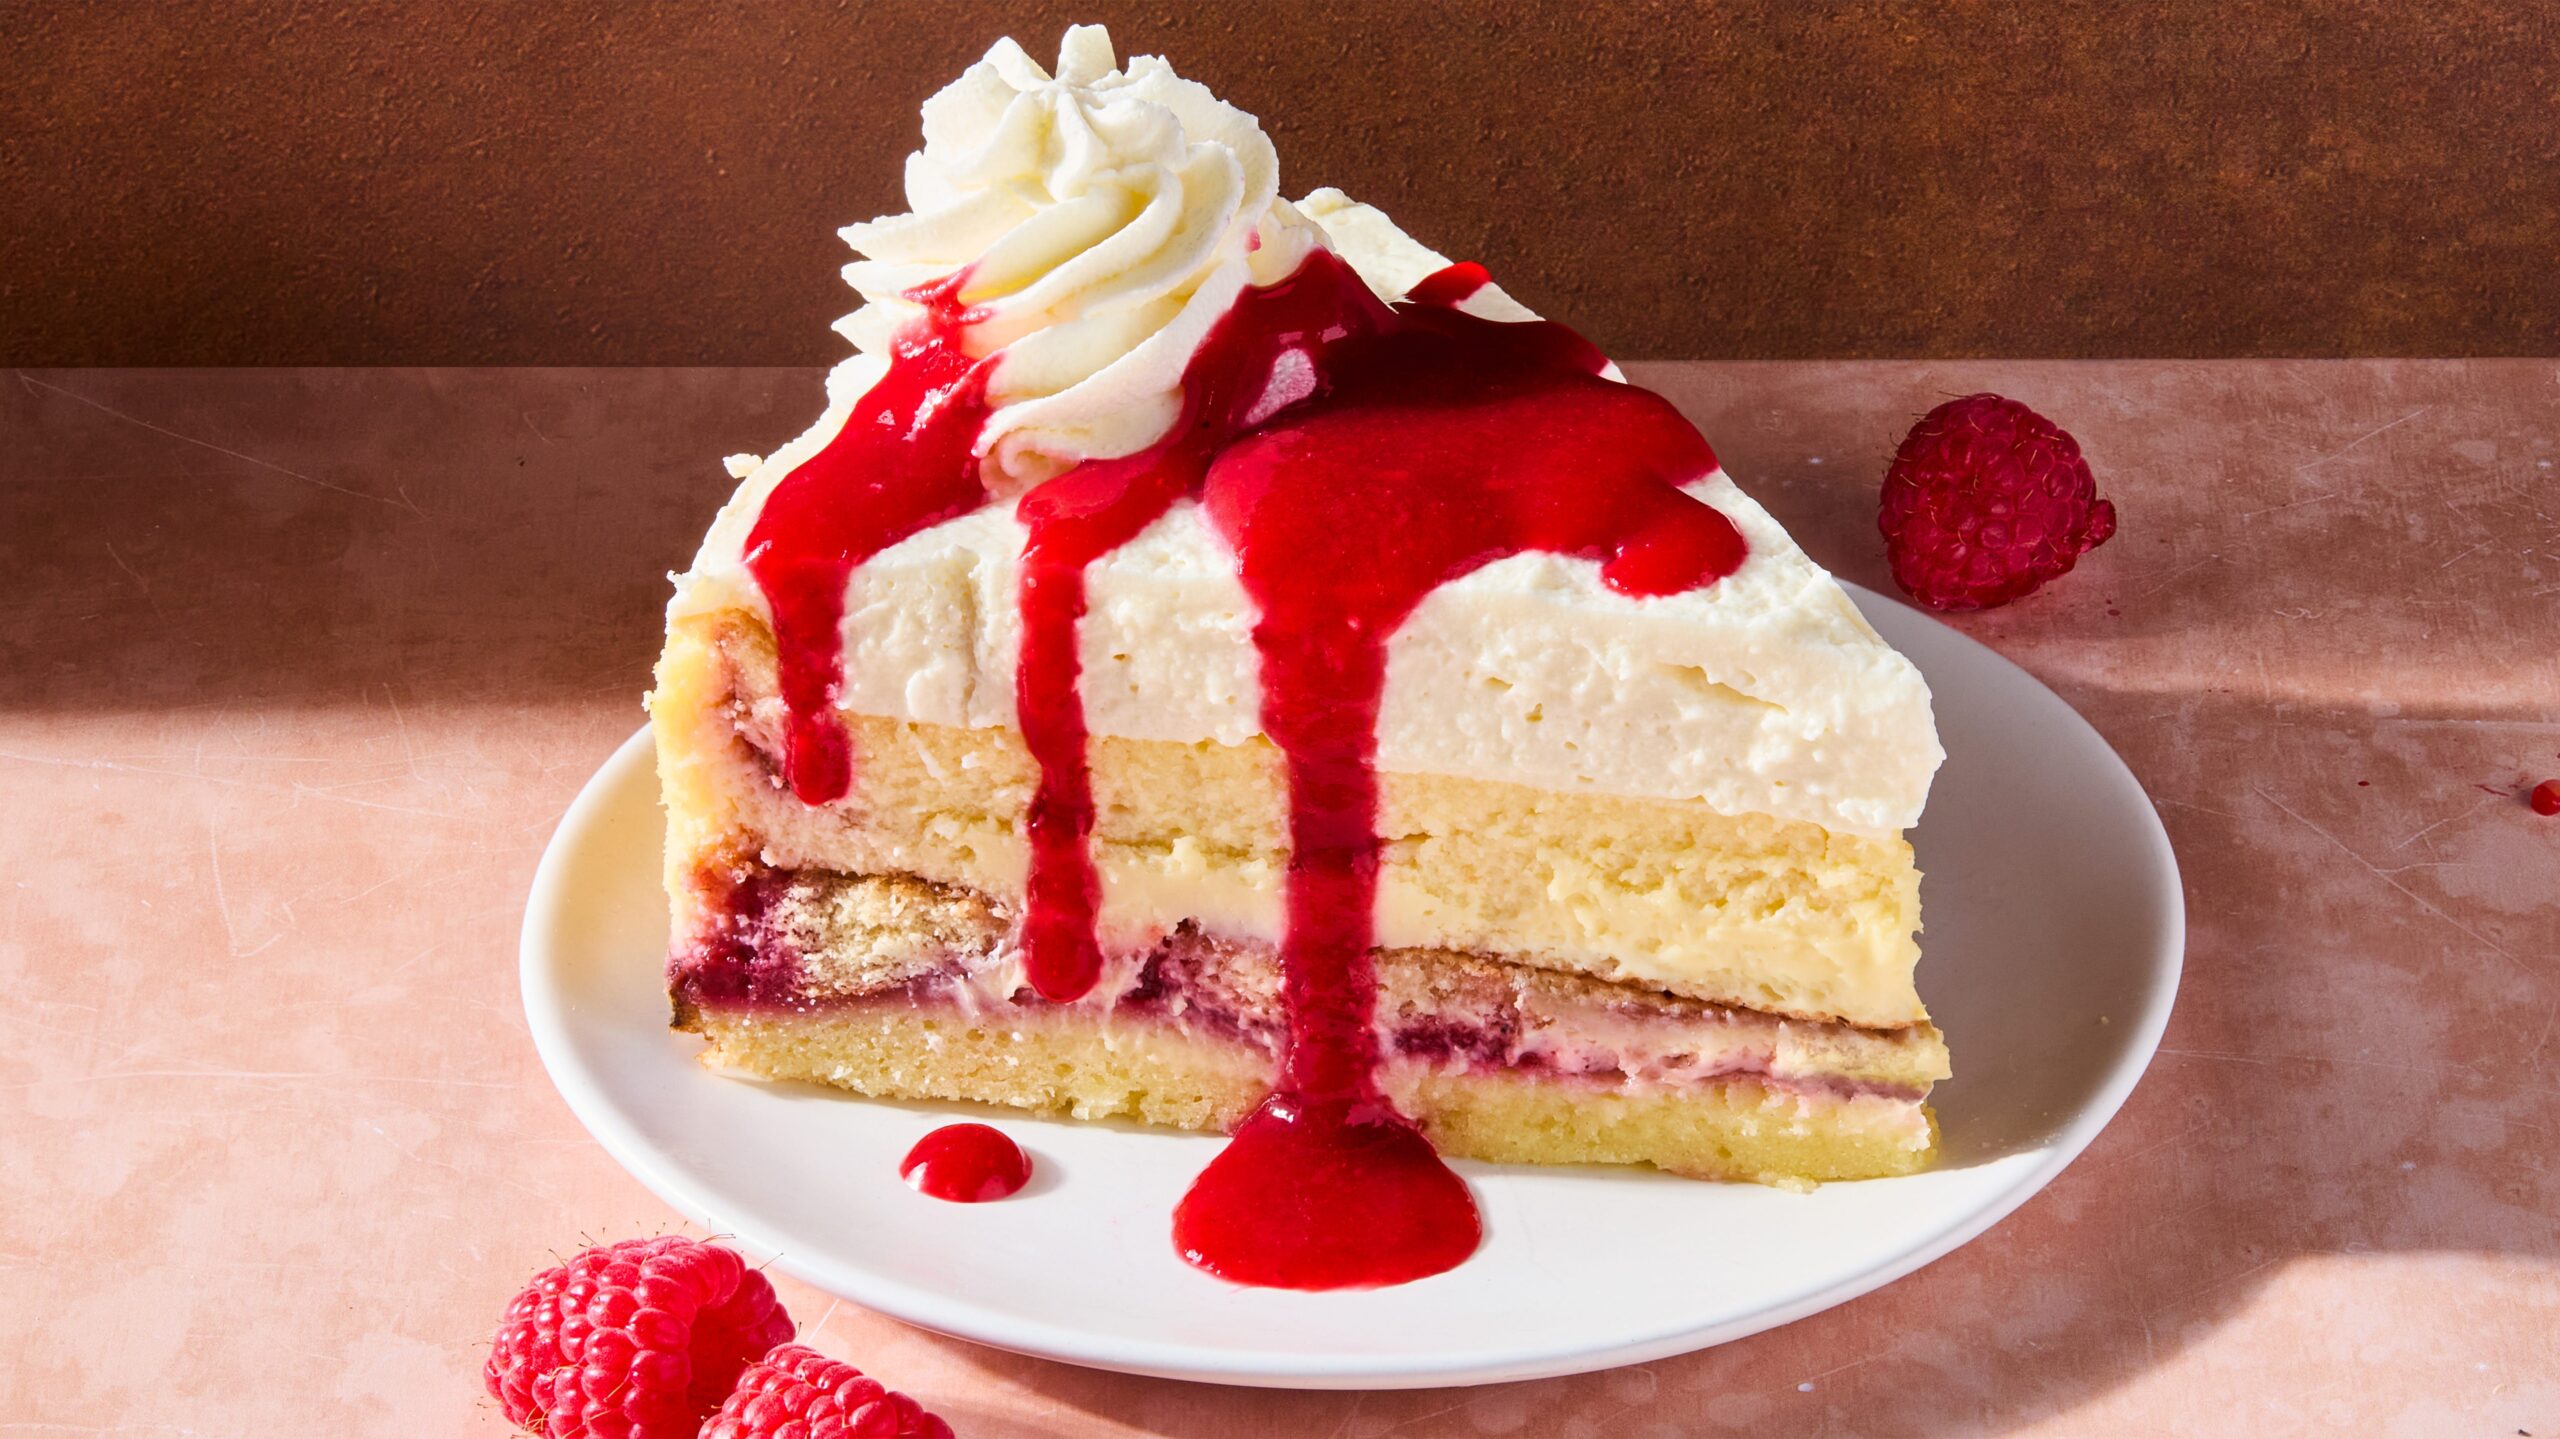
This topping gives the cheesecake its polished finish. It adds a subtle tangy layer that breaks up the richness and creates a smooth top surface. It is optional in some recipes, but for a more authentic restaurant-style look and taste, it is absolutely worth including.
Kitchen Equipment That Makes the Process Easier
A great cheesecake recipe does not require a professional pastry kitchen, but the right tools can make the process smoother and more reliable. The most important item is a 9-inch springform pan. A regular cake pan makes removal tricky and increases the risk of damaging the cheesecake when you try to release it. With a springform pan, the sides detach cleanly, allowing your finished cheesecake to stay neat and elegant. That alone makes a huge difference, especially if presentation matters to you.
You will also need a large mixing bowl or stand mixer, though a hand mixer works perfectly well too. What matters most is control. Cream cheese needs to be blended until smooth, but not whipped into a cloud. That is why medium-low speed is your best friend here. A rubber spatula is equally useful because it helps scrape down the bowl thoroughly. Hidden lumps of unmixed cream cheese love to cling to the sides, and if you ignore them, they will absolutely make a surprise appearance in the final batter.
A roasting pan or large baking dish is useful for the water bath. This step may sound fancy, but it is really just a way to create gentle, humid heat around the cheesecake while it bakes. The result is a more even texture and fewer cracks. You will also want heavy-duty aluminum foil to wrap the outside of the springform pan and help prevent water from sneaking in. Some bakers skip the water bath and hope for the best. Sometimes they get lucky. Sometimes they get the Grand Canyon across the top of their cheesecake.
A wire rack helps with controlled cooling, and a sharp knife is essential for clean slices once the cheesecake has chilled. Dip the knife in hot water and wipe it clean between cuts for that polished bakery-style look. These tools are not about making the recipe complicated. They are about giving you a smoother path from mixing bowl to beautiful final slice.
Step-by-Step Guide for Cheesecake Factory Cheesecake
Step 1: Prepare the Pan, Oven, and Water Bath
Start by preheating your oven and getting your springform pan ready. Wrap the outside of the pan with foil to help protect it from water if you are using a water bath. Place a larger baking dish nearby so it is ready for the cheesecake pan later. This setup helps the cheesecake bake gently and evenly.
Step 2: Make and Pre-Bake the Crust
Prepare your crust by mixing the crumbs, sugar, and melted butter until the texture looks like wet sand. Press the mixture firmly into the bottom of the pan to create an even layer. Bake it for a few minutes until lightly set, then remove it from the oven and let it cool slightly. A pre-baked crust gives the cheesecake a stronger base.
Step 3: Mix the Cheesecake Filling Properly
In a large bowl, beat the cream cheese until smooth and creamy with no lumps. Add the sugar, then mix in the eggs one at a time, followed by sour cream, vanilla, and any other flavoring ingredients. Mix just until combined to avoid adding too much air. A smooth filling is the secret to that rich, dense cheesecake texture.
Step 4: Bake the Cheesecake Low and Slow
Pour the filling over the crust and smooth the top. Place the cheesecake in the oven, using the water bath if your recipe calls for it. Bake at a moderate to low temperature until the edges are set but the center still has a slight jiggle. This gentle baking method helps prevent cracking.
Step 5: Cool, Chill, and Finish the Cheesecake
Turn off the oven and let the cheesecake cool gradually before removing it. After it reaches room temperature, chill it in the refrigerator for several hours or overnight. Once fully chilled, add your favorite topping and serve. This final step gives the cheesecake its classic creamy texture and flavor.
Common Mistakes to Avoid
One of the biggest cheesecake mistakes is using cold ingredients. Cream cheese straight from the fridge does not blend smoothly, and cold eggs do not incorporate as evenly as room-temperature ones. The result is often a lumpy batter that tempts you to overmix. Once that happens, too much air gets trapped in the filling, and the cheesecake may puff in the oven and crack as it cools. Starting with room-temperature ingredients is one of the simplest ways to improve both texture and appearance.
Another common issue is overbaking. People often assume a cheesecake should look fully set before it comes out of the oven, but that is not how this dessert works. The center should still wobble slightly. If you keep baking until it looks totally firm, you risk a dry, dense texture that loses the luxurious creaminess you are after. Cheesecake is a dessert of patience. It finishes setting during the cooling and chilling stages, not just in the oven.
Skipping the water bath is also a gamble. Yes, some cheesecakes bake up fine without it, but the risk of cracking and uneven texture rises fast. The water bath creates a gentler environment, helping the cheesecake bake more evenly from edge to center. Even if a crack does not ruin the taste, it can affect the finished look, especially if you are aiming for that polished Cheesecake Factory-style presentation.
Finally, many people cut into the cheesecake too soon. That is understandable because it smells amazing and looks almost ready. But warm cheesecake is like wet cement. It has not finished setting yet. Chill it long enough, and you get clean slices and the right dense-creamy consistency. Rush it, and you end up with a soft, messy center that does not reflect the effort you put in. Avoiding these mistakes is not about perfectionism. It is about protecting the texture, flavor, and visual appeal that make cheesecake worth making at all.
Pro Tips for Bakery-Style Texture and Flavor
For a more professional result, focus first on ingredient quality. Full-fat cream cheese delivers the best flavor and structure, and pure vanilla extract makes a noticeable difference in a recipe with such a clean flavor profile. Since cheesecake is not loaded with spices or mix-ins, each ingredient has nowhere to hide. This is one of those desserts where quality shows up immediately in the final bite. A better cream cheese means a better cheesecake, plain and simple.
Use a low mixer speed throughout most of the process. That may sound like a small technical detail, but it matters more than many people realize. High speed whips extra air into the batter, and air is not your friend here. A cheesecake should feel smooth and dense, not puffed like a soufflé. Treat the batter gently, scrape the bowl often, and stop mixing as soon as the ingredients are fully combined. Restraint is part of the craft.
Another excellent tip is to let the cheesecake rest in the oven after baking. That gradual temperature drop is like easing a car to a stop instead of slamming the brakes. It reduces stress on the cheesecake and helps keep the top surface smoother. Also, chilling overnight rather than for the bare minimum makes a visible and flavorful difference. The texture gets tighter, the flavor becomes more balanced, and the slices hold beautifully.
For extra finesse, consider finishing the cheesecake with a simple garnish rather than piling on toppings. A few fresh berries, a spoonful of fruit compote, or a light swirl of whipped cream can enhance the dessert without covering up the careful work underneath. The goal is not to distract from the cheesecake. It is to frame it. And when the base recipe is strong, even the simplest presentation can feel elegant and memorable.
Flavor Variations You Can Try at Home
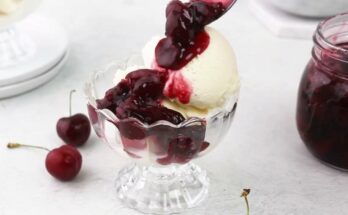
One of the best things about a classic cheesecake base is how flexible it is. Once you master the original version, it becomes a blank canvas for creative variations. A strawberry cheesecake is one of the easiest upgrades. Top the finished cheesecake with a glossy homemade strawberry sauce or fresh sliced berries tossed with a little sugar. The fruit adds brightness and color while keeping the dessert familiar and crowd-pleasing. It is ideal for spring, summer dinners, or any time you want a fresher finish.
A chocolate cheesecake twist works beautifully too. You can melt semisweet chocolate into part of the filling for a marbled effect or drizzle ganache over the chilled top for a more dramatic look. Chocolate deepens the dessert and makes it feel even more indulgent, like the difference between a cozy sweater and a velvet jacket. Rich, smooth, and impossible to ignore. If you love coffeehouse desserts, a little espresso powder can also be added to enhance chocolate notes without overpowering the cheesecake itself.
For something warmer and more seasonal, try a caramel pecan version or a pumpkin spice cheesecake in cooler months. A swirl of caramel sauce and a handful of toasted pecans can add crunch and complexity. Pumpkin purée paired with cinnamon, nutmeg, and cloves turns the filling into a holiday-ready dessert while still preserving the creamy structure of the original. Just reduce some of the sour cream or cream cheese proportionally if adding pumpkin so the texture stays balanced.
You can even play with the crust. Swap graham crackers for vanilla wafers, digestive biscuits, or chocolate cookie crumbs for a different personality. That is the beauty of this recipe. At its core, it is classic and dependable. Around the edges, it is wonderfully adaptable. Once you understand the structure, the flavor options open up in every direction.
How to Serve, Store, and Freeze Cheesecake
Serving cheesecake well is part of the experience. For the best texture and flavor, let the chilled cheesecake sit at room temperature for about 20 to 30 minutes before slicing and serving. That short rest softens the filling just enough to make each bite creamier and more expressive. Straight-from-the-fridge cheesecake can taste slightly muted because cold temperatures dull flavor. A little patience before serving brings back the richness and tang that make the dessert shine.
To store cheesecake, keep it covered in the refrigerator for up to 5 days. A cake container works well, but plastic wrap or foil can also help protect it from absorbing fridge odors. Cheesecake is like butter in that way. It quietly picks up surrounding smells if left exposed. If you plan to garnish it with fruit or sauce, it is often best to add those toppings just before serving so the surface stays neat and fresh.
Freezing is also an excellent option. Chill the cheesecake completely first, then wrap either the whole cake or individual slices tightly in plastic wrap followed by foil. Store it in the freezer for up to 2 months. To serve, thaw it overnight in the refrigerator. This makes cheesecake a smart make-ahead dessert for parties, holidays, or special occasions when you want one less thing to worry about on the day itself. Individual slices are especially convenient because they let you enjoy a restaurant-style dessert whenever the craving hits.
The biggest rule with storage is simple: protect the texture. Keep the cheesecake chilled, covered, and handled gently. Done right, it stays creamy, slices cleanly, and tastes just as satisfying the next day. In some cases, it even tastes better after resting because the flavors settle and meld more fully. That is one of the quiet joys of cheesecake. It rewards patience all the way through, from mixing bowl to leftover slice.
FAQs about Cheesecake Factory Recipe
1. What makes Cheesecake Factory-style cheesecake so rich?
Cheesecake Factory-style cheesecake is known for its smooth, dense, and creamy texture. This usually comes from using full-fat cream cheese, sugar, eggs, and rich ingredients like sour cream or heavy cream. The slow baking process also helps create that signature texture.
2. Do I need a water bath for this cheesecake?
A water bath is not always required, but it is very helpful. It adds moisture to the oven and helps the cheesecake bake more evenly. This can reduce the chance of cracks on the surface.
3. Why did my cheesecake crack on top?
Cheesecake often cracks when it is overmixed, overbaked, or cooled too quickly. Too much air in the batter can rise and fall during baking. Letting the cheesecake cool gradually can help prevent this problem.
4. How long should I chill the cheesecake before serving?
It is best to chill the cheesecake for at least 6 hours, but overnight is even better. This gives the filling enough time to fully set and develop a richer flavor. A well-chilled cheesecake is also easier to slice neatly.
5. Can I freeze Cheesecake Factory-style cheesecake?
Yes, this cheesecake freezes very well. Wrap it tightly in plastic wrap and then foil, or store slices in an airtight container. Thaw it in the refrigerator before serving for the best texture.
6. What toppings go well with this cheesecake?
Popular toppings include strawberry sauce, chocolate ganache, caramel, whipped cream, or fresh berries. You can keep it simple or make it extra indulgent. The creamy base pairs well with both fruity and rich dessert toppings.
Conclusion
This step-by-step guide gives you everything needed to get there. The Ingredients You’ll Need are simple and accessible, the method is clear, and the tips help you avoid the most common missteps. Whether you serve it plain, top it with berries, or dress it up with caramel or chocolate, the base recipe delivers the kind of flavor and texture that makes people pause after the first bite. That little moment of silence at the table? That is usually the best review a dessert can get.
Homemade cheesecake has a reputation for being complicated, but the truth is far more encouraging. It is not difficult so much as deliberate. Give it care, and it gives a lot back. By following these steps closely, you can create a cheesecake that looks polished, slices beautifully, and tastes every bit as satisfying as the restaurant favorite that inspired it. And once you do it successfully one time, it becomes much less intimidating and a lot more inviting. That is when the recipe starts to become part of your kitchen, not just a one-time project.