Cheesecake Bites Recipe: Cheesecake bites are little bundles of joy—creamy, rich, and utterly irresistible. If you’ve ever had a full cheesecake and thought, “This is amazing, but I wish I could just pop it in my mouth like candy,” then cheesecake bites are the answer to your dessert dreams. These miniature desserts capture all the decadence of a traditional cheesecake in a bite-sized form, making them perfect for parties, family gatherings, or simply treating yourself without the commitment of a full slice.
The charm of cheesecake bites is not just in their size but also in their versatility. You can customize them endlessly—whether you want them classic New York–style, topped with berries, dipped in chocolate, or even made into a no-bake version. Plus, they’re easier to serve, easier to store, and let’s be honest, way more fun to eat.
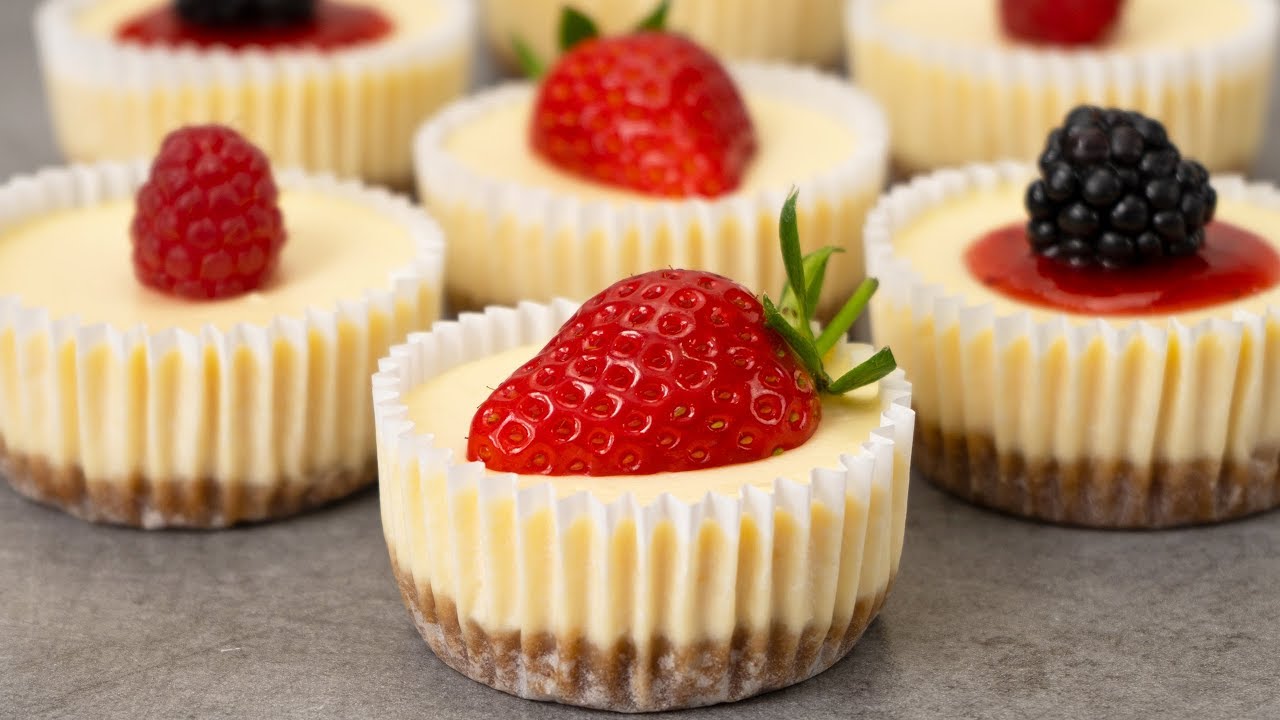
Imagine walking into a party and seeing a tray of glossy, perfectly chilled cheesecake bites—each one adorned with fresh fruit, a drizzle of caramel, or a dusting of cocoa. Guests can just grab one (or three, no judgment!) without the hassle of cutting, serving, and distributing plates. They’re not only delicious but also convenient, which is why they’ve become a dessert table favorite across the world.
Why Cheesecake Bites Are So Popular
The popularity of cheesecake bites can be summed up in one word: accessibility. Unlike full cheesecakes, which can be heavy, rich, and sometimes intimidating to make, cheesecake bites offer a more approachable way to enjoy this beloved dessert. Their small size makes portion control easier—although, let’s be honest, it’s also easier to eat five of them without noticing.
Another reason they’ve won hearts everywhere is their adaptability. You can make them in mini cupcake liners for a cute, grab-and-go treat, or use silicone molds for perfectly uniform shapes. They can be baked or no-bake, gluten-free, keto-friendly, or even dairy-free if you want to experiment with alternative ingredients.
They’re also a hit because of how they look. Food presentation matters, and cheesecake bites photograph beautifully, making them popular among food bloggers, Instagram bakers, and Pinterest recipe curators. Whether you drizzle them with glossy chocolate, top them with vibrant berries, or sprinkle them with powdered sugar, they’re as pretty as they are delicious.
And of course, the biggest selling point—they’re quick. Compared to a traditional cheesecake that requires hours of baking and chilling, cheesecake bites can be ready in a fraction of the time, especially if you go for a no-bake recipe. This makes them perfect for last-minute desserts when guests are coming over.
The Perfect Dessert for Any Occasion
Cheesecake bites have an incredible knack for fitting into any type of event. Hosting a fancy dinner? Serve them on a platter with edible flowers. Having a casual backyard barbecue? Pop them in muffin liners and pass them around. Celebrating the holidays? Decorate them with seasonal colors and flavors like peppermint, pumpkin spice, or gingerbread.
For kids’ parties, you can make fun, colorful versions by adding food coloring or candy toppings. For weddings, you can create elegant tiers of cheesecake bites, each with delicate garnishes. And for Valentine’s Day, imagine heart-shaped bites with strawberry glaze—romantic and delicious.
Their universal appeal comes from their balance of flavor and texture. The buttery crunch of the crust pairs perfectly with the silky, tangy-sweet filling, and when served chilled, they have that refreshing coolness that makes them especially enjoyable after a heavy meal.
In short, cheesecake bites aren’t just a dessert—they’re a canvas for creativity, a crowd-pleaser for every celebration, and a quick indulgence for any day of the week.
Ingredients You’ll Need
Before we dive into the fun part—actually making them—let’s gather our ingredients. Cheesecake bites are surprisingly simple when broken down into their core components: the crust, the filling, and the toppings.
Essential Ingredients for the Base
The crust is the foundation of any cheesecake bite. Most recipes stick to a classic graham cracker crust, but you can swap in Oreos, digestive biscuits, or even gluten-free cookies. Here’s what you’ll need for the classic version:
- Graham crackers – finely crushed (about 1½ cups)
- Unsalted butter – melted (about 6 tablespoons)
- Granulated sugar – 2 to 3 tablespoons, for a touch of sweetness
- Pinch of salt – to balance the flavors
You want the texture to be sandy but slightly moist so it packs well at the bottom of each mold or liner. The crust gives that buttery crunch that contrasts perfectly with the creamy filling.
Creamy Cheesecake Filling Ingredients
This is where the magic happens—the creamy, tangy, melt-in-your-mouth layer. You’ll need:
- Cream cheese – 16 ounces, softened
- Granulated sugar – ½ cup
- Sour cream or heavy cream – ½ cup for richness
- Eggs – 2 large, room temperature
- Vanilla extract – 1 teaspoon
- Lemon juice – 1 teaspoon, for brightness
The cream cheese should be room temperature to ensure a silky-smooth texture. Sour cream gives a tangy depth, while the eggs help bind everything together during baking.
Optional Toppings & Garnishes
This is where your creativity can shine. Depending on your mood or occasion, you can choose from:
- Fresh berries (strawberries, raspberries, blueberries)
- Chocolate ganache or drizzle
- Caramel sauce or dulce de leche
- Whipped cream swirls
- Crushed nuts or cookie crumbs
- Shaved chocolate or cocoa powder
Whether you go for something fruity, chocolatey, or nutty, toppings add that final touch of beauty and flavor.
Equipment You’ll Need
While cheesecake bites aren’t overly complicated, having the right tools makes the process smoother and ensures consistent results.
Basic Kitchen Tools
- Mixing bowls (at least two sizes)
- Electric mixer or stand mixer
- Measuring cups and spoons
- Rubber spatula
- Baking sheet
Special Tools for Perfect Bites
- Mini muffin tin or silicone mold (for uniform shapes)
- Cupcake liners (optional but helpful for easy removal)
- Food processor (for crushing crackers or cookies)
- Cooling rack (to prevent soggy bottoms)
If you’re doing a no-bake version, you can get away with even less equipment—just a mold or tray and a fridge/freezer.
Step-by-Step Guide to Making Cheesecake Bites
Making cheesecake bites is all about precision and patience, but don’t worry—it’s much easier than making a full cheesecake. We’ll break it down into clear, manageable steps so you can follow along without feeling overwhelmed.
Step 1 – Preparing the Crust
The crust is the crunchy, buttery base that supports your creamy filling. A good crust should hold together but still have a pleasant crumble when you bite into it.
- Crush the graham crackers – Place them in a food processor and pulse until you get fine crumbs. If you don’t have a food processor, you can put the crackers in a ziplock bag and crush them with a rolling pin.
- Add sugar and salt – Mix in the granulated sugar and a pinch of salt to balance the sweetness.
- Incorporate the butter – Melt the butter and pour it into the crumbs, mixing until everything is evenly coated. The texture should feel like damp sand.
- Press into molds – Using a spoon or the bottom of a shot glass, firmly press the crumb mixture into the bottom of each mini muffin cup or silicone mold. Pressing firmly helps the crust hold together after baking.
Pro tip: Pre-baking the crust for 5–7 minutes at 325°F (163°C) helps it firm up, preventing sogginess when you add the filling.
Step 2 – Making the Cheesecake Filling
This step is where your dessert really starts to take shape. A good filling should be smooth, creamy, and lump-free.
- Soften your cream cheese – This is crucial. Cold cream cheese will create lumps in your batter, so make sure it’s at room temperature before you start.
- Beat the cream cheese – In a large mixing bowl, beat the cream cheese until smooth and fluffy.
- Add sugar – Slowly mix in the sugar until fully incorporated.
- Add eggs one at a time – Beat gently after each addition to avoid incorporating too much air, which can cause cracks.
- Mix in sour cream and vanilla – These add richness and depth of flavor.
- Optional lemon juice – This brightens the flavor and balances the richness.
Pro tip: Scrape down the sides of the bowl as you mix to make sure no cream cheese lumps hide in the corners.
Step 3 – Assembling the Cheesecake Bites
This is where it all comes together.
- Spoon the filling – Add the cheesecake mixture on top of the prepared crusts, filling each cup almost to the top.
- Tap the tray – Gently tap the muffin tin on the counter to release any air bubbles.
- Optional swirl – For a marbled look, drop a teaspoon of fruit puree or chocolate sauce on top and swirl it with a toothpick.
Pro tip: If you’re making multiple flavors, divide the filling into different bowls and add your flavorings before spooning them in.
Step 4 – Baking the Cheesecake Bites
Now comes the magic.
- Preheat the oven – Set it to 325°F (163°C).
- Bake gently – Bake the bites for 15–18 minutes, or until the edges are set but the centers still have a slight jiggle.
- Avoid overbaking – Overbaking leads to cracks and a dry texture. The residual heat will finish cooking them after you remove them from the oven.
Pro tip: Baking in a water bath helps maintain moisture and prevents cracking, but for bites, it’s optional since they’re small and cook evenly.
Step 5 – Cooling & Chilling
Cheesecake bites need proper cooling to set and develop their flavor.
- Cool at room temperature – Let them rest for about 30 minutes before moving them.
- Chill in the fridge – Cover and refrigerate for at least 2 hours, ideally overnight. This helps them firm up.
- Add toppings before serving – Whether it’s berries, chocolate drizzle, or whipped cream, add these just before serving to keep them fresh and vibrant.
Pro tip: If you’re dipping them in chocolate, freeze them for 20–30 minutes first—this makes the coating process much easier.
Creative Variations of Cheesecake Bites
The classic version is amazing, but why stop there? Here are some irresistible twists to try.
Chocolate-Dipped Cheesecake Bites
For an indulgent treat, chill your baked cheesecake bites, then dip them in melted chocolate. You can even roll them in crushed nuts, sprinkles, or coconut flakes while the chocolate is still soft.
Flavor idea: White chocolate with raspberry drizzle for a romantic look.
Fruit-Topped Cheesecake Bites
Top each bite with fresh berries, fruit compote, or citrus zest for a refreshing, tangy contrast to the creamy filling.
Flavor idea: Blueberries with lemon zest and a drizzle of honey.
No-Bake Cheesecake Bites
Skip the oven by using a simple cream cheese and whipped cream filling set on a chilled cookie crust. These are perfect for summer when you don’t want to heat up the kitchen.
Flavor idea: Oreo crust with chocolate filling topped with whipped cream.
Storage & Serving Tips
Cheesecake bites are not only delicious fresh out of the fridge but can also be stored for future enjoyment. If you make a large batch, knowing the best way to keep them fresh will ensure every bite tastes just as amazing as the first.
How to Store Cheesecake Bites
- Refrigerator storage:
Once cooled and topped (if desired), place cheesecake bites in an airtight container. Store them in the refrigerator for up to 5 days. If stacking them, place parchment paper between layers to prevent sticking. - Freezer storage:
Cheesecake bites freeze exceptionally well. Simply place them on a baking sheet and freeze until solid, then transfer them to a freezer-safe bag or container. They’ll keep for up to 2 months. Thaw in the fridge overnight before serving. - Topping storage tip:
If you’re adding delicate toppings like fresh berries or whipped cream, it’s best to store the bites plain and add toppings right before serving. This prevents sogginess and keeps them looking fresh.
Best Ways to Serve Them
Serving cheesecake bites can be just as creative as making them. Presentation matters, especially if you’re making them for guests or a special event.
- For casual gatherings: Arrange them on a colorful platter, with different toppings to give guests variety.
- For formal occasions: Place each bite in a decorative cupcake liner, and serve on tiered dessert stands.
- For holidays: Decorate them with themed toppings—red and green for Christmas, pastel colors for Easter, or heart-shaped chocolates for Valentine’s Day.
- With beverages: Pair with coffee for a rich breakfast treat, with tea for an afternoon snack, or with wine for a sophisticated dessert pairing.
Pro tip: Serve them slightly chilled but not ice-cold. This allows the cheesecake texture to be creamy and soft, enhancing the flavor.
Troubleshooting Common Issues
Even though cheesecake bites are relatively easy to make, a few things can go wrong if you’re not careful. Here’s how to fix (or better yet, prevent) the most common problems.
Preventing Cracks in Cheesecake
- Don’t overbake: The edges should be set, but the center should have a slight jiggle when you take them out.
- Avoid overmixing: Too much air in the batter can cause cracks when baking. Mix gently, especially after adding the eggs.
- Cool gradually: Sudden temperature changes can cause cracks. Let them cool slowly before refrigerating.
Ensuring the Right Texture
- Use room temperature ingredients: This ensures the batter is smooth and prevents lumps.
- Measure ingredients accurately: Too much liquid can make the filling runny, while too little can make it overly dense.
- Bake at the right temperature: Too hot, and they’ll dry out; too cool, and they won’t set properly. Stick to 325°F (163°C) for even results.
FAQs about Cheesecake Bites Recipe
1. Can I make cheesecake bites without eggs?
Yes! Simply use an egg substitute or try a no-bake recipe that relies on whipped cream and cream cheese for structure.
2. How do I know when cheesecake bites are done baking?
The edges should be firm, and the center should jiggle slightly when you gently shake the pan.
3. Can I make them gluten-free?
Absolutely. Just replace the graham crackers with gluten-free cookies or biscuits for the crust.
4. What’s the best way to get uniform cheesecake bites?
Use a mini muffin tin or silicone mold and fill each cup with the same amount of batter using a cookie scoop.
5. How can I make them extra creamy?
Use full-fat cream cheese, don’t overbake, and allow plenty of chilling time before serving.
Conclusion
Cheesecake bites are a delightful, versatile dessert that can easily steal the show at any gathering. They’re simple enough for beginner bakers yet fancy enough to impress guests. With a buttery crust, creamy filling, and endless topping possibilities, they’re a dessert that never gets boring. Whether you stick to the classic version or get creative with chocolate dips, fruit toppings, or no-bake variations, these little treats will always be a hit.
The best part? You can make them ahead of time, store them in the fridge or freezer, and have an elegant dessert ready at a moment’s notice. Once you make your first batch, you’ll understand why they’ve become a favorite for so many dessert lovers.