Cheese Sandwich Recipe: There’s something undeniably comforting about biting into a warm, golden, cheesy sandwich.
Whether you’re looking for a quick lunch or a simple snack, the cheese sandwich never fails. It’s the ultimate go-to comfort food—easy to make, deliciously satisfying, and endlessly customizable.
In this guide, we’ll walk you through everything you need to make the perfect cheese sandwich, from choosing the right ingredients to mastering the cooking process.
Why Cheese Sandwiches Are Always a Hit
Cheese sandwiches are beloved around the world for their simplicity and irresistible taste. They require just a handful of ingredients, can be whipped up in minutes, and cater to all ages. Whether you’re making one for a picky child, a busy adult, or yourself, there’s something magical about the creamy melt of cheese between slices of crispy, toasted bread. Not to mention, they pair well with soups, salads, and even fries. It’s the kind of food that brings comfort with every bite.
You can go traditional with just bread and cheese or get fancy with ingredients like caramelized onions, pesto, or even apple slices. That’s the beauty of it—cheese sandwiches can be anything you want them to be. Want something quick and budget-friendly? Go basic. Looking for a gourmet bite? Elevate it with artisanal cheese and sourdough. Either way, you’re in for a treat.
List of Ingredients You’ll Need
Let’s start with the basics. Here’s what you’ll need for a classic cheese sandwich. Feel free to get creative later, but this is your foundation.
Bread Options
- White sandwich bread (classic)
- Whole wheat (healthier)
- Sourdough (tangy and crispy)
- Brioche (rich and buttery)
- Rye or multigrain (for deeper flavor)
Types of Cheese
- Cheddar (sharp or mild)
- American cheese (super melty)
- Swiss (nutty flavor)
- Mozzarella (stretchy)
- Provolone
- Pepper Jack (for a spicy kick)
Optional Add-ons for Extra Flavor
- Butter or mayonnaise (for grilling)
- Tomatoes
- Onions (raw or caramelized)
- Ham, bacon, or turkey
- Mustard or pesto
- Pickles or jalapeños
- Garlic powder or chili flakes
Essential Tools for Making the Perfect Cheese Sandwich
Believe it or not, the right tools can make a huge difference in the outcome of your sandwich. Here’s what you’ll need:
- Non-stick skillet or griddle – for even cooking and a crispy crust
- Spatula – for flipping the sandwich without tearing it
- Butter knife – to spread butter or mayo evenly
- Grater (if using block cheese) – freshly grated cheese melts better
- Cutting board & sharp knife – to prep any add-ons
If you’re feeling fancy, a sandwich press or panini maker can take things up a notch. But a simple pan on the stove works just fine.
How to Choose the Right Bread for Your Cheese Sandwich
Not all bread is created equal. The bread you choose sets the tone for your sandwich—texture, flavor, and how well it holds up to melting cheese. White bread is the traditional choice because it crisps beautifully and doesn’t overpower the cheese. But don’t be afraid to switch things up!
Sourdough offers a tangy contrast that cuts through rich cheeses. Whole wheat adds nuttiness and fiber. Brioche brings a soft, sweet contrast that pairs great with sharp cheeses. For a crunchy twist, try rustic bread with a thick crust—just make sure you butter it well for even browning.
When choosing bread, look for slices that are thick enough to hold the cheese but not so thick they overpower it. A good rule of thumb? Aim for 1/2-inch slices that are sturdy but still soft enough to bite into easily.
Best Cheeses for a Gooey, Melty Cheese Sandwich
Cheese is the heart of this dish, and choosing the right one can make or break your sandwich. Here’s what to look for:
Top Melting Cheeses
- Cheddar: The gold standard. Sharp for a punchy flavor, mild for a smooth melt.
- Mozzarella: Super stretchy and mild. Great for adding texture.
- American Cheese: Processed but perfect for that creamy, nostalgic melt.
- Gruyère: Nutty and sweet, melts like a dream.
- Provolone: Smooth and slightly tangy.
- Fontina: Rich, creamy, and perfect for gourmet sandwiches.
Tip: Mix two types of cheese for a flavor combo. For example, cheddar + mozzarella gives you both sharpness and stretch.
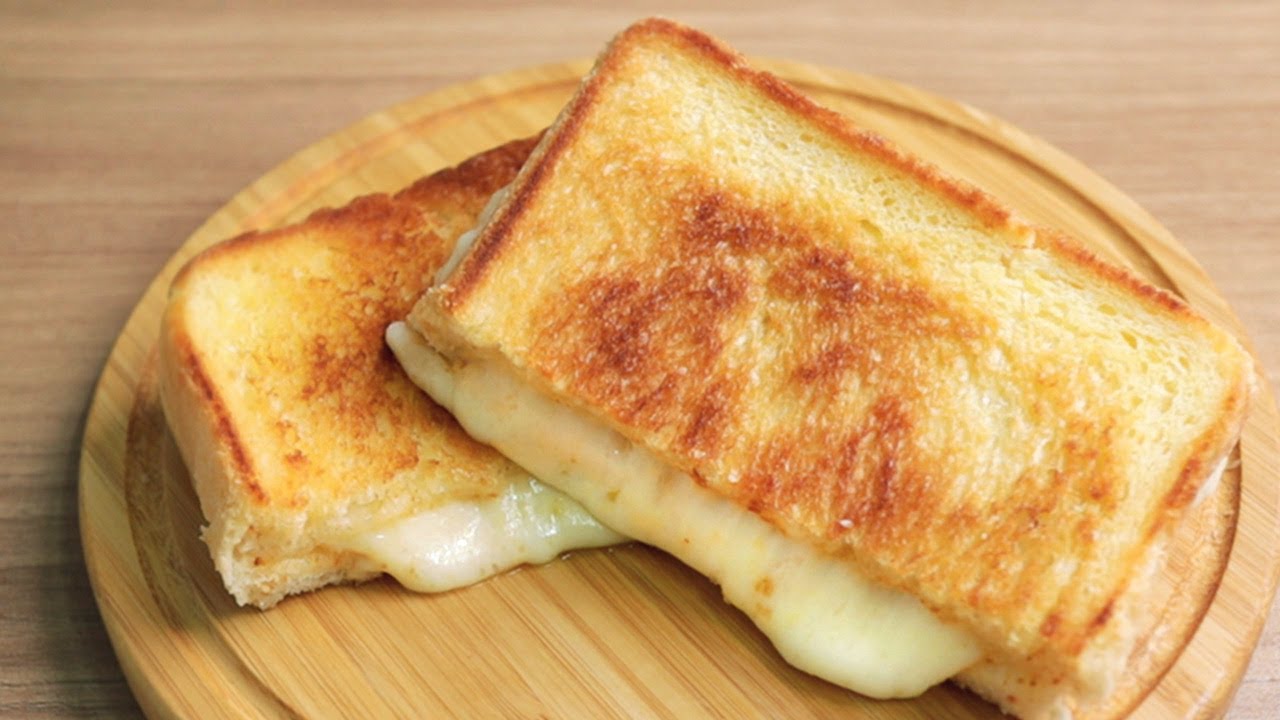
Step-by-Step Guide to Making a Classic Cheese Sandwich
Let’s get into the fun part—making your sandwich! Follow this foolproof step-by-step guide for cheesy success.
Step 1: Gather All Your Ingredients
Have everything ready to go—bread, cheese, butter or mayo, and any extras. This makes the process smoother and ensures your sandwich doesn’t burn while you search for ingredients.
Step 2: Prep the Bread
Lay your slices on a cutting board. Spread butter or mayo on one side of each slice. This will be the outside, which gets crispy and golden in the pan.
Step 3: Add the Cheese
Place cheese on the unbuttered side of one slice. Layer it evenly, avoiding the edges (so it doesn’t spill out too much while melting). Add your extras if you’re using any.
Step 4: Close the Sandwich
Top it with the second slice of bread, buttered side facing out. Press down gently to hold everything together.
Step 5: Cook It to Perfection
Heat a skillet over medium heat. Place the sandwich in the pan and cook for about 3-4 minutes on each side, pressing slightly with a spatula for even browning. Flip carefully. Once both sides are golden brown and the cheese is melted—you’re done!
Step 6: Let It Cool Slightly Before Serving
Don’t burn your mouth! Let the sandwich sit for 1-2 minutes so the cheese sets slightly. Then slice and serve.
Pan-Fried vs. Grilled – What’s Better?
When it comes to making cheese sandwiches, there’s an age-old debate: pan-fried or grilled? Both methods have their perks, and choosing the right one depends on the texture and flavor you’re after.
Pan-Fried Cheese Sandwich
Pan-frying gives you total control. You can adjust the heat, monitor the browning, and get a super crispy, buttery crust. It’s the go-to method for a classic grilled cheese. Plus, it’s perfect for adding extras like tomatoes or ham since you can press the sandwich slightly for an even toast and melt.
Grilled Cheese Sandwich (Using a Grill or Panini Press)
Using a grill or press makes the process hands-free and consistent. It’s great for making multiple sandwiches at once. You get those beautiful grill marks and a slightly smokier flavor. The pressure also flattens the sandwich, making it crispier and denser—perfect for heartier breads like ciabatta or sourdough.
So, which is better?
If you want a traditional taste and feel, go pan-fried. If you’re cooking for a crowd or want those aesthetic grill marks, use a sandwich press or grill. You can’t go wrong either way—it’s all about your personal preference.
Tasty Variations of the Classic Cheese Sandwich
The basic cheese sandwich is amazing, but sometimes you crave a twist. Here are some fun and tasty variations to keep things interesting.
Grilled Cheese with Tomato
Add fresh slices of tomato between the cheese layers before grilling. The acidity of the tomato balances the richness of the cheese perfectly. Add a sprinkle of oregano or basil for an Italian-inspired flavor.
Cheese and Ham Sandwich
Layer slices of ham with your cheese for a salty, savory combo that makes the sandwich more filling. Try honey ham with sharp cheddar or smoked ham with Swiss for a gourmet touch.
Spicy Jalapeño Cheese Melt
Feeling bold? Add sliced jalapeños or chili flakes with your cheese. Pepper Jack is a great cheese for this one. This spicy version gives your tastebuds a serious kick—perfect for spice lovers.
Other Creative Ideas
- Cheese + caramelized onions + mushrooms = savory overload
- Cheese + apple slices + honey mustard = sweet and tangy combo
- Cheese + turkey + cranberry sauce = great for holiday leftovers
The possibilities are endless, and the beauty is you can adjust based on whatever you have in your fridge.
Vegan Cheese Sandwich Alternatives
Don’t eat dairy? No problem. Vegan cheese sandwiches can be just as melty and delicious with a few smart swaps.
Vegan Cheese Options
- Daiya: Melts well and has a decent flavor
- Violife: Creamy and great texture
- Chao: Mild, buttery, and super melty
- Homemade cashew cheese: Great if you like cooking from scratch
Plant-Based Add-ons
- Sliced avocado
- Roasted red peppers
- Spinach or arugula
- Vegan pesto or hummus
- Caramelized onions
Use vegan butter or olive oil on the bread before grilling. If you’re making it in a pan, stick to medium-low heat to allow the vegan cheese time to melt without burning the bread. A lid helps create steam, speeding up the melt process.
Healthy Cheese Sandwich Tips
Want to indulge without the guilt? Here’s how to lighten up your cheese sandwich without sacrificing flavor.
Healthy Swaps:
- Use whole grain or sprouted bread: Adds fiber and nutrients
- Opt for low-fat cheese: Look for part-skim mozzarella or reduced-fat cheddar
- Skip the butter: Use a light layer of olive oil spray or avocado oil instead
- Add veggies: Tomatoes, spinach, onions, mushrooms, or even zucchini
Portion Control
Instead of loading up on thick slices of cheese, use one layer and pair it with flavorful ingredients like mustard or herbs to boost taste without extra calories.
Grill Smart
Use a non-stick pan or grill with minimal oil. You can also bake your sandwich in the oven or use an air fryer for a crispy finish with less fat.
Healthy doesn’t mean boring—it means smarter choices that still taste amazing.
What to Serve With a Cheese Sandwich
A cheese sandwich is great on its own, but it’s even better with the right sides. Here are some delicious pairings to turn your sandwich into a full meal:
Soups
- Tomato soup (a classic!)
- Creamy broccoli
- Potato leek
- Lentil or vegetable
Salads
- Caesar salad
- Mixed greens with vinaigrette
- Cucumber and tomato salad
- Chickpea salad for added protein
Snacks and Sides
- Sweet potato fries or regular fries
- Pickles or coleslaw
- Fresh fruit or a fruit salad
- Roasted veggies
Want to keep it light? Pair your sandwich with a simple apple or a cup of green tea. Want comfort food? Go full-on cheesy and add mac & cheese or loaded potato wedges on the side.
Storing and Reheating Tips
Leftovers? No problem. Here’s how to keep that cheesy goodness intact:
Storing:
- Wrap in foil or store in an airtight container
- Refrigerate for up to 2 days
- Avoid storing with moist ingredients inside (like tomatoes) as they can make the bread soggy
Reheating:
- Pan method: Reheat in a non-stick skillet on medium-low. This brings back the crisp without drying out the cheese.
- Oven method: Wrap in foil and bake at 350°F (175°C) for 10 minutes.
- Avoid microwaving: It makes the bread rubbery and the cheese uneven.
For best results, reheat slowly to let the cheese melt again and the bread crisp up—just like fresh!
Common Mistakes to Avoid
Even a simple cheese sandwich can go wrong if you’re not careful. Here are some mistakes to watch out for:
Using too much cheese
It may sound impossible, but overloading your sandwich can make it ooze out and burn in the pan.
High heat
Cooking too hot too fast will burn the bread before the cheese melts. Stick to medium or medium-low heat.
Skipping the butter/mayo
That golden crust comes from fat. If you skip it, you won’t get that crispy, flavorful outer layer.
Cheap cheese
Go for real cheese when possible. Pre-shredded options have additives that stop them from melting smoothly.
Not pressing the sandwich
Gently pressing with a spatula ensures even browning and melt. It also helps the flavors marry together better.
Avoid these rookie mistakes and your sandwich will go from average to amazing.
FAQs about Cheese Sandwich Recipe
1. What’s the best cheese for grilled cheese sandwiches?
Cheddar, mozzarella, and American cheese are favorites for their great melt and flavor. Mix and match for the best combo!
2. Can I make a cheese sandwich without butter?
Yes! You can use mayo, olive oil, or even vegan alternatives. Just make sure you have some fat to help toast the bread.
3. Is it okay to use pre-shredded cheese?
You can, but freshly grated cheese melts better and tastes richer because it lacks the anti-caking agents found in pre-shredded types.
4. How do I stop the sandwich from getting soggy?
Avoid watery veggies like tomatoes unless cooked. Toasting the inside slightly before adding cheese can also help.
5. Can I freeze cheese sandwiches?
Yes! Freeze ungrilled sandwiches in foil or plastic wrap. When ready, grill directly from frozen—just cook a little longer.
Conclusion
Whether you’re whipping up a quick lunch, feeding a crowd, or just craving something warm and cheesy, the humble cheese sandwich is the ultimate comfort food. It’s fast, versatile, and always satisfying. From simple classics to creative twists, there’s a version out there for everyone.
The best part? You don’t need to be a pro chef to get it right. Just good ingredients, a little love, and a warm skillet. Now that you know the secrets, go make yourself (or someone else) the perfect cheese sandwich. You deserve it.


