Cappuccino Recipe: A cappuccino is a beloved Italian coffee drink that combines a bold espresso shot, steamed milk, and a thick layer of velvety milk foam. Traditionally, it’s made in a 1:1:1 ratio—one part espresso, one part steamed milk, and one part milk foam—creating a balanced drink that’s rich yet smooth. Unlike a latte, which has more milk and less foam, a cappuccino offers a stronger coffee flavor with a lighter, airy texture on top. The magic lies in its harmony—each sip delivers a perfect blend of robust espresso, creamy milk, and frothy foam.
A Brief History of Cappuccino
The cappuccino’s origins trace back to Italy in the early 1900s, evolving alongside the invention of the espresso machine. Its name comes from the Capuchin friars, whose brown robes resembled the coffee’s rich color beneath the foam. Originally served in small cups, cappuccinos were enjoyed mostly in the mornings, often paired with pastries. Over time, the drink spread globally, adapting to local tastes—from extra foam versions in Europe to sweeter, flavored varieties in the U.S. Despite changes, its core essence—a perfect coffee-and-milk harmony—remains unchanged.
Essential Ingredients for the Perfect Cappuccino
Choosing the Right Coffee Beans
The foundation of any great cappuccino is the coffee bean. Medium to dark roast beans are the most popular choice, offering a bold, full-bodied flavor that can stand up to milk’s creaminess. Arabica beans provide a smooth, slightly sweet taste, while robusta beans give a more intense, bitter kick. Freshness is crucial—buy beans in small batches and grind them just before brewing to lock in aroma and flavor. Specialty coffee shops often recommend beans roasted within the last 2–3 weeks for peak freshness.
The Importance of Fresh Milk
Milk plays a vital role in a cappuccino’s taste and texture. Whole milk is preferred for its creaminess and ability to create stable microfoam. The natural fats in whole milk contribute to the rich mouthfeel and silky consistency essential for latte art. If you want a lighter drink, 2% milk can work, but foam quality might suffer slightly. Always use cold, fresh milk—this gives you more time to achieve perfect froth before it overheats.
Optional Add-Ons and Flavors
While traditionalists might stick to the classic recipe, experimenting with flavors can make your cappuccino unique. A dash of cinnamon, cocoa powder, or nutmeg on top adds warmth and aroma. For sweeter variations, try syrups like vanilla, caramel, or hazelnut. You can even sprinkle shaved chocolate over the foam for a decadent finish. These additions should complement, not overpower, the espresso’s natural flavors.
Equipment You Need
Espresso Machine
An espresso machine is the heart of cappuccino-making. For the best results, choose a machine that offers precise temperature control and a steam wand for frothing milk. Entry-level machines can produce decent shots, but higher-end models ensure consistency, richer crema, and better milk texturing capabilities. If you’re serious about coffee, consider a semi-automatic or manual machine for more control.
Milk Frother or Steam Wand
If your espresso machine has a built-in steam wand, you’re set for frothing. However, if not, a standalone electric milk frother can do the job. Steam wands produce finer microfoam, essential for smooth, creamy milk, while electric frothers are convenient but may create slightly larger bubbles. For the ultimate cappuccino texture, mastering the steam wand technique is worth the effort.
Measuring Tools and Cups
Consistency matters—measuring your coffee and milk ensures you get the same great taste every time. A digital scale helps you weigh your coffee grounds precisely, while a thermometer prevents overheating milk. Standard cappuccino cups (around 150–180ml) are designed to hold the perfect ratio of espresso, milk, and foam.
Step-by-Step Guide to Making Cappuccino
Step 1 – Grinding the Coffee Beans
Start with fresh beans and grind them to a fine consistency, similar to table salt. Too coarse, and your espresso will be weak; too fine, and it may taste bitter. Use a burr grinder for uniform grounds, which helps extract flavor evenly. Aim for 18–20 grams of coffee for a double shot, depending on your machine. The grind size may need adjusting based on your espresso maker’s performance—experiment until you find the sweet spot.
Step 2 – Brewing the Espresso
Place the coffee grounds into the portafilter, tamp evenly with firm pressure, and lock it into the espresso machine. Brew immediately to prevent staleness. A double shot typically takes 25–30 seconds to extract, producing a rich, golden crema on top. The crema is a good indicator of quality—thick, golden-brown foam means your coffee is well-brewed and full of flavor.
Step 3 – Frothing the Milk
Frothing milk is an art that requires precision and practice. Start by pouring cold, fresh milk into a stainless-steel frothing pitcher—fill it to about one-third full to allow room for expansion. Position the steam wand just below the milk’s surface and turn on the steam to introduce air into the milk. You’ll hear a gentle hissing sound as tiny bubbles form, creating the microfoam. After a few seconds, submerge the wand deeper to heat the milk evenly. The ideal temperature is around 150°F (65°C)—hot enough to enhance sweetness but not so hot that it scalds. The finished milk should have a silky, glossy texture, with foam so fine it looks like wet paint.
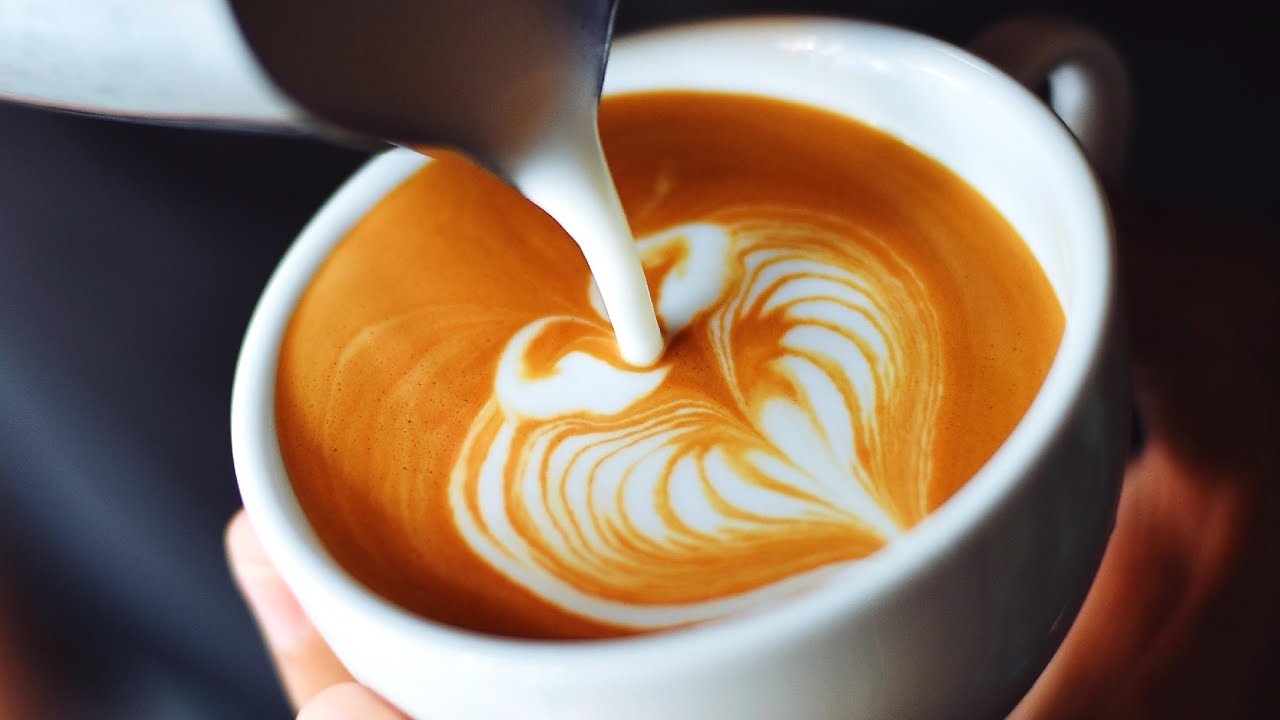
Step 4 – Combining Espresso and Milk Foam
Once your espresso shot is ready and your milk is perfectly frothed, it’s time to combine them. Pour the steamed milk into the espresso slowly, aiming for the center of the cup. As you pour, tilt the cup slightly and then straighten it to let the foam rise to the top. The goal is to maintain the traditional cappuccino ratio—equal parts espresso, steamed milk, and foam. For a professional finish, try a simple latte art pattern like a heart or leaf. This not only looks impressive but also blends the coffee and milk for a smooth taste.
Tips for Achieving Café-Style Cappuccino at Home
Latte Art for Beginners
Latte art might seem intimidating, but it’s all about technique and practice. Start with basic shapes before moving on to complex designs. The key is well-textured milk—without silky microfoam, your designs won’t form properly. Pour steadily and control the flow rate; too fast, and the milk will break the crema; too slow, and it won’t blend. Beginners often start with the “heart” design, then progress to tulips, rosettas, and swans.
Balancing Strength and Smoothness
A great cappuccino strikes the perfect balance between bold espresso and creamy milk. If your drink tastes too strong, try using a slightly coarser grind or adding a touch more milk. If it’s too mild, use a finer grind for a more intense shot or reduce the milk slightly. Remember, the classic cappuccino has a 1:1:1 ratio, but you can adjust it to match your taste preferences without losing the drink’s essence.
Common Mistakes to Avoid
Using the Wrong Coffee Beans
Not all coffee beans are created equal when it comes to cappuccino. Light roasts, while great for filter coffee, can taste sour or weak when paired with milk. Overly oily beans can also clog your grinder or espresso machine. Stick to medium or dark roasts with chocolatey, nutty, or caramel notes—they complement milk beautifully.
Overheating the Milk
One of the most common mistakes is overheating milk, which destroys its natural sweetness and creates a burnt taste. Milk should never exceed 160°F (70°C). Use a thermometer until you develop the ability to judge temperature by touch. Overheated milk also loses its ability to hold microfoam, resulting in a flat, lifeless cappuccino.
Variations of Cappuccino You Should Try
Iced Cappuccino
Perfect for hot days, the iced cappuccino swaps steamed milk for cold milk and ice. Brew a double shot of espresso, let it cool slightly, then pour it over ice in a tall glass. Add chilled milk and top with cold foam (created using a frother or blender). The result is a refreshing twist that still delivers the cappuccino’s signature flavor balance.
Flavored Cappuccino (Vanilla, Caramel, etc.)
Adding flavor syrups transforms a traditional cappuccino into a gourmet treat. Popular options include vanilla, caramel, hazelnut, and mocha. Simply add the syrup to your espresso before pouring in the milk. Start with about half an ounce and adjust to taste—too much syrup can overpower the coffee.
Vegan and Dairy-Free Options
Plant-based milks like oat, almond, and soy can be excellent in cappuccinos. Oat milk is especially popular because it froths well and has a naturally creamy texture. Almond milk gives a nutty flavor, while soy milk offers a neutral base. When steaming plant-based milks, avoid overheating—they often scorch more easily than dairy.
Health Benefits and Considerations
Nutritional Value
A traditional cappuccino contains about 80–120 calories, depending on the milk type and portion size. It’s a good source of calcium, protein, and antioxidants from the coffee. Caffeine can boost alertness and mood, making cappuccinos a popular morning choice.
Potential Downsides
Too much caffeine can cause restlessness, jitters, or disrupted sleep. Those who are lactose intolerant or sensitive to dairy should opt for plant-based alternatives. Adding syrups or sweeteners increases sugar content, so enjoy flavored cappuccinos in moderation.
FAQs about Cappuccino Recipe
Can I make cappuccino without an espresso machine?
Yes, you can use a moka pot or AeroPress for the coffee base and a handheld frother for milk foam.
What’s the difference between cappuccino and latte?
A cappuccino has equal parts espresso, steamed milk, and foam, while a latte has more milk and less foam.
Why does my milk foam collapse quickly?
It may be due to overheating the milk or using milk with too little fat content.
How can I make my cappuccino stronger?
Use a finer grind, increase coffee dose slightly, or reduce the milk amount.
What’s the best milk for latte art?
Whole milk works best due to its fat content, which creates stable microfoam.
Conclusion
Making a cappuccino at home is both an art and a science. With the right ingredients, tools, and techniques, you can recreate the café experience in your kitchen. From grinding fresh beans to perfecting milk foam, every step matters in achieving that rich, balanced flavor. Whether you stick to the classic recipe or experiment with creative variations, the satisfaction of crafting your own cappuccino is worth the effort.