Cannoli Shell Recipe: Who doesn’t love a crispy, golden cannoli filled with sweet, creamy filling? But while most people focus on the filling, the secret to a truly unforgettable cannoli lies in the shell. That perfectly fried, bubbly, crunchy exterior is what makes cannoli one of the most loved desserts in the world. In this guide, we’re diving deep into making homemade cannoli shells from scratch. Don’t worry—it’s easier than you think, and I’ll walk you through every step.
This guide is packed with step-by-step instructions, helpful tips, and everything you need to know to make your own authentic cannoli shells at home. Let’s get rolling (pun intended).
What Are Cannoli Shells?
Cannoli shells are the crisp, fried pastry tubes that hold the luscious filling in traditional Italian cannoli. They’re made from a sweet dough that’s rolled out thin, cut into circles or ovals, wrapped around metal tubes, and deep-fried to a beautiful golden brown.
These shells are meant to be thin, bubbly, and crispy, with a texture that shatters lightly when you bite into them. They’re often dusted with powdered sugar or dipped in chocolate before being filled. While the filling varies, the shell remains a constant star.
What makes them so unique? The combination of flour, fat, sugar, and a splash of wine or vinegar gives them their signature lightness and texture. Think of them as the delicate, golden armor that protects the creamy treasure inside.
The Origin of Cannoli
Cannoli hail from Sicily, where they were traditionally made for Carnival celebrations—a time of indulgence before Lent. Over time, they became popular year-round, spreading throughout Italy and eventually to Italian communities worldwide.
The word “cannoli” means “little tubes,” and they’ve certainly stood the test of time. Once a celebration treat, they’re now a staple in Italian bakeries everywhere. And making them at home is a beautiful way to honor this delicious heritage.
Why Make Cannoli Shells at Home?
Sure, you can buy pre-made shells—but where’s the fun in that? Making your own cannoli shells is surprisingly rewarding. Here’s why you should try it:
- Freshness: Homemade shells are crispier and fresher than anything store-bought.
- Flavor Control: Adjust sweetness, spice, and even add flavors like cinnamon or cocoa.
- Texture: Achieve that perfectly bubbled, golden surface that only comes with freshly fried dough.
- Customization: Want mini cannoli? Chocolate-dipped shells? You can do it all at home.
Plus, your kitchen will smell like a Sicilian bakery. And that’s always a good thing.
List of Ingredients You’ll Need
Before diving into the process, let’s make sure you’ve got all your ingredients ready. Here’s what you’ll need:
Dry Ingredients
- 2 cups all-purpose flour (plus more for dusting)
- 1 tablespoon granulated sugar
- ½ teaspoon ground cinnamon (optional but adds warmth)
- ¼ teaspoon salt
Wet Ingredients
- 3 tablespoons unsalted butter, chilled and cut into small cubes
- 1 large egg
- ½ cup dry white wine (like Marsala or even white vinegar works)
- 1 teaspoon vanilla extract
Optional Add-Ins for Flavor
- 1 tablespoon cocoa powder (for chocolate cannoli shells)
- Zest of 1 orange (for a citrus twist)
These ingredients will yield about 12–15 standard cannoli shells, depending on size.
Tools and Equipment You’ll Need
Making cannoli shells doesn’t require fancy gear, but a few tools will make life easier:
- Rolling pin
- Pastry cutter or knife
- Cannoli molds/tubes (metal preferred)
- Deep fryer or heavy-bottomed pot
- Slotted spoon or tongs
- Paper towels (for draining)
- Mixing bowls
- Pastry brush
- Thermometer (optional but helpful for oil temperature)
Now that we’ve got everything prepped, let’s roll up our sleeves and get cooking.
Step-by-Step Guide to Making Cannoli Shells
Step 1: Mixing the Dry Ingredients
In a large mixing bowl, whisk together the flour, sugar, cinnamon, and salt. This forms the base of your dough and helps evenly distribute the flavors.
If you’re adding cocoa or orange zest, mix them in at this point. Doing so early helps the flavors infuse deeply into the dough as it rests and fries.
Make sure all ingredients are thoroughly combined. No clumps, no corners missed.
Step 2: Adding the Wet Ingredients
Cut in the cold butter using your fingers or a pastry cutter. The mixture should resemble coarse crumbs—similar to pie crust.
In a separate bowl, beat the egg, then mix it with the white wine and vanilla extract. Slowly add the wet mixture to the dry ingredients, stirring until a dough starts to form.
Don’t dump all the liquid in at once—start slow and add more as needed. The dough should be soft but not sticky.
Step 3: Kneading the Dough
Transfer the dough to a lightly floured surface and knead it for about 8–10 minutes until smooth and elastic. This step activates the gluten, which helps create that light, crispy texture.
If the dough feels too sticky, add a tiny bit of flour. If it’s dry, sprinkle in a few drops of wine or water. Trust your hands—they’ll tell you when it’s just right.
Step 4: Resting the Dough
Wrap the dough in plastic wrap and let it rest at room temperature for at least 30 minutes. Resting allows the gluten to relax, making the dough easier to roll out later.
Don’t skip this part. It’s the secret to shells that don’t shrink or puff unevenly during frying.
Step 5: Rolling Out the Dough
Once your dough has rested, it’s time to roll it out. Lightly flour your work surface and rolling pin, then divide the dough into two portions to make it easier to handle.
Roll each piece as thin as possible—aim for about 1/16 inch. The thinner the dough, the crispier your cannoli shells will be. If the dough is too thick, you’ll end up with a chewy, doughy shell instead of the signature light crunch.
You can use a pasta machine if you have one to get an ultra-even thinness, but a good ol’ rolling pin works just fine with a bit of elbow grease. Don’t rush this part. Take your time to get it just right. Remember: thin dough = airy, crispy shells.
Step 6: Cutting and Shaping the Shells
Using a round cutter (about 4 to 5 inches in diameter), cut circles from the rolled-out dough. You can also use a bowl or glass as a makeshift cutter.
Take each circle and wrap it loosely around a metal cannoli tube. Use a bit of beaten egg white or water to seal the edge of the dough so it doesn’t unravel during frying. Gently press the overlapping edges to make sure they stick.
Pro tip: Don’t wrap the dough too tightly around the tube. You want just enough space so the shell can slide off easily after frying.
Step 7: Frying the Cannoli Shells
Heat oil in a deep fryer or heavy pot to about 350°F (175°C). If you don’t have a thermometer, test it by dropping a small piece of dough into the oil—it should sizzle and rise to the top immediately.
Gently place the dough-wrapped cannoli tubes into the hot oil, one or two at a time. Fry for about 1 to 2 minutes, turning occasionally, until golden brown and bubbly.
Use a slotted spoon or tongs to remove them from the oil and transfer to paper towels to drain.
The shells will be incredibly hot, so let them cool for a minute or two before attempting to remove them from the molds.
Step 8: Cooling and Removing the Shells
Once the shells have cooled slightly but are still warm, carefully slide them off the metal tubes. Hold the tube with a paper towel (it’ll still be hot!) and gently twist or pull the shell off.
Place the empty shells on a wire rack to cool completely. Don’t stack them while they’re warm—they may lose their crispness or stick together.
Repeat the frying process with your remaining dough circles, being careful not to overcrowd the oil.
At this stage, you’ll already notice how light and crisp your shells feel. That’s the sign of a job well done.
Pro Tips for Perfect Cannoli Shells
Want to take your cannoli shell game to the next level? Here are a few expert tips:
- Chill before frying: Pop your shaped, raw shells in the fridge for 15 minutes before frying. This helps them keep their shape.
- Use dry wine: Marsala wine gives the dough a sweet, complex flavor, but any dry white wine works.
- Don’t skip the rest: Resting the dough makes it easier to roll and keeps shells from shrinking.
- Bubbles are good: Don’t panic when the shells bubble up in the oil—it’s a sign of great texture.
- No molds? No problem: Try wrapping dough around cleaned metal curtain rods or aluminum foil rolled into tubes.
How to Store Cannoli Shells
One of the best things about cannoli shells is that they can be made ahead of time.
- Room Temperature: Store completely cooled shells in an airtight container at room temperature for up to 5 days.
- Avoid Humidity: Keep them in a dry place; moisture is their enemy. A desiccant packet inside the container helps.
- Do Not Fill Ahead of Time: Only fill cannoli just before serving to maintain that signature crunch.
You can also store them in the freezer—more on that in the next section.
How to Reheat or Refresh Cannoli Shells
Cannoli shells are best when freshly fried, but if you need to refresh them:
- Oven Method: Preheat your oven to 250°F (120°C) and place the shells on a baking sheet. Warm them for 5-7 minutes. This helps remove any moisture and restores crispness.
- Air Fryer Method: Use at the lowest temperature setting for 3–4 minutes.
- Never Microwave: It will make them soggy and rubbery.
Remember: Always fill your cannoli after reheating, never before.
Common Mistakes to Avoid
If your cannoli shells aren’t turning out the way you hoped, one of these issues might be the culprit:
- Dough too thick: Results in tough, chewy shells.
- Oil too cold or too hot: Leads to greasy or burnt shells.
- Not sealing edges properly: Causes the shell to unwrap during frying.
- Filling too early: Makes shells soggy fast.
Avoid these rookie mistakes, and your shells will come out bakery-worthy.
Flavor Variations for Cannoli Shells
Want to put your own twist on the classic? Try these fun shell variations:
- Chocolate Cannoli Shells: Add 1 tablespoon of cocoa powder to the dough.
- Citrus Zest: Orange or lemon zest adds a fresh, tangy bite.
- Spiced Shells: A dash of nutmeg or cardamom can give a warm fall flavor.
- Dipped Edges: Dip cooled shells in melted chocolate and sprinkle with crushed pistachios or coconut.
These small changes can turn a traditional dessert into a signature treat.
Gluten-Free or Vegan Cannoli Shell Alternatives
Want to enjoy cannoli but have dietary restrictions? No worries—there are great alternatives that still give you that satisfying crunch without gluten or animal products.
Gluten-Free Cannoli Shells
To make gluten-free shells, replace the all-purpose flour with a 1:1 gluten-free flour blend that includes xanthan gum or guar gum. Here are a few tips:
- Use a trusted GF flour blend: Bob’s Red Mill and King Arthur make great ones.
- Add an egg for structure: Gluten-free doughs can be more fragile, so an extra egg yolk helps bind it.
- Chill the dough longer: Resting GF dough for at least an hour helps with texture and elasticity.
The texture might be slightly different—less stretchy—but the flavor can be just as delicious.
Vegan Cannoli Shells
To make vegan shells:
- Replace eggs with flax eggs: 1 tablespoon ground flaxseed + 3 tablespoons water = 1 egg.
- Use plant-based butter or coconut oil: Stick with unsalted options to control the flavor.
- Use white vinegar or lemon juice with water instead of wine for acidity.
Vegan shells tend to be a little more delicate, but with gentle handling, they fry up beautifully crisp.
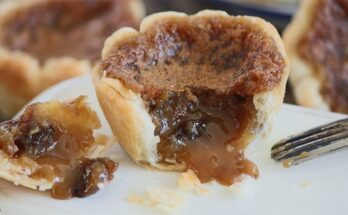
What to Fill Your Cannoli With
Now that you’ve nailed the perfect shell, it’s time for the fun part: filling!
The traditional cannoli filling is a sweetened ricotta cheese mixture. But let’s explore the possibilities:
Classic Ricotta Filling
- 2 cups ricotta cheese (drained)
- ¾ cup powdered sugar
- 1 teaspoon vanilla extract
- Optional: chocolate chips, orange zest, or cinnamon
Mix until smooth and pipe into your cooled cannoli shells. Use a piping bag or zip-top bag with the corner snipped off.
Other Delicious Fillings
- Mascarpone and whipped cream for a lighter twist
- Chocolate mousse
- Lemon curd
- Peanut butter or Nutella whipped cream
- Vegan cashew cream sweetened with maple syrup
Toppings Ideas:
- Crushed pistachios
- Mini chocolate chips
- Chopped candied fruit
- Powdered sugar
- Chocolate-dipped ends
Filling is where you can really make the dessert your own. Have fun with it!
FAQs about Cannoli Shell Recipe
1. Can I bake cannoli shells instead of frying?
Yes, you can! While traditional cannoli shells are fried for that signature texture, baking is a lighter alternative. Bake at 375°F (190°C) for about 15–18 minutes or until golden. Keep in mind, baked shells won’t be as crispy as fried ones but still taste great.
2. How long do homemade cannoli shells last?
When stored in an airtight container at room temperature, homemade cannoli shells last up to 5 days. Keep them dry and unfilled until ready to serve. Once filled, eat them within a few hours to avoid sogginess.
3. Can I freeze cannoli shells?
Absolutely. Let the shells cool completely, then wrap them individually or place them in an airtight container with parchment between layers. Freeze for up to 2 months. To serve, thaw at room temperature and re-crisp in a 250°F oven for 5–7 minutes.
4. Do I need a cannoli mold to make these?
Cannoli molds make shaping much easier and ensure consistent results. However, in a pinch, you can use rolled-up aluminum foil, metal dowels, or even cleaned metal curtain rods. Just make sure they’re heat-safe!
5. How do I keep cannoli shells crispy?
Keep them unfilled until just before serving. Store in an airtight container with a paper towel inside to absorb moisture. Reheat in a low oven (250°F) for 5 minutes if they start to soften. And always cool them completely before storing.
Conclusion
There you have it—a complete, step-by-step guide to making authentic cannoli shells at home. From mixing the dough to that glorious first bite of a freshly filled shell, the process may take a little time, but the reward is pure Italian pastry perfection.
Making cannoli shells from scratch might seem intimidating at first, but once you roll out your first batch and hear that crispy crunch, you’ll never want to go back to store-bought again. Plus, you get the satisfaction of saying, “Yep, I made these.”
Whether you’re making them for a holiday, a party, or just because you’re craving a sweet treat, homemade cannoli shells will always impress.
So, grab your rolling pin, heat up that oil, and bring a little taste of Sicily into your kitchen. You’re going to love it.