Canned Peaches Recipe: Peaches are one of those fruits that define summer—sweet, juicy, and dripping with flavor. But what happens when the season ends? That’s where home canning comes in! Canning peaches is a time-honored tradition that lets you lock in that summer sweetness and enjoy it all year round.
You might be wondering, “Why go through the trouble when you can just buy canned peaches from the store?” Great question. Here’s the deal: store-bought peaches are convenient, but they’re often packed in heavy syrup, can be overly soft, and lack the fresh, vibrant taste of the real thing. When you can your own, you control everything—sugar levels, flavor add-ins, and even texture.
The best time to start canning peaches is mid to late summer, depending on where you live. Look for ripe, aromatic peaches at local farmers markets or orchards. Trust me, your future self will thank you when you’re spooning golden peaches onto your pancakes in the middle of winter.
Ready to preserve summer in a jar? Let’s walk through everything you need and the exact steps to make perfect, shelf-stable canned peaches at home.
Ingredients You’ll Need
Fresh Ingredients
To start, the most important ingredient is—you guessed it—peaches. But not all peaches are created equal, especially for canning. Here’s what to look for:
- Best Varieties for Canning: Choose freestone peaches like Elberta, Red Haven, or Cresthaven. These are easier to pit and hold up well during canning.
- Ripeness: Go for peaches that are ripe but still firm. Overripe peaches can turn mushy, while underripe ones lack flavor.
- Look and Feel: Pick peaches that smell sweet and have a slight give when gently squeezed. Avoid fruit with green patches or too much bruising.
You’ll want about 17-18 pounds of fresh peaches to yield 7 quarts (a typical full canner load), or around 8-9 pounds for 7 pints.
Additional Ingredients
Besides the peaches themselves, here’s what you’ll need:
- Sugar: Used to make a syrup that helps preserve flavor, color, and texture. You can use:
- White granulated sugar
- Honey
- Fruit juice (like white grape or apple juice for a no-sugar version)
- Water: For making the syrup
- Lemon Juice: Adding lemon juice or citric acid helps maintain color and keeps the peaches from browning.
- Optional Spices: A cinnamon stick, vanilla bean, or a dash of nutmeg can elevate the flavor if you want to get creative.
Essential Tools and Equipment
Let’s talk tools. Having the right equipment can make or break your canning experience. Here’s your checklist:
- Canning Jars: Use pint or quart-size jars with two-piece lids (flat lid + ring).
- Water Bath Canner or Large Pot: Needs to be tall enough to submerge the jars in 1–2 inches of boiling water.
- Jar Lifter: For safely lifting hot jars.
- Canning Funnel: Makes filling jars neat and easy.
- Bubble Remover/Spatula: Helps remove trapped air in the jars.
- Peeler and Knife: For prepping the peaches.
- Large Bowls and Towels: You’ll need these for peeling, slicing, and cleaning up.
Sterilizing and prepping everything beforehand will save you a ton of stress later on. Clean tools = safe, long-lasting canned peaches.
Preparation Before Canning
Before diving into the actual canning, there’s a bit of prep involved:
Washing and Sterilizing Jars
You can sterilize jars in the dishwasher (high heat setting), or place them in boiling water for 10 minutes. Keep them warm until ready to use so they don’t crack when hot syrup is added.
Preparing the Syrup
Depending on your sweetness preference, choose a syrup type:
| Syrup Type | Sugar (cups) | Water (cups) |
|---|---|---|
| Light | 2 | 6 |
| Medium | 3 | 6 |
| Heavy | 4¾ | 6 |
Bring sugar and water to a boil, then reduce heat to keep warm.
Blanching and Peeling the Peaches
Peeling peaches is way easier when you blanch them:
- Boil a large pot of water.
- Cut an “X” at the bottom of each peach.
- Drop them into boiling water for 30–60 seconds.
- Transfer to ice water immediately.
- Skins should slide off easily!
Now slice the peaches in halves or quarters and remove the pits.
Step-by-Step Guide to Canning Peaches
Let’s get into the heart of the process. Here’s your detailed, step-by-step guide to canning peaches like a pro. If it’s your first time, don’t stress—just follow each step and you’ll have golden jars of peaches in no time.
Step 1: Wash and Sort the Peaches
Wash peaches thoroughly under running water to remove dirt and residue. Choose ripe but firm peaches—avoid bruised or overripe ones, as they won’t hold their shape during canning.
Step 2: Peel and Slice the Peaches
Bring a large pot of water to a boil. Score a small “X” on the bottom of each peach, blanch for 30–60 seconds, then transfer to an ice bath. The skins will slip off easily. Slice peaches in halves or wedges and remove the pits.
Step 3: Prepare Your Canning Syrup
In a saucepan, combine water and sugar to make your syrup. A light syrup works well for most people (about 2 cups sugar to 4 cups water). Heat until the sugar dissolves, then keep warm.
Step 4: Pack the Peaches Into Jars
Place peach slices into clean, hot canning jars. Pack gently but firmly, leaving about ½ inch of headspace at the top.
Step 5: Remove Air Bubbles and Adjust Headspace
Pour hot syrup over the peaches until covered, maintaining the headspace. Run a non-metal utensil around the inside of the jar to release trapped air bubbles. Adjust syrup if needed.
Step 6: Seal the Jars with Lids and Rings
Wipe jar rims clean. Place lids on top and screw bands on until fingertip-tight—not too tight.
Step 7: Process the Jars in a Water Bath
Lower jars into a boiling water bath, ensuring they’re fully submerged. Process for 20–30 minutes, depending on jar size and altitude.
Step 8: Let Jars Cool and Check Seals
Remove jars and let them cool undisturbed for 12–24 hours. Check seals by pressing the center of each lid—it should not flex.
Step 9: Label and Store Properly
Label jars with the date and store them in a cool, dark place. Properly sealed jars can last up to 1 year.
Enjoy the taste of summer anytime! 🍑
Tips for Perfect Canned Peaches
Want to take your canning game up a notch? Here are some bonus tips:
- Cold Pack vs Hot Pack: Hot packing gives better syrup distribution and reduces fruit floating. Cold packing is quicker but may lead to shrinkage.
- Prevent Browning: Soak peach slices in lemon water while prepping.
- Add Flavor: Drop in a cinnamon stick or vanilla bean for a gourmet twist.
- Check for Air Bubbles: Trapped air = spoilage. Don’t skip that bubble remover step!
- Use Ripe but Firm Peaches: Too soft = mushy results. Too hard = underripe taste.
How Long Do Canned Peaches Last?
Shelf life matters, especially when you’ve spent an afternoon elbow-deep in peaches.
- Properly canned and sealed peaches: Best quality for up to 12 months; safe to eat for up to 18 months.
- Storage tips:
- Keep jars in a cool, dark place.
- Avoid high humidity, which can rust lids.
- Don’t stack jars without a barrier—lids may come loose.
If you notice cloudy syrup, bulging lids, or an off smell when opened—toss it. Better safe than sorry.
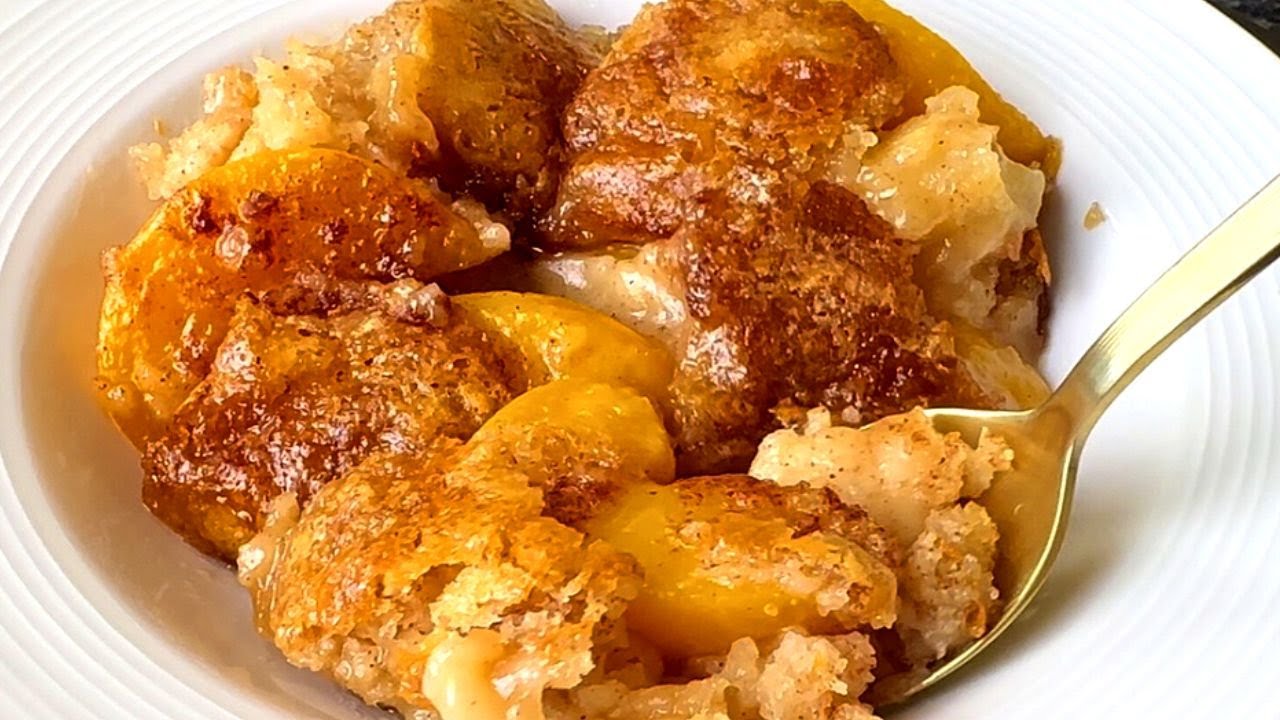
Creative Ways to Use Canned Peaches
Once you have jars of peaches sitting pretty on your shelf, it’s time to enjoy them!
Breakfast Boosters:
- Add to oatmeal, yogurt, or pancakes.
- Make a quick peach compote for toast or waffles.
Dessert Favorites:
- Bake into cobblers, crisps, or pies.
- Blend into milkshakes or smoothies.
Savoury Surprises:
- Use as a topping for grilled chicken or pork.
- Make a spicy peach salsa.
Basically, any dish that could use a hit of fruity sweetness—canned peaches have your back.
Troubleshooting Common Problems
Even seasoned canners hit a few bumps in the road. Here’s how to troubleshoot some of the most common issues with home-canned peaches so your efforts don’t go to waste.
Jars Not Sealing?
This is one of the most frustrating problems, especially after you’ve done everything else right. Here are a few reasons it might happen:
- Dirty Jar Rims: Syrup or peach residue on the rim can prevent a good seal. Always wipe the rims clean with a damp cloth before applying the lid.
- Damaged Lids or Jars: A small nick or bend in the lid can stop it from sealing. Always inspect your materials before use.
- Lids Not Heated Properly: Some modern lids don’t require preheating, but check the manufacturer’s instructions. If needed, warm the lids in hot (not boiling) water for a few minutes.
- Rings Too Tight or Too Loose: Rings should be “fingertip tight.” Overtightening can prevent proper venting during processing, while loose rings won’t hold the lid in place.
What to do if a jar doesn’t seal: Store it in the fridge and use within a week, or reprocess it within 24 hours using a new lid.
Floating Fruit?
If your peach slices are bobbing up near the top of the jar, that’s known as fruit float. It’s common and harmless, but here’s how to minimize it:
- Use the Hot Pack Method: This reduces trapped air in the fruit and helps it absorb the syrup better.
- Pack Fruit Tightly: Gently but firmly place peach slices in the jar to reduce extra space.
- Use Medium or Heavy Syrup: Lighter syrups make fruit more buoyant.
Even if the peaches float, the product is still safe to eat—as long as it sealed properly and shows no signs of spoilage.
Cloudy Syrup?
Ever open a jar and find murky, cloudy liquid inside? It’s not always a problem, but here’s what to look out for:
- Hard Water: Minerals can react with the syrup and cause cloudiness.
- Overripe Fruit: Soft, overripe peaches can break down during processing and cloud the syrup.
- Spoilage: If the syrup is cloudy and smells funky or the jar lid is bulging, don’t take chances—throw it out.
If everything smells and looks fine besides the cloudiness, it’s likely safe to eat.
FAQs about Canned Peaches Recipe
1. Can I use white peaches for canning?
Yes, but with caution. White peaches are lower in acidity compared to yellow peaches, which can make them unsafe for water bath canning. If you want to can white peaches, it’s best to use a pressure canner or check with your local extension service for guidance.
2. How much sugar do I really need?
Technically, you don’t need any sugar to safely can peaches—it’s there for flavor and preservation of texture and color. You can use fruit juice or water if you’re avoiding sugar. However, adding sugar does help maintain the best quality over time.
3. Can I freeze peaches instead of canning?
Absolutely! If you’re short on time or equipment, freezing is a great alternative. Peel, slice, and sprinkle the peaches with a bit of lemon juice. Store in freezer-safe bags or containers. They won’t have the same shelf life as canned peaches, but they’ll last several months in the freezer.
4. How do I fix overripe peaches?
Overripe peaches are great for jam, peach butter, or purees, but not ideal for canning whole. If they’re too soft to hold shape, consider blending them into a syrup or sauce. You can also freeze them for smoothies or baking later on.
5. Are canned peaches healthy?
Yes! Especially when you can them yourself. You control the ingredients, so you can use less sugar or opt for fruit juice. Peaches are rich in vitamin C, fiber, and antioxidants. Homemade canned peaches are a much healthier option than store-bought versions loaded with heavy syrup or additives.
Conclusion
Canning peaches at home is more than just preserving fruit—it’s preserving memories, summer sunshine, and the joy of real, homemade flavor. Whether you’re new to canning or looking to perfect your technique, the process is rewarding from start to finish.
With just a few tools, fresh peaches, and some patience, you can stock your pantry with jars of golden goodness that last all year long. Not only do canned peaches taste better than store-bought, but they also give you total control over what goes into your food—less sugar, more flavor, and zero preservatives.
So the next time peaches are in season, skip the grocery store cans and try making your own. Trust me—once you taste your first homemade jar, you’ll never go back.
Happy canning!