Canned Black Eyed Peas Recipe: If you’ve ever stood in your kitchen wondering how to make a quick, hearty, and satisfying meal without spending hours soaking and boiling beans, canned black eyed peas are your secret weapon. They’re convenient, affordable, and incredibly versatile. Whether you’re craving a Southern-inspired comfort dish or looking for a healthy plant-based protein source, canned black eyed peas make the process almost effortless.
Freshly dried black eyed peas require soaking overnight and simmering for a long time to reach that tender texture we all love. But canned versions? They’re already cooked and ready to go. That means you can transform them into a delicious dish in under 30 minutes. For busy weeknights or last-minute meal prep, this is a total game changer.
Beyond convenience, black eyed peas have deep cultural roots, especially in Southern cuisine. They’re traditionally eaten on New Year’s Day for good luck and prosperity. But honestly, why limit them to just one day a year? With the right seasonings and simple cooking techniques, canned black eyed peas can become a staple in your weekly meal rotation.
Let’s break down why they deserve a permanent spot in your pantry.
Convenience and Time-Saving Benefits
Time is precious, and most of us don’t have hours to spend in the kitchen every day. Canned black eyed peas eliminate the need for soaking, long boiling times, and constant monitoring. They’re pre-cooked, which means you’re essentially reheating and enhancing flavor rather than starting from scratch.
Think about it like this: cooking dried beans is like building a house from the foundation up. Using canned beans is like moving into a fully built home and just decorating it to your taste. The hard work is already done.
Another major benefit is consistency. With canned beans, you know exactly what texture you’re getting every time. No undercooked centers or overly mushy surprises. Just tender, ready-to-use legumes that absorb flavors beautifully.
For families, students, and professionals juggling busy schedules, canned black eyed peas provide a reliable shortcut without sacrificing nutrition. You can toss them into soups, stews, salads, rice bowls, or enjoy them as a simple side dish. The flexibility alone makes them a pantry essential.
Nutritional Value of Black Eyed Peas
Let’s talk nutrition, because black eyed peas aren’t just convenient—they’re incredibly healthy. These little legumes are packed with plant-based protein, fiber, vitamins, and minerals. A single cup of black eyed peas contains around 13 grams of protein and 11 grams of fiber, making them excellent for digestion and muscle support.
They’re also rich in folate, iron, potassium, and magnesium. Folate is especially important for cell growth and overall health, while iron supports oxygen transport in the body. If you’re following a vegetarian or vegan diet, black eyed peas can help you meet your protein and iron needs naturally.
Fiber plays a major role in maintaining stable blood sugar levels and promoting heart health. According to various nutritional studies, diets high in legumes are linked to lower cholesterol levels and reduced risk of heart disease. That’s a pretty impressive benefit from something so simple.
What’s even better? Canned black eyed peas retain most of their nutrients during processing. Just be sure to rinse them well to reduce excess sodium. With one simple step, you turn them into a heart-healthy, protein-rich addition to your meal.
Ingredients You’ll Need
Before we dive into cooking, let’s gather everything you need. The beauty of this canned black eyed peas recipe is that the ingredient list is simple, budget-friendly, and customizable. You probably already have most of these items in your kitchen.
Core Ingredients
Here are the essentials for a basic yet flavorful canned black eyed peas recipe:
- 2 cans (15 oz each) black eyed peas, drained and rinsed
- 1 tablespoon olive oil or butter
- 1 small onion, finely chopped
- 2 cloves garlic, minced
- 1 cup vegetable broth or chicken broth
- ½ teaspoon salt (adjust to taste)
- ½ teaspoon black pepper
- ½ teaspoon smoked paprika
- ¼ teaspoon red pepper flakes (optional for heat)
These ingredients create a savory, well-balanced base. The onion and garlic provide aromatic depth, while smoked paprika adds that subtle Southern-style warmth. Broth enhances richness and prevents the peas from tasting flat.
Each ingredient plays a specific role. The oil helps sauté aromatics and release their natural sweetness. The broth infuses flavor into every bite. And the spices tie everything together like a well-rehearsed orchestra.
Optional Add-Ins for Extra Flavor
Want to elevate your dish? Here are some optional additions:
- Diced tomatoes
- Chopped bell peppers
- Cooked bacon or turkey sausage
- Fresh thyme or bay leaves
- A splash of apple cider vinegar
- Chopped green onions for garnish
These additions can transform a simple side dish into a full-flavored main course. For example, adding bacon introduces smokiness and richness, while bell peppers bring color and sweetness. A splash of vinegar at the end brightens the entire dish and balances savory notes.
Cooking is all about layering flavors. Think of it like painting—each ingredient adds another stroke to the canvas. By the time you’re done, you’ve created something vibrant and satisfying.
Kitchen Tools Required
You don’t need fancy equipment for this recipe, which makes it even more approachable. Basic kitchen tools will get the job done efficiently.
You’ll need a medium-sized saucepan or skillet, a wooden spoon or spatula, a cutting board, and a sharp knife. That’s it. If you’re adding meat like bacon or sausage, you may also want a separate pan to cook it first before combining everything.
Using the right pan size matters. A medium saucepan allows enough space for the peas to simmer evenly without overcrowding. Overcrowding can lead to uneven heating and less flavor absorption. A wooden spoon works best for stirring because it’s gentle and prevents breaking the peas apart.
Preparation is key. Chop all vegetables before you start cooking. This keeps the process smooth and stress-free. Cooking should feel enjoyable, not chaotic. Having everything ready beforehand makes the entire experience more relaxed and efficient.
Step-by-Step Guide to Cooking Canned Black Eyed Peas
Now comes the exciting part—bringing everything together. Follow these steps carefully, and you’ll end up with perfectly seasoned, tender black eyed peas that taste like they’ve been simmering all day.
Step 1: Drain and Rinse
Open the can and pour the black-eyed peas into a colander. Rinse them under cool water to remove excess salt and canning liquid.
Step 2: Sauté the Aromatics
Heat oil or butter in a skillet or saucepan over medium heat. Add the chopped onion and cook for 2 to 3 minutes until soft. Stir in the garlic and cook for 30 seconds.
Step 3: Add the Black-Eyed Peas
Pour the rinsed peas into the pan. Stir gently so they mix well with the onion and garlic.
Step 4: Season and Simmer
Add salt, black pepper, paprika, and any extra ingredients you like. Pour in a few tablespoons of water or broth to keep them moist. Let everything simmer for 5 to 10 minutes.
Step 5: Taste and Adjust
Taste the peas and adjust the seasoning if needed. Add more pepper or a little butter for extra richness.
Step 6: Serve Warm
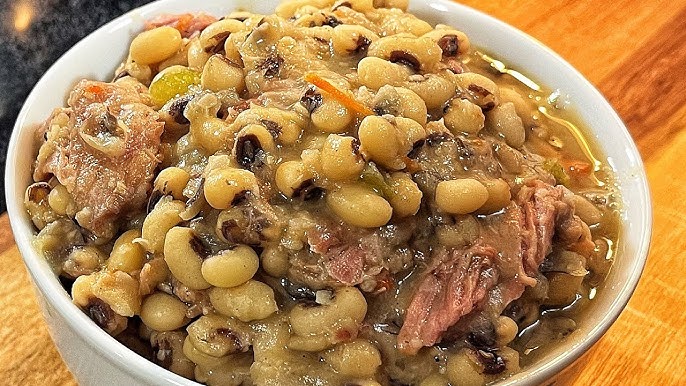
Serve the black-eyed peas with rice, fried plantain, cornbread, grilled meat, or vegetables.
This method gives canned black-eyed peas a homemade taste with very little effort.
Pro Tips for Enhancing Flavor
Want to take your canned black eyed peas recipe from good to unforgettable? A few small techniques can make a dramatic difference. The secret isn’t complicated ingredients—it’s smart layering and balance.
First, always sauté your aromatics properly. Rushing onions or garlic leads to flat flavor. Patience here pays off big time. Second, consider adding a smoky element. Smoked paprika is fantastic, but liquid smoke, diced ham, or even a smoked turkey leg can add incredible depth.
Another game-changing tip is to use broth instead of water. Water keeps things moist, but broth builds complexity. If you want a richer texture, mash a small spoonful of peas against the side of the pan and stir them back in. This naturally thickens the dish without adding flour or cornstarch.
Spices are your playground. Cumin adds warmth. Cayenne brings heat. Thyme introduces herbal notes. Don’t be afraid to experiment, but add gradually. You can always add more, but you can’t take it away.
Finally, let the dish sit for 5–10 minutes after cooking. Just like soups and stews, black eyed peas taste even better when flavors have time to marry. It’s a small step that creates a big payoff.
Serving Suggestions
Canned black eyed peas are incredibly versatile. You can serve them as a simple side dish or transform them into a complete meal.
Southern-Style Serving Ideas
For a traditional Southern approach, serve your black eyed peas over steamed white rice. The rice soaks up the flavorful broth, creating a comforting, hearty plate. Pair it with cornbread for a classic combination that feels like home cooking at its best.
You can also serve them alongside collard greens and baked chicken for a full Southern-inspired meal. If you’ve added bacon or sausage, the dish becomes even more substantial. Some people like to drizzle a little hot sauce on top for extra kick.
There’s something nostalgic about this style of serving. It feels warm, communal, and satisfying. Whether it’s a family dinner or a New Year’s celebration, black eyed peas fit right in.
Healthy Bowl Variations
Looking for something lighter or more modern? Try building a healthy grain bowl. Start with quinoa or brown rice, add your seasoned black eyed peas, then layer in avocado slices, roasted vegetables, and a dollop of Greek yogurt or dairy-free sauce.
You can also toss cooled black eyed peas into a salad with cherry tomatoes, cucumbers, red onion, and a lemon vinaigrette. The peas add protein and substance, turning a simple salad into a filling meal.
Think of black eyed peas as a blank canvas. They adapt to whatever flavors and cuisines you enjoy—Tex-Mex, Mediterranean, Southern, or even plant-based fusion dishes.
Storage and Reheating Tips
Leftovers? No problem. Store cooled black eyed peas in an airtight container in the refrigerator for up to 4 days. The flavors actually deepen overnight, making them even tastier the next day.
To reheat, place them in a saucepan over low heat and add a splash of broth or water to prevent drying out. Stir occasionally until heated through. You can also microwave them in 30-second intervals, stirring between each round.
If you want to freeze them, transfer to a freezer-safe container and store for up to 2 months. Thaw overnight in the refrigerator before reheating.
Proper storage keeps the texture intact and ensures you can enjoy your delicious canned black eyed peas anytime.
Common Mistakes to Avoid
Even though this recipe is simple, a few mistakes can affect the final result. One common error is skipping the rinse. Not rinsing canned black eyed peas can leave excess sodium and a metallic taste.
Another mistake is overcooking. Since the peas are already cooked, long simmering can make them mushy. Keep the cooking time moderate—just enough to absorb flavor.
Under-seasoning is also a frequent issue. Beans need adequate seasoning because they’re naturally mild. Taste as you go and adjust accordingly.
Finally, don’t forget acid. A splash of vinegar or lemon juice can transform the entire dish. Without it, flavors may feel heavy or one-dimensional.
FAQs about Canned Black-Eyed Peas Recipe
1. Do I need to soak canned black-eyed peas?
No. Canned black-eyed peas are already cooked, so they do not need soaking before use.
2. Should I rinse canned black-eyed peas?
Yes. Rinsing helps remove excess sodium and the thick canning liquid, giving the peas a cleaner taste.
3. How long do canned black-eyed peas take to cook?
They usually need only 5 to 10 minutes to heat through with your preferred seasonings.
4. What can I add for more flavor?
We can add onion, garlic, paprika, black pepper, tomatoes, broth, smoked turkey, bacon, sausage, or green pepper for a richer taste.
5. Are canned black-eyed peas healthy?
Yes. They are a good source of fiber, protein, vitamins, and minerals. Choosing low-sodium versions can make them even healthier.
6. Can I eat canned black-eyed peas straight from the can?
Yes, because they are already cooked. However, they taste much better when heated and seasoned.
7. What dishes can I make with canned black-eyed peas?
They work well in soups, stews, salads, rice dishes, casseroles, and side dishes.
8. How do I keep them from becoming mushy?
Heat them gently and avoid over-stirring or cooking them too long, since they are already soft.
Conclusion
This canned black eyed peas recipe proves that simple ingredients can create something deeply satisfying. With minimal prep and a short cooking time, you get a flavorful, protein-rich dish that works as a side or main course. By sautéing aromatics, layering seasonings, and allowing a gentle simmer, you build depth that rivals slow-cooked versions.
Cooking doesn’t have to be complicated to be delicious. Sometimes, the best meals come from pantry staples and a little creativity. Keep a few cans of black eyed peas on hand, and you’ll always have the foundation for a quick, nourishing, and comforting dish.