Canned Apple Pie Filling Recipe: There’s something incredibly comforting about opening a jar of homemade canned apple pie filling in the middle of winter and instantly smelling autumn all over again. If you’ve ever relied on store-bought pie filling, you already know it gets the job done—but does it truly deliver that rich, fresh apple flavor? Not always. Making your own canned apple pie filling puts you in complete control of taste, texture, sweetness, and spice. You decide how bold the cinnamon should be, how thick the syrup feels, and how tender the apples remain after baking.
Beyond flavor, homemade canning is about independence and preparation. When apple season is in full swing and prices drop, you can preserve that abundance for months—or even up to a year. Instead of rushing to the grocery store before every holiday gathering, you’ll have ready-to-use filling sitting neatly on your shelf. It’s like having a baking shortcut without sacrificing quality.
Professional bakers often emphasize one simple principle: quality ingredients create exceptional results. By preparing your own filling, you eliminate artificial preservatives, excessive sugars, and unnecessary additives. What you’re left with is a clean, flavorful, beautifully textured filling that tastes like it was made from scratch—because it was. Once you try it, going back to canned store versions feels almost impossible.
The Taste Difference Between Homemade and Store-Bought
Store-bought pie fillings often rely on heavy syrups, artificial flavors, and stabilizers that mask the natural brightness of apples. When you prepare your own version, you notice the difference immediately. The apples maintain a firmer bite, the cinnamon doesn’t overpower, and the sweetness feels balanced instead of cloying.
The real magic happens when you bake with it. Homemade canned filling thickens beautifully in the oven without becoming gluey. Instead of one uniform texture, you get layers—soft apples wrapped in silky syrup with a gentle spice warmth. That’s the difference between convenience food and crafted food.
Cost Savings and Long-Term Convenience
If you bake frequently, buying multiple cans of pie filling throughout the year adds up quickly. Making a large batch during apple season significantly reduces cost per jar. Apples are cheapest during peak harvest, especially when purchased in bulk from local orchards.
From a convenience standpoint, it’s a time saver. Imagine prepping pies for Thanksgiving or a weekend gathering. Instead of peeling and slicing apples for an hour, you simply open a jar. It’s homemade efficiency at its best.
Choosing the Right Apples
Selecting the right apples is arguably the most important step in making high-quality canned apple pie filling. Not all apples behave the same once cooked and canned. Some turn mushy, others retain their structure beautifully. Choosing wisely ensures your filling doesn’t become applesauce after processing.
Texture is key. You want apples that hold their shape through cooking and water bath canning. Firm varieties perform best because they soften just enough without disintegrating. Flavor also matters—using apples that naturally balance sweetness and acidity creates a filling that tastes layered rather than flat.
Best Apple Varieties for Pie Filling
Professional bakers often recommend Granny Smith, Honeycrisp, Jonagold, Braeburn, and Golden Delicious for pie applications. Granny Smith apples are particularly popular because of their firm texture and tart flavor, which balances the sugar in the syrup. Honeycrisp offers a sweeter, juicy profile while still maintaining structure.
Combining two varieties often produces the best result. Mixing tart and sweet apples gives depth and complexity to the filling. Think of it like blending coffee beans—you get a richer final flavor.
Balancing Sweetness and Tartness
A great pie filling shouldn’t taste one-dimensional. If your apples are overly sweet, the filling can feel heavy. If they’re too tart, you may need extra sugar, which changes texture. The ideal approach is balance. Taste your apples before you begin. Adjust sugar slightly depending on natural sweetness.
When apples carry natural brightness, the cinnamon and nutmeg shine without overpowering. That’s when your filling tastes bakery-quality rather than sugary.
Ingredients You’ll Need
Creating professional-quality canned apple pie filling doesn’t require complicated ingredients. In fact, simplicity is what makes it shine. Here’s what you’ll need:
Core Ingredients for Flavor and Texture
- 6 pounds firm apples (peeled, cored, sliced)
- 2 ½ cups granulated sugar
- ½ cup clear jel (modified cornstarch for canning)
- 1 teaspoon ground cinnamon
- ¼ teaspoon ground nutmeg
- 1 ½ cups apple juice or water
- ½ cup lemon juice (bottled for safe acidity levels)
Each ingredient plays a specific role. Clear jel is essential for safe canning because regular cornstarch can break down during processing. Lemon juice ensures proper acidity for preservation and prevents browning. Cinnamon and nutmeg add warmth without dominating the apples.
Optional Ingredients for Customization
You can personalize your filling by adding a pinch of cloves, a splash of vanilla extract, or even a bit of brown sugar for caramel notes. Some bakers add a tablespoon of butter while cooking for richness, though this is optional. Keep customizations balanced so they enhance rather than overwhelm.
Essential Equipment for Canning
Before starting, make sure your kitchen is prepared. Safe canning requires proper tools to ensure shelf stability.
Basic Kitchen Tools
You’ll need a large stockpot, sharp knife, vegetable peeler, cutting board, wooden spoon, and measuring cups. Precision matters in canning, so accurate measurements are critical.
Canning Tools for Safe Preservation
A water bath canner, glass mason jars with lids and bands, jar lifter, funnel, and bubble remover tool are essential. These tools ensure your jars seal properly and prevent contamination. Sterilizing jars beforehand is non-negotiable for food safety.
Step-by-Step Guide to Making Canned Apple Pie Filling
Step 1 – Preparing and Slicing the Apples
Start by washing, peeling, coring, and slicing the apples into uniform ½-inch slices. Consistency ensures even cooking. Place sliced apples into a large bowl as you work to prevent oxidation. Uniform slices create a professional finish in your final pie.
Step 2 – Preventing Browning
As apples are exposed to air, they oxidize quickly. Toss slices in a mixture of water and lemon juice to preserve color. This simple step keeps your filling visually appealing and fresh-looking.
Step 3 – Preparing the Thickening Syrup
In a large pot, combine sugar, clear jel, cinnamon, and nutmeg. Gradually stir in apple juice or water over medium heat. Stir constantly to prevent lumps. The mixture will thicken as it heats, forming a glossy syrup.
Add lemon juice once thickened. The syrup should be smooth and slightly translucent.
Step 4 – Cooking the Apple Mixture
Add drained apple slices to the syrup. Stir gently to coat. Cook for about 5–8 minutes until apples begin to soften but remain firm. Avoid overcooking; they will continue softening during canning and baking.
The mixture should look rich, glossy, and evenly coated.
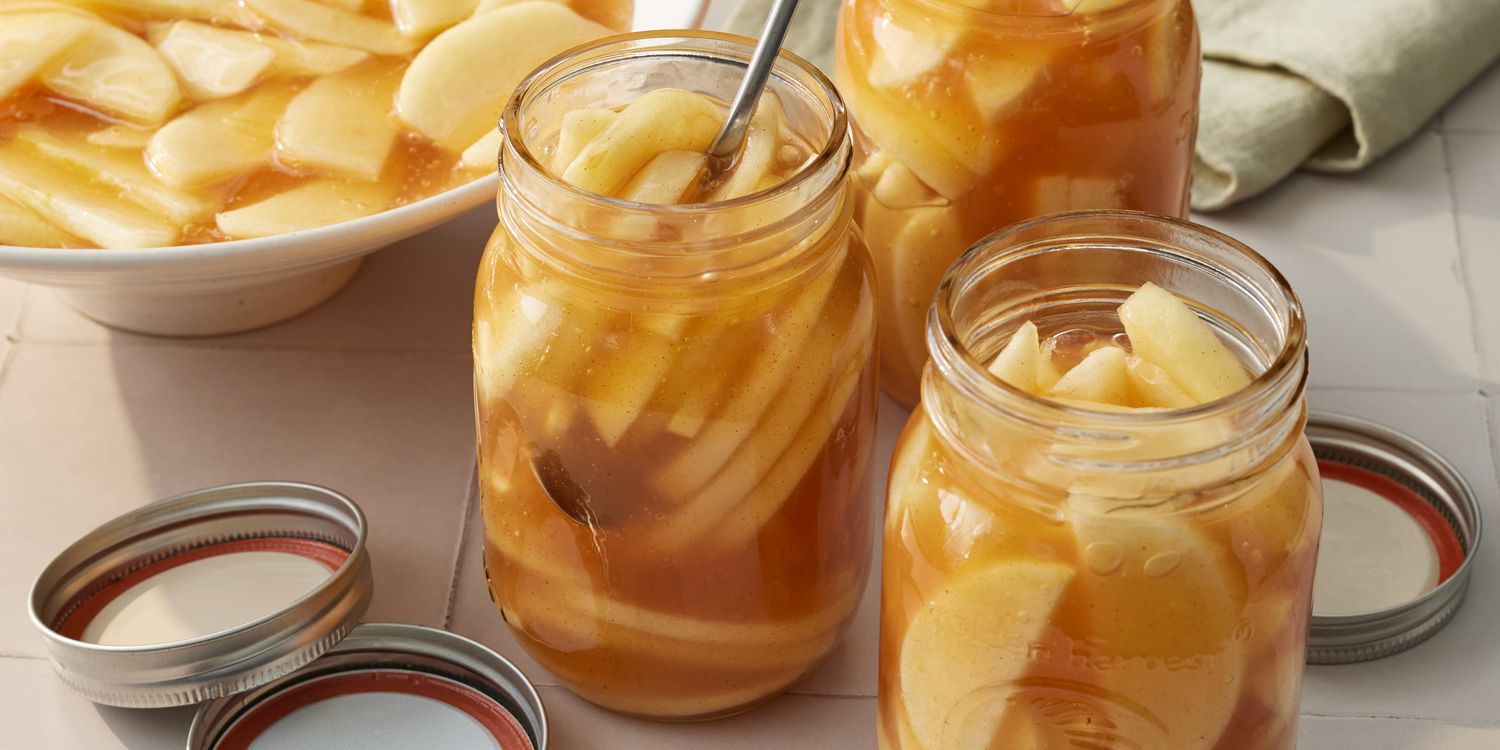
Step 5 – Filling and Sealing the Jars
Using a funnel, ladle hot filling into sterilized jars, leaving about 1 inch of headspace. Remove air bubbles using a bubble remover tool. Wipe jar rims clean, place lids on top, and secure bands fingertip tight.
Step 6 – Water Bath Canning Process
Place jars into a boiling water bath canner. Ensure water covers jars by at least 1–2 inches. Process for 25 minutes (adjusting for altitude if necessary). After processing, remove jars carefully and let them cool undisturbed for 12–24 hours.
You’ll hear satisfying “pops” as jars seal—a sign of success.
Storage Tips and Shelf Life
Once your jars of canned apple pie filling have cooled completely and the lids have sealed properly, the next step is storage. This part might seem simple, but proper storage plays a huge role in maintaining quality, flavor, and safety. After the 12–24 hour cooling period, check each lid by pressing the center. If it doesn’t flex up and down, you’ve got a successful seal. If any jar failed to seal, don’t panic—just refrigerate it and use it within a week.
Store sealed jars in a cool, dark place. Think pantry, basement shelf, or kitchen cabinet away from heat sources. Light and heat gradually degrade color and flavor over time. The ideal storage temperature is between 50°F and 70°F. When stored properly, homemade apple pie filling can last up to 12 months while maintaining its best quality. That means you can enjoy fall flavors well into the following year.
You may notice slight color changes after several months. Apples can darken naturally, but as long as the seal remains intact and there are no signs of spoilage—like mold, leaking, or unusual odors—the filling is safe to use. Always inspect before opening. When you finally twist that lid open, listen for the gentle release of pressure. That sound tells you the preservation process worked.
Labeling your jars with the date is a small habit that makes a big difference. It keeps your pantry organized and ensures you use older jars first. Rotating stock is a professional kitchen habit that works just as well at home.
One more tip: avoid stacking jars directly on top of each other unless you use a sturdy divider. Pressure can weaken seals over time. Treat your jars like small treasures—because they are. Each one represents hours of preparation and a little bit of seasonal magic captured in glass.
Creative Ways to Use Canned Apple Pie Filling
Of course, the most obvious use for canned apple pie filling is classic apple pie. But limiting it to just one dessert would be like owning a Swiss Army knife and only using the blade. This filling is versatile, adaptable, and surprisingly creative in the kitchen.
Imagine spooning it over vanilla ice cream while it’s slightly warmed. The syrup melts into the ice cream, creating ribbons of cinnamon-scented sweetness. Or layering it between cake batter to create an apple spice cake that tastes like autumn in every bite. You can swirl it into oatmeal for a breakfast that feels indulgent without extra effort.
Apple crisp becomes almost effortless when your filling is ready to go. Just pour it into a baking dish, top with a buttery oat crumble, and bake. No peeling, no slicing, no prep chaos. Turnovers, hand pies, and puff pastry pinwheels also become quick projects instead of lengthy ones.
For brunch lovers, try folding chopped pie filling into pancake or waffle batter. The apples caramelize slightly on the griddle, creating pockets of flavor in every bite. Even savory dishes benefit—pair it with roasted pork or turkey for a sweet contrast that feels gourmet.
If you love meal prepping, this filling is your secret weapon. Hosting holidays becomes less stressful because one major component is already done. It transforms spontaneous baking into something manageable. Open jar, pour, bake. That’s it.
The beauty lies in flexibility. One jar can become dessert, breakfast, or a creative twist on dinner. When something is both practical and delicious, that’s when it earns a permanent place in your pantry.
Common Mistakes to Avoid
Even though making homemade canned apple pie filling isn’t complicated, small mistakes can affect texture, flavor, or safety. Knowing what to avoid helps you produce consistent, professional-level results every time.
One common mistake is using regular cornstarch instead of clear jel. Cornstarch can break down during the canning process, leading to a runny or uneven filling months later. Clear jel is specifically designed for high-heat preservation and remains stable over time. It might require a special order, but it’s worth it.
Another issue is overcooking the apples before canning. Remember, they will cook again during water bath processing and once more when baked into a pie. If they’re too soft before jarring, you’ll end up with mush instead of tender slices. Aim for slightly firm apples during the stovetop stage.
Incorrect headspace is also a frequent problem. Leaving less than one inch can cause overflow during processing, which interferes with sealing. Too much headspace can prevent proper vacuum formation. Precision matters here.
Skipping altitude adjustments is another oversight. If you live at higher elevations, water boils at lower temperatures, meaning processing times must increase. Check reliable canning charts based on your altitude to ensure safety.
Finally, rushing the cooling process can compromise seals. Don’t tilt jars, don’t tighten bands further, and don’t move them too soon. Let them sit undisturbed. Patience ensures success.
Avoiding these mistakes doesn’t require advanced skills—just attention to detail. Treat the process like a recipe and a science experiment combined. Follow steps carefully, and you’ll consistently achieve safe, delicious results.
FAQs about Canned Apple Pie Filling Recipe
1. What is canned apple pie filling?
Canned apple pie filling is a sweet apple mixture made with sliced apples, sugar, spices, and thickener, then preserved in jars for later use in pies and desserts.
2. What apples are best for apple pie filling?
Firm apples such as Granny Smith, Honeycrisp, Fuji, or Golden Delicious work best because they hold their shape during cooking.
3. Do I need to cook the apples first?
Most recipes briefly cook or heat the apples before canning. This helps improve texture and ensures the filling thickens properly.
4. How long does canned apple pie filling last?
When properly sealed and stored in a cool, dark place, it can last up to 1 year. Once opened, refrigerate and use within a few days.
5. Can I use flour or cornstarch as a thickener?
For canning, it is better to use Clear Jel because it stays stable during processing. Flour and cornstarch may not give safe or reliable results.
6. How do I use canned apple pie filling?
You can use it for apple pie, crisps, cobblers, turnovers, cheesecakes, or as a topping for pancakes and ice cream.
7. Do I need a water bath canner?
Yes, most canned apple pie filling recipes require water bath processing to safely preserve the jars.
Conclusion
The process itself is surprisingly satisfying. Peeling, slicing, simmering, and sealing jars creates a rhythm in the kitchen that feels productive and comforting. And months later, when you open that jar and the scent of cinnamon drifts upward, it feels like you bottled a memory.
Professional results don’t require professional equipment—just good apples, proper technique, and careful canning. Once you’ve made your first batch, you’ll likely double it next season. That’s the beauty of preservation. It rewards preparation with convenience.
Whether you’re baking for holidays, gifting homemade treats, or simply craving apple pie on a random Tuesday, having jars ready on the shelf changes everything. Fresh flavor, balanced sweetness, and perfect texture—anytime you want it.