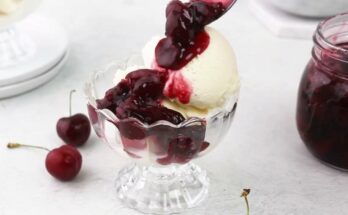
Cannabutter Recipe: Making your own cannabutter is like unlocking a secret ingredient that can elevate everyday dishes into high-flying delights.
Whether you’re looking to bake edibles or just enjoy the benefits of cannabis in your cooking, this recipe will walk you through everything from decarboxylation to storage.
Ready to get cooking? Let’s dive in!
What is Cannabutter?
Cannabutter is simply butter that has been infused with cannabis. It’s one of the most common bases for making weed edibles because it blends well with other ingredients and carries the THC or CBD content effectively. When done right, cannabutter can turn an ordinary cookie, brownie, or even pasta dish into a chill culinary masterpiece.
The butter acts as a fat carrier for the cannabinoids—mainly THC and CBD—which are fat-soluble. This means they need to bind to fats in order to be absorbed by the body. So, using real butter or even clarified butter (ghee) can enhance the bioavailability of these compounds.
Why Make Your Own?
There’s something extra satisfying about making your own cannabutter. You control the strain, the strength, and the cleanliness of the process. Store-bought edibles can be hit or miss—not to mention pricey. By making your own, you can tailor every detail to your taste and tolerance, and you know exactly what’s going in your body.
Plus, it’s just fun! It turns cannabis into a culinary art and gives you the freedom to create any edible you can dream up—from savory dishes to sweet treats.
What You’ll Need to Make Cannabutter
List of Ingredients
To make basic cannabutter, you’ll need:
- 1 cup (2 sticks) of unsalted butter
- 1 cup (about 7–10 grams) of ground, decarboxylated cannabis
- 1 cup of water (optional, helps regulate temperature and prevent burning)
Using unsalted butter gives you more flexibility in cooking later. The amount of cannabis used can be adjusted based on how potent you want your butter to be. Start with a small amount if you’re new to edibles—you can always add more next time.
Essential Tools and Equipment
Having the right tools makes the process smoother:
- Baking sheet (for decarboxylation)
- Parchment paper
- Saucepan or slow cooker
- Wooden spoon or spatula
- Cheesecloth or fine mesh strainer
- Glass storage container (preferably with a lid)
- Grinder (don’t overgrind!)
- Measuring cups
Don’t skip the cheesecloth—it’s essential for straining the plant material from your butter so you get a smooth, usable final product.
Decarboxylation – The First and Crucial Step
What is Decarboxylation?
Before cannabis can work its magic in edibles, it must go through a process called decarboxylation. Raw cannabis contains THCA and CBDA—non-psychoactive acids. When heated, these compounds lose a carboxyl group and become THC and CBD, the compounds that give cannabis its well-known effects.
Without decarbing, your cannabutter won’t be potent, and you might not feel any effects at all. This is the part a lot of people skip or rush—and it’s a big mistake!
How to Properly Decarb Cannabis
Here’s how to do it right:
- Preheat your oven to 240°F (115°C).
- Break your cannabis into small chunks (don’t grind it too fine).
- Spread it evenly on a parchment-lined baking sheet.
- Bake for 30–40 minutes, stirring every 10 minutes.
The color will change slightly from green to light brown, and you’ll notice a toasty smell. Once it’s done, let it cool before using. You can store decarbed cannabis in an airtight container if you’re not using it immediately.
How to Make Cannabutter – Step-by-Step Instructions
Step 1: Preparing Your Cannabis
After decarbing, lightly grind your cannabis. You want a coarse grind so that it doesn’t seep through the cheesecloth during straining. Grinding too fine can leave your butter gritty and hard to filter.
Measure out your desired amount—usually 7 to 10 grams per cup of butter for a standard potency. If you’re a beginner, start lower (5 grams or less) to avoid overdoing it.
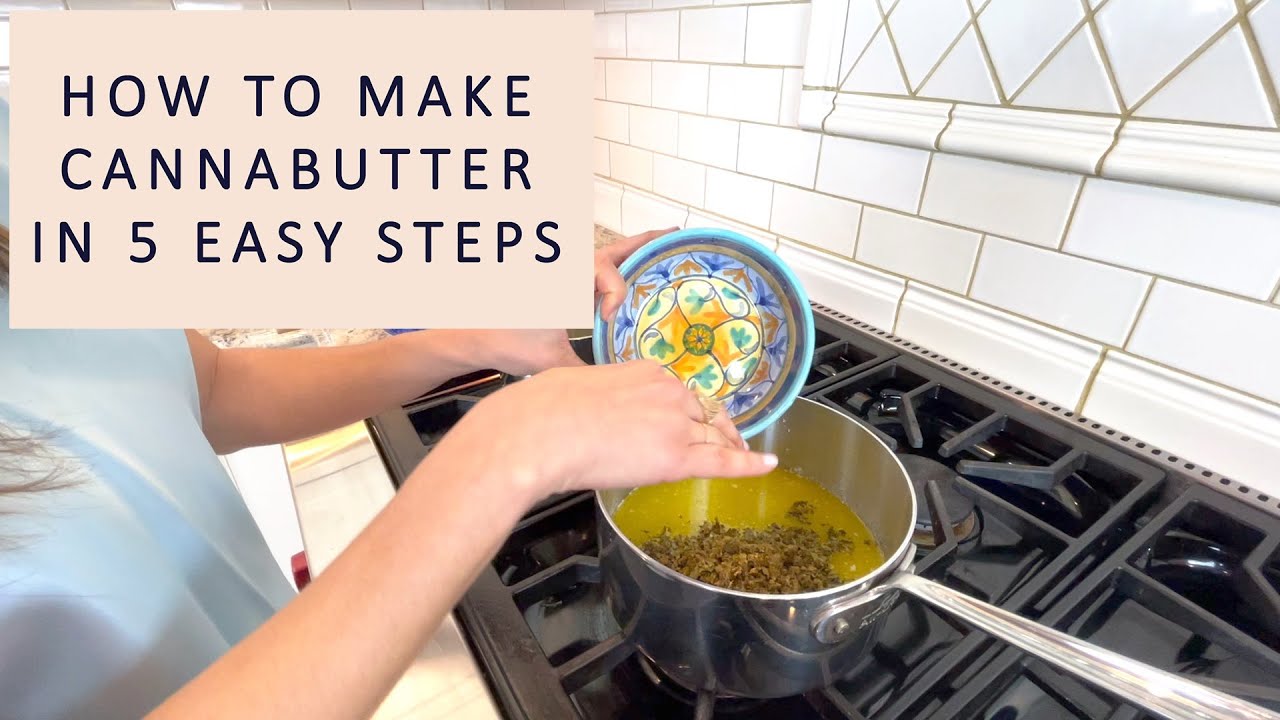
Step 2: Melting the Butter
In a saucepan over low heat, melt 1 cup of unsalted butter. Add 1 cup of water to help regulate the temperature and keep the butter from scorching.
Avoid using high heat! Keeping things low and slow is the name of the game. Too much heat can destroy the cannabinoids you worked so hard to preserve during decarboxylation.
Step 3: Infusing the Butter with Cannabis
Once the butter is fully melted, stir in your ground, decarboxylated cannabis. Let it simmer on low heat (around 160–200°F or 70–90°C) for 2 to 3 hours. Stir occasionally to prevent scorching.
Use a thermometer if possible to monitor the temp—you want it hot enough to infuse but not so hot that it evaporates or burns. You’ll know it’s working when your kitchen smells like a dispensary!
Step 4: Straining the Mixture
After simmering, it’s time to separate the butter from the plant material. Line a strainer or funnel with cheesecloth and carefully pour the mixture into a glass container.
Let it drip—don’t squeeze the cheesecloth! Squeezing can push through unwanted plant particles and make the butter taste harsh. Discard the used cannabis pulp.
Step 5: Storing Your Cannabutter
Let the butter cool at room temperature before refrigerating. It will harden as it chills, and any excess water will separate. You can pour off the water and keep just the solid butter.
Store in an airtight container in the fridge for up to two weeks, or freeze for up to six months. Label your cannabutter clearly—especially if you share a fridge!
Tips for Perfect Cannabutter Every Time
Dos and Don’ts
Making cannabutter is a bit of a balancing act. Here are some golden rules that will help you avoid rookie mistakes:
Do:
- Keep the heat low – High temperatures can degrade THC and ruin your batch.
- Stir regularly – Prevents the butter and cannabis from sticking to the pan.
- Use high-quality butter – Better butter = better flavor and texture.
- Label your butter – Always mark it as infused and note the strength.
- Be patient – Infusion takes time; don’t rush the simmering process.
Don’t:
- Skip decarboxylation – It’s essential for activating the THC.
- Over-grind your weed – You don’t want green grit in your finished butter.
- Squeeze the cheesecloth too hard – It forces bitter plant matter into your butter.
- Use salted butter – It complicates dosing and alters the flavor.
- Store at room temperature – It can go rancid quickly without refrigeration.
How to Control Potency
Potency is the trickiest part of making cannabutter, especially if you’re new to it. Everyone’s tolerance is different, and cannabis strains vary in THC/CBD content.
Here’s how to take control:
- Know your strain’s THC content – For example, if your strain is 20% THC, that’s 200mg per gram.
- Calculate your dose – If you use 7 grams of 20% THC cannabis, that’s around 1400mg of THC in your butter.
- Divide and conquer – If a recipe calls for 1 tablespoon of butter, and you made 1 cup (16 tablespoons), that’s about 87.5mg of THC per tablespoon.
- Test with a small dose – Try ¼ teaspoon first and wait 90 minutes before taking more. Everyone reacts differently.
Still unsure? Use an online edible calculator to estimate strength, or start with a low-THC strain for a gentler introduction.
Storing and Using Cannabutter
Storage Tips
Proper storage keeps your cannabutter fresh and potent:
- Refrigerator: Store in an airtight jar or container. It’ll last up to 2 weeks.
- Freezer: Wrap it in parchment paper, then foil, and seal in a zip-lock bag. It can stay fresh for up to 6 months or more.
- Keep away from light and air: These can degrade THC over time.
- Use portions: Consider freezing in ice cube trays so you have pre-measured doses ready to go.
Also, label it clearly to avoid mix-ups. You don’t want to confuse cannabutter with your regular breakfast spread!
Ideas for Recipes and Uses
The best part of making cannabutter? You can use it in almost anything! Once you’ve got a stash, here are a few tasty ideas:
Sweet Treats:
- Brownies (classic!)
- Cookies
- Cakes and cupcakes
- Rice Krispies treats
- Chocolates or fudge
Savory Snacks:
- Garlic herb cannabutter on toast
- Grilled cheese sandwiches
- Infused mashed potatoes
- Cannabutter popcorn
- Pasta sauces and risottos
Drinks and More:
- Cannabutter coffee (bulletproof style)
- Infused hot chocolate
- Blend into smoothies (just a small amount!)
Just remember, heat can degrade THC if it’s too intense, so avoid frying or boiling it. And always clearly communicate that your dishes contain cannabis, especially if serving others.
Troubleshooting Common Cannabutter Problems
Why is My Cannabutter Weak?
If your butter turned out less potent than expected, don’t worry—this is a common issue for beginners. Here’s what could have gone wrong:
- Improper decarboxylation: If the cannabis wasn’t heated long enough or at the right temperature, THC wasn’t activated properly.
- Too much water: Adding too much water can dilute the infusion.
- Wrong butter-to-weed ratio: Using too much butter or too little cannabis can lead to weaker results.
- Overheating: High temperatures can destroy THC, so a simmer above 200°F may have burned off the good stuff.
- Strain strength: Not all strains are created equal. A low-THC strain will naturally make a milder butter.
Next time, double-check your decarb process, monitor your infusion temp, and use an edible calculator to estimate dosage more precisely.
Why Does My Cannabutter Taste Bad?
A bitter, grassy, or overly “weedy” flavor usually means too much plant matter made it through the straining process. Here’s how to avoid that:
- Don’t grind too fine: Use a coarse grind to prevent small particles from passing through the cheesecloth.
- Don’t squeeze the cheesecloth: Pressing the pulp will release chlorophyll and bitter flavors into your butter.
- Use quality cannabis: Old, poorly cured bud or trim will make your butter taste more like hay than herb.
- Add flavor: You can mix in garlic, herbs, or lemon zest when cooking with cannabutter to mask the earthy taste.
Health Considerations and Dosage Advice
How Much Cannabutter Should You Consume?
This depends on your tolerance, the potency of the butter, and what you’re using it for. A standard dose of THC is 10mg, but beginners should start with 2.5 to 5mg.
If you know your total THC content, divide it by the number of servings you plan to make. Always test with a small amount first and wait at least 1–2 hours before consuming more.
Safety Tips for Edibles
Edibles hit differently than smoking or vaping:
- Start low, go slow: It can take 30–90 minutes to feel the effects.
- Don’t mix with alcohol: It can intensify the effects and lead to an unpleasant experience.
- Store safely: Keep cannabutter and edibles out of reach of children and pets.
- Know your limit: If you feel overwhelmed, stay calm, hydrate, and rest—it will pass.
Being cautious is key to having a fun, safe, and relaxing edible experience.
Different Methods for Making Cannabutter
Stovetop Method (Traditional)
This method involves simmering butter and cannabis on a stovetop for a few hours. It’s simple and effective but requires close monitoring of temperature.
Pros:
- Easy and accessible
- No special tools required
Cons:
- Risk of burning if not watched carefully
- Can be time-consuming
Slow Cooker Method
Place your ingredients in a crockpot and let them cook on low heat for 3–4 hours. Stir occasionally and strain when done.
Pros:
- Low risk of overheating
- Hands-off cooking
Cons:
- Longer process
- Needs a slow cooker
Double Boiler Method
Perfect for those who want to avoid scorching. It keeps temperatures steady and ideal for delicate infusions.
Pros:
- Even heating
- Great for small batches
Cons:
- Requires a double boiler setup
- Takes up more space
Each method has its strengths—pick what fits your kitchen and schedule best!
Beyond Butter: Other Cannabis Infusions
Cannabutter is just the beginning. If you’re feeling adventurous, try these other infusion options:
Coconut Oil Infusion
Great for vegans and keto diets, coconut oil is a super-fat that binds well with cannabinoids. It’s versatile and has a long shelf life.
Olive Oil Infusion
A heart-healthy alternative perfect for salad dressings, pasta, or low-heat sautéing. Just like butter, it needs a gentle simmer with decarbed weed.
Tinctures and Glycerin Extracts
Ideal for sublingual use or adding to beverages. These alcohol- or glycerin-based extractions don’t need cooking and offer quicker onset than edibles.
Explore different mediums based on your dietary needs or taste preferences!
Creative Edible Ideas Using Cannabutter
Your freshly made cannabutter opens the door to a world of infused goodness. Here are some fun, easy ways to use it:
Baked Goods
- Weed brownies
- Chocolate chip cookies
- Banana bread
- Muffins and cupcakes
Breakfast and Brunch
- Infused pancakes or waffles
- Cannabutter on toast or bagels
- Cannabis-infused scrambled eggs
Savory Dishes
- Mac and cheese with a cannabutter roux
- Garlic cannabutter mashed potatoes
- Infused grilled cheese or quesadillas
You can even melt it over popcorn or stir it into a soup—just be mindful of portion sizes and always label your creations clearly.
FAQs about Cannabutter Recipe
1. How long does cannabutter last?
Properly stored in an airtight container in the fridge, cannabutter can last up to 3 weeks. For longer storage, freeze it—it’ll stay good for up to 6 months.
2. What’s the ideal butter-to-cannabis ratio?
A common starting point is 1 cup of butter to 7–10 grams of decarboxylated cannabis. You can adjust depending on your desired potency.
3. Do I need to decarb the cannabis first?
Yes! Decarboxylation is crucial. It activates the THC, so your cannabutter will actually have the psychoactive effects you’re aiming for.
4. Can I use unsalted or salted butter?
Either works, but unsalted butter is preferred—it gives you more control over the flavor, especially for baking.
5. Is it okay to cook cannabutter on high heat?
Nope. High heat can destroy the THC. Stick to low and slow cooking, around 160–180°F (70–82°C) for 2–3 hours.
6. Can I make cannabutter with trim or stems?
You can, but expect lower potency. Using flower or quality trim gives the best results in both strength and flavor.
7. How do I know how strong my cannabutter is?
You can use online THC calculators, or test with a small amount first to see how it affects you before diving in.
8. Can I use vegan butter or coconut oil instead?
Absolutely! Vegan butters and coconut oil are great alternatives. Coconut oil, in particular, binds well with THC.
9. What’s the best way to strain cannabutter?
Use cheesecloth or a fine mesh strainer. Don’t squeeze the plant matter too hard—it can release bitter compounds.
10. What recipes can I use cannabutter in?
From brownies and cookies to sauces and pasta, cannabutter is wildly versatile. Just swap it for regular butter in your favorite dish!
Conclusion
So there you have it—a complete, step-by-step guide to making rich, flavorful, and potent cannabutter. Whether you’re an experienced cannabis chef or just starting out, this recipe gives you the foundation to create delicious edibles from the comfort of your own kitchen.
From the crucial decarboxylation step to properly storing and dosing your butter, every phase matters. With the right ingredients, tools, and a bit of patience, you’ll end up with a golden spread that can add a whole new dimension to your favorite recipes.
So fire up the stove, prep your cannabis, and get ready to infuse your cooking with a whole lot of chill. And remember—go low, go slow, and enjoy the ride.