Candy Apple Recipe: There’s something irresistibly nostalgic about candy apples. Just the thought of biting into that glossy, crimson coating and hitting the juicy crunch of a fresh apple takes many of us back to childhood fairs, Halloween nights, or fall festivals. But did you know you can recreate that magic right in your own kitchen? Whether you’re planning a themed party, a festive event, or just looking for a fun kitchen activity, candy apples make a delightful treat that’s surprisingly easy to whip up.
Candy apples date all the way back to the early 1900s. First introduced by a New Jersey candymaker named William W. Kolb, these shiny treats were originally created as a way to display red cinnamon candy for the holiday season. But they quickly became a seasonal sensation. Over a century later, they’re still a hit – and with good reason. The combination of hard candy shell and tart apple is pure bliss, especially when made fresh.
In this step-by-step guide, you’ll learn how to make perfect candy apples with ease. From selecting the best apples to mastering the candy coating, we’ve got everything covered. By the end of this article, you’ll be armed with a recipe that’s as fun to make as it is to eat.
Ingredients You’ll Need
Making candy apples starts with the right ingredients. Here’s what you’ll need:
Main Ingredients:
- 6–8 small to medium apples (Granny Smith or Gala are best)
- 2 cups granulated sugar
- ¾ cup water
- ½ cup light corn syrup
- Red food coloring (gel or liquid)
- ½ tsp cinnamon extract (optional but traditional)
These are the core ingredients for classic red candy apples. Want to get fancy? You can mix it up with different food colors, flavored extracts (think vanilla, cherry, or even root beer), and even sprinkle toppings like crushed nuts or candy.
Tips for Choosing Apples:
- Go tart: Granny Smith apples are a classic choice. Their tangy bite pairs beautifully with the sweet candy shell.
- Avoid waxed apples: Supermarket apples often have a wax coating that prevents the candy from sticking well. If yours do, you’ll need to remove that (we’ll cover how in the next section).
- Pick small to medium apples: Larger apples can be harder to coat evenly and trickier to eat.
Also, make sure the apples are firm with no bruises or soft spots. You want every bite to be crisp and satisfying.
Tools and Equipment Required
You don’t need fancy equipment to make candy apples, but having the right tools will make the process smoother and more fun. Here’s what you should gather before starting:
Must-Have Tools:
- Heavy-bottomed saucepan: This ensures even heating and prevents the sugar from burning.
- Candy thermometer: Absolutely essential! It tells you exactly when the syrup has reached the right temperature (usually around 300°F or the “hard crack” stage).
- Wooden skewers or lollipop sticks: These give you something to hold the apple by.
- Baking sheet lined with parchment or a silicone mat: For letting the apples cool and set.
Helpful Extras:
- Heatproof spatula: For stirring the candy syrup without melting your tools.
- Measuring cups and spoons: Accuracy matters with candy.
- Glass of cold water (for candy testing): If you don’t have a thermometer, the old-school “cold water test” can help you judge the stage of your candy.
Pro tip: Prep everything in advance. Once the candy hits the right temperature, you’ll need to work fast to coat the apples before it starts to harden.
Prepping the Apples
Prepping the apples is crucial. A poorly prepped apple will make your candy coating slide right off, leaving you with a sticky, uneven mess. Here’s how to do it right:
- Wash thoroughly: Use warm water and scrub your apples well to remove any dirt and residue. If they’re store-bought, they likely have a wax coating that needs to be removed.
- Remove wax coating: Soak apples in hot water with a splash of vinegar for 5 minutes, then scrub with a rough towel. Rinse and dry completely.
- Dry the apples: Any moisture on the surface will mess with the candy sticking, so pat them dry thoroughly.
- Insert the sticks: Push your sticks into the top of each apple, right through the core. You want them to feel secure but not crack the apple.
Place your prepped apples on the lined baking sheet and set them aside while you move on to making the candy coating. At this stage, they should look like little soldiers standing at attention, ready for their glossy armor.
Making the Candy Coating
This is where the real fun begins – turning plain sugar into a shiny, red, sweet shell. Here’s how to make the perfect candy coating:
- Combine your ingredients: In a heavy saucepan, mix together the sugar, water, and corn syrup.
- Bring to a boil: Place the pan over medium-high heat and stir gently until the sugar dissolves. Once it starts boiling, stop stirring.
- Add your thermometer: Insert your candy thermometer into the pot, making sure it doesn’t touch the bottom.
- Watch the temperature: Let it boil until it reaches 300°F (hard crack stage). This takes around 15-20 minutes. If you don’t have a thermometer, test by dropping a bit of syrup into cold water—it should harden instantly and crack when bent.
- Add color and flavor: Once it hits the right temp, quickly remove from heat. Stir in red food coloring and cinnamon extract if using.
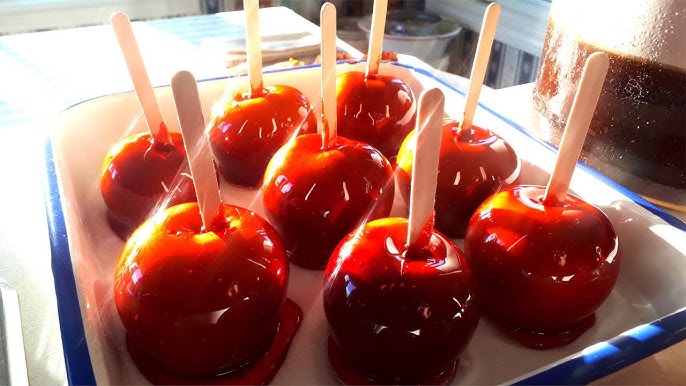
- Coat the apples: Tilt the saucepan slightly and swirl each apple into the syrup, turning to coat evenly. Let the excess drip off before placing it back on the lined tray.
- Let cool: Allow the apples to sit at room temperature for at least 30 minutes or until fully hardened.
Safety note: The candy syrup is extremely hot. Be careful while handling it, and definitely keep little ones at a safe distance during this part.
Once cooled, your candy apples will be ready to shine – both literally and figuratively!
Decorating Your Candy Apples
Now that your candy apples are coated and cool, you can stop right there and enjoy their classic charm—or, you can get creative and take them to the next level. Decorating candy apples is one of the most fun parts of this whole process, especially if you’re making them with kids or for a themed event.
Here are a few decorating ideas that’ll wow your guests and please your tastebuds:
1. Add Toppings Before the Candy Sets: While the coating is still warm and sticky (within the first few seconds after dipping), you can roll the apples in:
- Crushed nuts (peanuts, almonds, pecans)
- Mini chocolate chips
- Crushed graham crackers or Oreos
- Sprinkles or edible glitter
- Toasted coconut
Make sure to press gently but quickly so the toppings adhere well before the candy hardens.
2. Use Colored Candy Coating: Swap out the classic red for colors that fit your occasion:
- Blue or pink for baby showers
- Black or green for Halloween
- Gold for New Year’s Eve
Just use gel food coloring instead of liquid to avoid altering the texture of your syrup.
3. Add Drizzles and Designs: Once the candy coating has hardened, you can drizzle melted chocolate or white chocolate over the apples for a fancy look. Use a fork or piping bag to make crisscross patterns or even write initials.
4. Stick Style Upgrade: Instead of regular wooden sticks, use decorative straws, wooden dowels wrapped in ribbon, or skewers topped with mini flags or bows.
5. Wrap for Gifting: Once fully set, wrap each apple in clear cellophane and tie it with a ribbon. They make amazing party favors and gifts!
This extra bit of flair transforms your simple candy apples into edible works of art.
How to Store Candy Apples
You’ve put all that effort into making beautiful, delicious candy apples—now let’s talk about keeping them fresh. Candy apples aren’t just a one-day treat if stored properly.
Short-Term Storage (1-3 Days):
- Room Temperature: Store them in a cool, dry place at room temperature. Keep them separated (not stacked) and on parchment paper to prevent sticking.
- Avoid moisture: Humidity is the enemy. Moisture can make the candy shell sticky or even cause it to melt.
- Don’t refrigerate (unless necessary): Refrigeration can cause condensation, leading to a gooey mess. If your house is very warm or humid, you can refrigerate, but wrap each apple tightly in plastic wrap or use airtight containers to minimize moisture exposure.
Long-Term Storage (up to a week):
- Wrap them tightly in plastic wrap or cellophane and store them in an airtight container in the fridge. Before serving, let them sit at room temperature for 10–15 minutes to avoid cracking the candy shell with your teeth.
Pro tip: Candy apples are best enjoyed within the first 48 hours. The candy starts to lose its shine and hardness over time, and the apple inside can begin to get soft or weepy.
Troubleshooting Common Candy Apple Issues
Let’s face it—working with hot sugar can be a little tricky, especially the first few times. If things didn’t go perfectly, don’t worry! Here are some common candy apple problems and how to fix them next time:
1. Candy Won’t Stick to the Apples:
- This is usually due to wax or moisture on the apple’s skin. Make sure to wash thoroughly and dry completely.
- Also, avoid using oily toppings that can cause slippage.
2. Candy Cracks After Setting:
- That’s often from dipping apples that are too cold or refrigerating them immediately after coating.
- Let apples come to room temp before dipping and allow them to cool slowly after coating.
3. Candy Coating is Cloudy, Not Glossy:
- This can happen if your sugar crystallized during cooking. Avoid stirring once the sugar has dissolved and consider adding a little cream of tartar (½ tsp) to stabilize the syrup.
4. Candy is Too Thick or Too Thin:
- If your syrup wasn’t cooked long enough, it might be too runny. If it cooked too long, it could be thick or even start to caramelize.
- Use a candy thermometer and remove it from heat right at 300°F.
5. Apples Leak or Get Mushy: This happens if they’re stored too long or refrigerated without wrapping. Best practice is to eat them within a couple of days.
Keep in mind—making candy is part science, part art. Don’t be discouraged by a few bumps in the road!
Fun Variations of Candy Apples
While the classic red candy apple is always a winner, don’t be afraid to explore some tasty and creative variations that might just become your new favorite.
1. Caramel Candy Apples:
- Swap the hard candy shell for a chewy caramel coating made with butter, brown sugar, and condensed milk.
- Perfect for fall, especially when topped with chopped nuts or dipped in chocolate.
2. Chocolate-Dipped Apples: Use melted dark, milk, or white chocolate to coat apples. Great for decorating with sprinkles, cookie crumbs, or candies.
3. Galaxy or Marble Candy Apples: Mix multiple colors into your candy coating and swirl them gently to create a cosmic, marble effect. These are Instagram gold.
4. Halloween Monster Apples: Use green or black candy coating and edible googly eyes to turn your apples into spooky monsters.
5. Gourmet Toppings: Think beyond basic sprinkles. Try crushed pretzels, freeze-dried fruit, crushed cereal, or even bacon bits for a savory-sweet twist.
Switching up your flavor and topping combos can turn this simple treat into a showstopping centerpiece for any celebration.
Health & Safety Tips When Making Candy Apples
Candy-making is fun, but working with boiling sugar isn’t something to take lightly. Here’s how to stay safe while getting your sweet fix:
- Use a thermometer: Never eyeball sugar stages—it’s dangerous and can ruin your batch.
- Avoid distractions: Stay focused while cooking sugar syrup. A few seconds can mean the difference between perfect and burnt.
- Protect your hands: Use oven mitts when handling hot pans or dipping apples.
- Watch for drips: Hardened candy on countertops can be sharp. Clean spills immediately with warm water.
- Keep kids safe: Let them help with decorating and wrapping, but not the boiling sugar part.
- Don’t lick the spoon: It’s tempting, but you could burn your tongue if the candy hasn’t cooled.
Always respect the heat and be cautious—it’s the key to a safe, enjoyable experience.
Serving Suggestions and Creative Presentation Ideas
Now that your candy apples are glistening and gorgeous, it’s time to think about presentation. After all, half the joy of a treat like this is showing it off before taking that first bite. Whether you’re preparing them for a party, a bake sale, or a special event, how you serve your candy apples can really elevate the experience.
Here are some fun and eye-catching ways to serve your candy apples:
1. Candy Apple Stand: Use a foam block or decorative stand where you can stick the apples upright by their sticks. You can cover the base with colored paper, ribbons, or fabric to match your theme.
2. Individual Gift Wraps: Wrap each apple in clear cellophane and tie with twine or colorful ribbon. You can even add a tag with the person’s name, a fun message, or your event’s date.
3. Mini Candy Apples: Make bite-sized versions using small apples or even melon scoops of apple coated in candy. Stick them on toothpicks or cocktail sticks—adorable and easy to eat!
4. Dessert Table Feature: Set your candy apples on tiered trays or cake stands surrounded by other fall treats like mini pies, cupcakes, or cookies for a gorgeous dessert spread.
5. Rustic Basket Display: Place your apples in a woven basket lined with a gingham napkin or straw. It creates a cozy, autumn-festival vibe that’s perfect for country weddings, harvest parties, or Thanksgiving.
6. Seasonal Themes: Coordinate your apple colors and toppings with holidays:
- Halloween: Black or orange candy, edible eyeballs, spider web designs.
- Christmas: Red and green apples with peppermint drizzle or edible glitter.
- Valentine’s Day: Pink or red with heart-shaped sprinkles.
Presentation doesn’t have to be complicated—just thoughtful and themed. A little effort here goes a long way!
The History of Candy Apples
Candy apples aren’t just a sweet treat—they’re a bite of American culinary history. Originating in the early 20th century, they’ve been part of fall celebrations for generations.
Here’s a quick look at their backstory:
- Invented by accident: Around 1908, William W. Kolb, a Newark, New Jersey candymaker, dipped apples in red cinnamon candy as a store display for Christmas. Surprisingly, customers wanted to buy the apples themselves!
- A seasonal sensation: They became wildly popular in the early 1900s, especially at circuses, county fairs, and carnivals. They were cheap to make, easy to eat on-the-go, and visually stunning.
- Fall traditions: Because apples are harvested in the fall and the red color fit perfectly with autumn aesthetics, candy apples quickly became a go-to for Halloween and Thanksgiving.
Over time, variations like caramel and chocolate apples joined the mix, but the OG red candy apple still holds a special place in sweet history. It’s more than a treat—it’s a symbol of tradition, fun, and old-school charm.
Why Candy Apples are a Great Family Activity
Making candy apples isn’t just about the end result—it’s also about the experience. Whether it’s a weekend kitchen adventure or part of a holiday tradition, crafting these treats is a fantastic activity for families, kids, and friends.
Here’s why it’s a winner for family fun:
- Interactive and hands-on: Everyone can get involved—from washing apples and adding sticks to decorating and wrapping the final product.
- Creative expression: Let kids pick their own toppings or create silly faces with candies and chocolate chips.
- Learning opportunity: It’s a great way to teach kids about cooking basics, measurements, and even the science of sugar.
- Memorable bonding time: Turn on some music, lay out all the ingredients, and enjoy laughing and chatting as you create together.
- Tradition starter: Make it an annual event—“Candy Apple Day” during October or a sweet Valentine’s activity with heart-shaped sprinkles.
Plus, the reward at the end—a crunchy, sweet apple—is immediate and delicious.
Nutritional Information of Candy Apples
Okay, let’s get real for a second—candy apples are definitely a treat. While they do contain fruit, that glossy candy shell adds a decent sugar boost. That said, they can be enjoyed in moderation as part of a balanced lifestyle.
Here’s a rough breakdown for one medium candy apple (based on standard ingredients):
| Nutrient | Approximate Value |
|---|---|
| Calories | 220–280 kcal |
| Total Sugar | 38–50g |
| Carbohydrates | 50–60g |
| Fiber | 3–4g |
| Fat | 0g |
| Protein | 0.5g |
Keep in mind, this varies depending on the size of the apple and how thick your candy coating is. Toppings like chocolate, nuts, or caramel will raise calorie and fat content.
But don’t let the numbers scare you off—enjoying one of these nostalgic treats once in a while is totally fine, especially if paired with a balanced diet. Think of them like you would a cupcake or a candy bar—an occasional indulgence that brings joy.
Tips for Hosting a Candy Apple-Making Party
Want to take the candy apple fun up a notch? Host your very own candy apple-making party! Whether it’s a kids’ gathering, a friends’ night in, or a fun holiday event, this is a guaranteed crowd-pleaser.
Here’s how to pull it off:
- Set up stations: Have a dipping station with candy syrup, a topping station with bowls of goodies, and a drying/cooling area.
- Pre-dip apples: If your guests are younger, consider prepping the dipped apples in advance and letting them decorate once they’ve cooled.
- Keep it clean: Use disposable tablecloths and have paper towels or wet wipes nearby—things will get sticky.
- Offer variety: Provide chocolate and caramel options alongside the candy coating.
- Make it a contest: Have a mini competition for “Most Creative Apple” or “Best Topping Combo.”
Hand out small boxes or cellophane wraps so guests can take their masterpieces home. It’s not just an activity—it’s an edible memory maker.
FAQs about Candy Apple Recipe
Q1: What kind of apples are best for candy apples?
A: Crisp, tart apples like Granny Smith are perfect! Their sharpness balances the sweetness of the candy coating beautifully.
Q2: Do I need a candy thermometer to make candy apples?
A: Yes, a candy thermometer is highly recommended. You’ll need to reach the “hard crack” stage (around 300°F or 150°C) to get that signature snap.
Q3: Can I use food coloring for candy apples?
A: Absolutely! Red is classic, but you can get creative with any color you like—just add gel food coloring to the sugar mix before dipping.
Q4: How long do homemade candy apples last?
A: They’re best eaten within 2-3 days. Keep them in a cool, dry place—not the fridge—to avoid the coating becoming sticky.
Q5: How do I keep the candy coating from sliding off?
A: Make sure your apples are washed, dried, and free of wax. Any moisture or waxy coating will prevent the candy from sticking properly.
Q6: Can I make candy apples without corn syrup?
A: Yes, but corn syrup helps prevent the sugar from crystallizing. If skipping it, use a small amount of lemon juice or cream of tartar as a substitute.
Conclusion
What makes this treat so special is its versatility. You can keep it classic or go wild with toppings, colors, and flavors. You can serve them at fancy events or enjoy them as a casual weekend kitchen adventure. Plus, with just a few basic ingredients and some simple tools, anyone can become a candy apple artist.
So the next time you’re looking for something festive, fun, and absolutely delicious, give this candy apple recipe a try. It’s not just about the treat—it’s about the experience. The laughter, the sticky fingers, the shiny results—they’re all part of what makes candy apples so unforgettable.
Now, get dipping and make something sweetly spectacular!