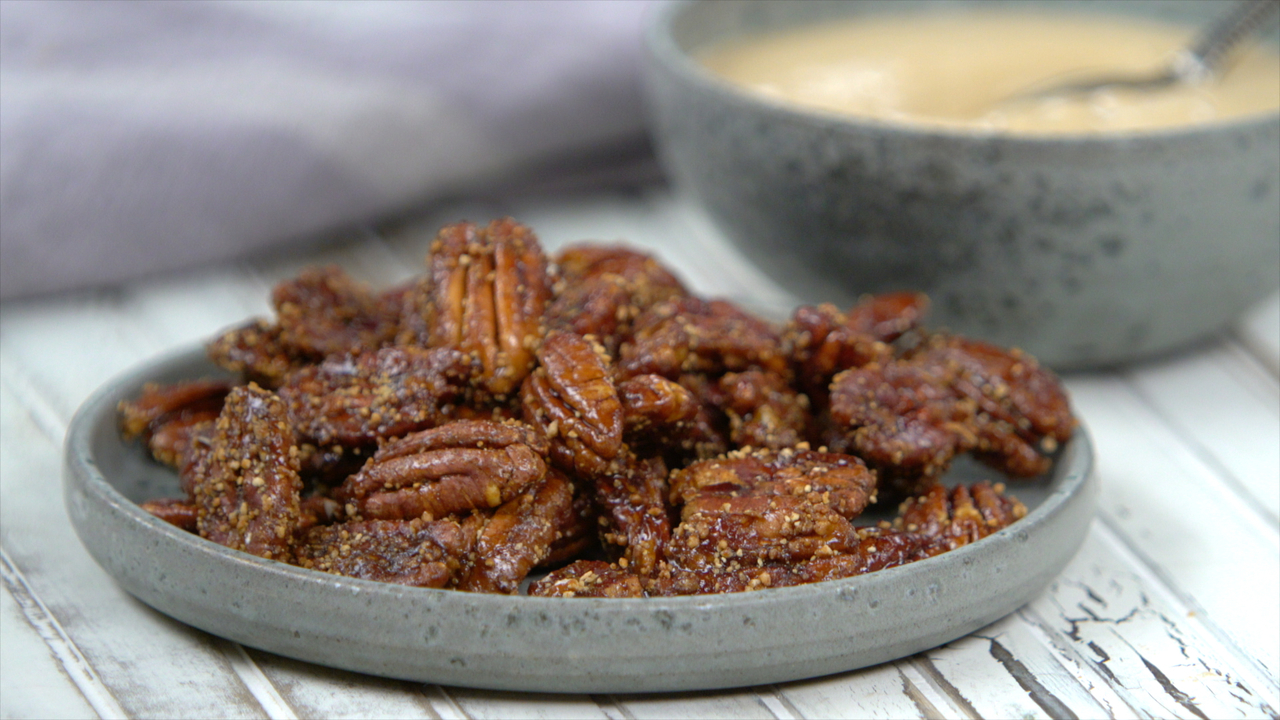
Candied Nuts Recipe: Candied nuts are one of those irresistible snacks that combine the perfect balance of sweetness, crunch, and flavor. Whether you’re preparing them for holiday gatherings, using them as salad toppers, or just keeping a jar handy for snacking, they are an all-time favorite. Imagine the aroma of roasted pecans or almonds coated in a caramelized sugar glaze, with just the right hint of cinnamon or vanilla—it’s enough to make your mouth water!
What makes candied nuts so special is their versatility. They can be sweet, spicy, or even slightly savory, depending on the flavors you add. They’re a crowd-pleaser at parties, an elegant topping for desserts like ice cream or cheesecake, and they also make thoughtful homemade gifts. Plus, they’re surprisingly simple to make with just a handful of ingredients and basic kitchen equipment.
In this guide, we’ll break down everything you need to know about making candied nuts at home. From choosing the right nuts and sweeteners to mastering the perfect baking technique, you’ll have all the tools to make this delicious treat with confidence. So, let’s get started on your journey to creating the perfect candied nuts!
Ingredients You’ll Need
One of the best parts about making candied nuts is how few ingredients you actually need. In fact, the base recipe usually requires only 4 to 5 simple items that you probably already have in your pantry. Once you’ve mastered the basic version, you can start experimenting with flavor variations to suit your preferences.
Here’s the classic list of ingredients you’ll need:
- Nuts: Pecans, almonds, cashews, or walnuts work best.
- Sugar: White granulated sugar or brown sugar (for extra caramel flavor).
- Egg White (optional): Helps bind the sugar and spices to the nuts.
- Vanilla Extract: Adds depth and enhances sweetness.
- Spices: Cinnamon is the most common, but nutmeg, pumpkin spice, or even cayenne pepper can be added.
- Salt: A pinch of salt balances out the sweetness and enhances the flavors.
Optional add-ins include honey, maple syrup, cocoa powder, or even chili flakes for a sweet and spicy kick. Depending on your flavor preference, you can keep it classic or go bold with unique variations.
But before we dive into the process, let’s take a closer look at the ingredients and how to choose the best options for your recipe.
Nuts Selection
The star of the recipe is, of course, the nuts. While technically you can candy just about any nut, certain varieties work better because of their texture and ability to hold onto the sugary coating.
Best Nuts for Candying:
- Pecans: A holiday favorite, pecans are naturally buttery, making them an excellent choice. Their ridges catch the sugary coating beautifully.
- Almonds: Crunchy and sturdy, almonds hold up well to baking and add a strong nutty flavor.
- Cashews: Naturally sweet and creamy, cashews pair wonderfully with caramelized sugar.
- Walnuts: With their slightly bitter undertone, walnuts provide a great balance to the sweetness.
How to Choose Quality Nuts:
Always opt for fresh, raw, and unsalted nuts when making candied recipes. Salted or roasted nuts may alter the flavor and could result in overly salty or burnt nuts. Check for freshness by smelling them—stale nuts often have a rancid, oily scent. If buying in bulk, store them in the freezer until you’re ready to use them.
For variety, you can even mix different nuts together for a more exciting flavor combination. A mix of pecans, almonds, and cashews, for instance, makes a great party snack.
Sweetener Choices
The second most important ingredient in candied nuts is the sweetener. This is what creates the caramelized coating that gives the nuts their irresistible crunch.
Sugar Options:
- White Granulated Sugar: The classic choice for candied nuts. It creates a glossy, hard shell around the nuts.
- Brown Sugar: Contains molasses, which adds richness and a slightly softer texture. Perfect if you want more of a caramel flavor.
Natural Sweeteners:
- Honey: Adds a floral note and a sticky texture, making the nuts a little chewier.
- Maple Syrup: Great for a deeper, earthy sweetness. Perfect for fall flavors.
While sugar gives the best crunch, using honey or maple syrup can create a softer coating, which some people prefer. You can even combine white sugar and brown sugar for a more balanced flavor.
When choosing sweeteners, keep in mind that liquid ones (like honey and maple syrup) may cause the nuts to clump together if not mixed properly, so always stir frequently during the cooking process.
Flavor Enhancers
While nuts and sugar form the base of the recipe, it’s the extra touches that take candied nuts from simple to spectacular. A few well-chosen spices and extracts can completely transform the flavor.
Spices:
- Cinnamon: The classic choice, adds warmth and coziness.
- Nutmeg: A little goes a long way—perfect for holiday recipes.
- Pumpkin Pie Spice: A blend of cinnamon, nutmeg, ginger, and cloves for a festive twist.
- Cayenne Pepper or Chili Powder: For those who like a sweet-and-spicy flavor profile.
Extracts and Add-ins:
- Vanilla Extract: A small splash enhances sweetness and rounds out the flavor.
- Almond Extract: Works beautifully with almonds and pecans for a deeper nutty flavor.
- Sea Salt: A pinch of flaky sea salt on top after baking creates the ultimate sweet-salty balance.
Think of flavor enhancers as your secret weapon. They’re what make your candied nuts unique, and once you find your favorite blend, you’ll never want to buy store-bought versions again.
Tools and Equipment
Before diving into the cooking process, it’s important to gather the right tools and equipment. While candied nuts don’t require any fancy kitchen gadgets, having the proper tools on hand makes the process smoother and helps ensure success. Think of it like preparing your workbench before starting a DIY project—organization saves time and prevents mistakes.
Essential Tools:
- Mixing Bowls: You’ll need at least two—one for whisking the egg whites or liquid coating and another for mixing the nuts with sugar and spices.
- Baking Sheet: A sturdy rimmed baking sheet is a must to prevent the sugar mixture from spilling over into your oven.
- Parchment Paper or Silicone Baking Mat: This prevents the nuts from sticking and makes cleanup much easier. Trust me, baked sugar can be a nightmare to scrub off bare pans.
- Spatula or Wooden Spoon: For stirring the nuts evenly while baking to prevent clumping and burning.
- Whisk: Helps create a frothy mixture when using egg whites.
Optional Tools:
- Candy Thermometer: Not required, but if you’re making stovetop candied nuts, it ensures the sugar reaches the right temperature without burning.
- Cooling Rack: Useful for letting the nuts cool quickly while staying crisp.
The beauty of candied nuts is that they can be made in almost any kitchen. Even if you don’t have a professional setup, a basic oven and mixing tools will do the job perfectly.
Step-by-Step Guide to Making Candied Nuts
Now that you’ve gathered your ingredients and tools, let’s walk through the actual cooking process. Making candied nuts is much like following a dance—each step is simple on its own, but when done in the right sequence, it results in a flawless performance. The key is patience and attention, especially during the baking stage, to prevent burning.
This recipe follows the oven-baked method, which is the most popular and foolproof technique. However, you can also make candied nuts on the stovetop or even in an air fryer, which we’ll touch on later.
Let’s break down the steps one by one.
Step 1 – Preheat and Prepare
Every great recipe begins with proper preparation. Start by preheating your oven to 300°F (150°C). This lower temperature ensures the nuts cook evenly without burning the sugar. High heat may caramelize the sugar too quickly, leaving you with burnt spots and an uneven coating.
Next, prepare your baking sheet. Line it with parchment paper or a silicone baking mat. This not only prevents sticking but also makes cleanup a breeze. If you’ve ever tried scraping hardened sugar from a pan, you know why this step is non-negotiable.
Spread your chosen nuts out on the lined baking sheet in a single layer. This helps you visually inspect them for any shells, broken pieces, or bad nuts before starting the coating process. Keeping everything neat at this stage will save you trouble later.
Step 2 – Mix Wet Ingredients
The next step is creating the sticky base that helps the sugar and spices cling to the nuts. If you’re using the egg white method (which is the most common), whisk one egg white with 1 tablespoon of water until it becomes frothy but not stiff. This mixture acts like glue, ensuring every nut gets an even coating.
If you prefer a vegan option, you can skip the egg white and instead use 2 tablespoons of maple syrup or honey. While this gives the nuts a slightly chewier texture, it works just as well in helping the sugar adhere.
Add 1 teaspoon of vanilla extract (or almond extract if using almonds) to the wet mixture. This tiny addition makes a big difference, giving your candied nuts a rich, aromatic flavor that smells heavenly as they bake.
Pour the wet mixture over your nuts in a large mixing bowl. Stir well until every nut is lightly coated. This step ensures that the sugar and spices will stick evenly in the next stage.
Step 3 – Add Dry Ingredients
Here’s where the magic starts to happen. In a separate bowl, combine:
- ½ cup of sugar (white, brown, or a mix of both)
- 1 to 2 teaspoons of cinnamon
- ½ teaspoon of salt (or more to taste)
- Optional: ¼ teaspoon of nutmeg, pumpkin spice, or cayenne pepper for added flavor
Once mixed, sprinkle the sugar-spice blend over the wet-coated nuts. Stir thoroughly until every nut is covered in a grainy layer of sugary goodness. Don’t be afraid to get in there with a spatula and keep mixing—it’s important that the coating is distributed evenly so no nut is left behind.
At this point, the nuts should look like they’re wearing a rough sugary jacket. Don’t worry if they seem too grainy—that texture will melt into a glossy, caramelized shell as they bake.
Step 4 – Bake to Perfection
Now comes the most crucial part: baking. Spread the coated nuts evenly on your prepared baking sheet in a single layer. This prevents clumping and ensures each nut cooks evenly.
Bake in the preheated oven for 25 to 30 minutes, stirring the nuts every 10 minutes. This step is essential because sugar has a tendency to settle at the bottom, causing uneven caramelization. Stirring prevents hot spots and ensures every nut gets a shiny glaze.
Keep a close eye during the last 5 minutes of baking. The sugar can go from perfectly caramelized to burnt in seconds. A golden-brown color and a toasty aroma are signs they’re done. If they still look pale, give them another 2–3 minutes, but don’t push it too far.
Step 5 – Cooling and Storing
Once your nuts are baked to perfection, remove them from the oven and let them cool on the baking sheet. As they cool, the sugar coating hardens into that irresistible crunchy shell we all love. Be patient here—tasting too soon might burn your tongue (and stick your teeth together with molten sugar).
After cooling for about 15–20 minutes, break apart any clusters with your hands or a spoon. Store the candied nuts in an airtight container at room temperature. They will stay fresh and crunchy for up to 2 weeks, though I’d be surprised if they last that long without being eaten.
For longer storage, you can freeze them for up to 2 months. Just make sure to use a freezer-safe container or resealable bag. When ready to eat, let them thaw at room temperature, and they’ll be just as delicious as the day you made them.
Flavor Variations
One of the most exciting parts about making candied nuts at home is the endless opportunity for creativity. Once you’ve mastered the classic version, you can start experimenting with different flavors to suit any occasion or craving. Think of candied nuts as a blank canvas—you can paint them with sweet, spicy, or even savory profiles depending on your taste buds.
Spicy Candied Nuts
If you’re a fan of sweet-and-spicy combinations, this one’s for you. Simply add ½ teaspoon of cayenne pepper or chili powder to your sugar-spice mix before coating the nuts. The result is a bold kick that pairs perfectly with the caramelized sweetness. These are fantastic for cocktail parties, game-day snacks, or even as a unique holiday gift for friends who love a little heat.
Chocolate-Coated Candied Nuts
Chocolate lovers can take things up a notch by drizzling melted dark, milk, or white chocolate over the cooled candied nuts. You can even sprinkle a bit of sea salt on top before the chocolate sets for that irresistible sweet-salty contrast. Chocolate-coated candied almonds or pecans are especially indulgent and make a luxurious dessert topping.
Savory-Sweet Combinations
For a more balanced treat, try mixing in rosemary, thyme, or smoked paprika with your sugar blend. This creates a sophisticated flavor profile that pairs beautifully with wine and cheese boards. Imagine munching on rosemary-infused candied walnuts alongside a creamy brie—pure heaven!
Seasonal Variations
- Autumn Spice: Pumpkin spice mix + brown sugar = perfect for fall gatherings.
- Holiday Blend: Add nutmeg, cloves, and a splash of rum extract for festive Christmas candied nuts.
- Summer Twist: A touch of lime zest and coconut sugar brings a tropical vibe.
The key to experimenting is to keep the balance right. Too much spice or extract can overwhelm the natural nutty flavor. Start small, taste as you go, and adjust until you find your perfect mix.
Serving Ideas
Candied nuts are versatile enough to shine in countless settings. While they’re delicious straight out of the jar, there are so many fun and creative ways to serve them.
As Snacks
Candied nuts make the ultimate grab-and-go snack. Keep a bowl on your kitchen counter, pack them into small resealable bags for road trips, or portion them into lunchboxes for a sweet treat. They’re healthier than candy bars and keep you energized with protein and healthy fats.
Dessert Toppings
These crunchy gems can instantly elevate simple desserts. Sprinkle candied pecans on ice cream, fold candied almonds into brownie batter, or use candied cashews as a topping for cheesecake. They add both flavor and texture, turning ordinary desserts into gourmet delights.
Salads
Want to impress your guests with a restaurant-quality salad? Toss a handful of candied walnuts or pecans over mixed greens, goat cheese, and cranberries. The sweetness balances the tang of vinaigrettes and the creaminess of cheese beautifully.
Breakfast Additions
Stir candied nuts into yogurt parfaits, sprinkle them over oatmeal, or fold them into pancake and waffle batter. It’s like adding a crunchy surprise to your morning meal.
Gifting Ideas
Homemade candied nuts make wonderful edible gifts. Package them in mason jars, wrap them in clear cellophane with a ribbon, or place them in decorative tins. They’re a thoughtful and affordable option for birthdays, holidays, or hostess gifts.
Storage and Shelf Life
Knowing how to properly store your candied nuts is essential for keeping them fresh and crunchy. Because they’re sugar-coated, candied nuts have a longer shelf life than plain roasted nuts, but only if stored correctly.
Room Temperature Storage
Candied nuts can be stored at room temperature in an airtight container for up to 2 weeks. Make sure the container is truly airtight; otherwise, the sugar coating may soften, making the nuts sticky instead of crunchy.
Refrigeration
If you live in a humid climate, refrigeration is a good option to prevent moisture from ruining the texture. Place the nuts in a sealed container and store them in the fridge for up to 1 month. Just remember to let them come to room temperature before serving for the best flavor and crunch.
Freezing
Candied nuts can also be frozen for up to 2 months. Spread them out on a baking sheet to freeze individually before transferring them into a resealable freezer bag. This prevents clumping. When ready to enjoy, simply let them thaw at room temperature for 30 minutes.
Proper storage not only extends their shelf life but also ensures that the nuts stay as delicious as the day you made them.
Tips and Tricks for Perfect Candied Nuts
Even though the process is simple, a few clever tricks can make your candied nuts turn out absolutely perfect every single time. Think of these as insider secrets that professional bakers use.
- Use Raw Nuts: Always start with raw, unsalted nuts. Pre-roasted nuts may burn during baking.
- Stir Frequently: Stirring every 10 minutes during baking keeps the sugar evenly distributed and prevents clumps.
- Watch the Temperature: Low and slow is better. Baking at 300°F allows the sugar to caramelize gradually without scorching.
- Don’t Skip the Salt: A pinch of salt brings out the flavors and balances the sweetness.
- Cool Completely: Letting the nuts cool completely ensures the coating hardens properly for maximum crunch.
- Experiment with Flavors: Start small with spices and extracts. You can always add more, but you can’t take it away.
- Double the Batch: Trust me, one batch never lasts long. Make extra and thank yourself later.
By following these tips, you’ll master candied nuts and maybe even create your own signature version.
Common Mistakes to Avoid
Candied nuts are easy to make, but small missteps can lead to disappointing results. Here are the most common pitfalls and how to avoid them.
- Over-Baking
Leaving the nuts in the oven for too long can cause the sugar to burn, giving them a bitter taste. Always check in the last few minutes. - Too Much Liquid
Adding too much water, honey, or syrup can make the coating soggy instead of crisp. Stick to the recommended amounts. - Not Stirring Enough
If you don’t stir the nuts while baking, they may clump together in big chunks, and some will have too much coating while others have none. - Skipping the Liner
Never bake candied nuts directly on a pan without parchment or a silicone mat. The sugar will stick and become a nightmare to clean. - Improper Storage
Leaving candied nuts exposed to air makes them go stale quickly. Always use airtight containers to preserve crunchiness.
By being mindful of these common mistakes, you’ll save yourself frustration and ensure that every batch turns out beautifully.
Nutritional Information
Candied nuts are undeniably delicious, but it’s always good to know what you’re eating. While they aren’t the lowest-calorie snack out there, they’re still much healthier than processed candies or packaged sweets. Nuts are packed with protein, healthy fats, vitamins, and minerals. The sugar coating, of course, adds sweetness but should be enjoyed in moderation.
Nutritional Breakdown (per 1-ounce/28g serving of candied pecans or almonds):
- Calories: ~180–210
- Protein: 4–5g
- Fat: 14–16g (mostly healthy unsaturated fats)
- Carbohydrates: 14–16g
- Fiber: 2–3g
- Sugar: 10–12g
Health Benefits of Nuts:
- Heart Health: Almonds, walnuts, and pecans are rich in omega-3 fatty acids and antioxidants, which support cardiovascular health.
- Energy Boost: High in protein and healthy fats, candied nuts provide long-lasting energy, making them perfect as a pre-workout snack.
- Brain Food: Walnuts and almonds contain nutrients like vitamin E, folate, and magnesium that support brain function.
- Rich in Minerals: Nuts provide essential nutrients such as zinc, magnesium, and potassium, which keep your body functioning properly.
Moderation is Key:
Because candied nuts contain added sugar, portion control is important. A small handful is enough to satisfy a sweet craving while still reaping the health benefits of the nuts. Pair them with fresh fruit or yogurt for a more balanced snack.
FAQs about Candied Nuts Recipe
1. Can I make candied nuts without the oven?
Yes! You can make them on the stovetop by cooking the nuts with sugar and water in a skillet until the liquid evaporates and the sugar crystallizes. Stir constantly to avoid burning.
2. How long do candied nuts last?
When stored in an airtight container at room temperature, candied nuts stay fresh for up to 2 weeks. Refrigeration can extend their life to a month, and freezing keeps them good for up to 2 months.
3. Can I use alternative sweeteners like coconut sugar or keto-friendly options?
Absolutely. Coconut sugar works well and gives a caramel-like flavor. For keto versions, erythritol or monk fruit sweetener can be used, though the texture may not be as crunchy as with traditional sugar.
4. How do I keep candied nuts crunchy?
Make sure they cool completely before storing, and always use airtight containers. Moisture is the enemy of crunchiness, so avoid leaving them exposed to air for long periods.
5. What are the best nuts for beginners?
Pecans and almonds are the most forgiving and easiest to work with. They coat evenly, bake beautifully, and rarely burn if watched carefully. Cashews and walnuts are great too, but they can be a little trickier since they’re more delicate.
Conclusion
They’re more than just a snack—you can use them as a topping for desserts, salads, and breakfast dishes, or package them as thoughtful homemade gifts. Best of all, they keep well when stored properly, meaning you can always have a jar of these irresistible treats ready for when cravings strike.
If you’ve never made candied nuts before, this step-by-step guide will give you all the tools and confidence you need. And if you’re already a fan, maybe you’ve picked up a few new tricks or flavor ideas to try next time. Either way, one thing’s for sure: once you start making them at home, you’ll never go back to store-bought versions again.
So go ahead—grab those nuts, sugar, and spices, and let your kitchen fill with the irresistible aroma of freshly baked candied nuts. You’ll thank yourself later!


