Cake Icing Recipe: There’s something truly magical about the way icing transforms a cake. It’s like the finishing touch that elevates the dessert to showstopper status. Whether you’re making a birthday cake, a wedding masterpiece, or just a fun treat for friends, mastering cake icing is essential to make your creation both delicious and beautiful.
But where should you begin? From choosing the right type of icing to nailing those piping skills, I’ve got you covered. This guide will take you step-by-step through the entire process of making and applying icing like a pro.
Essential Ingredients and Tools for Cake Icing
Before you get started, it’s crucial to gather all your ingredients and tools. Having everything within reach will make the process smoother and more enjoyable.
Ingredients Needed:
- Butter (unsalted)
- Powdered sugar (also called icing sugar)
- Milk or cream
- Vanilla extract (or other flavorings)
- Food coloring (optional)
Tools Checklist:
- Mixing bowls
- Electric mixer or stand mixer
- Spatula and palette knife
- Piping bags and nozzles
- Cake turntable (for easy rotating while icing)
These tools will help you create a perfectly iced cake with ease, especially if you’re aiming for that bakery-quality finish.
Different Types of Cake Icing
Not all cake icings are created equal. Each type has its own texture, flavor, and best uses. Here’s a quick breakdown of the most popular icing types.
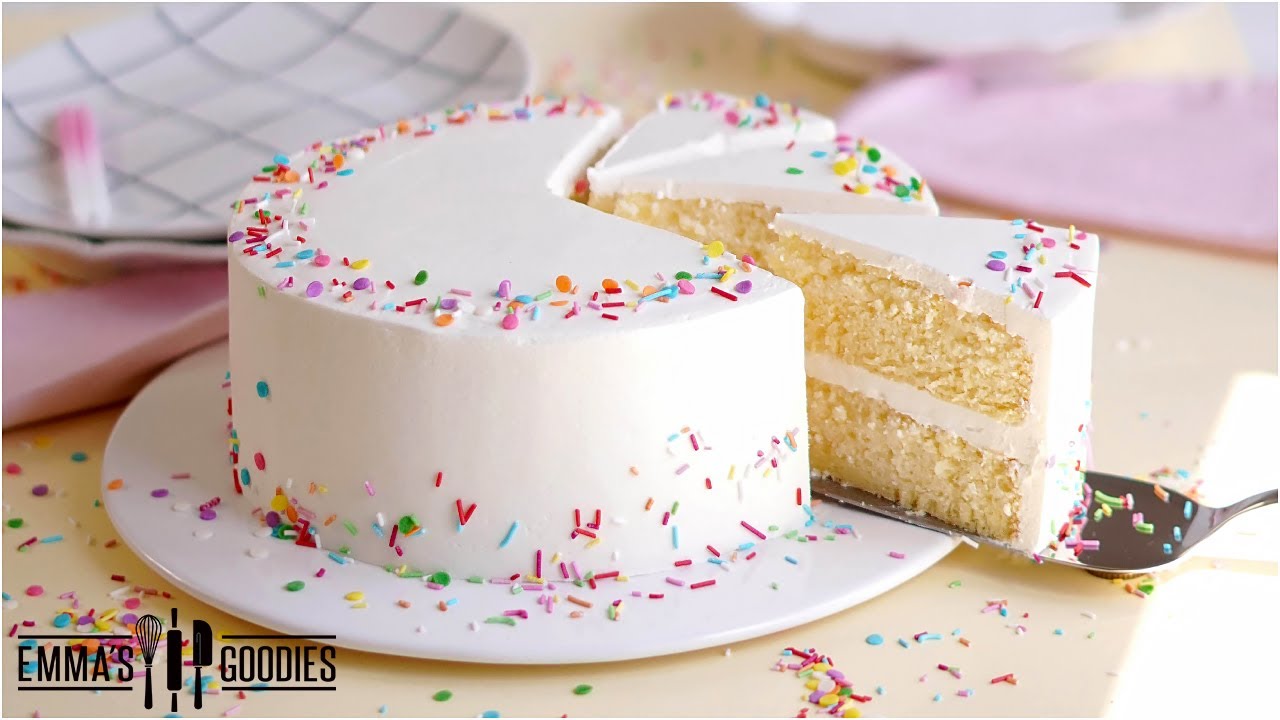
Buttercream Icing
This is the classic, creamy icing used on many cakes. It’s made with butter, powdered sugar, and a splash of milk. Buttercream is versatile, easy to flavor, and works well for both spreading and piping.
Royal Icing
Made with egg whites and powdered sugar, royal icing dries to a smooth, hard finish. It’s commonly used for intricate decorations and cookies.
Fondant Icing
Fondant is a smooth, pliable icing that can be rolled out like dough. It gives cakes a polished, professional look and is perfect for themed or decorative cakes.
Cream Cheese Icing
Cream cheese icing is rich and tangy, pairing beautifully with cakes like carrot cake or red velvet. It’s softer than buttercream, so it’s better for spreading than for detailed designs.
Preparing for Icing: Pre-Icing Steps
Before you jump straight into icing, you need to properly prep your cake. This step is often overlooked, but it’s key to getting that flawless finish.
Bake and Cool the Cake
Allow your cake to cool completely before icing it. Applying icing to a warm cake will cause it to melt and slip off the sides.
Level and Trim the Layers
Use a serrated knife to cut off any domed tops, making the layers even. This ensures your cake stacks evenly.
Apply a Crumb Coat
A crumb coat is a thin layer of icing that traps loose crumbs. Spread it evenly, let it chill in the fridge for about 30 minutes, and you’ll have a clean surface for your final layer of icing.
How to Make Classic Buttercream Icing
Buttercream is one of the easiest and most delicious icings to make. Here’s how you can whip it up in no time.
Ingredients:
- 1 cup unsalted butter (softened)
- 4 cups powdered sugar
- 2–3 tablespoons milk or cream
- 1 teaspoon vanilla extract
- Pinch of salt
Instructions:
- In a mixing bowl, beat the butter until light and fluffy.
- Gradually add powdered sugar, one cup at a time, mixing on low speed.
- Add vanilla extract, milk, and a pinch of salt. Beat on medium speed until smooth and creamy.
- Adjust the consistency by adding more milk (for thinner icing) or powdered sugar (for thicker icing).
Now you’re ready to spread or pipe this versatile buttercream on your cake!
How to Make Royal Icing
Royal icing is perfect for detailed designs and decorating cookies. It hardens quickly, creating a crisp finish.
Ingredients:
- 2 large egg whites (or meringue powder equivalent)
- 3 cups powdered sugar
- 1 teaspoon lemon juice
Instructions:
- Beat the egg whites until they form soft peaks.
- Gradually add powdered sugar and lemon juice, mixing on low speed.
- Continue beating until the icing holds stiff peaks.
You can thin royal icing with a few drops of water if needed for flooding techniques.
How to Make Fondant Icing
Fondant gives cakes that sleek, professional look you often see in bakery displays. You can either buy ready-made fondant or make your own from scratch.
Ingredients:
- 2 teaspoons gelatin (unflavored)
- 1/4 cup cold water
- 1/2 cup glucose syrup or corn syrup
- 2 tablespoons glycerin (food grade)
- 2 pounds powdered sugar (sifted)
Instructions:
- In a small bowl, dissolve gelatin in cold water and let it sit for a few minutes.
- Heat the gelatin mixture over low heat until fully melted.
- Stir in the glucose syrup and glycerin, then remove from heat.
- In a large bowl, place the powdered sugar and create a well in the center. Gradually pour the liquid mixture into the well.
- Mix with a spoon, then knead the dough by hand until smooth. Add more powdered sugar if the fondant is too sticky.
Roll out the fondant and drape it over your cake for a flawless finish. Smooth it out with a fondant smoother for the best results.
Tips for Perfect Icing Application
Want that bakery-level finish on your cake? It’s all about technique. These tips will help you apply icing like a pro.
- Use a Turntable: A cake turntable makes it much easier to apply icing evenly. Spin the cake while you spread the icing to achieve a smooth surface.
- Start with a Crumb Coat: As mentioned earlier, applying a thin crumb coat helps lock in crumbs so they don’t appear in the final icing layer.
- Use an Offset Spatula: This tool is perfect for spreading icing evenly across the surface without dragging or leaving marks.
- Chill Between Layers: Let each layer of icing or decoration set in the fridge for about 20–30 minutes. This prevents layers from mixing and sliding around.
- Thin Icing for Piping: If you’re planning to pipe designs, ensure your icing has the right consistency—soft enough to pipe smoothly but firm enough to hold its shape.
Decorating Techniques
Once your cake is iced, it’s time for the fun part—decorating! Whether you want to keep it simple or go all-out, here are a few techniques to try.
Basic Piping Designs
Using a piping bag fitted with different nozzles, you can create borders, rosettes, and other decorative designs. Practice on parchment paper before decorating the cake.
Adding Food Coloring
For vibrant designs, divide your icing into separate bowls and mix in food coloring. Gel-based colors work best since they don’t thin the icing.
Creating Patterns and Textures
Use textured cake combs, stencils, or even everyday kitchen tools (like forks or spoons) to create unique designs on the icing. This adds both visual interest and a personalized touch.
Cake Icing for Different Occasions
Different events call for different types of cake designs. Here are some ideas to inspire you for various occasions.
Birthday Cakes
Bright, colorful buttercream with sprinkles or themed decorations always makes a hit. Consider adding a piped message like “Happy Birthday!” for a personal touch.
Wedding Cakes
Wedding cakes often feature smooth fondant or elegant buttercream with delicate floral designs, lace patterns, or metallic accents.
Themed Celebration Cakes
For holidays or themed parties, match the icing and decorations to the occasion. For example, red and green icing for Christmas or spooky designs for Halloween.
Storing Iced Cakes
Proper storage is crucial to maintain the freshness and appearance of your cake. Here are a few storage tips to follow.
- Short-Term Storage: If you’re serving the cake within a day, you can leave it at room temperature in a covered container or cake dome. Avoid exposure to heat and direct sunlight.
- Refrigeration: For cakes with perishable icing (such as cream cheese or whipped cream), refrigeration is necessary. Store the cake in an airtight container to prevent it from absorbing odors from other foods.
- Freezing: You can freeze iced cakes by wrapping them tightly in plastic wrap and then foil. When ready to serve, let the cake thaw at room temperature for several hours.
Common Troubleshooting Tips
Cake icing isn’t always smooth sailing, especially for beginners. Here’s how to troubleshoot common issues.
- Icing Too Thick: If your icing is too stiff to spread, add a small amount of milk or cream to thin it out. Add liquid slowly to avoid making it too runny.
- Icing Too Thin: If your icing is runny, add more powdered sugar a little at a time until the desired consistency is reached.
- Air Bubbles: Air bubbles can form when icing is whipped too quickly. Mix slowly and tap the bowl on a counter to release trapped air before applying the icing.
- Cracks or Hard Spots: This can happen if icing is applied unevenly or if the cake isn’t leveled properly. Make sure to level your cake layers and apply even pressure when spreading.
Healthy Alternatives and Modifications
Want to make your icing a little healthier? Here are some alternatives that reduce sugar, dairy, or other allergens.
- Low-Sugar Icing: Use natural sweeteners like honey, maple syrup, or stevia in place of powdered sugar. Keep in mind that this may affect the icing’s consistency.
- Dairy-Free Icing: Replace butter with plant-based alternatives like vegan margarine or coconut oil. Use almond milk or oat milk instead of cream.
- Vegan Icing: Avoid animal products by using vegan-friendly substitutes like aquafaba (chickpea water) for royal icing or coconut cream for buttercream.
FAQs about Cake Icing Recipe
1. What are the basic ingredients needed for cake icing?
The basic ingredients for most cake icing recipes include powdered sugar, butter, milk or cream, and vanilla extract. These ingredients can be adjusted or flavored differently to suit various tastes and cake types.
2. How do I make buttercream icing?
To make buttercream icing, start by beating together softened butter until it’s creamy and smooth. Gradually add powdered sugar, milk, and vanilla extract, continuing to beat until the mixture is fluffy and spreadable. For variations, you can add different flavors or colors.
3. Can I make cake icing without dairy products?
Yes, you can make dairy-free cake icing by substituting the butter with vegan butter or margarine and using non-dairy milk alternatives like almond, soy, or coconut milk. Ensure all your ingredients are labeled dairy-free.
4. How long can I store cake icing?
Buttercream icing can be stored in an airtight container in the refrigerator for up to one week. Before using refrigerated icing, let it sit at room temperature for a few hours and re-whip it to bring back its creamy texture.
5. Is it possible to make sugar-free cake icing?
Absolutely! Substitute powdered sugar with a granulated sugar substitute that can be powdered in a blender. Be sure to check the blend for its compatibility with icing, as some substitutes may alter the texture or taste.
6. What are some tips for coloring cake icing?
For coloring cake icing, use gel or paste food colorings as they are more vibrant and less likely to affect the consistency of the icing compared to liquid food colorings. Add the coloring gradually until the desired shade is achieved.
Conclusion
Cake icing is both an art and a science, but with practice and the right techniques, anyone can master it. From choosing the right icing type to decorating with flair, you now have all the tools and tips you need to create beautifully iced cakes for any occasion. So, roll up your sleeves, grab your spatula, and let your creativity run wild!