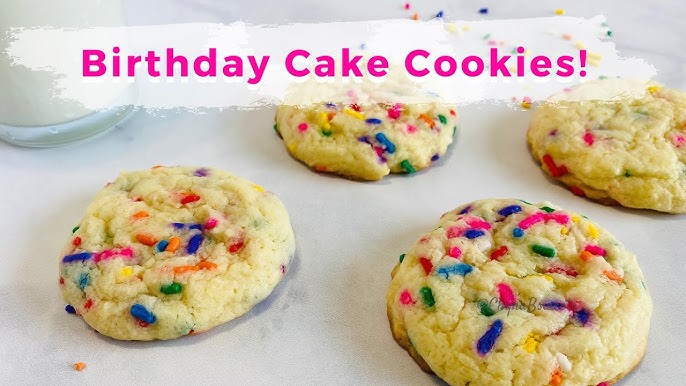
Cake Cookie Recipe: Imagine biting into a soft, fluffy cookie that melts in your mouth like a piece of cake. That’s what cake cookies are all about. These delicious little treats combine the moist, tender texture of cake with the convenience and shape of a cookie. They’re thicker, softer, and often more pillowy than your average cookie. Made with cake mix or from scratch, they’ve become a popular choice for quick and easy baking at home.
Cake cookies come in all flavors, from classic vanilla and rich chocolate to funfetti and red velvet. You can customize them in endless ways—by adding chocolate chips, sprinkles, nuts, or even frosting. Their versatility and simplicity make them perfect for holidays, birthday parties, or just a sweet treat after dinner.
Unlike traditional cookies that require precise measuring and mixing techniques, cake cookies offer more forgiveness. That’s why they’re a favorite for beginner bakers and a hit with kids. With just a few steps and ingredients, you can create something that tastes like it came from a bakery.
Why You’ll Love This Recipe
If you’re looking for a foolproof, crowd-pleasing dessert, this cake cookie recipe is the one. It’s quick, requires minimal ingredients, and doesn’t call for special baking skills. Here’s why this recipe is a must-try:
- Fast and easy: You can go from mixing bowl to oven in under 15 minutes.
- Customizable: Choose your favorite cake mix flavor and toss in your favorite extras.
- Kid-friendly: Kids can help with mixing, scooping, and decorating.
- Deliciously soft: Each bite is rich, soft, and melt-in-your-mouth tender.
Whether you need a last-minute dessert or want to bake for fun, this recipe has got you covered.
Ingredients You’ll Need
Basic Pantry Staples
To whip up these delicious cake cookies, you’ll need just a few staple ingredients. Most of these are probably already in your pantry:
- 1 box of cake mix (any flavor – chocolate, vanilla, lemon, etc.)
- 2 large eggs
- 1/2 cup of vegetable oil or melted butter
- 1 tsp vanilla extract (optional for extra flavor)
This base recipe is super versatile. The cake mix already contains most of the dry ingredients you’d typically use in a cookie recipe—flour, sugar, baking powder, etc.—so you’re saving time and effort.
Optional Add-ins for Flavor Twists
Want to take your cake cookies to the next level? Here are some fun add-in ideas to make your cookies extra special:
- Chocolate chips or chunks
- White chocolate chips
- Sprinkles
- Crushed nuts (walnuts, pecans)
- Dried fruits (cranberries, raisins)
- Coconut flakes
- Mini marshmallows
- Candy pieces (M&Ms, peanut butter cups)
These optional ingredients can be mixed in right before baking. Just be careful not to overload the dough—you want every bite to be balanced.
Tools You Need to Get Started
Must-Have Kitchen Tools
Don’t worry—you don’t need a professional kitchen setup to make these cookies. Here are the essentials:
- Mixing bowl: A large bowl to combine your ingredients.
- Whisk or hand mixer: To mix everything evenly.
- Cookie scoop or tablespoon: For consistent cookie sizes.
- Baking sheet: A flat tray for baking your cookies.
- Parchment paper or silicone baking mat: Prevents sticking and ensures even baking.
- Cooling rack: Helps cookies cool evenly without becoming soggy.
You likely have most of these in your kitchen already. Investing in a cookie scoop and silicone mat can really up your baking game over time.
Useful Baking Accessories
While not essential, these tools can make your baking even smoother:
- Stand mixer: Great for large batches or hands-free mixing.
- Offset spatula: For easy cookie removal.
- Cookie cutters: If you want fun shapes for themed cookies.
- Decorating tools: Piping bags, sprinkles, and edible glitter if you’re feeling fancy.
Using the right tools makes a difference in texture, shape, and even the cleanup afterward.
Step-by-Step Instructions
Step 1 – Prepare Your Ingredients
Start by gathering and measuring out all your ingredients. Preheat your oven to 350°F (175°C) and line your baking sheet with parchment paper or a silicone mat.
If you’re using butter instead of oil, melt it gently in the microwave and let it cool slightly. Crack the eggs into a small bowl and beat lightly.
Make sure your hands and tools are clean, and you’ve got a tidy workspace—it helps more than you think.
Step 2 – Mix the Dough
In your mixing bowl, pour in the entire box of cake mix. Add the eggs, oil (or melted butter), and vanilla extract. Use a whisk, hand mixer, or stand mixer to blend everything together until the dough forms.
The dough should be thick but sticky—kind of like a brownie batter, thicker than cake mix but not as firm as regular cookie dough. If it’s too runny, chill it in the fridge for 10–15 minutes before shaping.
At this point, gently fold in your chosen add-ins with a spatula. Don’t overmix—just enough to evenly distribute your extras throughout the dough.
Step 3 – Chill for Better Texture
While it’s tempting to go straight to baking, chilling your dough is a game-changer. Pop the dough into the refrigerator for at least 30 minutes. Why? Because chilled dough helps cookies hold their shape and prevents excessive spreading in the oven. It also enhances the flavor by giving the ingredients time to meld.
If you’re in a rush, even 15 minutes in the freezer can do the trick. But ideally, 30–60 minutes in the fridge will yield the best results. During this time, preheat your oven to 350°F (175°C) if you haven’t already. It’s also a good time to clean your workspace or prep any decorations.
Remember, the colder the dough, the thicker and more cake-like your cookies will be. It might require a bit more patience, but trust me—it’s worth the wait.
Step 4 – Scoop and Bake
Now comes the fun part—scooping the dough and baking it to perfection. Use a cookie scoop or a heaping tablespoon to drop uniform balls of dough onto your lined baking sheet. Leave about 2 inches of space between each cookie, as they will spread slightly during baking.
Slide the tray into the preheated oven and bake for 9–12 minutes. Keep a close eye on them around the 9-minute mark. The edges should look set, and the tops should still look slightly soft. Don’t overbake—these cookies will continue to cook a bit on the hot tray after you remove them from the oven.
If you’re baking multiple batches, be sure to let the cookie sheet cool slightly between uses or use two sheets and rotate them.
Once done, let the cookies cool on the baking sheet for 5 minutes before transferring them to a cooling rack. This helps them firm up just enough so they don’t fall apart when you move them.
Step 5 – Cool and Serve
After transferring to a cooling rack, let the cookies sit for about 15–20 minutes. This allows the texture to settle—crispy around the edges and soft, cakey in the center. It also prevents burned fingers if you’re impatient and want to taste-test right away!
Once cooled, you can leave them as they are or decorate them. A dusting of powdered sugar, a drizzle of melted chocolate, or a dollop of frosting can add an extra layer of sweetness and charm. Want to get creative? Add edible glitter, colorful icing, or even make cookie sandwiches with a buttercream center.
Serve with a glass of milk, a cup of tea, or pack them up as party favors. These cookies are perfect for any occasion and are guaranteed to be a hit wherever they go.
Tips and Tricks for Perfect Cake Cookies
How to Avoid Flat Cookies
One of the most common cake cookie fails? Flat, pancake-like cookies. Here’s how to make sure yours are thick and fluffy every time:
- Chill the dough: As mentioned earlier, this is non-negotiable.
- Use fresh cake mix: Expired or old mixes may not rise properly.
- Don’t overmix: Overworking the dough can cause it to lose structure.
- Avoid too much oil: Stick to the measurements in the recipe. Too much fat can cause spreading.
- Use parchment paper or silicone mats: These surfaces help cookies bake evenly and prevent over-spreading.
Bonus tip: If your first batch comes out too flat, pop the rest of the dough back in the fridge for another 15–20 minutes before baking again.
Adjusting for Altitude or Humidity
Baking can be tricky if you’re living at a high altitude or in a very humid area. Here’s how to adjust:
For High Altitude:
- Decrease the sugar slightly (by about 1–2 tablespoons).
- Add a tablespoon or two of flour.
- Increase oven temperature by 15–25°F.
- Check cookies a minute or two early.
For Humid Climates:
- Store your dry ingredients in airtight containers.
- Refrigerate the dough longer before baking.
- Bake slightly longer if cookies seem underdone.
These minor adjustments can make a big difference in the final texture and appearance of your cake cookies.
Storage and Make-Ahead Tips
Storing at Room Temperature
Cake cookies stay soft and chewy for days if stored properly. Once your cookies are completely cooled, place them in an airtight container. You can layer them between sheets of parchment or wax paper to keep them from sticking together. Keep the container at room temperature, away from direct sunlight or heat sources.
These cookies usually stay fresh for up to 5 days. If you live in a humid area, consider tossing in a slice of bread or a sugar-saving disc to absorb moisture and keep them from getting too soft or sticky. Always avoid storing cookies in the refrigerator, as that can dry them out and change their texture.
Want to add a fresh-out-of-the-oven feel? Pop a cookie in the microwave for about 8–10 seconds to restore a bit of warmth and softness.
Freezing the Dough or Baked Cookies
Want to prep your cake cookies in advance? Great idea. This recipe is incredibly freezer-friendly.
To freeze unbaked dough:
- Scoop dough onto a baking sheet.
- Freeze the scoops until firm (about 1 hour).
- Transfer to a freezer-safe bag or container.
- Label with the flavor and date. Bake directly from frozen—just add an extra 1–2 minutes to the baking time.
To freeze baked cookies:
- Let them cool completely.
- Layer between parchment paper in a container or zip-lock bag.
- Freeze for up to 2–3 months.
- Thaw at room temperature for 30 minutes or microwave for a quick warm-up.
Freezing makes it easy to enjoy cake cookies whenever the craving strikes. Just bake, eat, repeat!
FAQs about Cake Cookie Recipe
1. Can I use butter instead of oil in cake cookies?
Yes, you can substitute melted butter for oil. It gives the cookies a richer flavor but may change the texture slightly—making them a bit denser and crispier around the edges.
2. Do I need to refrigerate cake cookie dough before baking?
It’s not mandatory, but chilling the dough helps the cookies hold their shape and improves the texture. Even a 15-minute chill makes a noticeable difference.
3. What’s the best cake mix flavor for cookies?
Totally up to you! Chocolate, vanilla, lemon, funfetti, and red velvet are popular choices. Pick a flavor you love or experiment with seasonal mixes like pumpkin spice or carrot cake.
4. How do I make cake cookies gluten-free?
Use a gluten-free cake mix and ensure your other ingredients (like vanilla extract or chocolate chips) are certified gluten-free. The texture might be slightly different, but they’ll still taste great.
5. Can I add frosting or decorations?
Absolutely! Frosting, sprinkles, powdered sugar, or even a drizzle of caramel or chocolate can take your cake cookies to the next level. Just make sure the cookies are fully cooled before decorating.
Conclusion
There you have it—the ultimate guide to making delicious, soft, and fluffy cake cookies from scratch or with a cake mix. These cookies are the perfect blend of simplicity and indulgence. With just a few pantry staples, a little creativity, and a bit of patience, you can whip up a batch that’s sure to impress friends, family, or just yourself.
What’s great about this recipe is its flexibility. You can tweak it based on your mood, the season, or whatever ingredients you’ve got lying around. Want to go chocolate overload? Use devil’s food cake mix with chocolate chips. Craving something fruity? Try a strawberry cake mix with white chocolate chunks.
Whether you’re baking for the holidays, a birthday party, or just a sweet weekend treat, cake cookies are always a good idea. Plus, they’re so easy that even beginner bakers can achieve delicious, bakery-worthy results without breaking a sweat.
So go ahead, get mixing, and enjoy the heavenly bite of a cookie that thinks it’s a cake. You’ll be hooked from the first taste.