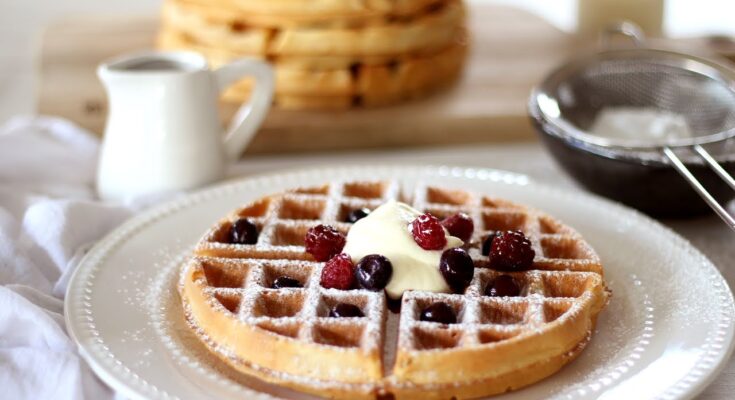
Buttermilk Waffle Recipe: Buttermilk waffles are a classic breakfast treat loved for their light, fluffy texture and rich flavor. They’re perfect for weekend brunches, family gatherings, or even a quick weekday indulgence. With this simple, step-by-step guide, you’ll learn how to create delicious homemade buttermilk waffles that rival your favorite diner’s offerings.
Whether you’re a novice in the kitchen or a seasoned cook, this recipe is designed to make the process easy and enjoyable. Get ready to impress your family and friends with waffles that are golden on the outside and soft on the inside!
Why Use Buttermilk for Waffles?
You might be wondering, why buttermilk? Buttermilk plays a crucial role in creating the perfect waffle texture. Here’s why:
- Tender Texture: The acidity in buttermilk reacts with baking soda, giving the batter a light and airy structure.
- Rich Flavor: Buttermilk adds a subtle tanginess that enhances the overall taste.
- Moisture Retention: It helps keep the waffles soft inside without drying out.
- Golden Brown Finish: The slight acidity promotes browning, ensuring a beautiful golden crust.
If you don’t have buttermilk, don’t worry—we’ll also cover substitutes later in the article.
Ingredients for Buttermilk Waffles
To make about 4–6 servings of fluffy buttermilk waffles, gather the following ingredients:
Dry Ingredients:
- 2 cups all-purpose flour
- 1 tablespoon granulated sugar
- 1 teaspoon baking powder
- ½ teaspoon baking soda
- ½ teaspoon salt
Wet Ingredients:
- 2 large eggs
- 2 cups buttermilk
- ½ cup unsalted butter (melted and slightly cooled)
- 1 teaspoon vanilla extract
Optional Add-Ins:
- Chocolate chips
- Blueberries
- Cinnamon or nutmeg
Toppings Suggestions:
- Fresh berries
- Whipped cream
- Maple syrup
- Nut butter
Essential Kitchen Tools You Need
Before diving into the recipe, make sure you have these tools ready:
- Mixing Bowls: Separate bowls for wet and dry ingredients.
- Whisk: For smooth batter blending.
- Measuring Cups and Spoons: Accuracy is key!
- Waffle Maker: The star of the show—ensure it’s preheated properly.
- Ladle or Measuring Cup: For pouring batter without mess.
- Spatula or Tongs: To safely remove waffles.
With everything prepped, you’re ready to make magic in the kitchen!
Step 1: Preparing the Wet Ingredients
Start by preparing the wet ingredients.
- Crack the eggs into a medium-sized mixing bowl.
- Beat them until slightly frothy—this helps introduce air into the batter.
- Add the buttermilk and vanilla extract. Whisk gently to combine.
- Slowly pour in the melted butter while whisking continuously.
Pro Tip: Make sure the butter is slightly cooled before adding it to prevent scrambling the eggs.
The wet mixture should be smooth and creamy, setting the foundation for fluffy waffles.
Step 2: Mixing the Dry Ingredients
Now, it’s time to prepare the dry ingredients.
- In a large mixing bowl, combine the all-purpose flour, sugar, baking powder, baking soda, and salt.
- Whisk thoroughly to distribute the leavening agents evenly.
Why Does This Step Matter?
Even mixing ensures that the baking powder and baking soda react uniformly with the buttermilk, giving your waffles their signature fluffiness.
Optional Add-Ins: If you’re adding chocolate chips, cinnamon, or blueberries, mix them into the dry ingredients to avoid clumping later.
Step 3: Combining Wet and Dry Ingredients
Here comes the fun part—combining everything.
- Create a well in the center of the dry ingredients.
- Gradually pour the wet mixture into the well while gently stirring.
- Use a whisk or spatula to mix until just combined.
Important Tips:
- Don’t overmix! A few lumps in the batter are perfectly fine and even desirable. Overmixing can make the waffles dense instead of light.
- Let the batter rest for 5–10 minutes to allow the ingredients to fully combine and activate.
Step 4: Preheating the Waffle Maker
Preheating is crucial for perfectly cooked waffles.
- Turn on your waffle maker and set it to the desired temperature (medium-high works well).
- Lightly grease the plates with cooking spray or melted butter.
Why Preheat?
A preheated waffle maker ensures even cooking and helps create that crispy golden crust. If the iron isn’t hot enough, the waffles may turn out pale and undercooked.
Step 5: Cooking the Waffles to Perfection
- Pour about ½ cup of batter (or as specified by your waffle maker) into the center of the hot waffle iron.
- Close the lid and let the waffle cook for 3–5 minutes or until golden brown.
- Carefully remove the waffle using tongs or a spatula.
Pro Tip: Avoid opening the lid too early, as this may cause the waffle to split apart.
Repeat this process with the remaining batter, greasing the waffle maker as needed.
Step 6: Serving Suggestions and Toppings
Now that your waffles are cooked to golden perfection, it’s time to serve them up! Buttermilk waffles are incredibly versatile and can be enjoyed with a variety of toppings, whether you prefer sweet or savory.
Sweet Toppings:
- Classic Maple Syrup: A drizzle of maple syrup complements the rich flavor of the waffles.
- Fresh Fruits: Add strawberries, blueberries, raspberries, or banana slices for a burst of freshness.
- Whipped Cream: For an indulgent treat, top your waffles with a dollop of whipped cream.
- Chocolate Chips or Nutella: Perfect for chocolate lovers.
- Honey or Fruit Preserves: A natural, sweet alternative to syrup.
Savory Toppings:
- Crispy Bacon and Eggs: Balance the sweetness with savory protein.
- Avocado and Smoked Salmon: A gourmet twist for brunch.
- Cheese and Herbs: Sprinkle shredded cheese and fresh herbs for a sophisticated taste.
Pro Tip: Layer multiple toppings to create a waffle masterpiece. For example, pair whipped cream with berries and a dusting of powdered sugar for a café-style look!
Tips for Light and Fluffy Waffles
Want your waffles to turn out light and fluffy every time? Follow these expert tips:
- Use Fresh Ingredients: Ensure your baking powder and baking soda are not expired for maximum rise.
- Don’t Overmix the Batter: Stir until just combined to keep the air pockets intact.
- Let the Batter Rest: Resting for 5–10 minutes allows the gluten to relax, making the waffles tender.
- Preheat the Waffle Maker Properly: A hot waffle maker prevents sticking and ensures even browning.
- Avoid Overcrowding the Iron: Too much batter can lead to overflow and uneven cooking.
- Keep Waffles Warm in the Oven: Place cooked waffles on a baking sheet in a 200°F oven to keep them warm until serving.
Common Mistakes to Avoid
Even the best recipes can go wrong if certain steps are overlooked. Here’s what to watch out for:
- Skipping the Preheat Step: A cold waffle maker results in soggy waffles.
- Overmixing the Batter: Overmixing creates tough, dense waffles instead of light and fluffy ones.
- Not Greasing the Iron: Always grease the waffle plates to prevent sticking.
- Using Cold Ingredients: Bring eggs, buttermilk, and butter to room temperature for smooth mixing.
- Opening the Waffle Maker Too Early: This can cause the waffle to tear apart. Wait until the steam stops before checking.
Avoid these pitfalls, and you’ll have foolproof waffles every time!
How to Store and Reheat Leftover Waffles
Waffles are best enjoyed fresh, but leftovers can still taste amazing if stored and reheated properly.
Storage Tips:
- Refrigerator: Store leftover waffles in an airtight container for up to 3 days.
- Freezer: Place waffles in a single layer on a baking sheet and freeze until solid. Then, transfer them to a ziplock bag or airtight container for up to 3 months.
Reheating Tips:
- Toaster: Reheat frozen waffles in a toaster for 2–3 minutes for a crispy finish.
- Oven: Warm waffles in a 350°F oven for 5–7 minutes.
- Microwave: While not ideal for crispiness, microwaving for 20–30 seconds works in a pinch.
Pro Tip: Avoid reheating waffles directly in the waffle iron, as it can overcook them.
Variations and Flavor Twists for Buttermilk Waffles
Want to spice up your waffles? Here are a few creative twists to the classic recipe:
1. Chocolate Chip Waffles:
- Add ½ cup of chocolate chips to the batter for a dessert-style waffle.
2. Blueberry Lemon Waffles:
- Fold in 1 cup of fresh blueberries and 1 teaspoon of lemon zest for a fruity burst.
3. Cinnamon Roll Waffles:
- Add 1 teaspoon of cinnamon and swirl brown sugar into the batter for a cinnamon roll-inspired flavor.
4. Savory Cheddar and Herb Waffles:
- Mix in ½ cup of shredded cheddar and chopped herbs like chives or parsley for a savory option.
5. Pumpkin Spice Waffles:
- Add ½ cup of pumpkin puree and 1 teaspoon of pumpkin spice to the batter for a fall favorite.
These variations are perfect for holidays, special occasions, or whenever you feel like experimenting in the kitchen.
Nutritional Information for Buttermilk Waffles
Here’s a general breakdown of the nutritional content for one serving (1 waffle):
| Nutrient | Amount per Serving |
|---|---|
| Calories | 220–250 kcal |
| Protein | 6–8 g |
| Carbohydrates | 28–32 g |
| Fat | 10–12 g |
| Fiber | 1–2 g |
| Sugar | 5–7 g |
Note: Values vary based on toppings and mix-ins, so adjust accordingly.
FAQs about Buttermilk Waffle Recipe
1. What makes buttermilk waffles different from regular waffles?
Buttermilk waffles differ due to the buttermilk in the batter, which imparts a rich, tangy flavor and fluffy texture. The acidity in buttermilk also reacts with baking soda, helping the waffles become light and airy.
2. Can I use regular milk instead of buttermilk?
Yes, you can substitute regular milk for buttermilk by adding 1 tablespoon of lemon juice or vinegar to a cup of milk and letting it sit for 5 minutes before using. However, the distinct tangy flavor and texture from buttermilk will be less pronounced.
3. How do I make my waffles extra crispy?
To achieve extra crispy waffles, make sure your waffle iron is fully heated before pouring the batter. Additionally, a little extra sugar in the batter can help caramelize and crisp the edges.
4. Can buttermilk waffle batter be made in advance?
Yes, buttermilk waffle batter can be made in advance and stored in the refrigerator overnight. This can actually enhance the flavor and texture. Just give it a gentle stir before cooking.
5. Are buttermilk waffles suitable for freezing?
Absolutely! Cook the waffles as usual, let them cool completely, and then freeze them in a single layer on a baking sheet. Once frozen, transfer them to a freezer-safe bag or container. They can be reheated in a toaster or oven for a quick and delicious meal.
6. What toppings go well with buttermilk waffles?
Buttermilk waffles are versatile and pair well with a variety of toppings. Popular choices include maple syrup, fresh berries, whipped cream, or even savory options like fried chicken or scrambled eggs.
Conclusion
And there you have it—your complete guide to making perfect buttermilk waffles at home! From selecting ingredients to serving suggestions and storage tips, this step-by-step recipe ensures success every time. Whether you stick to the classic recipe or try one of the variations, these waffles are sure to delight your taste buds.
So why wait? Grab your ingredients, fire up your waffle maker, and treat yourself to homemade waffles that are crispy, fluffy, and downright delicious!


